
An Interest In:
Web News this Week
- April 19, 2024
- April 18, 2024
- April 17, 2024
- April 16, 2024
- April 15, 2024
- April 14, 2024
- April 13, 2024
Some of Our Sources
- Technology Review
- Joshua Blankenship
- Spoon Graphics
- Smashing Magazine
- Six Revisions
- Abduzeedo
- CSS Globe
- Stylized Web
- Codrops
- TechPowerUp
Help Webnuz
Referal links:
Ethereum Development Blog (1)
Part 1: Deploy BlockChain and Smart Contract
The purpose to build this blog is to write down the detailed operation history and my memo for learning Dapp.
If you are also interested and want to get hands dirty, follow the following steps below and have fun!~
warm up
What is Ethereum?
What is BlockChain?
How does Node.js work?
Prerequisites
- Node.js installed on your local machine
- MetaMask Chrome extension installed in your browser
Getting started
We will create a new React application:
npx create-react-app react-dappUnfortunately, my installation for the react app is not successful, and I got error like in below:
Need to install the following packages: create-react-appOk to proceed? (y) ynpm WARN deprecated [email protected]: This version of tar is no longer supported, and will not receive security updates. Please upgrade asap.sh: create-react-app: command not foundThen I solve such problem by running the follow commands:
npm config set prefix /usr/localsudo npm install -g create-react-appcreate-react-app react-dappThen, I got a message notifying me that my installation is successful:

Next, we are going to change the directory:
cd react-dapp/And ls to see what files are in this directory:

Next step run the follow command to install ethers.js and hardhat using npm:
npm install ethers hardhat @nomiclabs/hardhat-waffle ethereum-waffle chai @nomiclabs/hardhat-ethersThen we got this message in the Terminal:
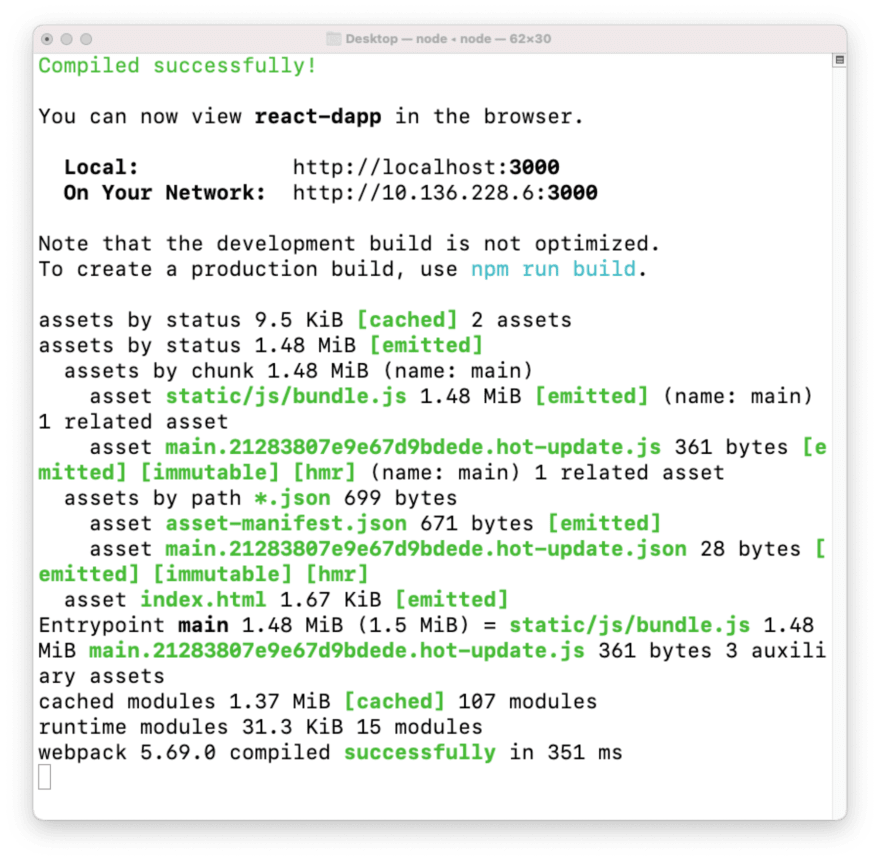
we can view react-dapp in the browser using the URL it inferred.
Open a new terminal and change directory to react-dapp again, and run npx hardhat to install hardhat:

we can now find artifacts contracts , hardhat.config.js, scripts and test in the current directory if previous steps are successful.

contracts - A folder holding an example Solidity smart contract
hardhat.config.js - The entirety of your Hardhat setup (i.e. your config, plugins, and custom tasks) is contained in this file.
scripts - A folder containing a script named sample-script.js that will deploy your smart contract when executed
test - A folder containing an example testing script
The next step is to launch VS Code and direct to the current work folder: react-dapp

open hardhat.config.js and update the module.exports to look like this:
module.exports = { solidity: "0.8.4", paths: { artifacts: './src/artifacts', }, networks: { hardhat: { chainId: 1337 } }};Next let us take a look at our smart contract at directory: contracts/Greeter.sol
//SPDX-License-Identifier: Unlicensepragma solidity ^0.8.4;import "hardhat/console.sol";contract Greeter { string private greeting; constructor(string memory _greeting) { console.log("Deploying a Greeter with greeting:", _greeting); greeting = _greeting; } function greet() public view returns (string memory) { return greeting; } function setGreeting(string memory _greeting) public { console.log("Changing greeting from '%s' to '%s'", greeting, _greeting); greeting = _greeting; }}This is a basic smart contract. When deployed, this contract sets a Greeting variable and exposes a function called greet() to return the greeting.
This contract also exposes another function setGreeting that allows a user to update the greeting. When deployed to the Ethereum BlockChain, these methods will be available for a user to interact with.
Next let us go back to Terminal and run: npx hardhat compile

This should compile smart contract into an artifacts directory, and now we should see our artifacts directory under src:
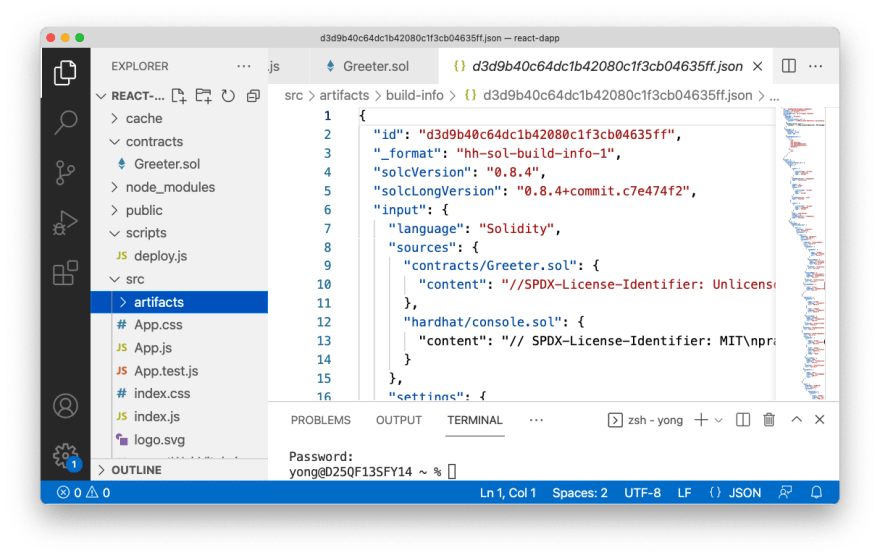
Click the folder contracts/Greeter.sol and open the file Greeter.json, we will find"abi" inside:

abi stands for: application binary interface. This is the thing we are going to import into our front end application to interact with it.
Deploy BlockChain
Next step is to deploy our smart contract to the local blockchain.
First we need to start the local test node. run the following command in Terminal:
npx hardhat nodeThis should launch a local test network, which is going ahead and provides us with 20 accounts to test with. Every account has their own account id as well as a private key, and we will use both of them when we start interacting with front end application.

Deploy Smart Contract
Next let's start another terminal window, and deploy our contract to the running test network by running the following command:
npx hardhat run scripts/deploy.js --network localhostIf deploy successfully, we should get message like this:
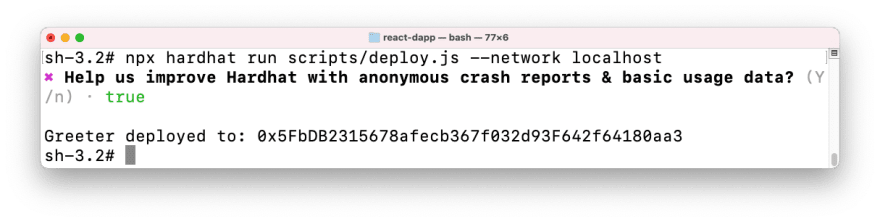
It responses to you the address of smart contract. getting permission issues? Just run command sudo su to become root user first.
Now things should have got updated in the previous terminal window like this:

It gives us message that the smart contract has been deployed to the running test network. We can see the Gas used, the Contract address, the Transaction and so on. We can also see the console.log message that we wrote in our smart contract.
Cool?
reference:
https://dribbble.com/shots/14225432-Coder
https://stackoverflow.com/questions/38751830/create-react-app-installation-error-command-not-found
https://dev.to/dabit3/the-complete-guide-to-full-stack-ethereum-development-3j13
https://richpicksdaily.com/ethereum-l2-scene-heats-up-with-boba-network-taking-second-spot-in-tvl/
Original Link: https://dev.to/yongchanghe/ethereum-development-log-part-1-deploy-blockchain-and-smart-contract-1a1j
Dev To
More About this Source Visit Dev To