
An Interest In:
Web News this Week
- April 19, 2024
- April 18, 2024
- April 17, 2024
- April 16, 2024
- April 15, 2024
- April 14, 2024
- April 13, 2024
Some of Our Sources
- Slashdot
- Techcrunch
- Simplebits
- The Logo Smith
- You The Designer
- Fuel Your Creativity
- My Ink Blog
- Spyre Studios
- Freelance Switch
- Willems Lab
Help Webnuz
Referal links:
Let's Learn: Remix Task Tracker App
Hello peeps , welcome to this week's article where we would be doing something interesting. Making a Remix app! I decided to take some of my old Github learning projects and tweak them a bit, and what better way than to re-write it in Remix? I hope to share my journey about how I achieved that in this article with you guys including my struggles, dislikes and my approaches to solving the issue. This would also include all my code snippets, so if you're interested in building a Remix Task Tracker App, let's go!
Prerequisites: I assume you have a good understanding of React, CSS and Javascript and some of the basics of Remix before attempting to follow along with this tutorial , also you have node installed and npm present. We are going to skip a lot of non-related concepts in this post.
You might also want to check out my Intro to Remix and Why Remix ? posts for some background info on Remix.
Getting Started:
To get started, open up Command Prompt (shell) and enter the command:
npx create-remix@latest
This would initiate a download that might take a while, depending on your network.
After that, a questionnaire would pop up, asking for your project name. Click "Enter" to use default or type your custom project name and click "Enter".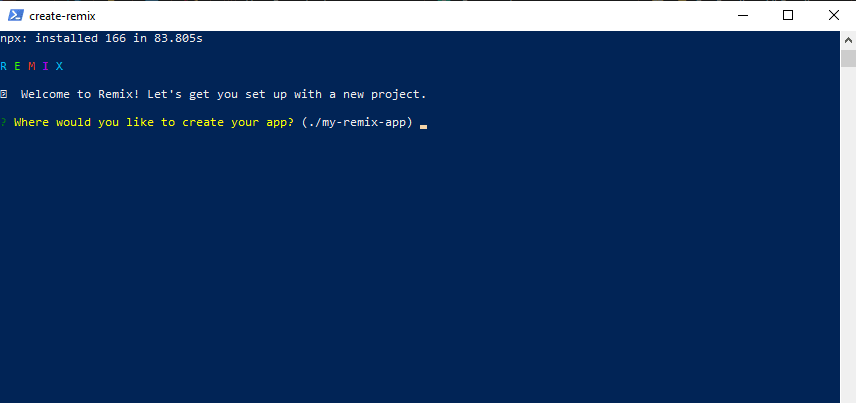
Next, you would be asked required to input your deployment choice. For keeping it simple, we would choose Vercel, we would use "Vercel"
You need to have created a vercel account for this, if you haven't, go and do so before continuing
And then we are asked, "TypeScript" (TS) or "JavaScript". I would go along with TypeScript(superiority reasons and easier development, you can still choose TypeScript even if you haven't learnt it yet . If you don't want to use TS, feel free to remove the bits of TS and just use Javascript). After that, we choose to run npm install and wait for our remix app to install its dependencies. Run
cd <your-app-name>
then
npm run postinstall
We can then use code . to open it in VS Code (if you use vs code).
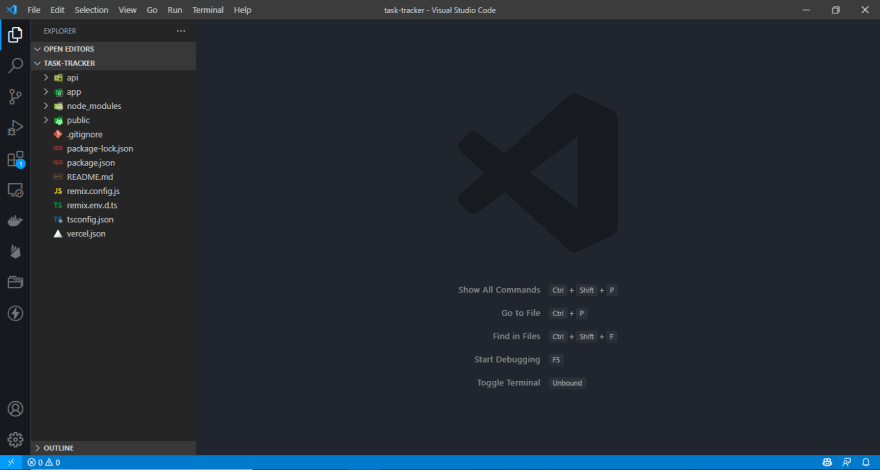
A bit of info on what the main folders & files do:
app/ - This is where all your Remix app code goes
app/entry.client.tsx - This is the first bit of your JavaScript that will run when the app loads in the browser. We use this file to hydrate our React components.
app/entry.server.tsx - This is the first bit of your JavaScript that will run when a request hits your server. Remix handles loading all the necessary data and you're responsible for sending back the response. We'll use this file to render our React app to a string/stream and send that as our response to the client.
app/root.tsx - This is where we put the root component for our application. You render the element here.
app/routes/ - This is where all your "route modules" will go. Remix uses the files in this directory to create the URL routes for your app based on the name of the files.
public/ - This is where your static assets go (images/fonts/etc)
remix.config.js - Remix has a handful of configuration options you can set in this file.
Sourced from the Remix docs. Don't worry, I would talk more about them later on.
Open a new terminal (Ctrl + Shift + ' default). Run npm run dev, then open up localhost:3000 and tada! we have a Remix app.
First Steps:
I would be using first-person pronouns a lot from now on as I transition from documenting how to set up a Remix app to creating your Remix own app.
The steps taken in creating this app are my choices, feel free to mix it up or completely change it
The most important thing in the project right now is the app folder, that's where our magic is stored and that's where we would start our editing.
The first thing I do is head to app/routes/index and clear out the boilerplate code. All of it. But don't save yet, we need to write something so that TypeScript doesn't throw an error.
If you have learned some Typescript, you might as well jump this section, else you want to continue reading
Essentially, TS (Typescript) is a strongly typed language built on JavaScript. Valid JS is also valid TS. The difference is the typed format, in short, this helps you check and avoid a lot of errors while programming in your editor without needing to leave your editor. It detects when things shouldn't be and can also help identify possible errors you might face later on. And like I said TS is just JS (it compiles to JS at runtime) but a stricter version that doesn't allow doubts while coding. You would see as we progress why TS would save a lot of headaches.
Let's fill our index.tsx (yes, tsx) with some code
export default function Index () { return ( <div> <h1>Hello World</h1> </div> )}Just a simple Hello World message.
The next thing I did was to plan the routes we would have in our task tracker App and how the app would function.
First thing, a user must be signed in before they can access the app, so if a user isn't authenticated, redirect him/her to the login page. The authentication options would be Google and Email (I am not sure I should add Twitter), for that Supabase or Firebase would come in handy. I picked Supabase cause it's a community thing, and I'm a big fan of Open Source projects. Next, I decided that the app wouldn't have too many routes and would have a long, seamless feel to it. I already had the layout and design, let's start routing !
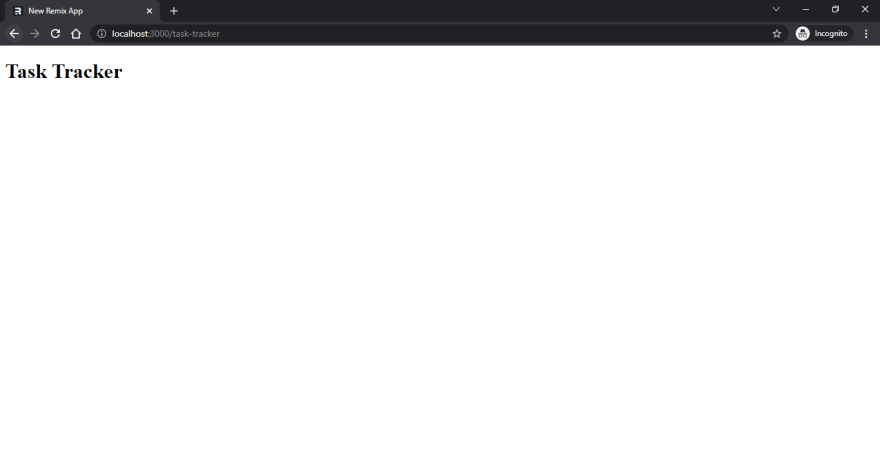
The routes would have this look, for now, just 2 routes, with the index route, index.tsx, serving as the login route and task-tracker.tsx serving as the actual homepage.
routes|---index.tsx|---task-tracker.tsxLet's start on the task-tracker route first.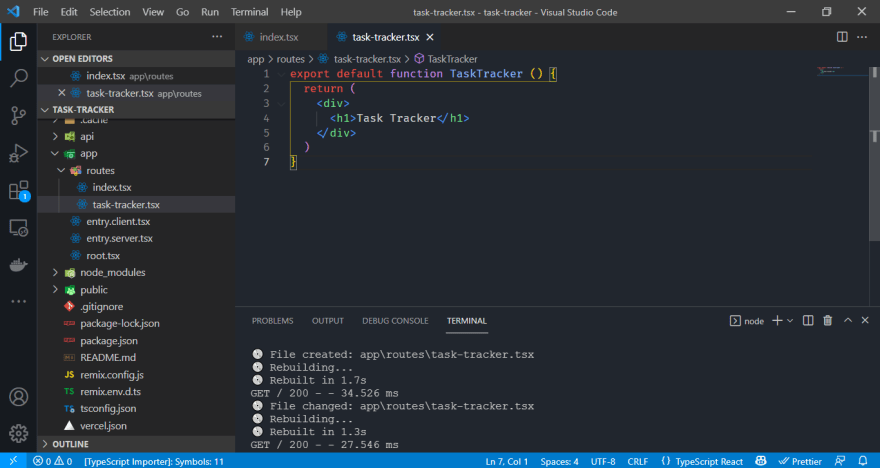
Again, we do a simple "Task Tracker" message and navigate to localhost:3000/task tracker to see our app works just fine.
 .
.
Alright, I delete everything between the div tags and leave an empty tag. I attach a className to it (call it whatever you want)
export default function TaskTracker () { return ( <div className="container"> </div> )}Time to add some styling . I use just CSS (modular CSS), no tailwind or library components. Create a styles folder in the app folder and it, I create a file called task-tracker.css in it and input my styles.
You could choose to use Tailwind but I won't be covering that in this article.
task-tracker.css file:
@import url('https://fonts.googleapis.com/css2?family=Poppins:wght@300;400&display=swap');* { box-sizing: border-box; margin: 0; padding: 0;}html { font-size: 16px;}body { font-family: 'Poppins', sans-serif;}.container { margin: 3rem auto 2rem auto; overflow: auto; min-height: 25rem; border: 0; padding: 2rem; width: 80%; border-radius: 0.325rem;}Remember to use what styles you like and prefer
Our styles do not appear! Let's link them up. Remix makes use of a function called links in individual routes to style that particular routes. In our case, we would use task-tracker.css in our task-tracker.tsx
task-tracker.tsx
import type { LinksFunction } from "remix";import styles from "../styles/task-tracker.css";export const links: LinksFunction = () => { return [{ rel: "stylesheet", href: styles }];};// Rest of our codeLet's now add some content.
We would split up our components to make creating them easier, there are several ways to create components in Remix. One is to create a components (I always use the name components, it can be anything) folder in app folder and import our components into our routes from there. Two is to go native style and just write all the components in that same file. Thirdly, you could just write all the components in your default export and avoid breaking your components up. And that's what I would be doing (Bad idea).
Let's create a sub-header for our todo container:
// something up hereexport default function TaskTracker() { return ( <div className="container"> <header className="header"> <h1>Task Tracker</h1> </header> </div> );}and our css file:
/* CSS styles */.header { display: flex; justify-content: space-between; align-items: center; margin-bottom: 1.2rem;}Our App is still looking bland . Let's fix that.
Speed coding is about to start
Let's add an Add button to our header. Just remember not to spend too much time styling. There would always be time for that .
Next up, we want to add the "tasks"
The tsx file:
export default function TaskTracker() { return ( <div className="container"> <header className="header"> <h1>Task Tracker</h1> <button className="btn">Add</button> </header> <div className="task-section"> <div className="task"> <h3>Eat Breakfast</h3> <p className="description">Eat Breakfast in the dining-room, I guess.</p> <p className="time">2:00pm</p> </div> </div> </div> );}and our stylesheet:
/* Css styles here */.task { background: #dbdbdb; border-radius: 3px; margin: 0.255rem; padding: 0.625rem 1.2rem; cursor: pointer;}.task h3 { display: flex; align-items: center; justify-content: space-between;}.time { color: #4e4e4e}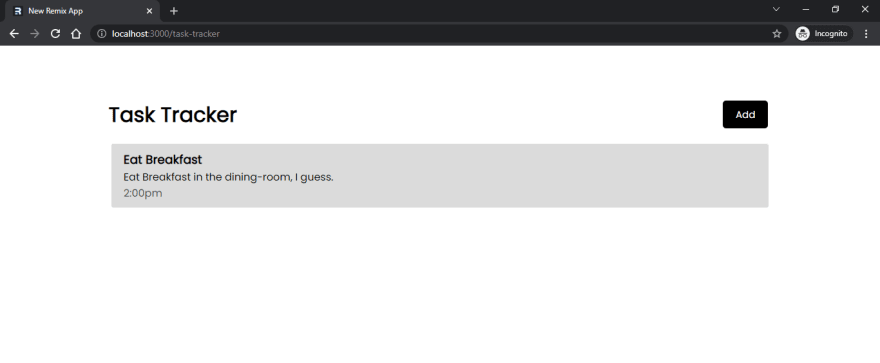
Our App currently looks like this, no functionality but the layout is coming together.
Let's work on the logic of the tasks component. We should be able to add tasks and delete tasks. Let's speedrun through some code again:
//Our Task type (do not include if you're using js)type Task = { id: string, title: string, description?: string, time: string}// Our default exportexport default function TaskTracker() { const [tasks, setTasks] = useState<Task[]>([ { id: "1", title: "Task 1", description: "Description 1", time: "1:00" }, { id: "2", title: "Task 2", description: "Description 2", time: "2:00" }, { id: "3", title: "Task 3", description: "Description 3", time: "3:00" }, ]); return ( <div className="container"> <header className="header"> <h1>Task Tracker</h1> <button className="btn">Add</button> </header> <div className="task-section"> { tasks.map(task => ( <div className="task" key={task.id}> <h3 className="task-title">{task.title}</h3> <p className="task-description">{task.description}</p> <p className="task-time">{task.time}</p> </div> )) } </div> </div> );}Our updated styles:
/* Updated styles */.task-title { display: flex; align-items: center; justify-content: space-between;}.task-time { color: #4e4e4e}I will summarize what I did here. I added a state to store our tasks, now the tasks would be objects stored in an array cause they are very easy to mutate and destructure that way. In our task component (remix jsx principles are like react's, only one default export per route), we map over the array and then arrange all our tasks in descending order.
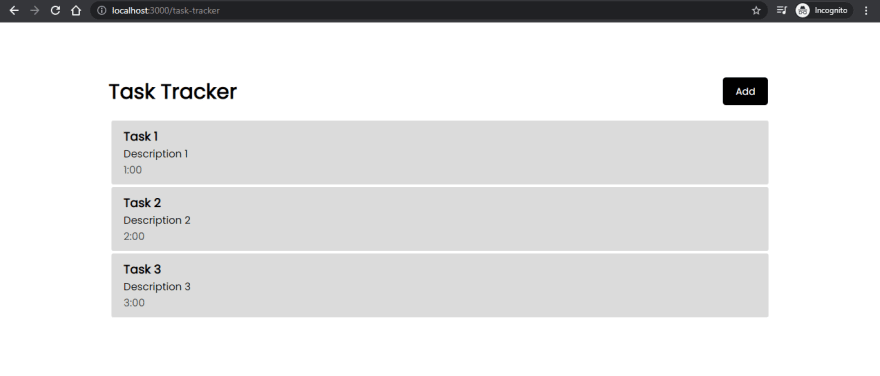
Now our task tracker is starting to come together (somehow).
Building the Logic:
Let's add the ability to delete tasks from our Task List. But first, I would install the module react-icons. It's what I used in the initial version of this app and it's a library with a lot of icons too.
npm i react-icons
// Importing our iconimport { RiDeleteBin5Line } from "react-icons/ri";//Our default exportexport default function TaskTracker() { const [tasks, setTasks] = useState<Task[]>([ { id: "1", title: "Task 1", description: "Description 1", time: "1:00" }, { id: "2", title: "Task 2", description: "Description 2", time: "2:00" }, { id: "3", title: "Task 3", description: "Description 3", time: "3:00" }, ]);//Our delete Task function const deleteTask = (id: string) => { setTasks(tasks.filter((tasks) => tasks.id !== id)); }; return ( <div className="container"> <header className="header"> <h1>Task Tracker</h1> <button className="btn">Add</button> </header> <div className="task-section"> {tasks.map((task) => ( <div className="task" key={task.id}> <h3 className="task-title">{task.title}</h3> <p className="task-description">{task.description}</p> <p className="task-time">{task.time}</p> <RiDeleteBin5Line className="delete-icon" onClick={() => deleteTask(task.id)} /> </div> ))} </div> </div> );}And the updated stylesheet:
.delete-icon { color: #4e4e4e; cursor: pointer; position: absolute; right: 1rem; font-size: 1.625rem; top: 35%;}.delete-icon:hover { color: #f11;}Remember to tweak things to your liking, you might even want to change the icon or soften up the colours.
If you reload the app, you can now delete tasks!
Now let's add the ability to add tasks, we would use forms for this. To avoid a messy route, let's split this one into a different component. At the top of the default export, make another export (remember, just export function.., no default)
// app/components/Add.tsx (or whatever you like)import { Form } from "remix";export default function Add() { return ( <div> <h1>Add Task</h1> <Form className="add-form"> <div className="form-control"> <label>Task</label> <input type="text" placeholder="Add Task" /> </div> <div className="form-control"> <label>Description</label> <input type="text" placeholder="Task description...(optional)" /> </div> <div className="form-control"> <label>Set day & Time</label> <input type="text" placeholder="Day & Time" /> </div> <input type="submit" value="Save Task" className="btn btn-block" /> </Form> </div> );}Let's update our CSS (No need to create a new stylesheet or re-import the CSS file into our components file.)
/* CSS Styling (Same task-tracker.css file) */.add-form { margin-bottom: 2.325rem;}.form-control { margin: 1.2rem 0;}.form-control label { display: block;}.form-control input { width: 100%; height: 2.325rem; margin: 0.25rem; padding: 0.2rem 0.35rem; font-size: 1.125rem;}.form-control-check { width: 100%; display: flex; align-items: center; justify-content: space-between;}.form-control-check label { flex: 1;}.form-control-check input { flex: 2; height: 1.25rem;}Let's import into our task-tracker.tsx file:
// Import our componentimport Add from "~/components/AddTask"; Now, I don't want the "Add Task" panel to be visible all the time. That's why the Add button is there. Let's add the toggling logic to our task-tracker route:
// The default export in app/task-tracker.tsx/* Other code up here */// should the AddTask show or not?const [showAddSection, setShowAddSection] = useState<boolean>(false);// function to toggle the view of AddTaskconst toggleShow = (): void => { setShowAddSection(!showAddSection); } return ( <div className="container"> <header className="header"> <h1>Task Tracker</h1> <button className="btn" style={showAddSection ? {backgroundColor: '#f11'} : {backgroundColor: '#000'}} onClick={toggleShow}>{showAddSection ? 'Close' : 'Add'}</button> </header> {showAddSection && <Add />}/* More code down here */What I did was to first create a boolean state called showAddSection (long name ) to determine, whether or not the app should show the AddTask section. Then a function to determine allow the user to manually toggle that state. We then attach the function to the button and add some modifications. First, if the AddTask section is open, we use an if..else (in a way) statement to override the background colour we set in the CSS file. And we also change the text from "Add" to "Close" and vice-versa.
Then we just use a simple if statement to display AddTask depending on whether the state is true or false.
Cleaning Up:
Final Section, let's add the ability to actually add tasks.
For this, we head back to our AddTask component file, and finally, do something with our form on submit:
// app/component/<your-file>.tsximport { useState } from "react";import { Form } from "remix";type Task = { task: string; description?: string; time: string;};export default function Add(props: { addTask: (task: Task) => void }) { const [task, setTask] = useState<string>(""); const [description, setDescription] = useState<string>(""); const [time, setTime] = useState<string>(""); const submit = () => { if (!task || !time) { alert("You can't submit an empty task!"); } else { props.addTask({ task, description, time }); } setTask(""); setDescription(""); setTime(""); }; return ( <div> <h2>Add Task</h2> <Form className="add-form" onSubmit={submit}> <div className="form-control"> <label>Task</label> <input type="text" value={task} placeholder="Add Task" onChange={(e) => setTask(e.target.value)}/> </div> <div className="form-control"> <label>Description</label> <input type="text" value={description} placeholder="Task description...(optional)" onChange={(e) => setDescription(e.target.value)} /> </div> <div className="form-control"> <label>Set Day & Time</label> <input type="text" value={time} placeholder="Day & Time" onChange={(e) => setTime(e.target.value)}/> </div> <input type="submit" value="Save Task" className="btn btn-block" /> </Form> </div> );}That's our entire code. The first thing I did was use states to store the values of the input so that we can access them later. Then we used a function to pass the values back up to our task tracker route (I would show the code in a sec..)
By the way, we didn't need
e.preventDefault()cause, Remix !
We also had an if statement, stating that the Task field and Time field were both a must to submit and would alert if it were empty.
And that's that! Feel free to customize but if you want to stop TS from protesting errors, you'd better move on. Our full task-tracker route:
import { useState } from "react";import { RiDeleteBin5Line } from "react-icons/ri";import Add from "~/components/AddTask";import type { LinksFunction } from "remix";import styles from "../styles/task-tracker.css";type Task = { id?: number; task: string; description?: string; time: string;};export const links: LinksFunction = () => { return [{ rel: "stylesheet", href: styles }];};export default function TaskTracker() { const [showAddSection, setShowAddSection] = useState<boolean>(false); const [tasks, setTasks] = useState<Task[]>([ { id: 1, task: "Task 1", description: "Description 1", time: "1:00" }, { id: 2, task: "Task 2", description: "Description 2", time: "2:00" }, { id: 3, task: "Task 3", description: "Description 3", time: "3:00" }, ]); const addTask = (task: Task) => { const id = Math.floor(Math.random() * 999999) + 1; const newTask = { id, ...task }; setTasks([...tasks, newTask]); }; const deleteTask = (id: number | undefined): void => { setTasks(tasks.filter((tasks) => tasks.id !== id)); }; const toggleShow = (): void => { setShowAddSection(!showAddSection); }; return ( <div className="container"> <header className="header"> <h1>Task Tracker</h1> <button className="btn" style={ showAddSection ? { backgroundColor: "#f11" } : { backgroundColor: "#000" } } onClick={toggleShow} > {showAddSection ? "Close" : "Add"} </button> </header> {showAddSection && <Add addTask={addTask}/>} <div className="task-section"> {tasks.map((task) => ( <div className="task" key={task.id}> <h3 className="task-title">{task.task}</h3> <p className="task-description">{task.description}</p> <p className="task-time">{task.time}</p> <RiDeleteBin5Line className="delete-icon" onClick={() => deleteTask(task.id)} /> </div> ))} </div> </div> );}We created a function called addTask, and we set its id to a random number and then after giving it an ID, we merged it with the original task state. We also passed that function down to AddTask component (that's how we were able to pass values up).
So right now, I have an app that I can successfully delete from and add tasks to.
Final Note:
That's it for this article. Fun fact, NO. I decided to split this article into 2 (might become 3 ) separate articles due to its length. To clarify something, you guys might get a bit confused by how I rushed through the app and did not give a detailed explanation as I was going along, well this post isn't a tutorial per se. It is supposed to be an article where I document my progress (As I was writing this post, I was coding this app along for the first time. Allowing me to generate points for the end since I was documenting everything)
I joined #buildinpublic on Twitter, and that is simply building stuff publicly and telling others your accomplishments and whatnot. And also getting feedback on how to become better.
And at the end of everything, write my thoughts, my struggles whilst making this app and also what Remix simplified for me and what I think it's lacking currently. But due to the length, that should hopefully appear in the next article.
That is it for now my friends, you can check me out on Twitter if you want, and follow my journey by following or just stalking the tweets . If you feel like helping out further, you could buy me my favourite coffee, digital coffee! Thanks in advance .
If you feel disappointed about the no-tutorial-yet thing with Remix, cheer up! I am building a mega written tutorial that I hope to release hopefully by it's a secret . You could speed up the process or find out, who knows?
Like always, have fun and enjoy yourself. Study. Code. Debug. Repeat. Wishing you happy learning and an awesome coding time .
Original Link: https://dev.to/shafspecs/lets-learn-remix-task-tracker-app-205p
Dev To
More About this Source Visit Dev To