
Some of Our Sources
- Slashdot
- Team Treehouse
- Smashing Apps
- Vandelay Design
- FanExtra - PSD
- Fudge Graphics
- Web Design Ledger
- Android Headlines
- The Verge
- TechPowerUp
Help Webnuz
Referal links:
Add a VSC Command Palette to Your Website!
What We'll Be Making Today

Wait, what?
Visual Studio Code has an amazing feature called the command palette, which gives you access to the entire application's functionality. It's a productivity hack and saves us a lot of tension.
Similar to VSC, MonkeyType is an open-source, minimalistic, and customisable typing test. It's designed to be accessed from just your keyboard, eliminating the need to switch back and forth with your mouse.
I really love the command palette feature on their website too, which allows you to tweak settings easily. Today, we're going to be making something similar to that in Next.js/React.
Looks cool right? Let's get into the tutorial.
Getting Started
The boring part of setting up a Next.js project which you probably know how to do.
Feel free to skip to Creating Our Command Palette
Using npx or yarn, create a new Next.js or React project
# Next.js (flags for TypeScript are optional)npx create-next-app@latest palette --ts# ...using yarnyarn create next-app palette --typescript# Create React App (flags for TypeScript are optional)npx create-react-app palette --template typescript# ...using yarnyarn create react-app palette --template typescriptSince I'm in love with it, I'll be doing this project in Next.js with TypeScript - however, the procedure for implementing this in other React frameworks shouldn't be too different.
Now let's go to our terminal and run yarn dev. Our development server should be started on localhost:3000. Nice!
Project Setup
Alright, now in our styles/globals.css file let's add some basic styles to make our page slightly less ugly.
html,body,button,input { padding: 0; margin: 0; color: #e9edf1; background-color: #323b45; font-family: Fira Code, monospace;}a { color: inherit; text-decoration: none;}* { box-sizing: border-box;}Now let's go to styles/Home.module.css and create some starter styles for our application.
.container { display: flex; justify-content: center; align-items: center; min-height: calc(100vh - 2rem);}Awesome! Let's go to pages/index.tsx and remove some junk there. Let's also import our custom monospace font using next-head.
const Home: NextPage = () => { return ( <div> <Head> <title>Command Palette</title> <link href='https://fonts.googleapis.com/css2?family=Fira+Code&display=swap' rel='stylesheet' /> </Head> <div className={styles.container}> <h1>Press Space For a Command Palette</h1> </div> </div> )}Our page should now look somewhat like this:

Building the Palette
Cool! So let's start building out our command palette.
Create a new file, components/Palette.tsx and open it up.
Inside it, let's define the basic structure of our command palette.
const Palette: React.FC = () => { return ( <div role='dialog' aria-modal='true'> <div> <div> { /* Search Icon */ } <input type='text' placeholder='Type to Search...' spellCheck='false' /> </div> <div> <a href='https://github.com/harshhhdev' rel='norefferer' > { /* GitHub Icon */ } GitHub </a> </div> </div> </div> )}Save it, and import this component into the main file.
If you check our browser now, the grotesque default styles make me want to vomit. Let's go back to our styles/Home.module.css file and add in some extra styles.
.container { display: flex; justify-content: center; align-items: center; min-height: 100vh;}.palette { position: fixed; min-height: 100vh; width: 100vw; background: rgba(0, 0, 0, 0.5); user-select: none; z-index: 1;}.wrapper { background-color: #323b45; max-height: 50vh; height: fit-content; width: 35rem; margin: 8% auto; left: 0; right: 0; border-radius: 20px; display: flex; flex-direction: column; overflow: hidden; z-index: 999;}.options { width: 35rem; overflow: hidden scroll;}.options::-webkit-scrollbar { width: 5px;}.options::-webkit-scrollbar-thumb { background-color: #939faf;}.search { display: flex; align-items: center; width: 35rem; height: 4rem; padding: 1.25rem; color: #939faf;}.search > svg { margin-right: 1.25rem;}.input { border: none; outline: none; background: none; color: #939faf; font-size: 1.25rem;}.option { display: flex; align-items: center; width: 35rem; height: 2.5rem; padding: 0.625rem 1.25rem; color: #939faf; background-color: #323b45; font-size: 0.875rem; border: none; text-decoration: none;}.option:hover,.option:focus { color: #323b45; background-color: #939faf; cursor: pointer;}.option > svg { margin-right: 0.625rem;}Awesome! We can now add these styles to our components accordingly.
While we're at it, let's also download some icons from React Icons, and import them up top.
const Palette: React.FC = () => { return ( <div className={styles.palette} role='dialog' aria-modal='true'> <div className={styles.wrapper}> <div className={styles.contents}> <div className={styles.search}> <FaSearch /> <input type='text' placeholder='Type to Search...' spellCheck='false' className={styles.input} /> </div> <div className={styles.options}> <a href='https://github.com/harshhhdev' rel='norefferer' className={styles.option} > <FaGithub /> GitHub </a> </div> </div> </div> </div> )}Phew, that sure looks better. Now let's create multiple links using an array and map it onto the command line.
const Options = [ { href: 'https://hxrsh.in/', title: 'Portfolio', icon: FaUser, }, { href: 'https://github.com/harshhhdev', title: 'GitHub', icon: FaGithub, }, { href: 'https://twitter.com/harshhhdev/', title: 'Twitter', icon: FaTwitter, },]Under div.options, let's map the array onto an option element
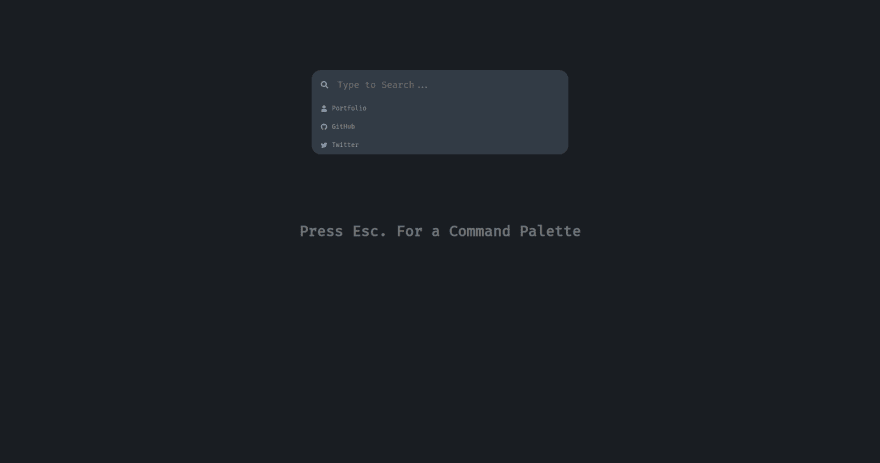
{Options.map((option, index) => ( <a className={styles.option} href={option.href} rel='norefferer' key={index} > <option.icon /> {option.title} </a>))}...and with that, woo-hoo! Our command line's visual aspect is finished It should look something like this
Searching
Let's get the search working. To start off, let's create a filter function which filters our array using a search query.
const filter = (options: typeof Options, query: string) => { if (!query) return options return options.filter((option) => { const optionText = option.title.toLowerCase() return optionText.includes(query.toLowerCase()) })}Awesome! Now let's get our search bar input and filter the results using some React hooks.
const inputRef = useRef<HTMLInputElement>(null)const [searchQuery, setSearchQuery] = useState('')Let's create another function, called changeHandler, which will be called when we type something onto the search bar.
const changeHandler = (e: React.FormEvent<HTMLInputElement>) => { e.preventDefault() setSearchQuery(e.currentTarget.value)}Then, let's create a new array of objects being passed through the filter function which returns an array of objects with keywords.
const filteredResults = filter(Options, searchQuery)Now, instead of mapping Options, let's map filteredResults
{filteredResults.map((option, index) => ( <a className={styles.option} href={option.href} rel='norefferer' key={index} > <option.icon /> {option.title} </a>))}The search should be working perfectly now! Give yourself a pat on the back if you made it this far.
Keyboard Navigation
One of the crucial characteristics of our command palette should be the ability to navigate it using only the keyboard.
For this, we'll be using a handy React hook called react-arrow-key-navigation-hook.
If you're using TypeScript, unfortunately, this project does not come with type definitions. Either make your own type definitions, turn off library checks in tsconfig.json, or just create a file called nav.d.ts paste in declare module 'react-arrow-key-navigation-hook'
After we've done that, we can import it into our project:
import useArrowKeyNavigationHook from 'react-arrow-key-navigation-hook'// ...inside the Palette componentconst parentRef = useArrowKeyNavigationHook({ selectors: 'a,input' })Let's assign the ref into our wrapper
<div className={styles.wrapper} ref={parentRef}>Awesome! We should now be able to navigate through our command palette using just our arrow keys.
Toggle States
As we prepare to wrap up, we need to add in toggling functionality to our palette.
Let's create another state:
const [open, setOpen] = useState(false)When we close, we also need to reset our searchQuery. To do this, let's create a toggle function.
const toggle = () => { setSearchQuery('') setOpen((open) => !open)}Now, let's add an event listener to our document inside the useEfffect
useEffect( () => document.addEventListener( 'keydown', (e) => e.key === ' ' && toggle() ), [] )Here, we add a document listener for the "space" key being pressed. When it's pressed, we simply toggle the state of the command palette.
We should now be able to toggle the state of our palette with the Space key. Nice! However, we also want it so that when the click outside the palette, it should close.
You can create your own hook for this following this tutorial, however, for the sake of this tutorial I'll just use react-detect-click-outside.
const boundary = useDetectClickOutside({ onTriggered: toggle })Now let's assign our boundary to our contents element
<div className={styles.contents} ref={boundary}>...and viola! The div should work.
Wrapping Up
That's it! There are libraries which do this for you, but nothing's as good as building your own from scratch as it leaves you limitless for customising it the way you want!
Now for those looking for some extra fun or learning something extra, here are some additions you could add to this:
- Animations using Framer Motion
- Create sub-menus using React hooks
- Add a radio button functionality
And that's it! Feel free to checkout the live demo on CodeSandbox
Original Link: https://dev.to/harshhhdev/adding-a-command-palette-to-your-website-5cpp
Dev To
More About this Source Visit Dev To