
An Interest In:
Web News this Week
- April 1, 2024
- March 31, 2024
- March 30, 2024
- March 29, 2024
- March 28, 2024
- March 27, 2024
- March 26, 2024
Some of Our Sources
- Joshua Blankenship
- Smashing Magazine
- Creative Curio
- Naldz Graphics
- Noupe
- Fudge Graphics
- Web Design Ledger
- Codrops
- Willems Lab
- The Verge
Help Webnuz
Referal links:
Accelerated Guide to Fullstack Web3 with ASS (Anchor, Solana, and Svelte)
Accelerated Guide to Fullstack Web3 with ASS (Anchor, Solana, and Svelte)
In this tutorial, you'll learn how to build from scratch a fullstack Web3 dApp with the ASS stack - the hottest Solana tech stack!
You do not need any Rust experience to follow this guide, but it would be helpful to have a general understanding of how dApps work at least from a users perspective (all that connect wallet, approve transaction kind of stuff).
You can find the finished project in this repo. If you have any questions, ping me on Twitter @0xMuse.
Ill skip the further mumbling on why ASS stack is thicc because it is self-evident. Lets dive straight in!
Preview of our app
We are building an app called gm Solana - a guest book app where users can log in with their Solana wallets and drop a gm to their frens.

Although the app is simple, you will be able to understand intuitively how Solana apps work, and get a hands-on experience with the most important skills and concepts developing a fullstack Solana dApp - the typical workflow, read and write blockchain data, connect the blockchain with your frontend app, authentication, etc.
Our tech stack
First, let's have a look at what the ASS stack covers:
- Anchor - The de facto high-level framework for Solana
- Solana - The reason why are you reading this
- Svelte - A blazing fast frontend framework (actually its a compiler), an alternative to React
- - The peach emoji, which is often associated with the word ass
In addition, well also integrate our app with:
- Phantom - An awesome Solana browser wallet
- @solana/web3.js - The Javascript library bridging client-side and the Solana network
- TypeScript - Frankly, I just cant work with Javascript... Besides, most Solana tutorials available right now are written in JS, and to get everything working with TS sometimes needs some extra effort, so I hope this tutorial proves helpful
Ill also be using VS Code. If you havent done it yet, you need to install the Svelte and Rust extensions to follow along this tutorial.
Step 0. Install and set up Solana
Before we start, you need to install the necessary tools. M1 Macs used to have some issues setting things up for the Solana Tool Suite, but now there is an official binary build for the M1 architecture, so the process has become pretty straightforward.
Install Rust
First, you will need to install the Rust toolchain.
curl https://sh.rustup.rs -sSf | shsource $HOME/.cargo/envrustup component add rustfmt
Install Solana Tool Suite
To install Solana, you can simply run the installation script. Im specifying to install v1.9.4:
sh -c "$(curl -sSfL https://release.solana.com/v1.9.4/install)"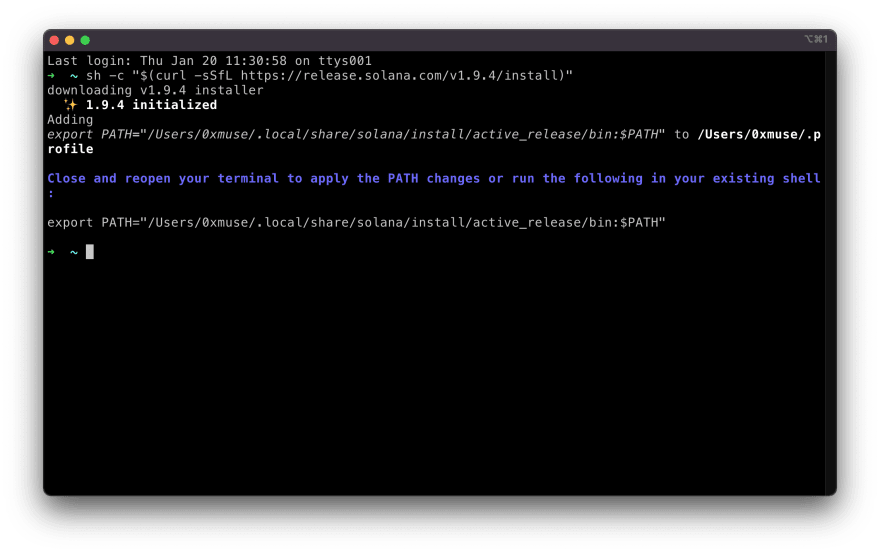
Note that if you are using zsh, you need to update your PATH.
After it is finished, you can verify if the installation is successful with the following command.
solana --versionNow, you can run the test validator (a local testnet) to see if everything works correctly with command solana-test-validator.

Lets stop the test validator for now and move on!
Install Anchor
Anchor is the recommended framework for Solana programs.
Note that Anchor uses Yarn v1 to manage Javascript dependencies in your project, so make sure you already have it installed on your computer.
Lets build the Rust code from source, its pretty straightforward:
cargo install --git https://github.com/project-serum/anchor --tag v0.20.1 anchor-cli --lockedThen, you can verify if the installation is successful with:
anchor --version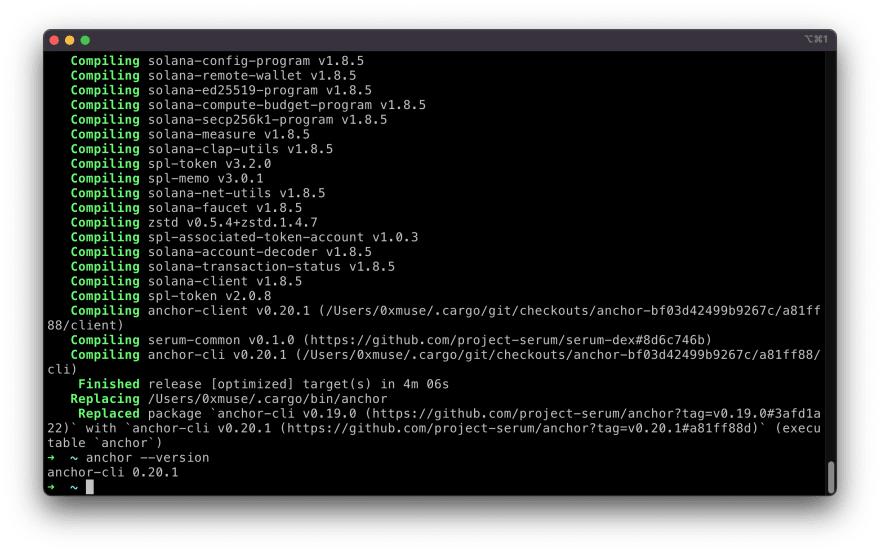
Install Phantom Wallet
The Phantom Wallet is a browser extension that takes care of connecting your Solana wallet and the dApp you are visiting, as well as the Solana blockchain. You can get it from their official website and follow their instruction to set it up.
If you have used MetaMask with EVM compatible networks before, you are then already familiar with how it works.

And thats it. Lets have some real fun!
Step 1. Create an Anchor project - gm Solana!
gm-solana
To kick off, use Anchor to initialize a project and open it in VS Code:
anchor init gm-solanacd gm-solanacode .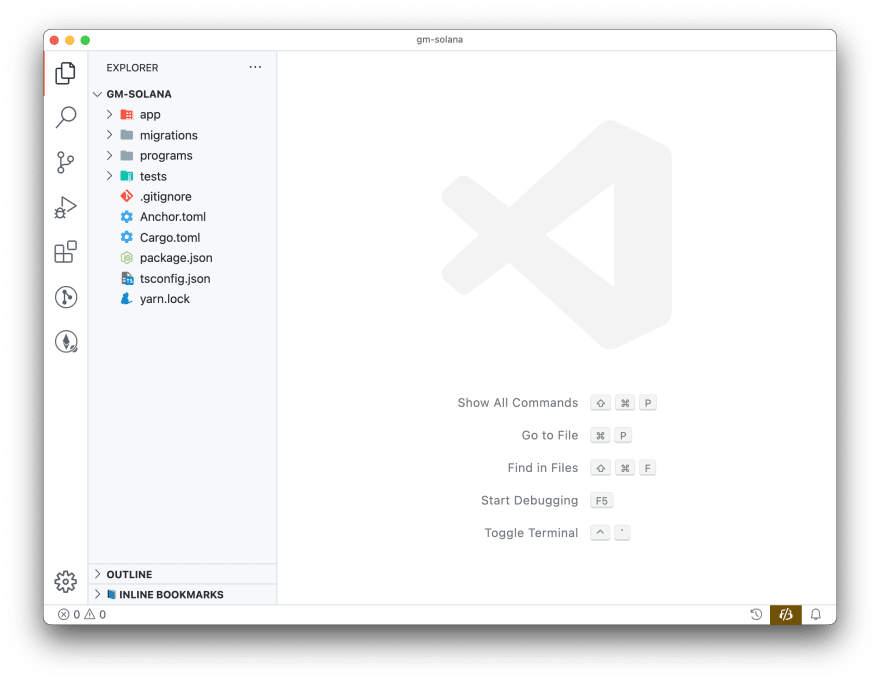
What weve got here are some config files and a few subdirectories:
- app - where our client-side Svelte app will be
- migrations - deployment scripts
- programs - smart contracts
- tests - the name says it all ;)
Set up keys
If you havent played with Solana on this machine yet, you will need to run solana-keygen new to generate a new key. The passphrase can be empty.
The new key is saved at ~/.config/solana/id.json.

You can also use the key generated from your Phantom wallet, but Im just going to use separate ones in this tutorial for clarity.
Configure Solana to use localhost
Next, run the following commands to set the network to localhost, and check the current settings:
solana config set --url localhostsolana config get
Later we will see how to push your app to devnet or mainnet.
Test and verify project setup
Now, you can run anchor build to test build the default example project Anchor created.

Building works! Now, run anchor test to see if tests pass too.
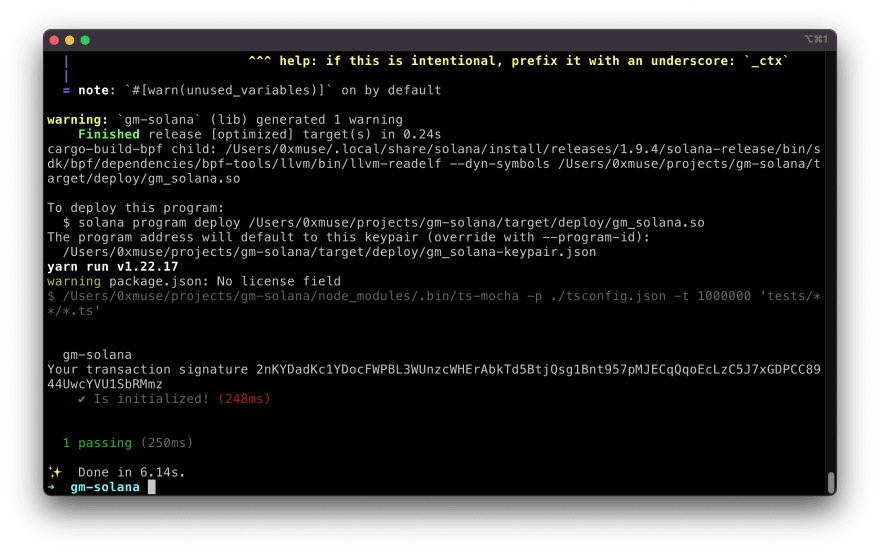
The anchor test command does a bunch in one go - it spins up the test validator, deploys the build, and runs the test cases against the deployments. Pretty handy!
Step 2. Anatomy of an Anchor program
Programs and Accounts
In Solana, theres a clear separation of logic (programs) and state (accounts). This is very different from Ethereum where contracts hold state themselves.
Users store data in accounts, Solana programs store data in accounts, the code instructions themselves are also stored in accounts. If your program wants some state stored, it will have to reach out to some accounts outside, everything is passed by reference.
Overview of the hello world example
Anchor is like the backend web framework for Solana, like Ruby on Rails, Express, or Flask. It really abstracts away a lot of the low level stuff so that you can focus on just designing logic and data structure.
Before we delete the hello world app that Anchor generated for us, lets have a look at it first.
The magic all happens in the programs/gm-solana/src/lib.rs file, thats the entrance of our program.
use anchor_lang::prelude::*;declare_id!("Fg6PaFpoGXkYsidMpWTK6W2BeZ7FEfcYkg476zPFsLnS");#[program]pub mod gm_solana { use super::*; pub fn initialize(ctx: Context<Initialize>) -> ProgramResult { Ok(()) }}#[derive(Accounts)]pub struct Initialize {}Lets break it down:
Preamble
use anchor_lang::prelude::*;declare_id!("Fg6PaFpoGXkYsidMpWTK6W2BeZ7FEfcYkg476zPFsLnS");These two lines basically imports the Rust libraries needed here and hardcodes the address where your program will be deployed to (it needs to be predefined for security reasons).
Program and instruction handlers
#[program]pub mod gm_solana { use super::*; pub fn initialize(ctx: Context<Initialize>) -> ProgramResult { Ok(()) }}This section is where our logic is defined.
The #[program] is a Rust macro that abstracts away the boilerplate and extra code needed to make your Rust program an Anchor program.
The functions here are very similar to request handlers in server-side web frameworks. And, this is exactly what all these Web3 things are about - they replace the web servers from the traditional, centralized web!
We can see that the initialize instruction handler takes in a context ctx, which has the type of Context of struct Initialize. What a mouthful!
Remember that we said everything is passed by reference into the program, if the program wants to access and manipulate state? Well, thats because of the parallel nature of Solanas executions and how all programs are stateless.
When we want to call a function on a program, we need to provide all the accounts in advance (aka. all the data that might be needed for a function to perform some tasks).
This ctx thing basically contains all those references, and it uses some Rust magic to constrain the types of accounts that can be passed in, below in the account constraints part.
Account constraints
#[derive(Accounts)]pub struct Initialize {}We dont have much going on here in this hello world program, but well see more in our gm Solana app below. What this section does is to enforce that the context passed into the instruction handler has the correct accounts.
Our gm Solana program is more complex, lets dive into it!
Step 3. Implement gm Solana
Understand what we need to do
Now we know what accounts and programs in Solana are, and how an Anchor app looks like. Lets see what we need exactly for our gm Solana guest book app to work:
- some state to store all those gms (specifically - message content, sender, and timestamp)
- a program to access that state and add new gms when needed
- a bunch of functions aka. instruction handlers on that program to do the actual work
Sounds good, lets go!
Define data structure
Lets start with data structures first, then move on to the logic parts.
First, we need to store the program state somewhere. Lets define a BaseAccount with exactly what we want to store - gm_count is an unsigned 64bit integer, and gm_list is a vector (a growable array) of GmMessage objects, which contain the message and some metadata.
#[account]pub struct BaseAccount { pub gm_count: u64, pub gm_list: Vec<GmMessage>,}// define a struct called GmMessage that contains a message, sender, and timestamp#[derive(Clone, Debug, AnchorSerialize, AnchorDeserialize)]pub struct GmMessage { pub message: String, pub user: Pubkey, pub timestamp: i64,}The BaseAccount is marked under the #[account] macro, and because Solana works with specific kinds of data structures, we have to use the macro #[derive(Clone, Debug, AnchorSerialize, AnchorDeserialize)] here.
Program and instruction handlers
Now, lets write the program logic. We need two functions - first one is to initialize a base_account, set the initial values to 0, then another one is to handle the clients request to say_gm.
Well declare the context structs / account constraints right after.
#[program]pub mod gm_solana { use super::*; pub fn initialize(ctx: Context<Initialize>) -> ProgramResult { // &mut means we are letting the compiler know that we are mutating this value let base_account = &mut ctx.accounts.base_account; base_account.gm_count = 0; Ok(()) } // receive a message and store it into gm_list with some metadata pub fn say_gm(ctx: Context<SayGm>, message: String) -> ProgramResult { let base_account = &mut ctx.accounts.base_account; // grab a copy of the input data let message = message.clone(); // get the current Solana network time let timestamp = Clock::get().unwrap().unix_timestamp; // grab the public key of the transaction sender // * dereferences the pointer let user = *ctx.accounts.user.to_account_info().key; let gm = GmMessage { user, message, timestamp, }; base_account.gm_list.push(gm); base_account.gm_count += 1; Ok(()) }}Account constraints
As we mentioned earlier, the program code itself has no way to access any data, unless the accounts that store that data are passed into the handlers in the context, by the client.
The Initialize context struct will look like this:
#[derive(Accounts)]pub struct Initialize<'info> { #[account(init, payer = user, space = 64 + 64)] pub base_account: Account<'info, BaseAccount>, #[account(mut)] pub user: Signer<'info>, pub system_program: Program<'info, System>,}The macro #[account(init, payer = user, space = 64 + 64)] basically means that we want to initialize the following account (base_account), the fee will be paid by user below, and well allocate 64KB + 64KB space for it. We need a bigger space because of the vector.
The macro #[account(mut)] means that the user here will be mutated, because it will be paying fees. This user field represents the signer of the transaction, aka. the wallet that called this function.
The last line refers to the root System Program, the special program on Solana that handles account creations. If you leave it out, you wont be able to initialize the base_account above.
OK, lets move on to the SayGm struct:
#[derive(Accounts)]pub struct SayGm<'info> { #[account(mut)] pub base_account: Account<'info, BaseAccount>, pub user: Signer<'info>,}Because we will be mutating the data held in base_account, well once again use the #[account(mut)] macro.
The most important thing here though is pub user: Signer<'info>. This is essentially how we will be able to authenticate, to verify that this address is indeed the one that signed the transaction.
AccountInfo<'info> can also represent a user, but theres no validation in place that anyone can be an imposter by simply passing in a random account.
What we just did was to do some simple authentication routines completely via writing some Rust types - this is pretty cool and wont be possible without Anchors abstraction! This way we can simply use the accounts in our program logic with the guarantee that they have already been checked.
To put everything together, your app should look like this:
use anchor_lang::prelude::*;declare_id!("Fg6PaFpoGXkYsidMpWTK6W2BeZ7FEfcYkg476zPFsLnS");#[program]pub mod gm_solana { use super::*; pub fn initialize(ctx: Context<Initialize>) -> ProgramResult { // &mut means we are letting the compiler know that we are mutating this value let base_account = &mut ctx.accounts.base_account; base_account.gm_count = 0; Ok(()) } pub fn say_gm(ctx: Context<SayGm>, message: String) -> ProgramResult { let base_account = &mut ctx.accounts.base_account; // grab a copy of the input data let message = message.clone(); // get the current Solana network time let timestamp = Clock::get().unwrap().unix_timestamp; // grab the public key of the user account. We need to use * to dereference the pointer let user = *ctx.accounts.user.to_account_info().key; let gm = GmMessage { user, message, timestamp, }; base_account.gm_list.push(gm); base_account.gm_count += 1; Ok(()) }}#[derive(Accounts)]pub struct Initialize<'info> { #[account(init, payer = user, space = 64 + 64)] pub base_account: Account<'info, BaseAccount>, #[account(mut)] pub user: Signer<'info>, pub system_program: Program<'info, System>,}#[derive(Accounts)]pub struct SayGm<'info> { #[account(mut)] pub base_account: Account<'info, BaseAccount>, pub user: Signer<'info>,}#[account]pub struct BaseAccount { pub gm_count: u64, pub gm_list: Vec<GmMessage>,}// define a struct called GmMessage that contains a message, sender, and timestamp#[derive(Clone, Debug, AnchorSerialize, AnchorDeserialize)]pub struct GmMessage { pub message: String, pub user: Pubkey, pub timestamp: i64,}Done!
Dont forget to compile!
The gm Solana program is complete and we need to rebuild the binary. At the same time, in order for our client-side code (be it tests or frontend app) to interact with it, we need to ask Anchor to generate IDL (similar to ABI in EVM), TypeScript types for us.
We can do all this by running anchor build.

And thats it!
Step 4. Write tests for gm Solana
We have already ran the tests for the default hello world program, now lets update the tests for our gm Solana.
Go into tests/gm-solana.ts and put in the following, Ill comment explanation in the code:
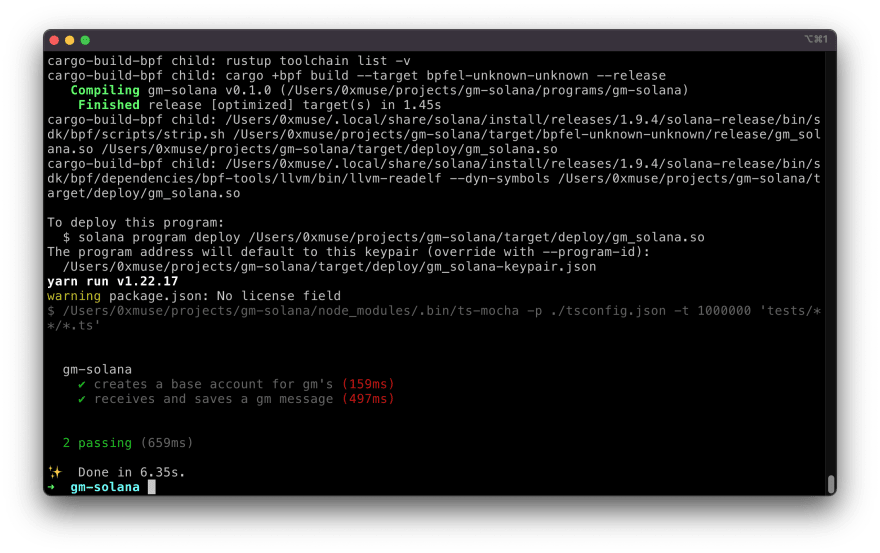
import * as anchor from "@project-serum/anchor";import { Program } from "@project-serum/anchor";import { GmSolana } from "../target/types/gm_solana";import assert from "assert";// we need to access SystemProgram so that we can create the base_accountconst { SystemProgram } = anchor.web3;describe("gm-solana", () => { // configure the client to use the local cluster. const provider = anchor.Provider.env(); anchor.setProvider(provider); const program = anchor.workspace.GmSolana as Program<GmSolana>; let _baseAccount: anchor.web3.Keypair; it("creates a base account for gm's", async () => { const baseAccount = anchor.web3.Keypair.generate(); // call the initialize function via RPC const tx = await program.rpc.initialize({ accounts: { baseAccount: baseAccount.publicKey, user: provider.wallet.publicKey, systemProgram: SystemProgram.programId, }, signers: [baseAccount], }); // fetch the base account const account = await program.account.baseAccount.fetch( baseAccount.publicKey ); // gmCount is a "big number" type, so we need to convert it to a string assert.equal(account.gmCount.toString(), "0"); _baseAccount = baseAccount; }); it("receives and saves a gm message", async () => { const message = "gm wagmi"; const user = provider.wallet.publicKey; // fetch the base account and cache how many messages are there const accountBefore = await program.account.baseAccount.fetch( _baseAccount.publicKey ); const gmCountBefore = accountBefore.gmCount; // call the sayGm function with message const tx = await program.rpc.sayGm(message, { accounts: { baseAccount: _baseAccount.publicKey, user, }, }); // fetch the base account again and check that the gmCount has increased const accountAfter = await program.account.baseAccount.fetch( _baseAccount.publicKey ); const gmCountAfter = accountAfter.gmCount; assert.equal(gmCountAfter.sub(gmCountBefore).toString(), "1"); // fetch the gmList and check the value of the first message const gmList = accountAfter.gmList; assert.equal(gmList[0].message, message); assert.equal(gmList[0].user.equals(user), true); // user is an object, we can't just compare objects in JS assert.equal(gmList[0].timestamp.gt(new anchor.BN(0)), true); // just a loose check to see if the timestamp is greater than 0 });});When finished, the run anchor test.

Both tests have passed!
Step 5. Deploy app to local network
Set new Program ID
Remember that in the beginning of our code, theres that line declare_id!("Fg6PaFpoGXkYsidMpWTK6W2BeZ7FEfcYkg476zPFsLnS");
Now as we are getting closer to production, we need to replace it with the unique Program ID generated by anchor build. We can get it with this command:
solana address -k target/deploy/gm_solana-keypair.json
Then, copy this key over back to the lib.rs file (use your own pub key pls!):
declare_id!("9V3sjRVvZ61X4qHkz2gVaxB1kKhMenzjwWhjmhpqgRHK");Well also need to update it accordingly in Anchor.toml:
# Anchor.toml[programs.localnet]gm-solana = "9V3sjRVvZ61X4qHkz2gVaxB1kKhMenzjwWhjmhpqgRHK"[provider]cluster = "localnet"Run anchor test again, and it still all works. ;)
Start a local network and deploy
To deploy, we need to start up the solana-test-validator in one terminal, and then simply run anchor deploy in a new terminal.


Now we have a live deployment, lets move on to the last S in ASS - Svelte!
Step 6. Set up frontend
Svelte is an incredibly simple framework/compiler to learn - its just HTML + JavaScript + built-in reactive state management!
If you know nothing about Svelte, I highly recommend you to check out the official interactive tutorials, it will only take you 15 minutes.
Set up Svelte
The workspace Anchor generated for us is a monorepo, so we are going to initialize the frontend right inside the app directory. Everything from now on is done inside this directory unless notified otherwise.
cd appnpx degit sveltejs/template .node scripts/setupTypeScript.jsyarn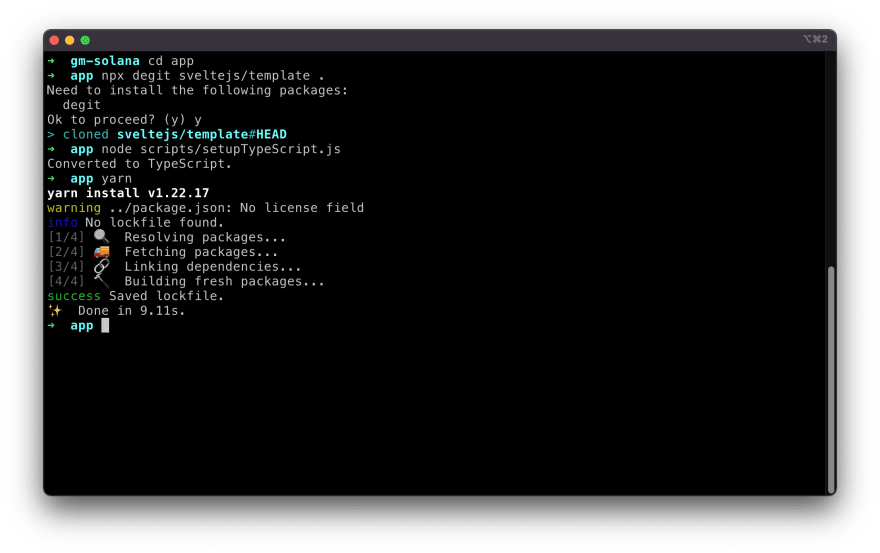
As mentioned in the very beginning, we will need to install a bunch of client-side JavaScript libraries to interact with the blockchain:
yarn add @project-serum/anchor @solana/web3.jsConfigure Rollup
We need some extra steps to get the Rollup bundler do its job correctly.
Just like how our tests worked, we need the IDL files for our Svelte app so that it knows which instruction handlers exist on our Solana program, as well as the data type of everything.
The IDL files and types are located under the target directory under the Anchor project root. Just copy the entire target/idl and target/types directory over into app/src/idl and app/src/types. In our case, we only have one gm_solana.json and one gm_solana.ts file.
We will also need to enable JSON module resolving in app/tsconfig.json. It will look like this:
{ "extends": "@tsconfig/svelte/tsconfig.json", "compilerOptions": { "resolveJsonModule": true }, "include": ["src/**/*"], "exclude": ["node_modules/*", "__sapper__/*", "public/*"]}And now we need to install a few plugins. These take care of JSON imports and polyfilling built-in Node.js modules not available in the browser.
yarn add -D @rollup/plugin-json rollup-plugin-node-builtins rollup-plugin-node-globalsThen enable them in rollup.config.js:
// ... other importsimport json from "@rollup/plugin-json";import builtins from "rollup-plugin-node-builtins";import globals from "rollup-plugin-node-globals";export default { // ... other configs plugins: [ // ... other rollup plugins resolve({ browser: true, dedupe: ["svelte"], preferBuiltins: false, // set this to false }), // ... more rollup plugins json(), globals(), builtins(), ]};Now we can start the dev server with:
yarn dev

Create a Connect Wallet button
When a user visits our dApp, the first thing they need to do should be to connect their Phantom Wallet with our app. What exactly this does is that the browser extension injects into our page a provider, which our app can use to interact with the blockchain on behalf of the user (of course the user needs to approve and sign any transactions). We will make a connect wallet button for them.
This is essentially the same as when you are already logged into Google or Github, and now want to connect to a third party service using the Sign in with Google button.
Lets clean up the default page Svelte generated for us and implement this thing, I added comments to highlight important lines:
<script lang="ts"> import { onMount } from "svelte"; // ======== APPLICATION STATE ======== let wallet: any; let account = ""; // reactively log the wallet connection when account state changes, // if you don't know what this is, check out https://svelte.dev/tutorial/reactive-declarations $: account && console.log(`Connected to wallet: ${account}`); // ======== PAGE LOAD CHECKS ======== const onLoad = async () => { const { solana } = window as any; wallet = solana; // set up handlers for wallet events wallet.on("connect", () => (account = wallet.publicKey.toString())); wallet.on("disconnect", () => (account = "")); // eagerly connect wallet if the user already has connected before, otherwise do nothing const resp = await wallet.connect({ onlyIfTrusted: true }); }; // life cycle hook for when the component is mounted onMount(() => { // run the onLoad function when the page completes loading window.addEventListener("load", onLoad); // return a cleanup function to remove the event listener to avoid memory leaks when the page unloads return () => window.removeEventListener("load", onLoad); }); // ======== CONNECT WALLET ======== const handleConnectWallet = async () => { const resp = await wallet.connect(); };</script><main> <h1>gm, Solana!</h1> <!-- Conditionally render the user account, connect button, or just a warning --> {#if account} <h3>Your wallet:</h3> <p>{account}</p> {:else if wallet} {#if wallet.isPhantom} <h2>Phantom Wallet found!</h2> <button on:click="{handleConnectWallet}">Connect wallet</button> {:else} <h2>Solana wallet found but not supported.</h2> {/if} {:else} <h2>Solana wallet not found.</h2> {/if}</main><style> main { text-align: center; padding: 1em; max-width: 240px; margin: 0 auto; } h1 { color: #ff3e00; font-size: 4em; font-weight: 100; } @media (min-width: 640px) { main { max-width: none; } }</style>Lets open up the app again in the browser, and voil!

Switch to local network
By default, the Phantom Wallet connects to the mainnet of Solana. Since we are doing all the testing on local network, you need to go to Settings then Change Network to localhost.

Step 7. Implement guest book frontend
Now lets write the core features of the app. The app should display a list of gm messages, tagged with their timestamps and the wallet address of their senders.
Weve already interacted with the Solana network before - in the tests! Now we just need to do something similar.
Connection helpers to the Solana network
To get started, we need to have a bunch of parameters at our disposal, namely the programID, which network we are interacting with, and some connection settings with some handy context providers.
Add this to the existing code in App.svelte:
<script lang="ts"> // ... import * as idl from "./idl/gm_solana.json"; import type { GmSolana } from "./types/gm_solana"; import { Connection, PublicKey, clusterApiUrl } from "@solana/web3.js"; import { Idl, Program, Provider, web3 } from "@project-serum/anchor"; const { SystemProgram, Keypair } = web3; //... // ======== CONNECT TO NETWORK ======== // get program id from IDL, the metadata is only available after a deployment const programID = new PublicKey(idl.metadata.address); // we are using local network endpoint for now const network = "http://127.0.0.1:8899"; // set up connection with "preflight commitment" set to "confirmed" level, which basically means that our app // will treat the transaction as done only when the block is voted on by supermajority. // this is similar to waiting for how many confirmations like in Ethereum. // you can also set it to "finalized" (even more secure) or "processed" (changes might be rolled back) const connection = new Connection(network, "confirmed"); // create a network and wallet context provider const getProvider = () => { const provider = new Provider(connection, wallet, { preflightCommitment: "confirmed", }); return provider; }; // helper function to get the program const getProgram = () => { const program = new Program( idl as Idl, programID, getProvider() ) as Program<GmSolana>; return program; };</script>Initialize Base Account
Now comes the interesting part. Remember that our app needs a base account to store all the gm messages?
Well, everyone can create their base account and they are all perfectly valid - its like that everyone can set up a private Minecraft server. If you insist having a singleton design for your base account, you will need to hardcode the user accounts that are allowed to create them in your program.
So, in our gm Solana app, the visitors will be given two choices - to initialize a new base account or use a pre-existing one. If you want to host your ultimate, canonical, official gm Solana app, you can just bake your base account into the Svelte code.
This is pretty cool isnt it? ;)
<script lang="ts"> // ... // ======== INITIATE BASE ACCOUNT ======== // the base account that will hold the gm messages, // if we want to share the same "gm Solana" instance then we need to provide the same base account let baseAccountPublicKey: PublicKey; let baseAccountPublicKeyInput = ""; // UI state used for the input field // because state in Solana is not tied with programs, users can create their own "baseAccount" for the gm app, // the way to share and establish our baseAccount as the "official" one is to provide users with ours up front // in the app client. otherwise we can also hardcode a "deployer account" in the program so only it can do it. // the initializeAccount() here is a naive implementation that creates a new baseAccount on demand. const initializeAccount = async () => { const provider = getProvider(); const program = getProgram(); const _baseAccount = Keypair.generate(); Keypair; await program.rpc.initialize({ accounts: { baseAccount: _baseAccount.publicKey, user: provider.wallet.publicKey, systemProgram: SystemProgram.programId, }, signers: [_baseAccount], }); baseAccountPublicKey = _baseAccount.publicKey; console.log("New BaseAccount:", baseAccountPublicKey.toString()); await getGmList(); // first fetch }; // alternative to initializeAccount(), loadAccount() allows you to pick up a previously created baseAccount // so we can share the same "gm Solana" instance! const loadAccount = async () => { baseAccountPublicKey = new PublicKey(baseAccountPublicKeyInput); console.log("Loaded BaseAccount:", baseAccountPublicKey.toString()); await getGmList(); // first fetch };</script><main> <!-- other stuff... --> {#if account} {#if !baseAccountPublicKey} <button on:click={initializeAccount}>Initialize account</button> or <input type="text" placeholder="use existing account..." bind:value={baseAccountPublicKeyInput} /> <button on:click={loadAccount}>Load</button> {:else} Using gm solana base account: {baseAccountPublicKey.toString()} {/if} {/if}</main>Interact with the program
Now we are all set to interact with the blockchain and wire up local state! Well set up a couple of extra UI state variables and render all the gms neatly in a list. Of course theres also a submit button.
<script lang="ts"> // ... // ======== APPLICATION STATE ======== // ... other state let gmList = []; let gmMessage = ""; // ======== PROGRAM INTERACTION ======== // interacts with our program and updates local the gm list const getGmList = async () => { const program = getProgram(); const account = await program.account.baseAccount.fetch( baseAccountPublicKey ); console.log("Got the account", account); gmList = account.gmList as any[]; }; // interacts with our program and submits a new gm message const sayGm = async () => { const provider = getProvider(); const program = getProgram(); await program.rpc.sayGm(gmMessage, { accounts: { baseAccount: baseAccountPublicKey, user: provider.wallet.publicKey, }, // if we don't supply a signer, it will try to use the connected wallet by default }); console.log("gm successfully sent", gmMessage); gmMessage = ""; // clears the input field await getGmList(); // updates the local gm list }; $: console.log("gmList:", gmList); // just some extra logging when the gm list changes</script><main> <!-- other stuff... --> {#if baseAccountPublicKey} <div> <h3>gm List:</h3> <ul> {#each gmList as gm} <li> <b>{gm.message}</b>, said {gm.user.toString().slice(0, 6)}... at {new Date( gm.timestamp.toNumber() * 1000 ).toLocaleTimeString()} </li> {/each} </ul> <button on:click={getGmList}>Refresh gms!</button> </div> <div> <h3>Say gm:</h3> <input type="text" placeholder="write something..." bind:value={gmMessage} /> <button on:click={sayGm} disabled={!gmMessage}>Say gm!</button> </div> {/if}</main>If your browser wallet doesnt have local network SOL tokens, you can always airdrop yourself a bunch:
solana airdrop 1000 mmmmyyyyywwwwwaaaalllleeeetttt
And thats it, we have finished the gm Solana dApp! Have fun playing with it in the browser.

Step 8. Deploy on public devnet (or mainnet)
So far weve only been deploying to localhost running the test validator. To deploy it to devnet (or mainnet-beta), you need a few extra steps.
Update tooling configs
First, you need to switch the Solana CLI to devnet.
solana config set --url devnetsolana config getThen, open the Anchor.toml file in project root to update the cluster and [programs.localnet]:
# Anchor.toml[programs.devnet]gm-solana = "foooooooobaaaaaaar"[provider]cluster = "devnet"If you dont have devnet SOL, you can airdrop yourself 5 at a time.
solana airdrop 5 mmmmyyyyywwwwwaaaalllleeeettttThen, you can run build and deploy again!
anchor buildanchor deployUpdate parameters in app
Since we are deploying to the public devnet, you will need to switch the network in Phantom Wallet to devnet of course.
Then, you only need to change one thing in the app:
<script lang=ts> // ... // // we are using local network endpoint for now // const network = "http://127.0.0.1:8899"; // we are using devnet endpoint const network = clusterApiUrl('devnet');</script>Run yarn dev or yarn build in the app directory again, and you are all set!
Thats bad-ASS!
Now you have mastered the art of ASS appreciation, you are an ASS stack connoisseur!
Also building in Web3? Let's connect via Twitter @0xMuse
Original Link: https://dev.to/0xmuse/accelerated-guide-to-fullstack-web3-with-ass-anchor-solana-and-svelte-1mg
Dev To
More About this Source Visit Dev To