
An Interest In:
Web News this Week
- April 1, 2024
- March 31, 2024
- March 30, 2024
- March 29, 2024
- March 28, 2024
- March 27, 2024
- March 26, 2024
Some of Our Sources
- Mashable
- Fuel Your Creativity
- Noupe
- CSS Tricks
- Spyre Studios
- Freelance Switch
- Web Resource Source
- Daily Now
- Hashedout
- TechPowerUp
Help Webnuz
Referal links:
Your Guide to Arch Linux
Hi everyone! This guide is meant to take you through the process of dual-booting Arch Linux. It's more of a set of guidelines rather than strict procedure. I'm hoping to give new or potential users an idea of what it's like to dual boot your computer with Arch Linux.
I started using Arch in 2018 after getting tired of Ubuntu and since then I have dealt with my fair share of problems (corrupted ISO, problematic updates, bluetooth nightmares). However, I can say with confidence that using Arch has given me a better understanding and appreciation for operating systems as a whole. There are some things I used to take for granted - like the wifi menu that comes pre-installed with Windows or Mac OS - that I had to install and configure when it came to Arch Linux.
I decided to create this guide for myself when my first installation went south. I lost everything because I didn't have my dotfiles backed up. So the second time around, I created this repo.
**Note: Steps 2-10 are the ones you need to do in one sitting but the rest can be done at your own pace!
Step 0 - Preparation
If you are dual-booting you are essentially telling your current operating system to stop hogging all the space on your computer and make room for a new OS. So figure out what disk management tool your current OS uses and make a partition for your new OS. I went with 100GB, which should be fairly sufficient unless you know you're going to be storing a lot of stuff.
I used the diskmgmt.msc utility on Windows. From there, I 'shrunk' my C drive by 100GB. This created an unallocated partition, which means it is no longer affiliated with your current OS.
Step 1 - Securing the ISO
When you decide to make the switch to Arch (or any Linux distro), you are going to need an image of the operating system. This comes in the form of a .iso file. You are going to have to flash this image file onto a good USB (or a CD if that's your jam and you still have a CD drive..). If you are on Windows you can use a software called Rufus which lets you select your USB and flash an ISO image onto it.
Here's a link to the official Arch Linux ISOs
Step 2 - Booting the ISO
Once you have a fresh image of Arch, plug the USB or whatever medium you're using into the machine you partitioned. Then, depending on what computer you're working with, you need to press some key(s) at startup so you're transported to the boot menu. This will prevent your default OS from loading up. For me, I spammed F2/F3 repeatedly until I saw the boot menu. Then, I selected the option to boot into the USB. Remember, if you mess up, it's not the end of the world, just possibly the end of your PC :D JK
Step 3 - Mount your system
At this point you are using Arch Linux. From here there are actually a bunch of steps but I usually do them all at once. It's kind of intimidating if it's your first time because you just see a black screen with a weird font of white text.
Select Arch Linux install medium to load up the contents of your USB. This might take a while. The following commands will help you verify that you are in boot mode and that your machine has detected the EFI partition (used for booting) and the Arch partition.
# To verify you are in boot models /sys/firmware/efi/efivars# To see partitions (like the one you made in Step 0)fdisk -lMy EFI disk is named sda1 and the Arch one is sda5. I know this because sda5 says exactly 100GB, which is how much I allocated to it. They may be under different names for you but it should indicate EFI on the EFI one and / on the one that will become your root directory. You can further partition the root directory using fdisk to allocate space for system encryption, RAID, etc. Data redundancy wasn't a major concern for me and I wouldn't recommend it if this is your first Linux build.
# To format your root partitionmkfs.ext4 <arch_partition># Here is what I ran for example, -L is for labelmkfs.ext4 -L "Arch Linux" /dev/sda5# To mount the partition, run mount <arch_partition> /mntmount /dev/sda5 /mnt# Mount EFI partition, for me it was /dev/sda1mkdir -p /mnt/boot/efimount <efi_partition> /mnt/boot/efi# If you are not on a wired connection, connect to wifi# Option A: comes with UI but outdatedwifi-menu# Option B - launches interactive iwd promptiwctl[iwd] device list[iwd] station <device> scan[iwd] station <device> get-networks[iwd] station <device> connect <SSID># Update the system time and datetimedatectl set-ntp true# Install base systempacstrap /mnt base linux linux-firmware vim# Generate the fstab (I have no clue what this is but I think it lets you detect mounted file systems)genfstab -p /mnt >> /mnt/etc/fstabStep 4 - Get out of the USB
You have successfully taken the image on your USB and mounted it onto your computer. This step will basically be the equivalent of cd into your new directory. Keep the USB plugged in though, we're not done with it yet.
# Change root into arch linuxarch-chroot /mntStep 5 - Wifi
Most important step because without wifi you can't browse memes. There are a lot of ways to do this and I had a lot of trouble with the ones that are mentioned in most tutorials so here's the one that I would recommend. NetworkManager
pacman -Sy networkmanager# Automatically start it upsystemctl enable NetworkManagerStep 6 - Bootloader
You need something to load your OS each time you restart your computer so get grub.
# Download grubpacman -S grub efibootmgr# Download something that allows Arch Linux to detect Windows as wellpacman -S os-prober# Install grub into HDDgrub-install /dev/sdals -l /boot/efi/EFI/arch# Generate grub configgrub-mkconfig -o /boot/grub/grub.cfgStep 7 - Set Up Some Boring Things
Like date, timezone, clock, etc
timedatectl set-ntp true# Set up timezoneln -sf /usr/share/zoneinfo/Canada/Eastern /etc/localtime# Set clockhwclock --systohc# Also set locale# First uncomment the Canada locale in /etc/locale.genvi /etc/locale.gen# Generate the localeslocale-genStep 8 - Password
# Set the root passwordpasswdStep 9 - Unmount
umount -R /mntrebootNow you can take out the USB.
Step 10 - Take a break because you've come this far
Step 11 - Users
After rebooting, login as root and create a user.
useradd -m -g wheel suhavipsswd suhavi# Give sudo abilityvim /etc/sudoers# Uncomment the following line%wheel ALl=(ALL) ALLStep 12 - Xorg
This is a graphical server. So you don't have to look at a blank sceen all the time.
pacman -S xorg-server xorg# Type startx to start itStep 13 - Terminal + Shell + Git + VS Code
At this point the steps are very general. It's important to do your research to see which terminal, shell and editor you want. These are the ones I decided to go with
- terminal: termite
- shell: fish (I think zsh is a better option, but you didn't hear it from me)
- editor: VS code
- version control: git
pacman -S termite fish git code# Make fish your defaultchsh -l # See all shellschsh -s fish# Copy the following to fish config file to make startx run on startupif status is-login if test -z "$DISPLAY" -a $XDG_VTNR = 1 exec startx -- -keeptty endendConfigs are your best friend with Linux. Located under .config at the root level, they contain rules for all the customizations you want to make to your operating system. Take a look at the files in this repo to get an idea of the kinds of changes you can make.
Step 14 - Window Manager
There are lots of window managers to choose from. I personally went with bspwm because I like binary trees. I also got dmenu, which is a search bar that lets you type commands or applications to open. It can be accessed with (cmd/windows key) + spacebar. However, in order for these hotkeys and shortcuts to work you need sxhkd. Lastly, I installed some fonts!
pacman -S bspwm dmenu sxhkd# Fontspacman -S noto-fonts# Fonts can be managed at ~/.config/fontconfig/fonts.conf# Make x server start bspwmvim ~/xinitrc# Add the followngsxhkd &exec bspwm# Make termite your default terminal by going into the `.config/sxhkd/sxhkdrc file and changing xterm to termite# Add custom keybinds to sxhkdrcStep 15 - Sound
I didn't have sound in the beginning.
pacman -S alsa-utilsalsamixer -c 0Use the arrow keys to adjust your sound preferences.
Step 16 - Wallpaper
feh --bg-scale wallpaper.jpg# Edit the following to xinitrc~/.fehbg &# Make sure it's before exec bspwm^Step 17 - Yay
This will help download AUR packages, which are unofficial packages for things. You'll need it at some point.
git clone https://aur.archlinux.org/yay.gitcd yaymakepkg -siStep 18 - Polybar
I actually hate this part but I missed having some sort of menu bar to tell me how much battery I have left, the date, etc
yay -S polybarinstall -Dm644 /usr/share/doc/polybar/config $HOME/.config/polybar/configexample polybar# Make a lot of changes to example config# I was getting unicode errors sosudo pacman -S ttf-font-awesome# In polybar config change fontsfont-1 = "Font Awesome 5 Free:style=Regular:size=10;5"font-2 = "Font Awesome 5 Free:style=Solid:size=10;5"# Go through all unicode characters in polybar config and replace them with icons from the FA cheatsheet# Put this line in bspwmrc. Change main to whatever the name of your bar ispolybar main &Step 19 - Backing Up Your Dotfiles
I forgot to do this the first time around and lost all my progress. It put me in a 8 month depression until I picked up Arch Linux again.
# Initialize a git bare repogit init --bare $HOME/.dotfiles# Create an alias so the bare repo mirrors your actual dotfilesalias dotfiles ="git --git-dir=$HOME/.dotfiles/ --work-tree=$HOME"# Save alias, this will allow you to use dotfiles as a command in place of gitfuncsave dotfiles# Ignore files you don't want trackeddotfiles config --local status.showUntrackedFiles no# Create a github repo called .dotfiles# dotfiles remote add origin https://github.com/gucci-ninja/.dotfilesStep 20 - Make your windows look less ugly
Since I have bspwm I don't have a display manager to add GTK themes to. A GTK theme is the overall theme that handles stuff like the panel color, the backgrounds for windows and tabs, how an application will look when it is active vs. inactive, buttons, check-boxes, etc. So I need a theme switcher to accomplish this.
yay -S lxappearancesudo pacman -S gtk-engine-murrine adwaita-icon-theme# Run lxappearance to choose the theme you want90% of the aesthetics of my build were made possible largely due to this reddit post that I wish I had found earlier.
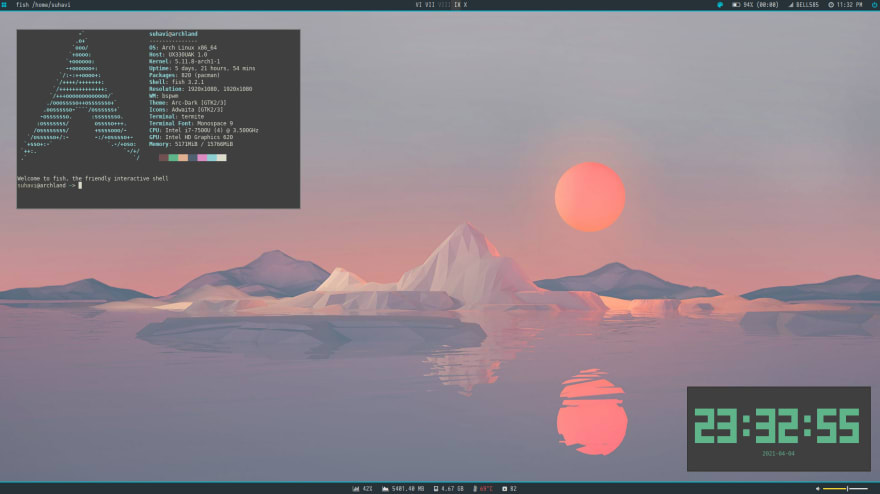
Step 21 - Neofetch
You don't need to do this, it's mostly fo showing off to people.
pacman -S neofetch# Add the following to fish.configneofetchNow every time you create a new terminal session you can show off.
Step 22 - File Manager
I'm using thunar.
Step 23 - Aliases
I respectfully ignore this part because I don't want to get used to an alias and look like a fool when I use another machine. But feel free to take this time to create aliases like git add . = ga.
Step 24 - Bluetooth
Bluetooth can be a pain to work with even for easy to use OSes. I'll save you the trouble of setting it up on Arch.
$ pacman -S bluez bluez-utils$ pacman -S pulseaudio-bluetooth pulseaudio-alsa pavucontrolsystemctl enable bluetooth.service$ sudo vim etc/bluetooth/main.conf# add the following line at the end# this will ensure your bluetooth headphones auto-connectAutoEnable=true# make a directory for pulse (you may already have it)$ mkdir ~/.config/pulse# copy sample$ cp /etc/pulse/* ~/.config/pulse/$ systemctl restart bluetooth$ bluetoothctl# you should be in the bluetooth user now[bluetooth]~ power on[bluetooth]~ agent on[bluetooth]~ default-agent[bluetooth]~ scan on# at this point you should put your headphones in pairing mode# they should show up with a mac address[bluetooth]~ pair 00:00:00:00:00[bluetooth]~ connect 00:00:00:00:00# if this part fails run the following in a new terminal$ pulseaudio --start# it should connect now[bluetooth]~ trust 00:00:00:00:00[bluetooth]~ scan off[bluetooth]~ exit# it should connect your headphoens at this point. if you don't hear sound, restart spotify or whatever and it should work# if it doesn't, open pavucontrol$ pavucontrol# this interface will show you your connected devices, make sure it is not on mute and that under configuration tab it says it's connect to ADP SINK or sm dumbThe End!
This brings me to the end of this Arch Linux Setup Guide. I've listed a few more tips and tools that are worth looking into
Display Clock
- download nerd-fonts-iosevka
- download tty-clock
More PolyBar Improvements
- rofi for slightly better application management
- themes: https://awesomeopensource.com/project/adi1090x/polybar-themes
Help, I updated my system and something broke.
It's common to update your system every now and then by running pacman -Syu but there have been times when updating caused issues such as wifi failure. I later checked the Arch Linux News Page to find that the latest update will break for some users. In cases like these, it's best to roll back to a previous version.
# This tells you the linux version you're running$ uname -a$ cd /var/cache/pacman/pkg# These are the linux versions you have saved in your cache. Find one you want to downgrade to$ ls$ sudo pacman -U linux-#.#.#.arch---$ rebootIf you have any questions or run into any issue, I would be happy to help out. Here's my Twitter!
Helpful Resources
Original Link: https://dev.to/suhavi/your-guide-to-arch-linux-1262
Dev To
More About this Source Visit Dev To