
An Interest In:
Web News this Week
- April 20, 2024
- April 19, 2024
- April 18, 2024
- April 17, 2024
- April 16, 2024
- April 15, 2024
- April 14, 2024
Some of Our Sources
- Simplebits
- Team Treehouse
- Smashing Apps
- Abduzeedo
- My Ink Blog
- Web Design Ledger
- Line 25
- Design Modo
- Web Resource Source
- Willems Lab
Help Webnuz
Referal links:
How to Setup Git and Github in less than 5 minutes
Git and Github is must-have skill for a developer. So, if you want to start using them then first you need to do the setup.
In this article, Ill do just that. Ill show you how you can set up Git and Github easily.
Lets get started.
Note: if you prefer video, dont worry I made a video for you too
Step#1: Install Git and log in to Github
To configure git first you need to install it on your machine and Login into your GitHub account
You can download Git from here
Step#2: Setting Your Username and Email in Git
Once youve installed git on your machine, now you need to let git know who you are.
You need to give git your name and email.
Open your command line run this with your name, to configure your name
git config --global user.name "Your Name"And run this with your Email, to configure your Email
git config --global user.email "[email protected]"Change the default master to main:
In 2020 GitHub changed the default branch name master to main.
Any new repositories you create will use main as the default branch, instead of master.
But if you create a repo with git init then it will make a branch master.
To solve that we can configure git to create a repo with a name main with this command
git config --global init.defaultBranch mainOur local configuration has finished. You can run these commands to see things working properly.
You should be able to see your Email and Username.
git config --get user.namegit config --get user.emailStep#3: Generate SSH Key
We set up the git, now we need to generate an SSH key and add that to our Github account.
First, we need to see if we have an SSH key with this command:
ls ~/.ssh/id_rsa.pubIf you run the command above and you dont have a key then youll see this message:

So, now we know we dont have any keys. We need to generate one.
We can generate a key with this command:
ssh-keygen -C yourEmailHereWe generated the key, Now we need to print on the screen and copy it so we can add that to Github:
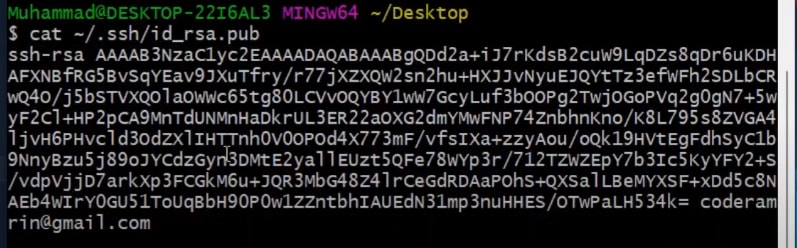
To print we need to run this command:
cat ~/.ssh/id_rsa.pubIf youve run all the commands properly you should see the key like this:
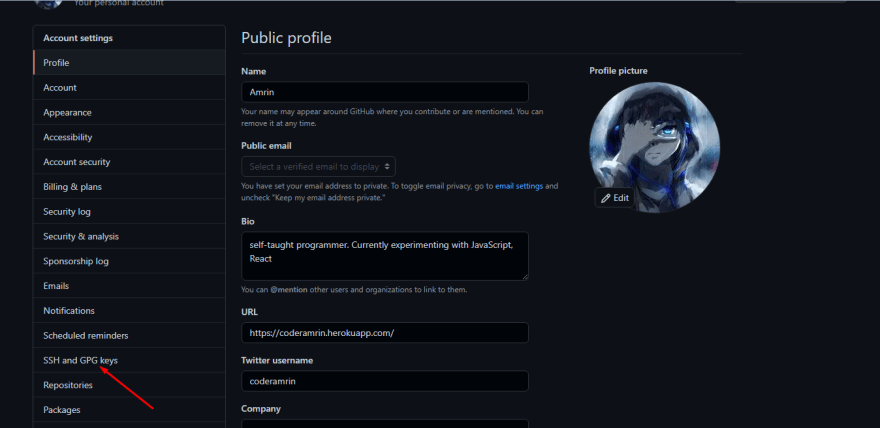
Step#4: Add SSH Key to GitHub:
Now we need to add the key to GitHub.
Go to Github, and click on your profile picture then go to setting.

Then go to SSH and GPG Keys
After that got to New SSH Key

Now add the key here:

We are almost done.
We just need to run one last command to see if everything is done properly.
ssh -T git@github.comIf youve followed along properly you should see this success message:

All the commands:
git config --global user.name "Your Name"git config --global user.email "[email protected]"git config --global init.defaultBranch maingit config --get user.namegit config --get user.emaills ~/.ssh/id_rsa.pubssh-keygen -C <youremail>cat ~/.ssh/id_rsa.pubssh -T git@github.comResources:
https://docs.github.com/en/get-started/quickstart/set-up-git
Highlights from Git 2.28 | The GitHub Blog
Conclusion
Yay! we are done setting git and GitHub. Now we can create repositories and host our projects on Github.
If this was helpful, subscribe to my newsletter where I share 5 web development resources every week.
Subscribe Now!
connect with me on Twitter at @coderamrin
Original Link: https://dev.to/coderamrin/how-to-setup-git-and-github-in-less-than-5-minutes-1dlo
Dev To
More About this Source Visit Dev To