
An Interest In:
Web News this Week
- April 2, 2024
- April 1, 2024
- March 31, 2024
- March 30, 2024
- March 29, 2024
- March 28, 2024
- March 27, 2024
Some of Our Sources
- Engadget
- Simplebits
- TutsPlus - Code
- TutsPlus - Design
- My Ink Blog
- Web Design Ledger
- 24 Ways
- Specky Boy
- Android Dissected
- The Verge
Help Webnuz
Referal links:
A beginners guide to AWS Amplify Studio
Are you trying to learn more about AWS Amplify Studio? If your answer is Yes, then this guide may help you get a better understanding. Hopefully it will also help you keep track of related information around this new release. There are a few different videos, blogs, tweets popping up on Amplify Studio. I needed something to connect them all together (maybe you do too). We all know how fast it changes in this space and a guide can help keep this information in one place and relevant. As I find new resources / links, i'll be updating this same guide to keep it up to date :) If you have recommended resources, please do share them and i'll add them to this guide. Probably a good time to drop that famous proverb:
If you want to go fast, go alone; but if you want to go far, go together :)
I'll be explaining and listing essential resources on Amplify Studio. We will also be taking AWS Amplify Studio for a test drive! Hopefully you will find value in this guide / blog. Even if it's just understanding concepts. Please do follow along (at your own pace) and test it out with me. If you're not aware of this new update let's explain below (feel free to skip this if you've already gone through it):
What is AWS Amplify Studio?
AWS Amplify Studio is a visual development environment for building full-stack web and mobile apps. Studio builds on existing backend building capabilities in AWS Amplify, allowing you to accelerate your UI development. With Studio, you can quickly build an entire web app, front-to-back, with minimal coding, while still maintaining full control over your app design and behaviour through code.
I like to think of amplify as a great way for you to go from idea to production ready app, fast. I also think this shift to Amplify Studio will help bring ideas to life for non developers too. Have you got a startup idea? I would recommend trying this out! Let's have a look at what resources are available to you:
Documentation Resources
- About Amplify Studio: https://aws.amazon.com/amplify/studio/
General information on Amplify Studio. Great for quickly understanding what it can be used for.
- Amplify Studio Docs: https://docs.amplify.aws/console/
This website is where most of the magic happens. It explains how to setup your Amplify (Studio) environment. Key concepts are explained, helping you to turn your idea into UI design, database modelling and binding your UI to data.
- Amplify UI Docs: https://ui.docs.amplify.aws
Great website for you to learn how you can use prebuilt UI design layouts and components within your app. This is a new feature and definitely worth checking out for inspiration!
- Understanding CSS: Flex Help
There are lots of properties now with UI / CSS aspects in the development and design of components and layouts. This website will help you fill in the gaps of what can be changed regarding design.
- What's New: AWS News Post on AWS Amplify Studio
General overview / announcement explaining region availability of Amplify Studio.
- Amplify Studio features written by @aspittel and @theswaminator

Great overview of eight new functionalities and features for Amplify Studio.
Tutorial Resources
- Launch Blog Tutorial: AWS Amplify Studio using Figma
Ren taking you through a tutorial from start to finish. Even if this is not aligned with your idea. Doing this tutorial will help you gain practical understanding of key concepts.
- AWS Amplify Studio: Official Getting Started Tutorial
You should do this official tutorial, really good and probably the best place to start if you don't want to read anything and just build. Which is completely cool to do too. We all learn and build differently.
- Build a Vacation Rental Site with Amplify Studio
Great tutorial that helps with all those nuances that don't get explained. Lots of extra links on the different steps to help plug those gaps.
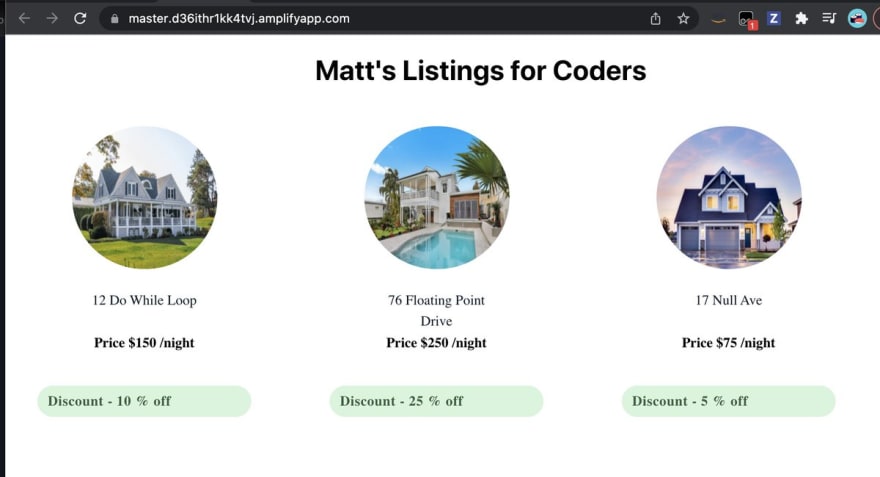
- Matt's Amplify Studio Twitter Tutorial thread:
 Recovering from re:invent so spent the evening playing with the @AWSAmplify Studio for the first time
It's honestly very cool and has a ton of potential. I just wish I knew how to use Figma better!
Created a silly app to list apartments
master.d36ithr1kk4tvj.amplifyapp.com
Tutorial06:06 AM - 05 Dec 2021


Great for understanding the steps quickly. Definitely recommended if you want to learn via Twitter.
- Anna's blog on: Building a Newsfeed with AWS Amplify Studio
Great to see a different use case tutorial. Brings in deeper integration of social platform you might be creating.

Figma Design Integration
One of the new features allows you or graphic designers to develop your app design in Figma and integrate within Amplify Studio. Let's take a look at this integration.
Figma is a free, online UI tool to create, collaborate, prototype, and handoff your application design. Amplify Studio offers an integration with Figma, allowing you to generate reusable React code by importing your Figma design file. Amplify Studio automatically converts any Figma component in your Figma file to a React component that can then be used in your app. Whenever you make a change to the component in Figma you sync the changes to Amplify Studio and update your application!
There are 4 introduction videos here on how to use Figma. If you're like me, this is all new. I'm used to graphic designers working in adobe photoshop, illustrator etc and sending it to front end developers (me) and then I would translate that into production. Using Figma is a new way for me to improve the design -> development process.
Let's GO! & Build a Solution (MVP)
The above is a lot of information to digest. We are not stopping there... (stick with me!) and yes we could probably split this into a series, though we have all these resources and we've got nothing tangible... We need to build something with all this knowledge!
I was in the Amplify Extensibility sessions and few people commented "is there anywhere on the web with all the amplify videos in one place?". I replied, "i've not seen one and could easily create a youtube playlist to encapsulate them all". Though let's create a place (solution) to view all Amplify Studio videos.
Yep, we are going to build an app to hold all of our Amplify Studios videos. Yes, that sounds like inception. Building something for Amplify with Amplify. We need this solution, to give other users CRUD access to update / manage the content (Amplify Studio enables this functionality). That's enough talking, let's GO!
Step 1: Load up an App in Amplify Studio
Lots of different ways to do this, i've gone via AWS Management Console, then locate AWS Amplify and select New app -> Build an App. You should see the below screen, i've called my app 'Amplify Learning'. Select Confirm Deployment.

Step 2: Launch Amplify Studio
Once it loads, you'll see 'Launch Studio' button in the backend tab, click that button. Though check if your pop up is blocking it from opening (always happens to me, in chrome!).

If you've been using Amplify recently, you'll notice, Amplify Studio looks exactly like Amplify Admin UI and you would be correct ;) What's better than a new service, a service that's been refined and improved over time. I digress, let's get back on it!
Step 3: Data modelling & Adding Data
Select the Data tab on the left, we are going to do some data modelling. Mine looks like this:

If you've gone through the other tutorials, this will be familiar to you. I've added fields for video url, name and type. Once you're happy with your data structure, click "Save and Deploy". This is where Amplify builds it all out for you in the background. Once done, head over to the content tab. Mine looks like this:

Yes we can add auto generated data, though you're on route to production / being a pro, put in some real data. I've inputed some Amplify Studio videos that are essential viewing. Once done, it's time to introduce Figma (Design). Click the Home menu and select the 'Build UI' button. Or click the UI Library tab and select Get Started button.
Step 4: Open up Figma
Clicking the Get Started button will open up the link to: Figma - Amplify Studio Template. Click duplicate and select My Components. You'll see the available components. I've customised CardE.

Feel free to adjust your component the way you would like it. Once you're happy with the design. Click the Share button in the top right and copy the link.

Step 5: Sync Amplify Studio with Figma
Once you've got your link, you need to switch back over to Amplify and paste the link in the UI Library (tab) area and click Continue. This will prompt you to sign in with Figma. Allow access and sync the files. I normally accept all, quicker. Then all your components will be available for you.

Once that is done, you will see all the components loaded from Figma in you Amplify UI Library tab. Here is what mine looks like.

Step 6: Configure & Bind Data to Components
Awesome, it's looking good. Notice i've highlighted the Configure button in the above image. We now need to turn our design into a collection and bind the data to our design. Click configure and you'll now be able to do this:

Groovy! Add in your model name in the Type. Select the top level Component (CardE) and input that in and give it a name (mines 'Info'). Go through your other elements and connect them up. The property on text is 'label' and the value would be 'Info.name'. This will be different for you, depending on what you've named your data model and component name. Once you're done connecting it up, click Create Collection and give it name.

Step 7: Adjust Layout and Get Component Code
Here you can adjust the layout, spacing and order for your collection. On the left, i've selected 'Grid' and added 10px around each card. On the right you can adjust the order. I've added a sort via Name to be ascending. Which will keep the content displayed in a logical order. Feel free to do the same or make it your own. Coolio, that's done. We need to import this into our app locally to test it out. Click '</> Get component code' This brings up a handy prompt of what we need to pull locally into our amplify app.

Step 8: Create App Locally & Sync with Amplify Studio
Create your React app locally. You can do this with running the following command in Terminal:
npx create-react-app amplify-demoMove into the React app that you've just created
cd amplify-demoRemember that section with the 'initial project setup' guide. Run those commands:
npm install -g @aws-amplify/clinpm install aws-amplify @aws-amplify/ui-reactOnce done, you'll need to switch to the other tab instruction and pull the Amplify Studio code into your project. Mine looks like this:
amplify pull --appId d22vmom8abyhk2 --envName stagingIn your App.js file add
import { CardECollection } from './ui-components';Place your collection, where you would like it displayed:
<CardECollection />My App.js looks like this:

Step 9: Override & Extend Generated Code - React Player
I know what you're thinking, wait a minute what happened to CardECollection in your code? Don't worry it's there, i've renamed it and it's called 'PlayerCollection' Why have I done this? Remember at the start we are trying to allow users (you and me) the ability to watch videos. There is no video component integrated (yet). When you use a default component, any changes will be overwritten when you re-sync with Figma. Take a look at this Modify Generated Code Override. Which explains how to do this change, also everything we've gone through so far is within that documentation. Take the time to explore the docs too.
I used and installed this (React Player):
npm install react-playerThen within your CardE component import the React player. Change the url to your corresponding path in your data model. Mine would be: url={Info?.video}
import ReactPlayer from 'react-player'// Render a Video Player<ReactPlayer url='https://www.youtube.com/watch?v=ysz5S6PUM-U' />Remember that grey box in my CardE design on Figma. I've made the React Player to be the same size and it fits nicely within that area. Here's what my Player / CardE component looks like:

Now that's added, we should load up the React server and check what this looks like...
npm start Mine looks like this:

Live Version - Amplify Videos
https://master.d22vmom8abyhk2.amplifyapp.com/
Summary
I really like the direction AWS Amplify (Studio) is going. If you've got a startup idea or need to develop a solution to a problem, with an AWS service, Amplify Studio is a good option. Yes, the learning curve does take time (each person is different). I would encourage you to stick with it, the rewards are exponential when you understand how it all connects. Yes, it isn't a no-code solution and it does take time to up-skill. We've seen a deeper design integration which will exponentially help us reduce the time it take to move from idea to production ready app. I hope you found any part of this guide useful. Leave a comment or tweet me @markramrattan with any questions or resources you think should be added. You can also join the Amplify Discord if you need help. They are superheroes

Clean Up
To clean up your Amplify project, run:
amplify deleteOr via the Amplify Web Console, go Actions -> Delete app

Wishing you a healthy and happy new year! I'm looking forward to seeing what you build in 2022.

Original Link: https://dev.to/aws-builders/a-beginners-guide-to-aws-amplify-studio-391
Dev To
More About this Source Visit Dev To