
An Interest In:
Web News this Week
- April 23, 2024
- April 22, 2024
- April 21, 2024
- April 20, 2024
- April 19, 2024
- April 18, 2024
- April 17, 2024
Some of Our Sources
- TutsPlus - Code
- Just Creative
- The Logo Smith
- Spoon Graphics
- Six Revisions
- FanExtra - PSD
- Noupe
- Crazy Leaf Design
- Web Design Ledger
- Wal You
Help Webnuz
Referal links:
How To Build A React App Using React Router v6 Without create-react-app
Recently I found myself in the position of needing to start a new React app from scratch, but due to anticipation for future needs of the app it was decided that we wouldn't be using create-react-app. But unfortunately, create-react-app is the only way I knew how to get a React project started. I also knew that we needed to use React Router in the app, and it just so happened that a new version was just released. So off to the internet I went, looking for a tutorial on getting started. I found some helpful links and articles, but I also found that I had to pull different steps from different areas in order to get a process that actually worked together with my setup and versioning. So in the interest of helping the next dev in my position, I decided to document the process I used. Hopefully this will make it much quicker and easier for whoever is reading this today.
To start off, create a new folder and give it a name (this will end up being the name of the app). Open up the folder and in a terminal type the following command:
npm init -y
You should see something similar to the following output
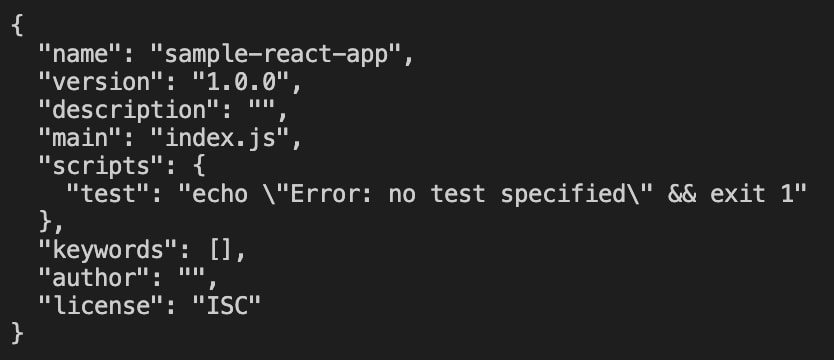
Next you'll create a "dist" folder at the root of your application. In that folder, create a file called index.html. This will be the initial starting HTML file for your application. Copy the following boilerplate into that file.
<!DOCTYPE html><html lang="en"><head> <meta charset="UTF-8"> <meta http-equiv="X-UA-Compatible" content="IE=edge"> <meta name="viewport" content="width=device-width, initial-scale=1.0"> <title>Sample React App</title></head><body> <div id="app"></div> <script src="bundle.js"></script></body></html>You'll notice that inside the body tags there is a div with an id of "app." This is the div that you will eventually reference when telling React where to render everything. You can name it whatever you want, just make sure when you are referencing later on you use the same id the one you specify here.
Next, we'll install the React dependencies, Webpack and Babel. These are the core dependencies you'll need for a basic React app.
npm i react react domnpm i --save-dev @babel/preset-env react-hot-loader webpack webpack-cli webpack-dev-server @babel/core @babel/preset-react babel-loaderNow we'll install React Router at version 6.
npm i react-router-dom@6Now that everything is installed, we'll add a script allowing us to start the application from the terminal. In package.json, add the following code to the "scripts" section.
"start": "webpack serve --config ./webpack.config.js --mode development --port 3000"
Your package.json should now look like this:
{ "name": "sample-react-app", "version": "1.0.0", "description": "", "main": "index.js", "scripts": { "start": "webpack serve --config ./webpack.config.js --mode development --port 3000" }, "keywords": [], "author": "", "license": "ISC", "dependencies": { "dom": "^0.0.3", "react": "^17.0.2" }, "devDependencies": { "@babel/core": "^7.16.0", "@babel/preset-env": "^7.16.4", "@babel/preset-react": "^7.16.0", "babel-loader": "^8.2.3", "react-hot-loader": "^4.13.0", "webpack": "^5.65.0", "webpack-cli": "^4.9.1", "webpack-dev-server": "^4.6.0" }}Next we need to set some Babel presets. In your root directory create a file called .babelrc and put in the following code:
{ "presets": ["@babel/preset-env", "@babel/preset-react"]}Now we'll specify our Webpack presets. Create another file in the root directory called webpack.config.js and put in the following:
const webpack = require("webpack");const path = require("path");module.exports = { entry: path.resolve(__dirname, "./src/index.js"), module: { rules: [ { test: /\.(js|jsx|ts|tsx)$/, exclude: /node_modules/, use: ["babel-loader"], }, ], }, resolve: { extensions: ["*", ".js", ".jsx", ".ts", ".tsx"], }, output: { path: path.resolve(__dirname, "./dist"), filename: "bundle.js", }, plugins: [new webpack.HotModuleReplacementPlugin()], devServer: { static: path.resolve(__dirname, "./dist"), hot: true, historyApiFallback: true, },};Note: if you are not using typescript in your app you can omit the all references to "ts" and "tsx" (found under resolve.extensions and module.rules.test).
Now we'll create our root React app file. Create a src folder at your root directory and inside make a new file called app.jsx. This will contain the following (I'll explain what all of this is below):
import React from "react";import { BrowserRouter, Routes, Route, Outlet } from "react-router-dom";const App = () => { return ( <BrowserRouter> <Routes> <Route path="/" element={<Layout />}> <Route index element={<Home />} /> <Route path="about" element={<About />} /> <Route path="contact" element={<Contact />} /> <Route path="*" element={<h2>Page Not Found</h2>} /> </Route> </Routes> </BrowserRouter> );};export default App;const Layout = () => { return ( <> <h1>Welcome to the app</h1> <Outlet /> </> );};const Home = () => { return <h2>Home</h2>;};const About = () => { return <h2>About</h2>;};const Contact = () => { return <h2>Contact</h2>;};At first glance, it looks like I just threw a massive code block at you just now. But if you break it down, it's simply a component that holds a router with a couple dummy components to get started. You can see that the component is called App and in this component we return a <BrowserRouter>. This is the built in React Router component that will wrap around whatever routes you add to your app in the future.
Inside the <BrowserRouter> tag is where we will place all of our Routes. We start with a <Routes> (note the "s") tag, another React Router component, basically saying "Hey here's a bunch of different routes to look for." Then of course is the <Route> component, which is where you'll put the actual path and the component to be rendered when that path is hit. I won't go into anymore detail on how these React Router components work. Instead if you want to see a more in depth explanation on how they all work I'd recommend checking out their documentation here. Their docs are really clear and they explain things much better than I ever could.
Below that is just a couple simple dummy components, so that something will actually render when you hit each route. You'll notice that layout is the parent route, and it contains an <Outlet> that renders any children elements (again - see the official documentation for a much better explanation). These of course should be replaced once you start building out your application, and they should probably be split into their own separate files. But for ease of this tutorial I decided to put them all together so you can clearly see what's being rendered and when.
Finally you'll need to write your ReactDOM renderer component. In your src folder, create a file called index.js. Inside that you'll place the code below:
import React from "react";import ReactDOM from "react-dom";import App from "./app";ReactDOM.render(<App />, document.getElementById("app"));This code is what React uses to actually render your entire app. Notice in the document.getElementbyId, you are using the id "app" that you created in your index.html file at the beginning.
Now time to check everything out! Run the app using npm start and then in your browser navigate to localhost:3000. You should see the home screen rendered on the page. In the URL bar, add "/about" to the end of the current URL and you'll see the about page rendered. Switch that to "/contact" for the contact page. The header from layout should be shown for all routes.
And that's it! You now have a basic React app with React Router v6. This is of course only one way to do it, and I'm sure others have other methods, but this is what I've found to be simple and effective to get everything going.
I hope this helped, and saved you some time in the process! If you want to save even more time and not read through everything - although I do recommend going through the steps and typing everything yourself so you can have a good idea of what's going on - you can go to the GitHub repo here to get everything in one go.
Thanks for reading! If this article was helpful, or you have any questions or feedback, feel free to leave a comment!
Original Link: https://dev.to/jordan_smith/how-to-build-a-react-app-using-react-router-v6-without-create-react-app-4fe3
Dev To
More About this Source Visit Dev To