
An Interest In:
Web News this Week
- April 25, 2024
- April 24, 2024
- April 23, 2024
- April 22, 2024
- April 21, 2024
- April 20, 2024
- April 19, 2024
Some of Our Sources
- BoingBoing
- Team Treehouse
- Creative Curio
- Naldz Graphics
- Web Design Ledger
- CSS Globe
- 24 Ways
- Specky Boy
- Design Modo
- The Verge
Help Webnuz
Referal links:
Integrate Firebase Authentication with Google Sign-In to SwiftUI app
SwiftUI framework is already in its third iteration and with that, it is well and truly on its way to production-ready applications. Such applications are certainly going to need some sort of authentication. Since authenticating users can be tricky, you may want to rely on third-party solutions for that, such as Firebase. Question is then, how does one integrate Firebase and Google Sign-In to SwiftUI application?
This article will show you how to create iOS application using SwiftUI, create Firebase project and then use Firebase Authentication to integrate Google Sign-In SDK to your SwiftUI application.
Within this article we will cover following topics:
Creation of Firebase project
Creation of SwiftUI Lifecycle application
Handling dependencies with CocoaPods
Handling authentication within our code
Designing UI elements
Creation of Firebase project
In order to use Firebase in our SwiftUI app, we need to create new Firebase project in
Firebase console. Create new project by clicking on Add project.
Once Create a project page opens, enter project name.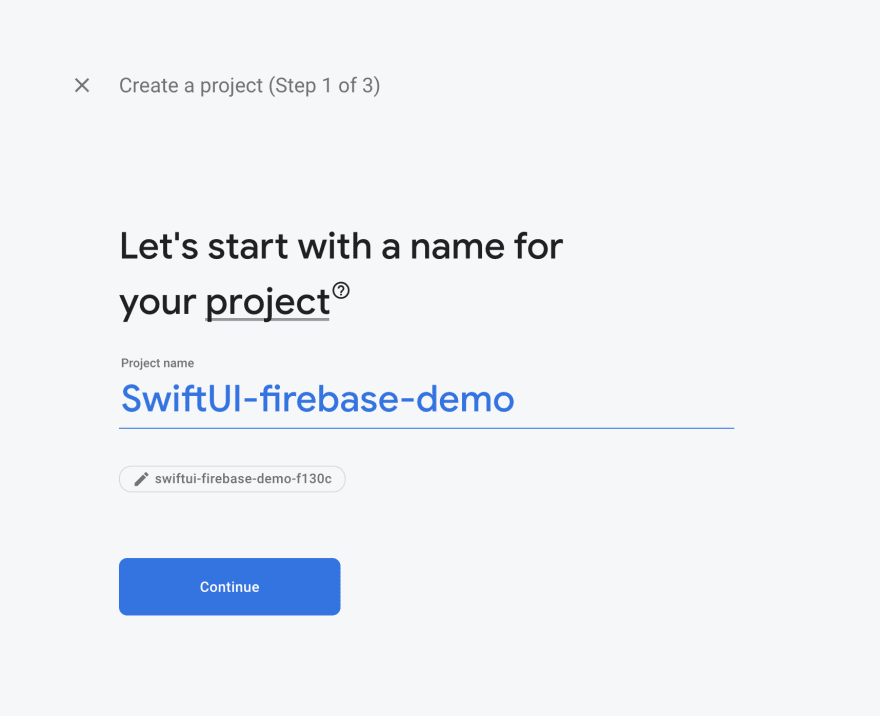
Next step is either enabling or disabling Google Analytics. It is not necessary for this demo, so it's up to you to enable it.
When project's Dashboard opens, click on iOS icon.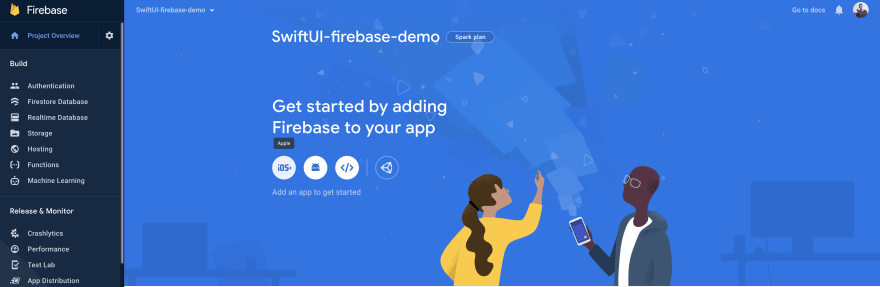
Next, fill out form for registering the app. Apple Bundle ID is important since it needs to be the same as bundle identifier, we will use later in Xcode project. Other two fields are optional. App Store ID is only needed if app will be uploaded to the App Store which we are not doing in this tutorial.
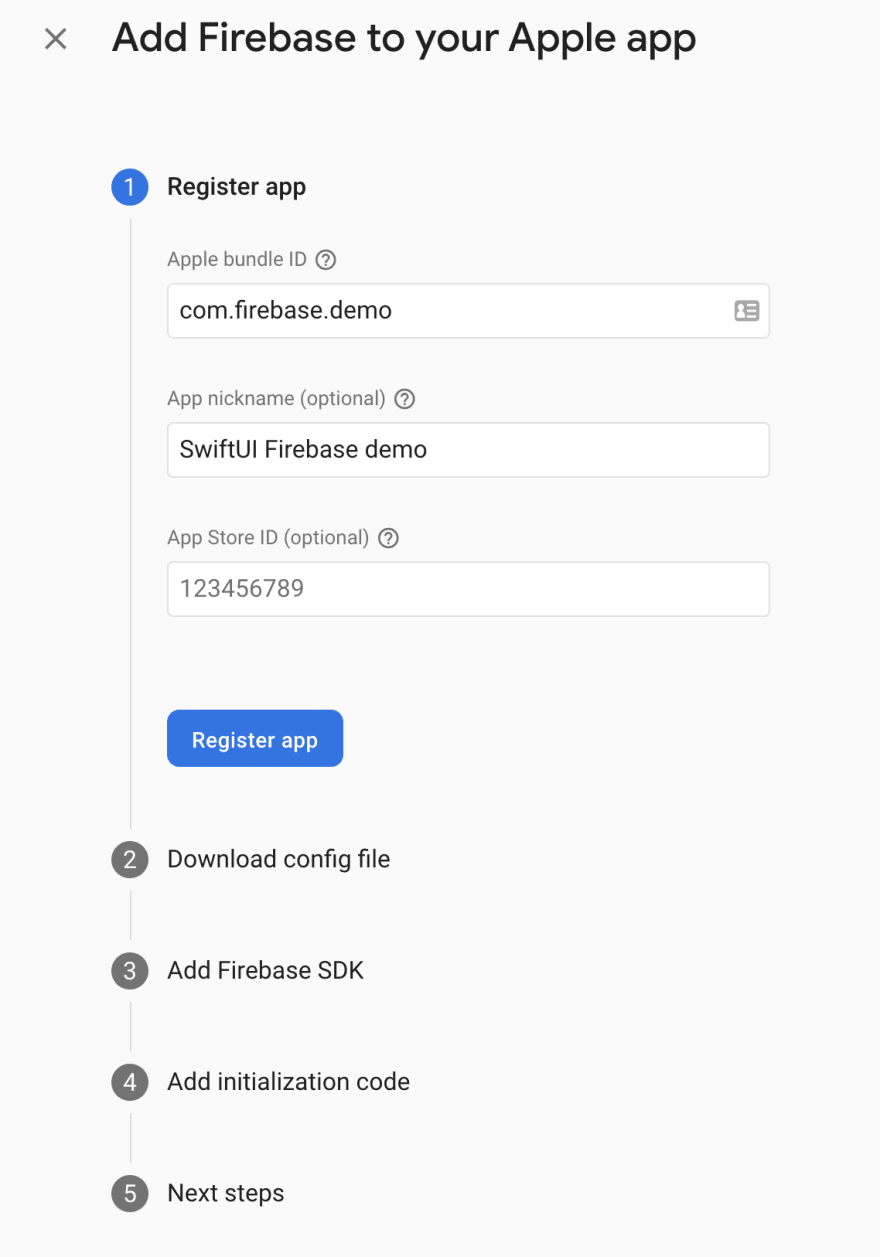
Click on Register app.
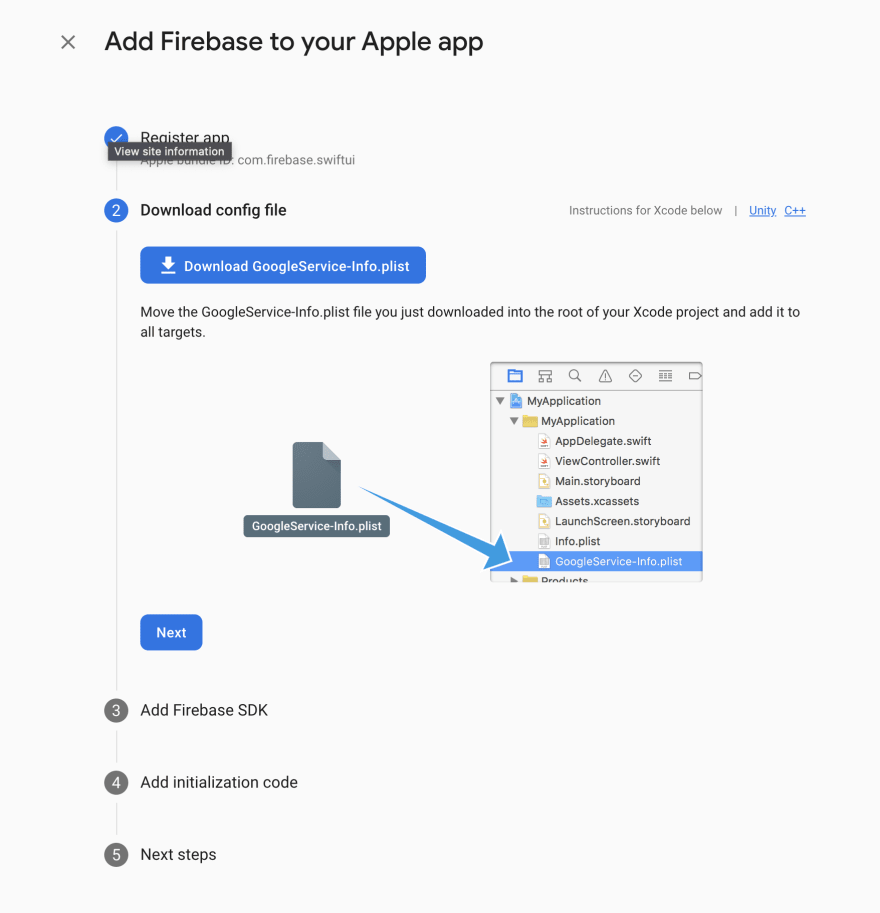
Next, we need to download GoogleService-Info.plist file which will be added to Xcode project later.
In steps 3 and 4 just click Next since we will cover them in more detail later in the tutorial. To finish registering the app, click Continue to console.
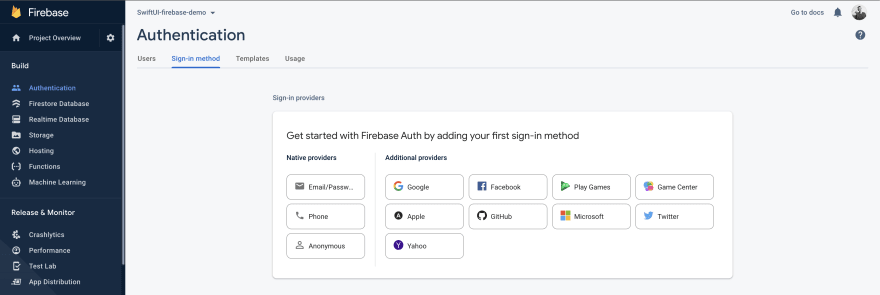
Almost finished with setting up Firebase project. Lastly, we need to enable Authentication.
Click on Authentication, and then on Get started.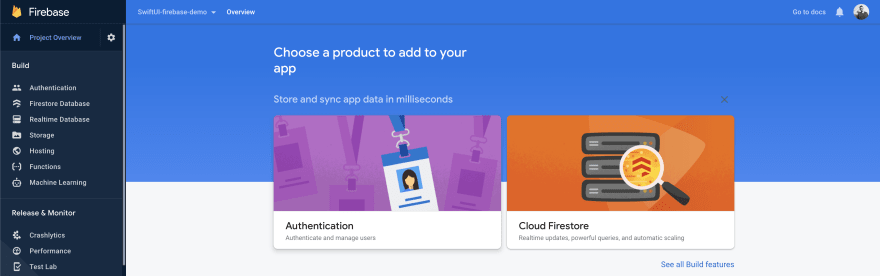
Now choose Google as Sign-in method provider.
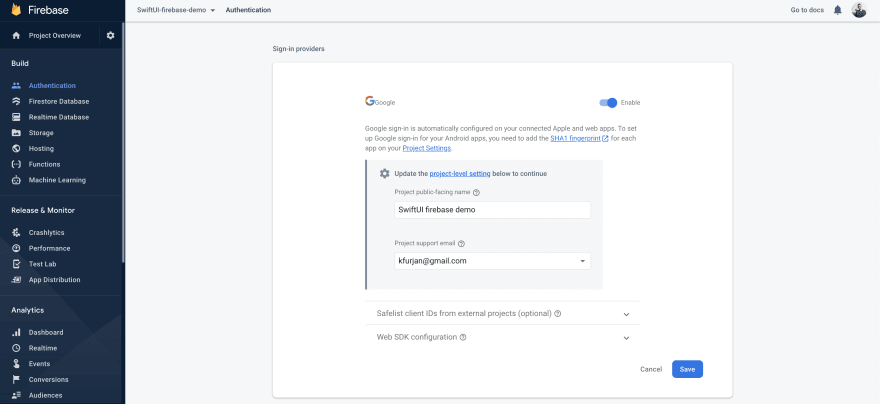
Finally, enable it by toggling Enable button, add Project public-facing name and Project support email. Save this changes by clicking on Save button.
We are done with Firebase settings and now we are moving to actual coding!
Creation of SwiftUI Lifecycle application
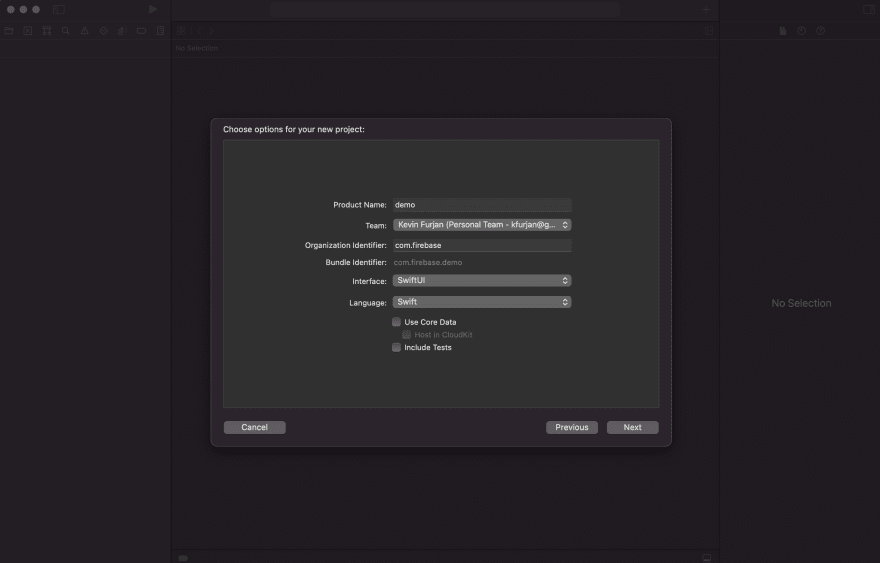
Next step is to actually create Xcode project. Open Xcode, select option Create a new Xcode project. Once new window opens, make sure that iOS is selected in header and then select App. Click Next.
Now we need enter some details about project.
- Product Name: demo
- Organization Identifier: com.firebase
- Interface: SwiftUI
- Language: Swift
Core Data and Tests are not needed for this tutorial, so it is up to you to include them into the project.
Click Next and then choose folder where you want to save Xcode project.
Great! We are ready for next section, handling dependencies with CocoaPods.
Handling dependencies with CocoaPods
CocoaPods is a dependency manager for Swift and Objective-C Cocoa projects. It has over 86 thousand libraries and is used in over 3 million apps. CocoaPods can help you scale your projects elegantly.
To handle project dependencies, this tutorial will use CocoaPods. If CocoaPods is not installed on your development machine, follow this Getting Started guide on official CocoaPods page.
Using Terminal, navigate to your project. Use command similar to this one: cd your/project/path.
Once in your project path, initialize empty pod file by executing pod init command. Open newly created Podfile to add dependencies needed for this project.
Add following content:
target 'swiftui' do # Comment the next line if you don't want to use dynamic frameworks use_frameworks! # Pods for swiftui pod 'Firebase/Core' pod 'Firebase/Auth' pod 'GoogleSignIn'endTo install these dependencies, execute pod install command.
Awesome! Project setup is done, and its dependencies are successfully installed.
Handling authentication within our code
First step is to take GoogleService-Info.plist file we downloaded it in Creation of Firebase project section and drag&drop it into Xcode project. Once file is added to the project, we need to add REVERSED_CLIENT_ID key to project configuration.
Handling REVERSED_CLIENT_ID key
Do the following:
Open your project configuration: double-click the project name in the left tree view. Select your app from the TARGETS section, then select the Info tab, and expand the URL Types section.
Click the + button, and add a URL scheme for your reversed client ID. To find this value, open the GoogleService-Info.plist configuration file, and look for the REVERSED_CLIENT_ID key. Copy the value of that key and paste it into the URL Schemes box on the configuration page. Leave the other fields blank.
When completed, your config should look something similar to the following (but with your application-specific values):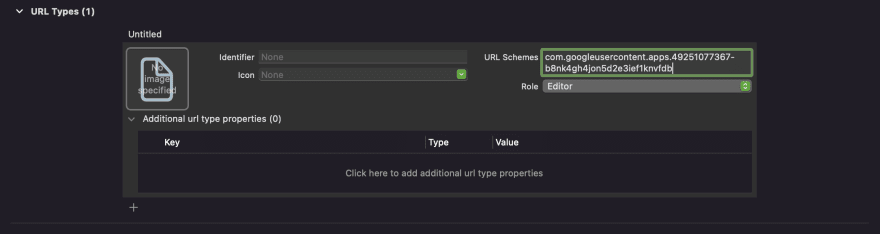
Now we can move on to some coding!
Adding AppDelegate
Since iOS 14 and SwiftUI 2.0, Apple added ability to include AppDelegate to SwiftUI Lifecycle app which we will need to add to our project.
Right click on project in Xcode left tree view and then select New file.... Add new Swift file named AppDelegate. Once create, add following contents to the file:
import Firebaseimport GoogleSignInclass AppDelegate: NSObject, UIApplicationDelegate { func application( _ application: UIApplication, didFinishLaunchingWithOptions launchOptions: [UIApplication.LaunchOptionsKey : Any]? = nil ) -> Bool { FirebaseApp.configure() return true } func application( _ app: UIApplication, open url: URL, options: [UIApplication.OpenURLOptionsKey : Any] = [:] ) -> Bool { return GIDSignIn.sharedInstance.handle(url) }}Adding helper functions
For signInWithConfiguration:presentingViewController:callback: method we will use later, we need to provide presenting ViewController and GIDConfiguration configuration thus we need to implement two helper functions.
GIDConfigurationExtensions.swift:
import Firebaseimport GoogleSignInextension GIDConfiguration { /// Get GIDConfiguration instance by providing clientID from GoogleService-Info.plist file /// - Returns: GIDConfiguration instance static func getGIDConfigurationInstance() -> GIDConfiguration { GIDConfiguration(clientID: FirebaseApp.app()?.options.clientID ?? "") }}UIApplicationExtensions.swift
import UIKitextension UIApplication { /// Get root UIViewController of application. If for whatever reason, UIViewController can not be accessed, /// invoke fatalError() since UIViewController instance is crucial for application for work properly. /// - Returns: root UIViewController static func getRootViewController() throws -> UIViewController { let scenes = UIApplication.shared.connectedScenes let windowScene = scenes.first as? UIWindowScene let window = windowScene?.windows.first guard let uiViewController = window?.rootViewController else { fatalError() } return uiViewController }}With this finished, we can move start implementing ViewModel.
Implementing LoginViewModel
Create new Swift file named LoginViewModel.
LoginViewModel:
import Firebaseimport GoogleSignInfinal class LoginViewModel: ObservableObject { @Published var isUserLoggedIn = false func signIn() { do { let config = GIDConfiguration.getGIDConfigurationInstance() let uiViewController = try UIApplication.getRootViewController() GIDSignIn.sharedInstance.signIn(with: config, presenting: uiViewController) { user, error in guard error == nil else { return } guard user != nil else { return } self.isUserLoggedIn = true } } catch { print(error.localizedDescription) } } func signOut() { GIDSignIn.sharedInstance.signOut() isUserLoggedIn = false }}Designing UI elements
Now comes last piece of the puzzle. Designing UI elements using SwiftUI framework and connecting UI with business logic we implemented earlier.
LoginView
Create new SwiftUI View file named LoginView.
LoginView:
import SwiftUIstruct LoginView: View { @EnvironmentObject var viewModel: LoginViewModel var body: some View { VStack { Spacer() Button(action: { withAnimation { viewModel.signIn() } }) { HStack { Text("Sign in with google") .fontWeight(.bold) } } .foregroundColor(.white) .padding() .frame(maxWidth: .infinity) .background(.black) .cornerRadius(12) .padding() Spacer() } }}struct LoginView_Previews: PreviewProvider { static var previews: some View { LoginView() }}LoginView will look something like this:

HomeView
Create new SwiftUI View file named HomeView.
HomeView:
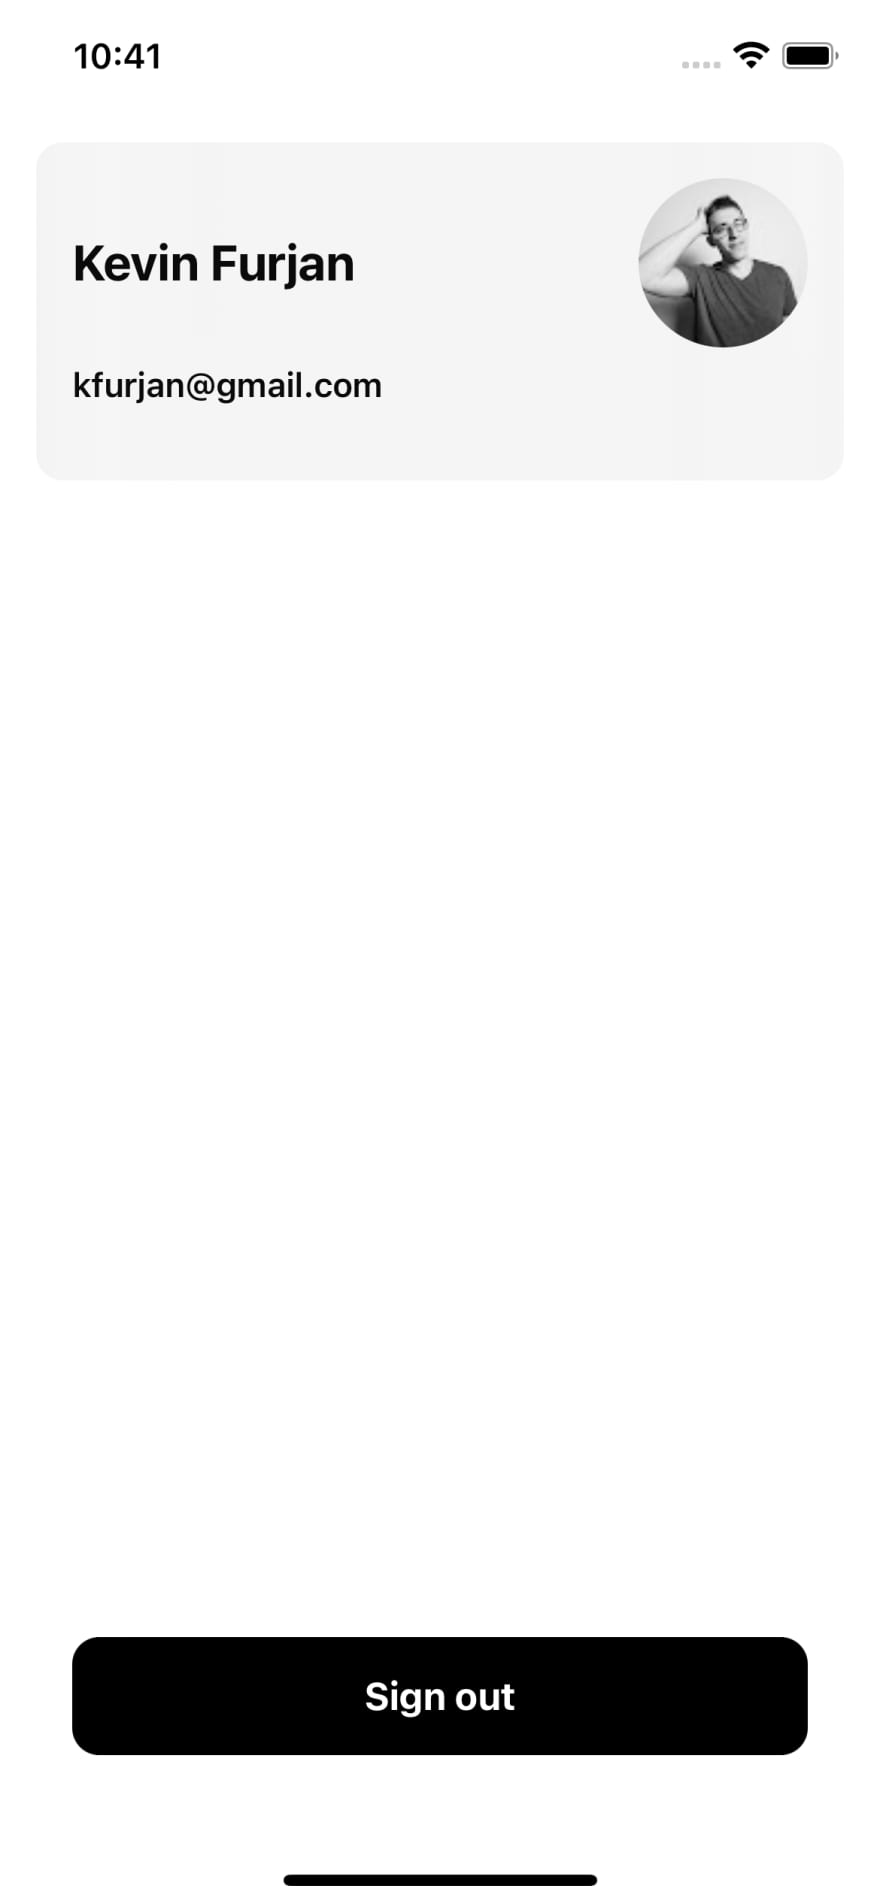
import GoogleSignInimport SwiftUIimport SDWebImageSwiftUIstruct UserDetailView: View { let user: GIDGoogleUser? var body: some View { VStack { HStack { Text(user?.profile?.name ?? "") .bold() .font(.title2) Spacer() WebImage(url: user?.profile?.imageURL(withDimension: 75)) .resizable() .placeholder( Image(systemName: "person.fill") ) .indicator(.activity) .transition(.fade(duration: 0.5)) .frame(width: 75, height: 75, alignment: .center) .scaledToFit() .clipShape(Circle()) } HStack { Text(user?.profile?.email ?? "") .bold() .font(.subheadline) Spacer() } Spacer() } .padding() .frame(height: 150, alignment: .center) .background(.thickMaterial) .cornerRadius(12) }}struct HomeView: View { @EnvironmentObject var viewModel: LoginViewModel private let user = GIDSignIn.sharedInstance.currentUser var body: some View { VStack { UserDetailView(user: user) Spacer() Button(action: { withAnimation { viewModel.signOut() } }) { HStack { Text("Sign out") .fontWeight(.bold) } } .foregroundColor(.white) .padding() .frame(maxWidth: .infinity) .background(.black) .cornerRadius(12) .padding() } .padding() }}struct HomeView_Previews: PreviewProvider { static var previews: some View { HomeView() }}HomeView will look something like this:
Connecting all together
All that is left to do is to connect it all together in DemoApp and ContentView.
DemoApp:
import SwiftUI@mainstruct DemoApp: App { @UIApplicationDelegateAdaptor(AppDelegate.self) var appDelegate @StateObject var viewModel = LoginViewModel() var body: some Scene { WindowGroup { ContentView() .environmentObject(viewModel) } }}ContentView:
import SwiftUIstruct ContentView: View { @EnvironmentObject var viewModel: LoginViewModel var body: some View { if viewModel.isUserLoggedIn { HomeView() } else { LoginView() } }}struct ContentView_Previews: PreviewProvider { static var previews: some View { ContentView() }}This is it! Integration of Firebase Authentication with Google Sign-In to SwiftUI application is done and our project is ready to be run on emulator or physical device!
Conclusion
Thank you for reading and and I hope this article was useful for you since integrating Firebase Authentication with SwiftUI Lifecycle application is not exactly straightforward.
If you like my content and find it useful, please consider following me here on Hashnode. If you are feeling extra generous, please consider buying me a coffee.
Connect with me on LinkedIn.
Original Link: https://dev.to/kfurjan/integrate-firebase-authentication-with-google-sign-in-to-swiftui-app-1g4i
Dev To
More About this Source Visit Dev To