
An Interest In:
Web News this Week
- March 30, 2024
- March 29, 2024
- March 28, 2024
- March 27, 2024
- March 26, 2024
- March 25, 2024
- March 24, 2024
Some of Our Sources
- Mashable
- Team Treehouse
- TutsPlus - Design
- Web Designer Depot
- FanExtra - PSD
- Crazy Leaf Design
- My Ink Blog
- Specky Boy
- CSS Tricks
- Web Resource Source
Help Webnuz
Referal links:
Building a web3 frontend with React

Introduction
In a previous tutorial, we covered how to create and deploy an NFT collectible smart contract from scratch. We also explored how to verify our contract on etherscan and enable yourself as well as your users to call functions directly from the contracts etherscan page.
However, most serious projects tend to deploy their own websites and allow users to mint directly from the website.
This is exactly what we will be covering in this tutorial. More specifically, this tutorial will show you how to:
- Let users connect their Metamask wallet to your website
- Allow users to call a contract function, make a payment, and mint an NFT from your collection.
By the end of this tutorial, youll have a fully functioning web3 frontend built with React. You will have also gained the foundational knowledge required to build any general-purpose web3 frontend (beyond an NFT minter).
Prerequisites

This tutorial assumes you have already developed and deployed your smart contract to the Rinkeby test network. If you havent, we strongly suggest you go through this tutorial. In order to follow along with this tutorial, you will need the following:
- The ABI file for your smart contract (which is available in the artifacts folder of your smart contract project).
- The address of your smart contract.
We also assume that you have experience working with React and Javascript. If not, we strongly suggest you go through the official tutorial on Reacts website first.
Setting up the project
Lets start off by creating a React project using create-react-app. Open your terminal and run the following command:
npx create-react-app nft-collectible-frontendThe installation process will take anywhere between 210 minutes. Once its done, check that everything is working by running the following:
cd nft-collectible-frontendnpm startIf all goes well, you should see your browser open a new tab at localhost://3000 with the following screen. Pretty standard React stuff.

Lets do a little cleanup now.
Go to public/index.html and change the title and meta description of your website. This step is optional.
Next, go to the src folder and delete the App.test.js, logo.svg, and setupTests.js files. We will not be needing these files for this tutorial.
Go to the App.js file and replace its contents with the following boilerplate.
import './App.css';function App() { return ( <h1>Hello World</h1> );}export default App;Remove all the contents of App.css as well. Do not, however, delete this file. In a later section, we will provide you with some basic styling that should be good enough for this demo project.
If you go back to localhost, you should see a screen that says Hello World. We now have a basic react project set up and good to go.
Getting contract ABI and address
For our React frontend to be able to connect and communicate with our smart contract, it needs the contracts ABI and address.
ABI (or Application Binary Interface) is a JSON file that is automatically generated during contract compilation. The blockchain we deploy to stores our smart contract in the form of bytecode. In order to invoke functions on it, pass the correct parameters, and parse return values using a high-level language, we need to specify details about the functions and the contract (such as name, arguments, types, etc.) to our frontend. This is exactly what the ABI file does. In order to learn more about the ABI, we suggest you go through this excellent post.
To find your ABI file, go to your hardhat project and navigate to artifacts/contracts/NFTCollectible.sol/NFTCollectible.json.

We need to now copy the JSON file to our React project. Create a new folder called contracts in the src folder and paste the NFTCollectible.json file.
You should already have the address of your deployed smart contract. (If you dont just deploy it to Rinkeby again, and get the latest address and ABI file).
Our contract address from the previous tutorial is 0x355638a4eCcb777794257f22f50c289d4189F245. We will be using this contract in this tutorial too.
Let us now import the contract ABI and define the contract address in the App.js file.

Setting up boilerplate HTML, CSS, and JS
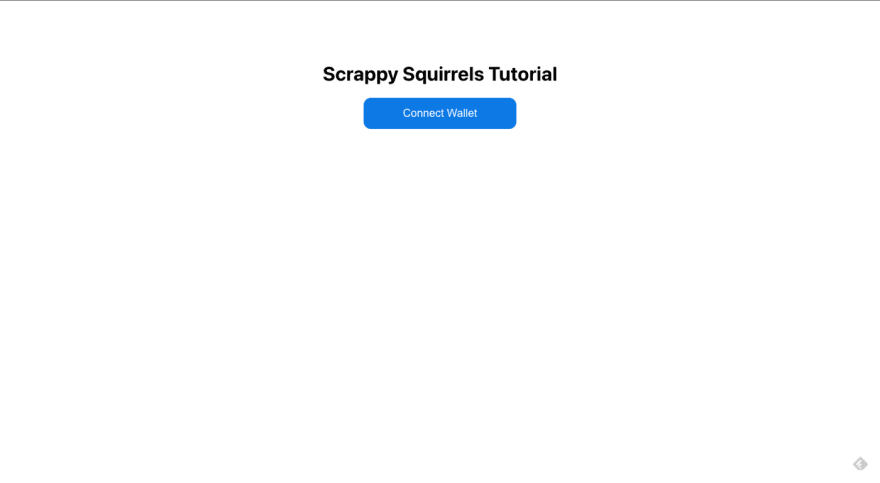
Our website is going to be incredibly simple. All it will have is a heading and a Connect Wallet button. Once the wallet is connected, the Connect Wallet button will be replaced by a Mint NFT button.
Were not going to bother with creating separate component files. Instead, we will write all our HTML and logic in App.js and all our CSS in App.css
Copy the contents of the following Github gist into your App.js file.
import { useEffect } from 'react';import './App.css';import contract from './contracts/NFTCollectible.json';const contractAddress = "0x355638a4eCcb777794257f22f50c289d4189F245";const abi = contract.abi;function App() { const checkWalletIsConnected = () => { } const connectWalletHandler = () => { } const mintNftHandler = () => { } const connectWalletButton = () => { return ( <button onClick={connectWalletHandler} className='cta-button connect-wallet-button'> Connect Wallet </button> ) } const mintNftButton = () => { return ( <button onClick={mintNftHandler} className='cta-button mint-nft-button'> Mint NFT </button> ) } useEffect(() => { checkWalletIsConnected(); }, []) return ( <div className='main-app'> <h1>Scrappy Squirrels Tutorial</h1> <div> {connectWalletButton()} </div> </div> )}export default App;(Remember to set the correct contract address on line 5)
Notice that we have defined a few functions for you which do not do a lot at the moment. We will be explaining their purpose and populating them with logic as we proceed with this tutorial.
We have a small amount of CSS for you to use too. Copy the following into your App.css file.
.main-app { text-align: center; margin: 100px;}.cta-button { padding: 15px; border: none; border-radius: 12px; min-width: 250px; color: white; font-size: 18px; cursor: pointer;}.connect-wallet-button { background: rgb(32, 129, 226);}.mint-nft-button { background: orange;}Your website should now look like this:
Feel free to customize the look of the website by adding more styles and static elements (images, header, footer, social media links, etc.).
Weve put together most of the foundational blocks of the project. We are now in a good position to tackle one of the first major objectives of this tutorial: allowing a user to connect their wallet to our website.
Connecting Metamask Wallet

For a user to call functions from our contract, they need to be able to connect their wallet to our website. The wallet will enable the user to pay gas and the sale price in order to mint an NFT from our collection.
In this tutorial, we will be working exclusively with the Metamask wallet and its suite of APIs. Off-the-shelf solutions like Moralis and web3modal exist that allow you to add support for multiple wallets with very few lines of code. But for this project, we will focus on implementing connect wallet functionality from scratch. We will cover solutions like Moralis in a later tutorial.
We assume you already have the Metamask wallet extension installed in your browser. If you do, Metamask injects an ethereum object into your browsers global window object. We will be accessing window.ethereum to perform the bulk of our functionality.
Checking if Metamask Wallet Exists
A user cannot mint NFTs on our website unless they have a Metamask wallet. Lets populate the checkWalletIsConnected function within the App component that checks if the Metamask wallet exists.

Note that we have also defined the useEffect hook that checks Metamasks existence when the App component loads.
Open the console on your apps localhost page. If you have Metamask installed, you should see a message that says Wallet exists! Were ready to go!

Connecting Metamask Programmatically
Just because we have the Metamask extension installed doesnt mean that Metamask will automatically connect to every website we visit. We need to prompt Metamask to ask the user to do so.
This is where the Connect Wallet functionality comes in. It is the web3 equivalent of a login button. It allows the user to connect and send contract function call requests through the website frontend.
Metamask makes this process remarkably simple with the window.ethereum.request method.
Lets first define a variable in App() with the useState hook that will keep track of the users wallet address. (Dont forget to import useState from React!)
const [currentAccount, setCurrentAccount] = useState(null);Now, lets define the connectWalletHandler function.

Lets briefly go through what this function does.
- It checks if you have Metamask installed. If not, the website displays a pop-up asking you to install Metamask.
- It requests Metamask for the users wallet addresses.
- Once the user has consented to connect with the website, it takes the first wallet address that is available and sets it as the value of the currentAccount variable.
- If something goes wrong (such as the user refusing to connect), it fails and prints an error message to the console.
At the moment, if you open the Metamask extension on your website, it will tell you that youre not connected.
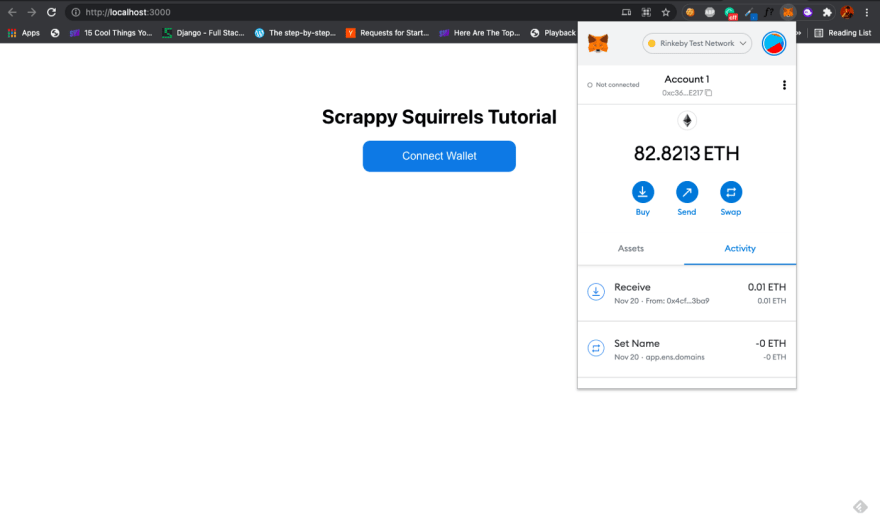
It is now time for the moment of truth. Click on the Connect Wallet button on your website. Metamask will prompt you to connect with the website. Once you agree to do so, your extension screen will look like this.

Congratulations! We have successfully connected our wallet to our website.
Once the wallet is connected, we should ideally replace the Connect Wallet button with a Mint NFT button. In the return value of App , lets replace the render of a Connect Wallet button with a conditional render.
{currentAccount ? mintNftButton() : connectWalletButton()}Our website should now look like this:
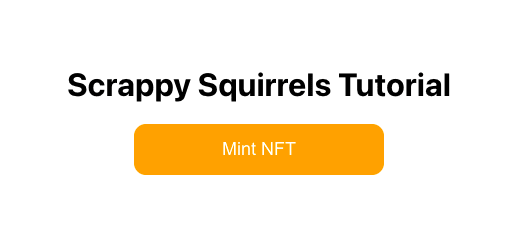
Lets refresh our page and check our extension. You will see that Metamask tells us that we are still connected to the website but our website still displays a Connect Wallet button.
If youre familiar with React, it should be obvious why this is happening. After all, we are setting the currentAccount state only within the connectWallet function.
Ideally what should happen is that the website should check if the wallet is connected every time the App component is loaded (i.e every time we refresh).
Let us extend the checkWalletIsConnected function to check for accounts as soon as the website is loaded and set currentAccount if the wallet has already been connected.
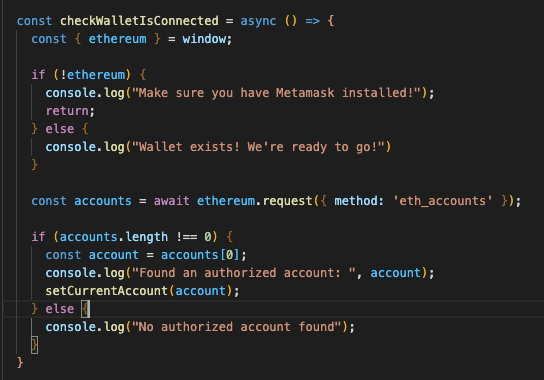
(Note that we have marked this function async ). Lets briefly touch upon what this function does:
- It checks if Metamask is installed and outputs result to the console.
- It attempts to request Metamask for accounts that are connected.
- If Metamask is already connected, it obliges by giving the function a list of accounts. If not, an empty list is returned.
- If the list is not empty, the function picks the first account sent over by Metamask and sets it as the current account.
If you now refresh the page, you will see that the website indeed displays the Mint NFT button as it should.
Mint NFTs from the website
Let us now implement the core functionality of our website. When a user clicks on the Mint NFT button, we expect the following to happen:
- Metamask prompts the user to pay the NFTs price + gas.
- Once the user accepts, Metamask calls the mintNFT function of our contract on behalf of the user.
- It notifies the user about the success/failure of the transaction once it is complete.
To do this, we will require the ethers library from our smart contract project. In your terminal, run the following command:
npm install ethersLet us import this library in App.js.
import { ethers } from 'ethers';Finally, lets populate the mintNftHandler function.

(Dont forget to mark this function as async)
As usual, lets touch upon what this function does.
- It tries to access the ethereum object injected by Metamask.
- If ethereum exists, it sets Metamask as the RPC provider. This means that you will be issuing requests to the miners using your Metamask wallet.
- To issue requests, the user will need to sign transactions using their private key. We access signer for this purpose.
- We then initiate an ethers Contract instance using the deployed contracts address, the contract ABI, and the signer.
- We can now call functions on our contract through the aforementioned contract object. We call the mintNFT function and ask Metamask to send 0.01 ETH (which is the price we set for our NFT).
- We wait for the transaction to be processed and once its done, we output the transaction hash to the console.
- If anything fails (the wrong function called, wrong parameters passed, < 0.01 ETH sent, user rejected transaction, etc.), an error is printed to the console.
On your website, open your browsers console so that you are able to view the mining status in real-time.
Now, click on the Mint NFT button. Metamask will prompt you to pay 0.01 ETH + gas. The transaction will take approximately 1520 seconds to process. Once its done, the transaction will be confirmed both by a Metamask popup and the console output.

You can now view the NFT on Opensea too. Navigate to your account on testnets.opensea.io and you should be able to see your latest NFT.

UX Improvements & Conclusion
Congratulations! You now have a fully functioning web3 frontend that users can mint NFTs from.
However, as you may have noticed, the UX of the website leaves a lot to be desired. Here are a few improvements that you should consider doing.
Ensure the user is connected to the right network
Our website assumes that the user is connected to the Rinkeby Network when interacting with our website. This may not always be the case.

Can you implement functionality that gently alerts the user if s/he is not connected to Rinkeby (like OpenSea does)? Also, ensure that the user is not able to see the Mint NFT button when connected to the wrong network.
Show transaction status
Currently, our website prints the transaction status onto the console. In a real project, you cannot really expect your users to open their console while interacting with the website.
Can you implement state which tracks the transaction status and gives feedback to the user in real-time? It should show a loader when the transaction is processing, notify the user if the transaction has failed, and display the transaction hash/Opensea link if the transaction has succeeded.
Prompt Metamask even if funds are non-existent
If you do not have any ETH in your Metamask wallet, clicking on Mint NFT will not prompt Metamask at all. In fact, the user will receive no feedback.
Can you ensure that Metamask is prompted even when the user has insufficient funds? It should ideally be Metamask that informs the user how much ETH is required and how much s/he is short by.
Other Quality of life changes
Here are a few other quality of life changes that you can consider.
- Allow users to mint more than 1 NFT at a time.
- Add a few sample artworks from your NFT collection.
- Add a link to your collection on Opensea.
- Add the verified smart contract address so people can double-check whats really happening behind the scenes.
- Add links to your Twitter, IG, and Discord.
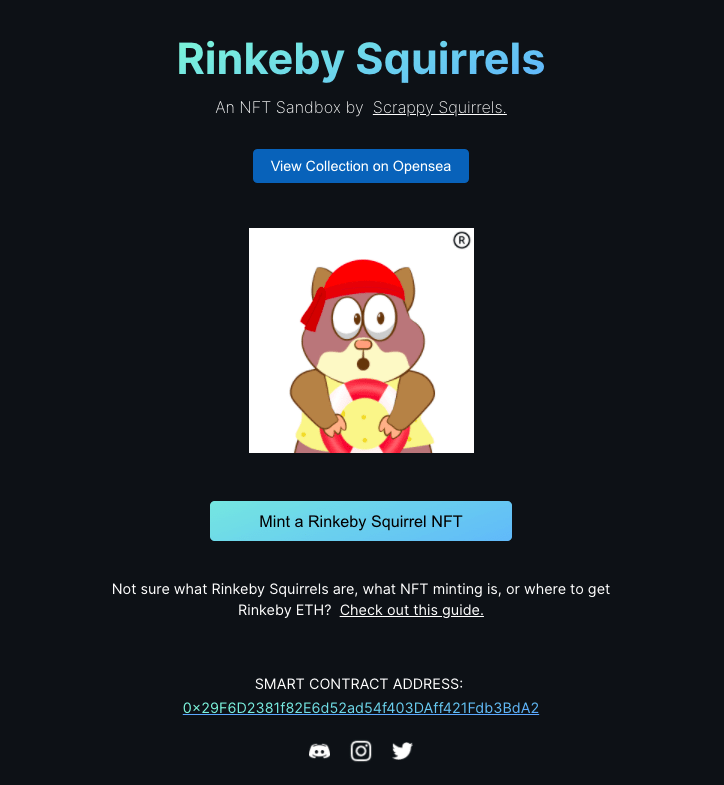
Our NFT sandbox project, Rinkeby Squirrels, implements a majority of the UX upgrades mentioned here. Try and mint one here and see if you can notice the difference between it and the website we built.
We will be launching future tutorials showing you how to implement a few of these upgrades. But we really suggest you try doing this yourself. Youll be one step closer to becoming a web3 frontend master.
If you have any questions or are stuck, reach out to us on our Discord.
If you dont have questions, come say hi to us on our Discord anyway! Also, if you liked our content, we would be super grateful if you tweet about us, follow us(@ScrappyNFTs and @Rounak_Banik), and invite your circle to our Discord. Thank you for your support!
Final code repository: https://github.com/rounakbanik/nft-collectible-frontend
About Scrappy Squirrels
Scrappy Squirrels is a collection of 10,000+ randomly generated NFTs. Scrappy Squirrels are meant for buyers, creators, and developers who are completely new to the NFT ecosystem.
The community is built around learning about the NFT revolution, exploring its current use cases, discovering new applications, and finding members to collaborate on exciting projects with.
Join our community here: https://discord.gg/8UqJXTX7Kd
Original Link: https://dev.to/rounakbanik/building-a-web3-frontend-with-react-340c
Dev To
More About this Source Visit Dev To