
An Interest In:
Web News this Week
- April 25, 2024
- April 24, 2024
- April 23, 2024
- April 22, 2024
- April 21, 2024
- April 20, 2024
- April 19, 2024
Some of Our Sources
- Slashdot
- Technology Review
- Web Designer Wall
- Just Creative
- Six Revisions
- Web Designer Depot
- Naldz Graphics
- Reencoded
- Specky Boy
- Spyre Studios
Help Webnuz
Referal links:
Guide to blockchain game development
Written by Ikeh Akinyemi
Blockchain development has grown and evolved rapidly over the past few years and is now being adopted across various spheres of software development. From decentralized applications (DApps), to decentralized finance (DeFi) software, to NFTs, to DAOs, blockchain technology has infiltrated a wide range of industries and serves many use cases.
In this tutorial, well explore the emerging trend of blockchain game development. Blockchain-based games are also referred to as chain games. Once you understand the basic structure involved in writing a smart contract and deploying it to a blockchain, you can use the tools available within the crypto space to build games.
Well build a lottery game to demonstrate how game development on blockchain works. Well also review the basic structure for implementing transactions within a blockchain game. Then, well deploy it to a testnet network.
What is blockchain?
The underlying data structure of a blockchain is a chain of linked lists, or unique blocks. Each block that is added to the chain is automatically linked to the previous block added, and the previous block as well points to its predecessor.
This chain of linked list is itself a list of transactions. The process through which these blocks are agreed upon before they are added to the list-of-lists data structure is laid the key innovation that blockchains have given us: a protocol. This protocol helps the network decide how blocks are added to the chain.
This decision-making process gave birth to the decentralized nature of blockchain. Proof of work (PoW), proof of take (PoS), and proof of authority (PoA) are decentralized mechanisms through which these decisions are made and agreed on before a block gets added to the chain.
The cryptocurrencies that have emerged through these blockchains are a means to incentivize people to run software that secures the networks around these blockchains.
Blockchain platforms like NEAR provide a cryptographically secure platform for storing, updating, and removing data from a blockchain using smart contracts.
Web3 game development
Web3, in the context of blockchains, refers to decentralized apps that run on the blockchain. These are apps that allow anyone to participate without monetizing their personal data. With good knowledge of a programming language that is supported by any of these blockchains, we can start writing smart contracts to build game applications as DApps on the blockchain.
As the blockchain ecosystem evolves, new paradigms emerge. Drawing inspiration from the De-Fi ecosystem, the blockchain game ecosystem has also evolved to something known as GameFi. GameFi, also referred to as play to earn, introduces a new way to game by turning its regular users into a governing force behind major decisions within the gaming industry.
GameFi facilitates a player-owned economy when it comes to trading valuables as well as generating additional income with tokens and non-fungible tokens. This means building communities around a particular game, and the users of these games can earn cryptocurrencies or assets that are valuable within the metaverse of the game (and outside it too).
Writing smart contracts on the NEAR blockchain
For this tutorial, well demonstrate how to build games on the NEAR blockchain by building a sample game project.
Within this game, well explore how to set up the codebase structure and the programming languages needed to write smart contracts that run on the Near blockchain. When were all done, well test our application on the local environment, then deploy our smart contract to a testnet.
Were going to clone a starter kit codebase. This repository provides a basic boilerplate on top of which to write more smart contract code as we build the various features of our game.
git clone https://github.com/IkehAkinyemi/lottery-smart-contract.gitOnce the above command is successfully executed, change the directory to the lottery-smart-contract folder. You can open it in any text editor; for this tutorial, well use Visual Studio Code.
From the terminal, run the code . command within the folder directory.

The above picture shows the basic folder structure for a NEAR project using AssemblyScript for its smart contract.
The script folder contains the shell source file to compile and deploy the smart contract to the blockchain. The src contains the lottery folder, inside of which well write the necessary code for our smart contract.
The remaining files are configuration files that AssemblyScript needs to understand some of the types defined on Near. The near-sdk-as library is a collection of packages used to develop NEAR smart contracts in AssemblyScript.
How to build a lottery game on the NEAR blockchain
With this game, well explore some of the basic concepts of writing smart contracts on the Near blockchain using AssemblyScript.
Run the yarn install or npm install command to install the near-sdk-as library and any necessary dependencies.
Next, create a folder called assembly. Inside this folder, create two files: index.ts and model.ts. The model.ts file contains the different object types well be using throughout our code in the index.ts file. The model.ts file contains the following:
import { RNG } from "near-sdk-as";@nearBindgenexport class Lottery { private luckyNum: u32 = 3; constructor() { const randGen = new RNG<u32>(1, u32.MAX_VALUE); this.id = "LO-" + randGen.next().toString(); }}In the above code, we define a Lottery type. This represents the structure of the lottery game type. Well define inside it the different interfaces we want to make available both the public and private interfaces just like the private luckyNum variable thats an unsigned integer.
Using the RNG (random number generator) object, we initialized the this.id variable of the game to a random number. And in the randGen variable, were just initializing the RNG object, while with the randGen.next function, were generating a random number using the seed values, <u32>(1, u32.MAX_VALUE), that were passed into it.
Defining function interfaces
Now lets define the play feature of our game. This will contain the code snippet responsible for generating a random number within a set range of integers.
import { RNG, logging } from "near-sdk-as";@nearBindgenexport class Lottery { ... play(): bool { const randGen = new RNG<u32>(1, u32.MAX_VALUE); const pickNum = randGen.next(); logging.log("You picked: " + pickedNum.toString()); return pickedNum === this.luckyNum }}With the play function, any player can call it to generate a random number using the RNG object. Then, we imported the logging object, which gives us access to output values on the native console thats our local machine terminal.
The play function returns a bool value, and this true or false value is the result of comparing the pickedNum against this.luckyNum to determine whether the guessed number is equal to the luckyNum defined in the lottery game.
Next, well define the reset function. As the name implies, this will enable us to reset the this.luckyNum to a new random number:
...@nearBindgenexport class Lottery { ... reset(): string { const randGen = new RNG<u32>(1, u32.MAX_VALUE); const randNum = randGen.next(); assert(randNum !== this.luckyNum, "Rerun this function to generate a new random luckyNum"); this.luckyNum = randNum; return "The luckyNum has been reset to another number"; }}In the above code, we generated another new random number. Using the assert function, we compared it against the current this.luckyNum value.
If the comparison evaluates true, then the rest of the functions code continues to execute. If not, the function halts at that point and returns the assertion message, Rerun this function to generate a new random luckyNum.
When the assert is true, we assign the variable this.luckyNum to the newly generated number, randNum.
Defining the Player object
For each player of the lottery game, well define a basic type structure. This structure presents the player within our game.
Update the model.ts file with the following code:
import { RNG, logging, PersistentVector, Context } from "near-sdk-as";export type AccountID = string;@nearBindgenexport class Lottery { ...}@nearBindgenexport class Player { id: AccountId; guesses: PersistentVector<bool>; constructor(isRight: bool) { this.id = Context.sender; this.guesses = new PersistorVector<bool>("g"); // choose a unique prefix per account this.guesses.push(isRight); }}The Player object type contains two interfaces: the this.id variable, which is an AccountID type, and this.guesses, which is an array of boolean values.
The PersistentVector data structure is an array datatype. During initialization, we use the Context object to get the current caller of this smart contract through the Context.sender function. Then, we assign it to this.id.
For this.guesses, we initialize a new PersistentVector object and assign it to this.guesses. Then, using the push function interface available on PersistorVector, we append a new boolean value, isRight, into the this.guesses variable.
Lets define other types and variables that well use while defining the core functions in the next section:
...exsport const TxFee = u128.from("500000000000000000000000");export const WinningPrize = u128.from("100000000000000000000000");export const Gas: u64 = 20_000_000_000_000;...export const players = new PersistentMap<AccountID, Player>("p")...Defining core game functions
Create an index.ts file inside the assembly folder. This is where well define the core functions of our lottery game.
Inside the index.ts file, define a pickANum function, as shown below:
import { TxFee, Lottery, Player, players } from "./model";import { Context, u128 } from "near-sdk-as";export function pickANum(): void { verifyDeposit(Context.attachedDeposit); const game = new Lottery(); const guess = game.play(); let player; if (players.contains(Context.sender)) { player = players.get(Context.sender) as Player; player.guesses.push(guess); players.set(Context.sender, player); } else { player = new Player(guess); }}function verifyDeposit(deposit: u128): void { assert(deposit >= TxFee, "You need 0.5 NEAR tokens to pick a number");}In the above function, were verifying a deposit of 0.5 NEAR tokens before any player of the lottery game can invoke any call to play a game on the smart contract. This way, our players are paying a certain amount of money before playing the game. Also, once a player plays, we update the profile of that player in the players data structure.
Next, lets define the function that will handle paying a winning player by randomly generating the right number thats equal to the luckyNum:
import { TxFee, Lottery, Player, players, Gas, WinningPrize } from "./model";import { Context, u128, ContractPromiseBatch, logging } from "near-sdk-as";function on_payout_complete(): string { logging.log("This winner has successfully been paid");}export function payout(): void { const player = players.get(Context.sender) as Player; for (let x = 0; x < players.guesses.length; x++) { if (player.guesses[x] === true) { const to_winner = ContractPromiseBatch.create(Context.sender); const self = Context.contractName; to_winner.transfer(WinningPrize); to_winner .then(self) .function_call("on_payout_complete", "{}", u128.Zero, Gas) } }}The above functions help us make transfer transactions to the winners of the lottery game. With the ContractPromiseBatch object, we create and set up a transfer transaction to the address we passed in as the argument to the create method. Then, with the transfer function, we make a transaction worth of the token, WinningPrize, that was passed into it.
Using the function_call function, we then schedule a function call for when the transaction has been successfully sent. For this game, the function we intend to call on a successful transaction is the on_payout_complete function.
For the purpose of this tutorial, we wont focus on setting up a NEAR Testnet or Testnet wallet, but I would encourage you to check out the links to learn more about the various networks that exists in the NEAR ecosystem.
For this demonstration, well build our lottery game to generate the binary format .wasm file, then use the near dev-deploy command to deploy the smart contract.
Building and deploying smart contracts
Well first build the smart contract using the asb command:
yarn asbThis is an alias command for the yarn asb --verbose --nologo command, as defined in the package.json file located in the root directory.
After weve successfully generated a build folder that contains a lottery.wasm file inside the build/release/ folder, we can run the following command to deploy it:
near dev-deploy ./build/release/lottery.wasm This will deploy the smart contract and provide us with the contract name or ID, which we can use to interact with it on the frontend or through a shell file.
$ near dev-deploy ./lottery.wasm Starting deployment. Account id: dev-1635968803538-35727285470528, node: https://rpc.testnet.near.org, helper: https://helper.testnet.near.org, file: ./lottery.wasmTransaction Id 4TWTTnLEx7hpPsVMfK31DDX3gVmG4dsqoMy7sA7ypHdoTo see the transaction in the transaction explorer, please open this url in your browserhttps://explorer.testnet.near.org/transactions/4TWTTnLEx7hpPsVMfK31DDX3gVmG4dsqoMy7sA7ypHdoDone deploying to dev-1635968803538-35727285470528Testing our blockchain game
Ive written two unit tests to confirm that our application is actually functional. These two simple tests will create a lottery game and as well reset the luckyNum variable to a new random number.
The /src/lottery/__test__ folder contains the test file. Run the test suite using the following command:
$ yarn test:unit[Describe]: Checks for creating account [Success]: creates a new game [Success]: create and reset the luckyNum of a new game [File]: src/lottery/__tests__/index.unit.spec.ts [Groups]: 2 pass, 2 total [Result]: PASS[Snapshot]: 0 total, 0 added, 0 removed, 0 different [Summary]: 2 pass, 0 fail, 2 total [Time]: 19.905ms [Result]: PASS [Files]: 1 total [Groups]: 2 count, 2 pass [Tests]: 2 pass, 0 fail, 2 total [Time]: 13907.01msDone in 14.90s.Conclusion
In this tutorial, we demonstrated how to create game applications on blockchain platforms. Blockchain-based games can be played either as multiplayer games or solo.
You can also extend the concept of blockchain games to include a metaverse a digital world around your game. The metaverse is a world where players can team up, create a governance, and even create currencies as a means for value exchange. You can mint NFTs or form DAO within a digital game world.
Check out the NEAR docs to see how to build a frontend to consume the games smart contract created in this tutorial. The full codebase of the smart contract is available on GitHub.
LogRocket: Full visibility into your web apps
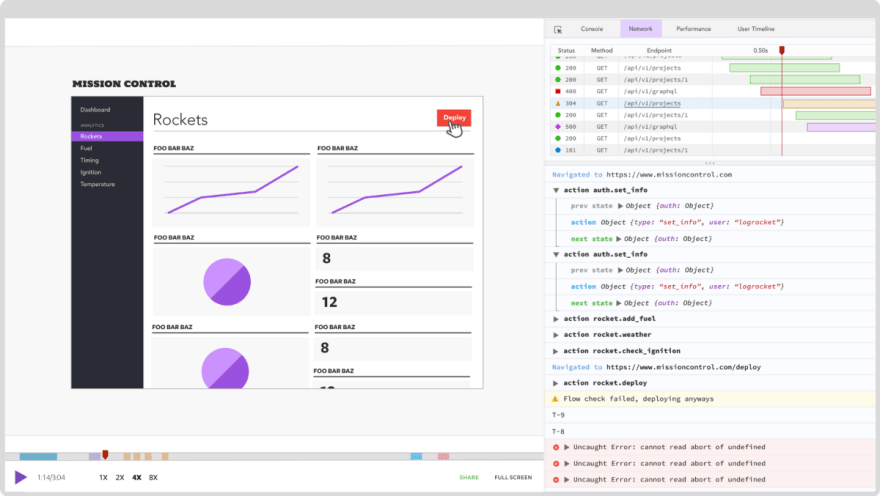
LogRocket is a frontend application monitoring solution that lets you replay problems as if they happened in your own browser. Instead of guessing why errors happen, or asking users for screenshots and log dumps, LogRocket lets you replay the session to quickly understand what went wrong. It works perfectly with any app, regardless of framework, and has plugins to log additional context from Redux, Vuex, and @ngrx/store.
In addition to logging Redux actions and state, LogRocket records console logs, JavaScript errors, stacktraces, network requests/responses with headers + bodies, browser metadata, and custom logs. It also instruments the DOM to record the HTML and CSS on the page, recreating pixel-perfect videos of even the most complex single-page apps.
Original Link: https://dev.to/logrocket/guide-to-blockchain-game-development-22ho
Dev To
More About this Source Visit Dev To