
An Interest In:
Web News this Week
- April 19, 2024
- April 18, 2024
- April 17, 2024
- April 16, 2024
- April 15, 2024
- April 14, 2024
- April 13, 2024
Some of Our Sources
- Slashdot
- Engadget
- Six Revisions
- FanExtra - PSD
- Crazy Leaf Design
- My Ink Blog
- Specky Boy
- CSS Tricks
- Willems Lab
- Hashedout
Help Webnuz
Referal links:
Webpack 5 : Guide for beginners
So many times heard from dev that they don't understand how to configure webpack because of the config file. Today we learn how to use webpack to set up bundle styles, JavaScript, images, and fonts for the web.
The first time using webpack lots of questions would be whirling around, it can be difficult to understand how it works and how it should be used. My goal is to help you understand webpack.
Let's dive into webpack Initialization.
What is webpack 5?
In short, webpack is a static module bundler for modern JavaScript applications. Its impossible to mention all tools and its unnecessary for a beginners guide like this.
Instead, I'll try to put a small core list to start.
Basic Configuration
- Entry point
- Output
Loaders
- Styles
- Images
- Fonts
- Babel (JavaScript)
Plugins
- HTML Template
Mode
- Development
Getting started with Webpack Basic Configuration
First, create a directory for your project to live and start the project. There before We will begin by creating the following directory structure:

1. Create Project
mkdir webpack-setupcd webpack- setupnpm init -y # creates a default package.json2. Webpack setup
npm install webpack webpack-cli -save-devWe will make an src/app folder to contain all source files. I will start by creating a simple index.js file
3. Basic Configuration
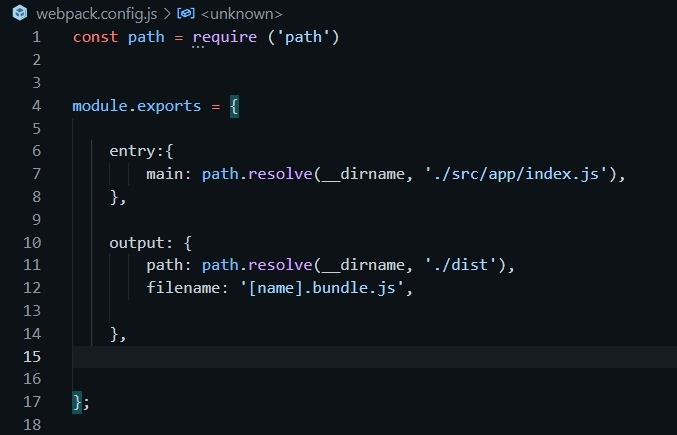
Lets create a webpack.config.js at the root of the project.
Touch webpack.config.js
4. Entry & Output
In this example, we'll set the entry point to the src/index.js. We'll have it output in the dist folder, which is where production code gets built. The [name] in the output will be main.
5. Build Webpack
To run the script, we can make a build script that runs the webpack command.
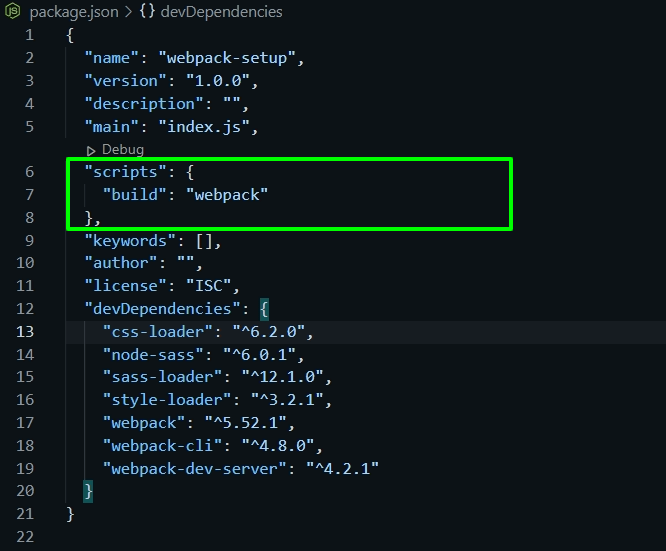
6. Now you can run it.
npm run buildThe dist folder has been created with main.bundle.js.

So we now have webpack building successfully.
We will start with Loaders in our example
1. Styles
For style, we will install style loader and SCSS, PostCSS, CSS loader packages.
- sass-loader for SCSS and CSS compile
- node-sass for node sass
- postcss-loader - Process CSS with PostCSS
- css-loader resolve CSS imports
- style-loader inject CSS into the Dom
npm i sass-loader postcss-loader css-loader style-loader postcss-preset-env node-sass --save-devWe will make postCSS.config.js file and add it to the root.
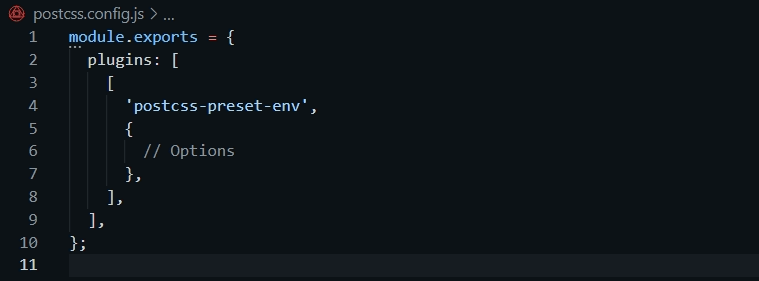
Also, add all loader in webpack config file.
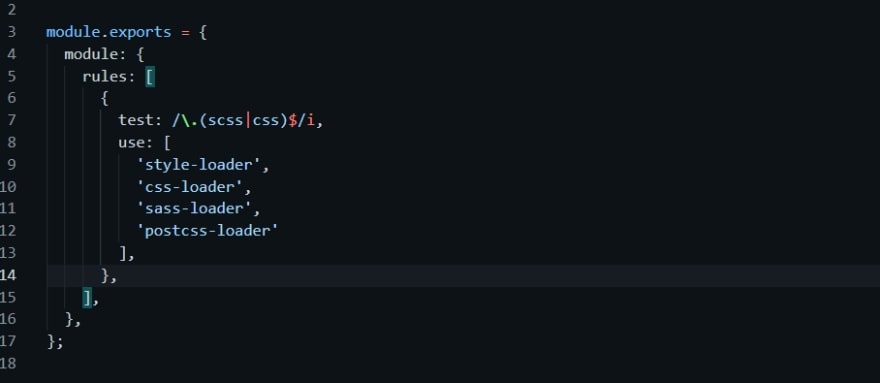
Run to build, you'll see the Sass and PostCSS have been applied.
2. Images
Create src/images and add an image to it, then try to import it into your index.js file.
Once load the file-loader configured in the webpack.config.js
npm i file-loader --save-dev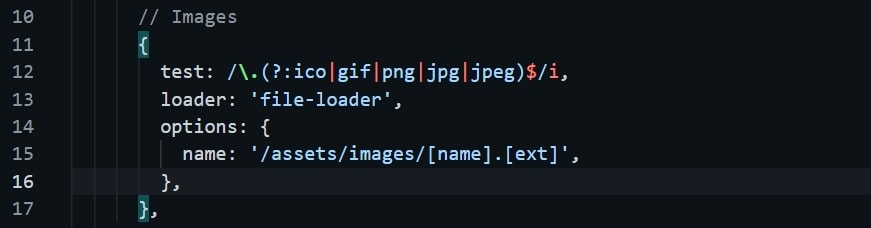
You will get an option for output files where we want the exact path (dist/assets/images/**.jpg).
3. Fonts
First, put your font files into one folder of your project's application.
Need to load url-loader for features.
npm i --save-dev url-loader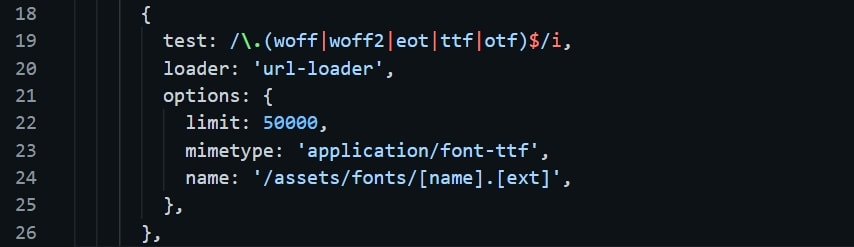
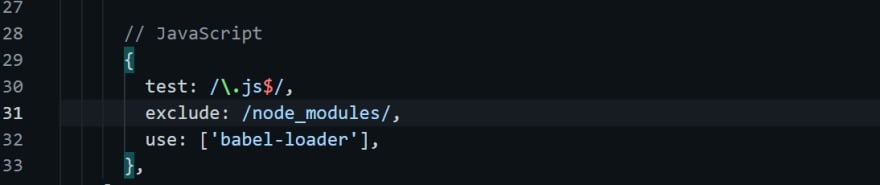
4. Javascript
We are using babel-loader for js. Babel is next-generation JavaScript. There are a few additional dependencies for Babel as well.
- babel-loader - Transpile files with webpack.
- @babel/core - Backwards compatible JavaScript
- @babel/preset-env - Smart defaults for Babel
- @babel/plugin-proposal-class-properties - Custom Babel config
npm i -D babel-loader @babel/core @babel/preset-env @babel/preset-env @babel/plugin-proposal-class-propertiesNow we will add some code for load js in webpack.config.js.
We create a .babelrc file in the root of the project for Babel Plugins.
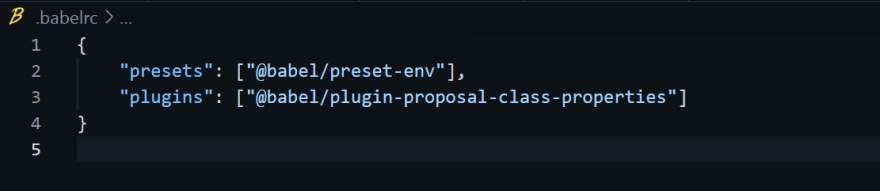
Run npm build, all code set without any error.
npm run build5. Plugins for HTML
How can configuring webpack to generate HTML with
HtmlWebpackPlugin which create file from a template. First, install the plugin.
npm install html-webpack-plugin --save-devCreate a template.html file in the src folder. We can pass a hash of configuration 'title' options to html-webpack-plugin. 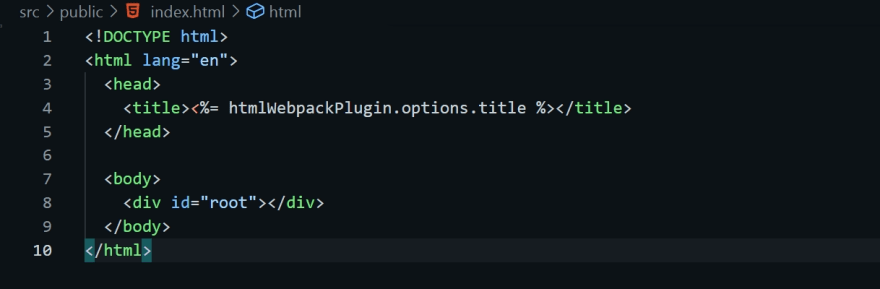
And also add code in webpack config file to build HTML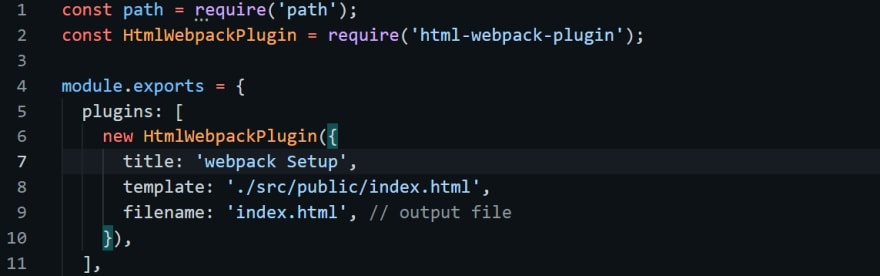
Now run a build again. See the dist folder now contains an
index.html with the bundle.
6. Mode of Development
To set up for development, we will install webpack-dev-server. Webpack gives us the option to easily install a server with live
reloading.
- webpack-dev-server - Development server for webpack
npm install --save-dev webpack-dev-serverAgain add a line mode:'development' to webpack.config.js file. and for run server add a script in package.json:


npm startWhen running this command, a link to localhost:8080 will automatically pop up in your browser
That shall be enough to get you to start with webpack! We've covered all (Basic,Plugins,Loaders) of the basic Webpack concepts. For further exploration of webpacks capabilities we recommend official docs Webpack
Hope you like it guys here we end our Webpack basic setup! Thank you so much for reading the post.
Happy Coding :)
Original Link: https://dev.to/anitaparmar26/webpack-5-guide-for-beginners-314c
Dev To
More About this Source Visit Dev To