
An Interest In:
Web News this Week
- April 23, 2024
- April 22, 2024
- April 21, 2024
- April 20, 2024
- April 19, 2024
- April 18, 2024
- April 17, 2024
Some of Our Sources
- Mashable
- Simplebits
- Just Creative
- Joshua Blankenship
- Fuel Your Creativity
- My Ink Blog
- Web Design Ledger
- CSS Globe
- Android Headlines
- Daily Now
Help Webnuz
Referal links:
Blog site API with Authentication in Node, Express and MongoDB
we are going to build a Blog site Api which has User Authentication using express, node and MongoDb, the Api has a simple functionality a since we are using express the framework of Node.js, all the data comes from a MongoDB database, the Api endpoints are coming from Node.js
Setup
Lets kick off by starting with the Node.js code. Create a folder and name it Blog site api.
Next, create a package.json file by entering the npm init-ycommand in the terminal.
After that, You need to install some packages before starting.
This packages we are going to use them through out the project
Open the terminal and install
Express,Mongoose,dotenv,bcryptjs in the api folder.
npm i express mongoose dotenv bcryptjswhen the packages are installing create a file and name it .env after this open the mongoDb and copy the link to link to our project.
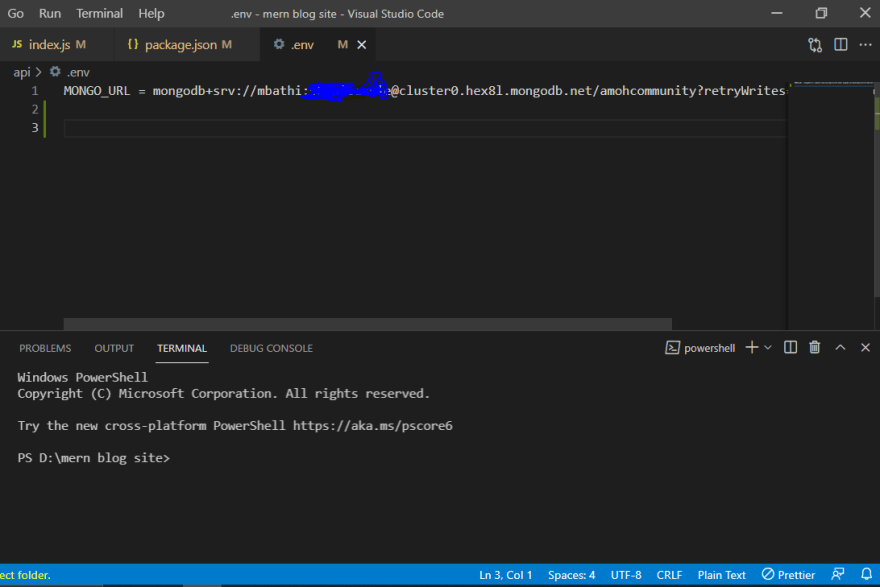
the url of the mongodb we are going to connect it to the main folder using the dotenv package. the package helps us to separate secrets from the source code .this is useful when you are going to upload your project in github.where you may not want to share your database login credentials with other people.Instead you share the source code.as you can see i have hide my password in the project.
Also i have installed bcryptjs as seen above. this package allows us to build a password security platform that scales with computation power and always hashes every password with a salt.
lets now create our main file and name it index.js . this is where we will accemble all routes and middleware.Before moving on further lets import nodemon in the api folder ,Whenever
you make any changes to the code in the index.js file, the Node server restarts
instantaneously.
npm i nodemonInitial Route Setup
Lets create the initial route, which generally checks whether everything is set up
correctly. The Express package in Node.js allows you to create routes, which is how most
of the Internet works. Most back-end languages like Node.js, Java offer capabilities to
create these routes, which interact with the databases. The initial route doesnt interact
with the database and simply returns a text when you go to it, using a GET request.
Create a index.js file in the api folder. Here, you import the Express
and the Mongoose packages first. Next, use Express to create a port variable to run on
the port you will be given or if their are no port then give it port 5000.
const express = require('express');const mongoose = require('express');//App Configconst app = express()const port = process.env.PORT || 5000//Middleware//DB Config//API Endpoints//Listenerapp.listen(port, () => console.log(`Listening on localhost: ${port}`))Database User and Network Access
In MongoDB, you need to create a database user and provide network access.and connect it to the initial routes using dotenv since we have stored our link in the .env file

Database Schema and Routes
The database we are using MongoDB stores data in a JSON format instead of the regular table structure found in a
traditional database like Oracle. You create the schema file required by MongoDB. It tells
you how fields are stored in MongoDB.
First create a folder and name it models .Inside the folder create and file and name it User.js this is where we are going to write our Authentication schema
Auth Schema
We are going to start by creating the authentication Schema for users where when one registers into the site. The user details are stored in the data base. So that when the user comes later they will jus login since the server will recognize them through their details that were saved.
const mongoose = require('mongoose');const UserSchema = new mongoose.Schema({ username:{ type:String, required:true, unique:true, min:3, max:20 }, email:{ type:String, required:true, unique:true }, password:{ type:String, required:true, min:3, max:10 },},{timestamps: true});module.exports = mongoose.model("User", UserSchema);also as seen in the code above in the last line we have exported our code so as to import it in the routes.
as you can see the schema contains details such as username,email and password they are going to be stored in the database..so when the user tries to login, The server will check if the user exist in the database and allows the user, if user details are in the database.
lets know create the Post Schema where we are going to store what we want to be in our post
In the models folder create a file and name it Post.js this is where we are going to write our Post Schema.
const mongoose = require('mongoose');const PostSchema = new mongoose.Schema({ desc : { type:String, required:true, }, title : { type:String, required:true, }},{timestamps: true});module.exports = mongoose.model('Post', PostSchema);Our post schema contains title and description which are going to be stored in the database
You now use the schema to create the endpoint that adds data to the database. The
MVC pattern is followed here; it is the traditional flow of a web application.
Next, use a POST request that takes any data from the user and sends it to the
database. You can use any endpoint. For example, if you write an article on Dev.to
and hit the POST button, your article is saved in the Dev.to database once the POST
request is made.
The GET endpoints fetch all the data from the database. Again, you can give any
endpoint. For example, when you browse through the posts in Dev.to, a GET request is
sent to the endpoint, which in turn fetches all posts from the Dev.to database.
routes
create a folder and name it routes. First we are going to start with the Authentication route. In the routes folder create a file and name it Auth.js this are the codes of the authentication below
const router = require('express').Router();const User = require('../models/User');const bcrypt = require('bcryptjs')//register end pointrouter.post('/register', async (req,res)=> { // const confirm = await User.find({Username : req.body.username ,email : req.body.email}) //confirm && res.status(400).json('this user or email exist'); try { const salt = await bcrypt.genSalt(10); const hashedPass = await bcrypt.hash(req.body.password, salt);const savedPost = await new User({ username: req.body.username, email: req.body.email, password : hashedPass }) const resultPost = await savedPost.save() res.status(200).json(resultPost); } catch (error) { res.status(500).json(error); }})//login endpointrouter.post('/login', async (req,res)=>{ try { const user = await User.findOne({username : req.body.username}); !user && res.status(400).json('wrong user'); const validate = await bcrypt.compare(req.body.password,user.password); !validate && res.status(400).json('wrong password'); const {password, ...others} = user._doc; res.status(200).json(others); } catch (error) { res.status(500).json(error); }})module.exports = router;As you can see in the code above we have imported the schema and we are going to use it to insert the details and save it.
create a POST request to the /register endpoint. The load is
in req.body.username,password,email to MongoDB. Then you use New method to send the User details. If its a success, you
receive status 200; otherwise, you receive status 500.
Next, create the post endpoint to /login to get the data from the database.
You are using findOne() here and receive a status 200 on success (otherwise, status 500).
Also in the code we have used the bcryptjs to protect our passwords as indicated above .
Lets go to the Post routes ,In the routes folder create a file and name it Post.js the codes of the Post file are indicated below
const router = require('express').Router();const Post = require('../models/Post');//create post router.post('/', async (req,res)=> {try { const savePost = await new Post(req.body); const savedPost = await savePost.save() res.status(200).json(savedPost);} catch (error) { res.status(500).json(error);}})//update postrouter.put('/:id', async (req,res)=> { try { const post = await Post.findById(req.params.id); if(post.userId === req.body.userId) { await Post.updateOne({$set:req.body}); res.status(200).json('it has been updated'); } else { res.status(403).json('you can only update your post'); } } catch (error) { res.status(500).json(error) }})//delete post router.delete('/:id', async (req, res)=> { try { const post = await Post.findById(req.params.id); if (post.userId === req.body.userId) { await Post.deleteOne() res.status(200).json('the post is deleted') } else { res.status(403).json("you can only delete your post") } } catch (error) { res.status(500).json(error) }})//get All posts router.get('/', async (req,res) => { try { const posts = await Post.find(); res.status(200).json(posts); } catch (error) { res.status(500).json(error); }})//get one post router.get('/:id',async(req,res)=> { try { const post = await Post.findById(req.params.id); res.status(200).json(post); } catch (error) { res.status(500).json(error); }})module.exports = router;In our code above we have created our post, saved it ,able to edit it ,able to delete it and able to get all the post or one post
first we use the post method to create the post and save it as indicated. we used the put method to be able to edit the post where we find the post using its id by using findByIdmethod provide by the mongoose package after finding it we use updateOne method to update the post.
in the third method we use the delete. where we find the post we want to delete using the findById method and use the deleteOne() to delete the post
..
also the get method is done the similar way use the first get to find only one post and the second to get all the post
in the last line of our code we have exported our code using router. this helps us to be able to track our handle request easily and send it to the main file index.js let me show you in the screenshot below

as you can see in the above screenshot we can now access out routes as middleware using use() function we import our codes the router function helps us to import easily.
example import authroute = require('./routes/Auth');. we have imported our route
as shown we create the end point /api/blog and the router in the end.
Before i forget we add the express.json() middleware since our data are in json so is a method inbuilt in express to recognize the incoming Request Object as a JSON Object.
Thanks for reading the article hope you learn alot from it in the next article we are going to learn how to test it in Postman Software.
Original Link: https://dev.to/collins87mbathi/blog-site-api-with-authentication-in-node-express-and-mongodb-59h4
Dev To
More About this Source Visit Dev To