
An Interest In:
Web News this Week
- March 21, 2024
- March 20, 2024
- March 19, 2024
- March 18, 2024
- March 17, 2024
- March 16, 2024
- March 15, 2024
Some of Our Sources
- TutsPlus - Code
- Pearsonified
- TutsPlus - Design
- Fuel Your Creativity
- Naldz Graphics
- Web Design Ledger
- Wal You
- Design Modo
- Codrops
- Daily Now
Help Webnuz
Referal links:
Learn JavaScript Form Validation || JavaScript project for beginners
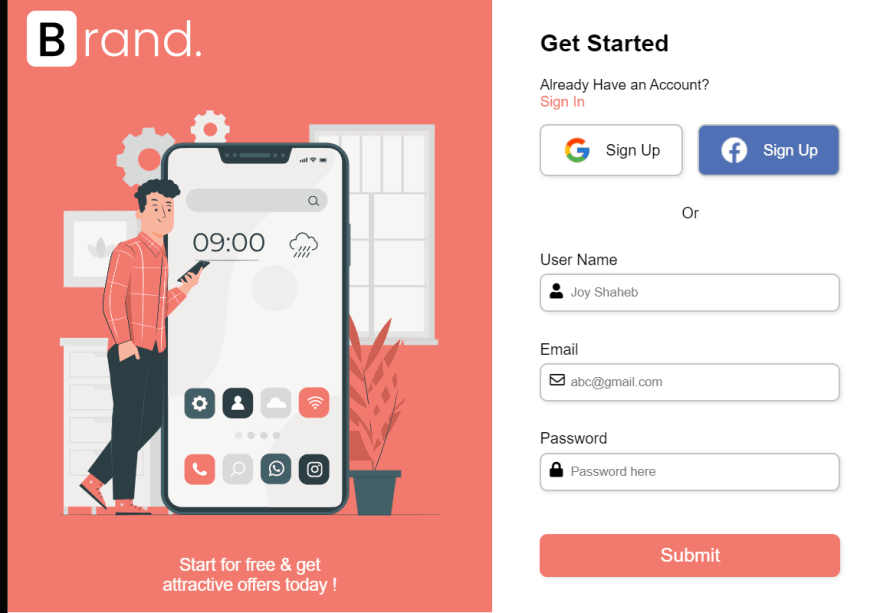
Today we're gonna learn how to do form validation using JavaScript. And we're gonna add images and media queries to build the entire project to keep it as a portfolio. Here's the project demo that we're gonna build

Here's a small sample of how the form will work

You can watch this tutorial on YouTube as well if you like:
Source code
You can get the source code, including the images from here
Setup

follow these steps
- Create a new folder named "Project" & Open VS code
- create index.html, style.css, main.js
- link the files inside the HTML
- Download images from my GitHub repository
- paste this font-awesome link inside the head tag. Then, we can access Font-awesome icons
<link rel="stylesheet" href="https://cdnjs.cloudflare.com/ajax/libs/font-awesome/5.15.4/css/all.min.css" crossorigin="anonymous" />Table of Contents -
- writing the HTML
- Adding the CSS
- JavaScript
- Social Media Btn
- Adding the images
- Media query for mobile version

HTML

Create a class named .container inside the body tag and host the form tag which will have an id of form
<div class="container"> <form id="form"></form></div>And inside the form tag, create 4 div. Like this
<form id="form"> <div class="title">Get Started</div> <div></div> <div></div> <div></div></form>Inside those 3 empty div tags, let's create 3 inputs [Username, Email & password] along with the icons and labels. Like this
Note : we are creating a .error class name. We will inject the error message here using JavaScript.
Username Input
<!-- User Name input --><div> <label for="username">User Name</label> <i class="fas fa-user"></i> <input type="text" name="username" id="username" placeholder="Joy Shaheb" /> <i class="fas fa-exclamation-circle failure-icon"></i> <i class="far fa-check-circle success-icon"></i> <div class="error"></div></div>Email Input
<!-- Email input --><div> <label for="email">Email</label> <i class="far fa-envelope"></i> <input type="email" name="email" id="email" placeholder="[email protected]" /> <i class="fas fa-exclamation-circle failure-icon"></i> <i class="far fa-check-circle success-icon"></i> <div class="error"></div></div>Password Input
<!-- Password input --><div> <label for="password">Password</label> <i class="fas fa-lock"></i> <input type="password" name="password" id="password" placeholder="Password here" /> <i class="fas fa-exclamation-circle failure-icon"></i> <i class="far fa-check-circle success-icon"></i> <div class="error"></div></div>Button
Finally, add the button before the form closing tag
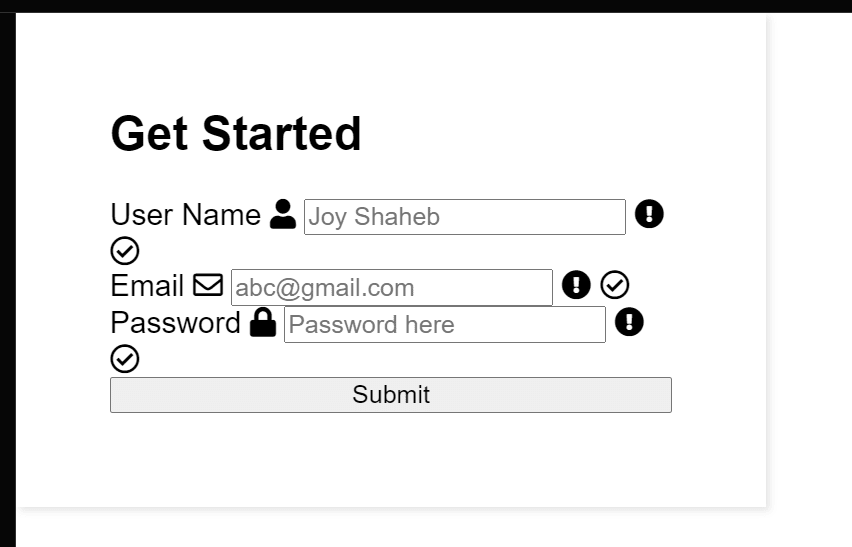
<form> <!-- other codes are here --> <button id="btn" type="submit">Submit</button></form>The result so far

Congrats for completing the HTML Part

Adding the CSS

Let's add the CSS to style our form. First, let's remove the default styles of our browser including the font-family
/*** ! changing default styles of brower**/* { margin: 0; padding: 0; box-sizing: border-box;}body { font-family: sans-serif;}Now, apply these styles for the form tag
/*** ! style rules for form section**/form { display: flex; flex-direction: column; justify-content: center; max-width: 400px; box-shadow: 2px 2px 4px rgba(0, 0, 0, 0.1); padding: 50px;}make these changes for our title text
.title { font-size: 25px; font-weight: bold; margin-bottom: 20px;}Your result so far
Now, add margin to bottom of our label text
label { display: block; margin-bottom: 5px;}make these styles to change the look & feel of our input tags
form div input { width: 100%; height: 40px; border-radius: 8px; outline: none; border: 2px solid #c4c4c4; padding: 0 30px; box-shadow: 2px 2px 4px rgba(0, 0, 0, 0.1);}Add these to add some space & color changing effects
form div { position: relative; margin-bottom: 15px;}input:focus { border: 2px solid #f2796e;}The result so far

Styling the icons
now, we're gonna style the icons which we imported from font-awesome. Follow along
/*** ! style rules for form icons**/form div i { position: absolute; padding: 10px;}The result of adding those 2 line
Now, add these styles to style the error class, success & failure icons
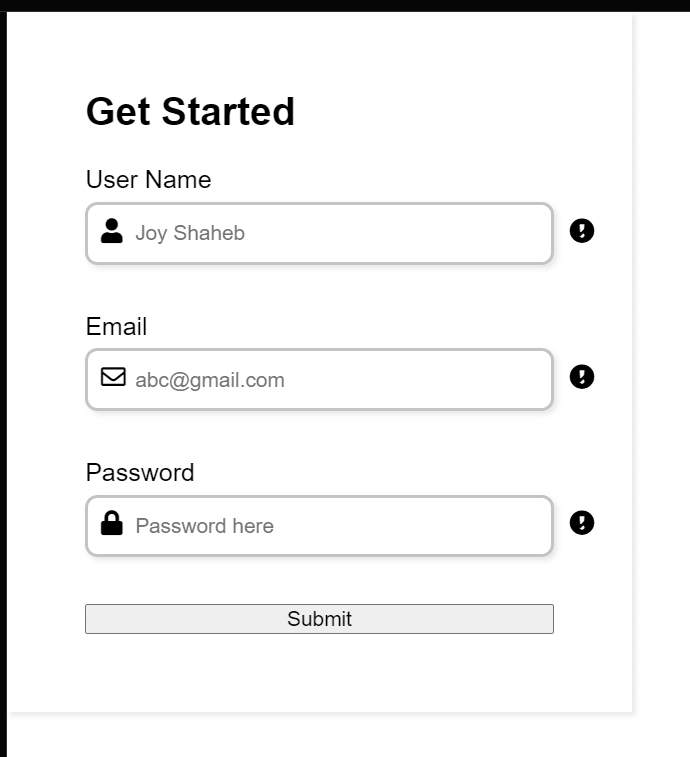
.failure-icon,.error { color: red;}.success-icon { color: green;}.error { font-size: 14.5px; margin-top: 5px;}Result so far
Look, the success & failure icons are overlapping each other. don't worry, we will manipulate those in JavaScript. for now, hide them
.success-icon,.failure-icon { right: 0; opacity: 0;}Now, style our submit button, like this
/* Style rules for submit btn */button { margin-top: 15px; width: 100%; height: 45px; background-color: #f2796e; border: 2px solid #f2796e; border-radius: 8px; color: #fff; font-size: 20px; cursor: pointer; box-shadow: 2px 2px 4px rgba(0, 0, 0, 0.1); transition: all 0.1s ease;}if you want some hover effect, then sure, add these styles
button:hover { opacity: 0.8;}Take a Break !
So far so good ! take a break, you deserve it !

Adding the JavaScript

first, target all our classes and id from HTML, inside the JavaScript. To do this task efficiently, make these 2 functions
let id = (id) => document.getElementById(id);let classes = (classes) => document.getElementsByClassName(classes);Then, store our classes & id inside these variables
let username = id("username"), email = id("email"), password = id("password"), form = id("form"), errorMsg = classes("error"), successIcon = classes("success-icon"), failureIcon = classes("failure-icon");Note : Try not to make spelling mistakes. Otherwise, our JavaScript will not work.
Now, we're gonna target our form & add the submit event listener
form.addEventListener("submit", (e) => { e.preventDefault();});Now, we will create a function named engine which will do all sorts of form validation work for us. it will have 3 arguments. Follow along
let engine = (id, serial, message) => {}the arguments represents these -
- id = it will target our id
- serial = this will target our classes [error class, success & failure icons]
- message = this will print message inside our .error class
Now create an if, else statement like this
let engine = (id, serial, message) => { if (id.value.trim() === "") { } else { }}Note : the id.value.trim() will remove all the extra white spaces from the value which the user inputs. You can get a practical idea by looking at this illustration

now, look at our objectives
we want the JavaScript to print a message inside the error class whenever the user submits the form blank. At the same time, we want the failure icons to highlight as well.
But, if the user writes all the inputs and submits it, we want the success icon to get visible.
To accomplish this, write this logic To print the message
let engine = (id, serial, message) => { if (id.value.trim() === "") { errorMsg[serial].innerHTML = message; } else { errorMsg[serial].innerHTML = ""; }}For the icons to work properly, add these
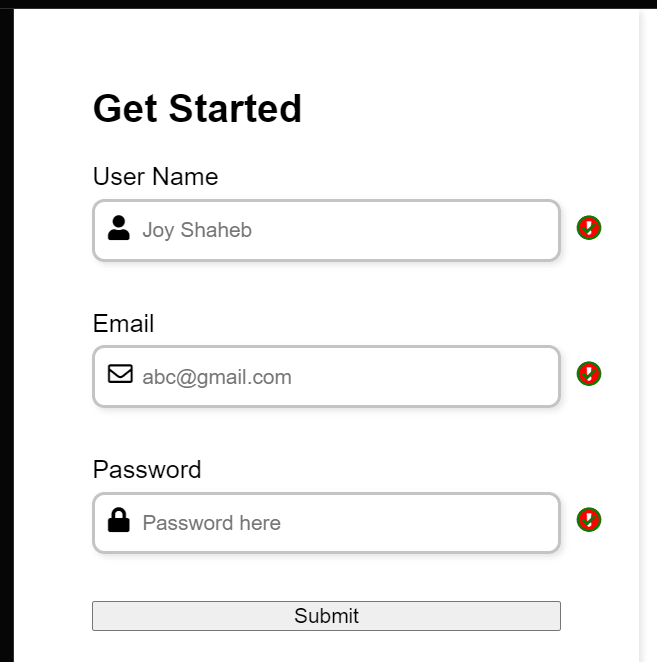
let engine = (id, serial, message) => { if (id.value.trim() === "") { errorMsg[serial].innerHTML = message; id.style.border = "2px solid red"; // icons failureIcon[serial].style.opacity = "1"; successIcon[serial].style.opacity = "0"; } else { errorMsg[serial].innerHTML = ""; id.style.border = "2px solid green"; // icons failureIcon[serial].style.opacity = "0"; successIcon[serial].style.opacity = "1"; }}Time to implement our newly created function. Write these inside the place where we added the submit event listener
here, we are passing the id names, serials of our class names and passing the message which should be printed when we find an error when the user submits the form.
form.addEventListener("submit", (e) => { e.preventDefault(); engine(username, 0, "Username cannot be blank"); engine(email, 1, "Email cannot be blank"); engine(password, 2, "Password cannot be blank");});The results so far
Adding social media Buttons

so far so good, let's add the social media sign up options. Follow along Inside the form tag, create a new div with the class name social.
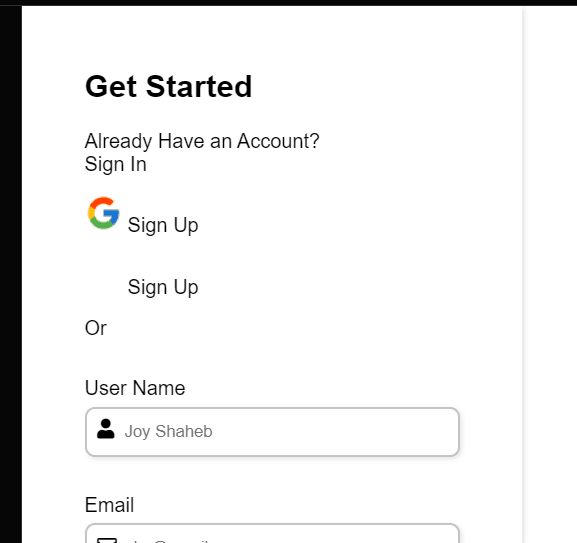
<form id="form"> <div class="social"> <div class="title">Get Started</div> <div class="question"> Already Have an Account? <br /> <span>Sign In</span> </div> <div class="btn"></div> <div class="or">Or</div> </div> <!-- other codes are here--></form>inside the .btn class, we create 2 more div with class names .btn-1, .btn-2 with the images & text as well
<div class="btn"> <div class="btn-1"> <img src="https://img.icons8.com/color/30/000000/google-logo.png" /> Sign Up </div> <div class="btn-2"> <img src="https://img.icons8.com/ios-filled/30/ffffff/facebook-new.png" /> Sign Up </div></div>The result so far
Now, let's style the .btn-1 & .btn-2 first, let's change direction of the buttons to row from column direction
/*** ! style rules for social section**/.btn { display: flex; flex-direction: row; justify-content: space-between; gap: 15px;}Result so far

now, add styles for the button. follow along
.btn-1,.btn-2 { padding: 10px 5px; width: 100%; display: flex; gap: 15px; justify-content: center; align-items: center; border: 2px solid #c4c4c4; border-radius: 8px; box-shadow: 2px 2px 4px rgba(0, 0, 0, 0.1); cursor: pointer;}Change the icon color and text color of .btn-2 like this
.btn-2 { background-color: #4f70b5; color: white;}And then, add these small changes to make the component look better
.or { text-align: center;}.question { font-size: 15px;}span { color: #f2796e; cursor: pointer;}The result so far

Adding the Images

Now, let's add images to our project. First, let's write the HTML
<div class="container"> <div class="content"> <div class="logo"> <img src="https://svgshare.com/i/_go.svg" alt="" /> </div> <div class="image"></div> <div class="text"> Start for free & get <br /> attractive offers today ! </div> </div> <form id="form"> <!--other codes are here --> </form></div>The result so far

we need to change the orientation of our content from column to row. follow along
.container { display: flex; flex-direction: row;}Add these style rules for the content section
/*** ! style rules for content section**/.content { display: flex; flex-direction: column; justify-content: space-around; background-color: #f2796e; width: 55%; min-height: 100vh; padding: 10px 20px;}form { width: 45%; max-width: none;}The result so far

add the main illustration in CSS
.image { background-image: url("https://svgshare.com/i/_gZ.svg"); background-repeat: no-repeat; background-size: contain; background-position: center; /* border: 2px solid black; */ height: 65%;}and make these styles for the .text class
.text { text-align: center; color: white; font-size: 18px;}form { width: 45%; max-width: none;}The result so far
Adding media queries for mobile version

from 900px, we will add these styles. Follow along
@media (max-width: 900px) { .container { flex-direction: column; } form, .content { width: 100%; } .btn { flex-direction: column; } .image { height: 70vh; }}From 425px, we will have these minor changes
@media (max-width: 425px) { form { padding: 20px; }}The final result 
Conclusion

Congratulations for reading till the end. Now you can easily & efficiently use JavaScript to handle form validation. Not only that, You also have a project to show your local recruiter !
Here's Your Medal For reading till the end
Suggestions & Criticisms Are Highly Appreciated

Original Link: https://dev.to/joyshaheb/learn-javascript-form-validation-javascript-project-for-beginners-2mm5
Dev To
More About this Source Visit Dev To