
An Interest In:
Web News this Week
- April 25, 2024
- April 24, 2024
- April 23, 2024
- April 22, 2024
- April 21, 2024
- April 20, 2024
- April 19, 2024
Some of Our Sources
- Engadget
- Technology Review
- Vandelay Design
- Inspiredology
- Web Design Ledger
- Line 25
- 24 Ways
- Freelance Switch
- Android Dissected
- Willems Lab
Help Webnuz
Referal links:
Automated Accessibility Testing
As described in our recent series of blog posts, our team has been working on improving the accessibility of the Chat Widget. While making the improvements, we wanted to maintain top-notch quality and ensure that while introducing new changes, there was no drop in standards. We use Cypress for all our automated testing, and so we decided to extend the existing testing suite by adding automated accessibility tests. In this article, Id like to share with you what weve learned and how you can do this yourself!

Example app overview
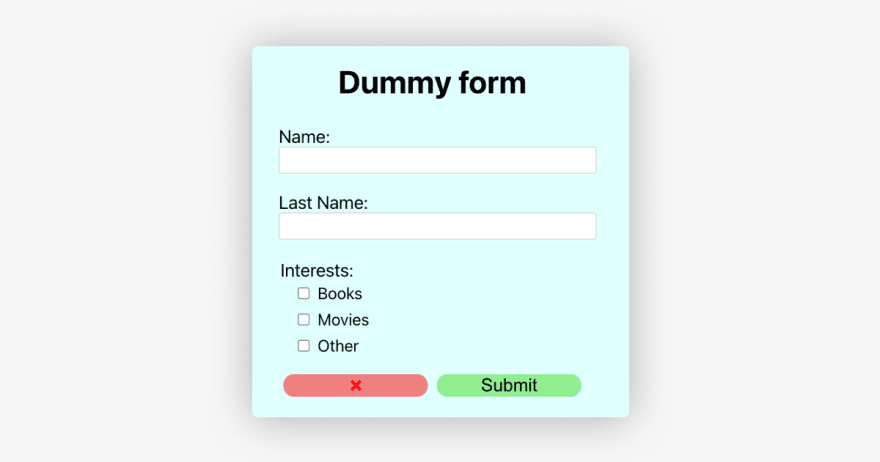
In order to make it easier for you to follow, Ive created a simple app that allows the user to submit a dummy form. You can find the repository here. Dont worry, the data you submit in the app is not sent anywhere, so you can play around with it as much as you want.
Its created using the Create React App scripts and using yarn as a dependency manager (installation instructions). After cloning the repository, all you need to do is install the dependencies by simply typing yarn (or npm install if you'll choose to do it without yarn) in the console. Then, with yarn start (or npm start), you can run the app, and it will be available at http://localhost:3000. Each step described in the article is reflected on the corresponding git branch.
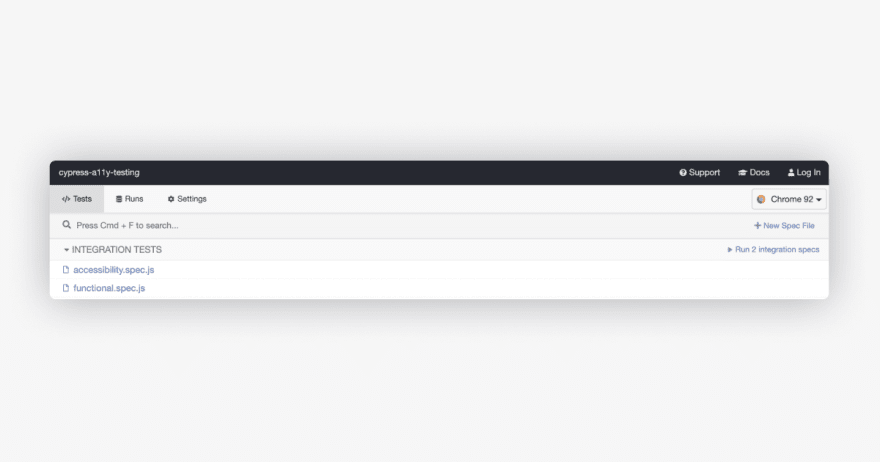
The repository also contains a simple integration test created with Cypress, located in the functional.spec.js file.
cypress-axe
In the previous article describing our journey with accessibility testing, I mentioned the axe DevTools browser extension. It allows the user to perform audits on the website, so that any accessibility issues can be discovered. This extension is based on the axe-core engine a testing tool, validating against different types of rules and best practices.
The same engine can be used with Cypress, thanks to the cypress-axe package. It adds several custom commands to the Cypress API, which utilizes axe-core under the hood. It makes it possible to perform a11y audits directly while testing.
Lets, then, add the required dependencies to the project we need the cypress-axe and axe-core (with the --dev flag, so that these are added as developer dependencies):
yarn add cypress-axe axe-core --dev# ornpm install cypress-axe axe-core --save-devNow, we need to let Cypress know that we have extended the list of commands. Therefore, we should add the following import statement in cypress/support/index.js:
import 'cypress-axe'Great, with that in place, we can start using the library.
Running audits
The first command were going to use is injectAxe. Basically, it inserts the axe-core code into the application under test. Therefore, it needs to be run after the visit call (and after each reload) to make sure the runtime is available on the website.
Lets create a separate accessibility.spec.js test suite and utilize it in there:
it('should not report any errors during the accessibility audit', () => { cy.injectAxe()})We can run the tests now. To get more feedback while developing, well run it in Cypress Test Runner with a full GUI. This can be done via the open command (keep in mind to start the app earlier with yarn start):
yarn run cypress open# ornpx cypress openAnd in the runner, we select accessibility.spec.js to run it:
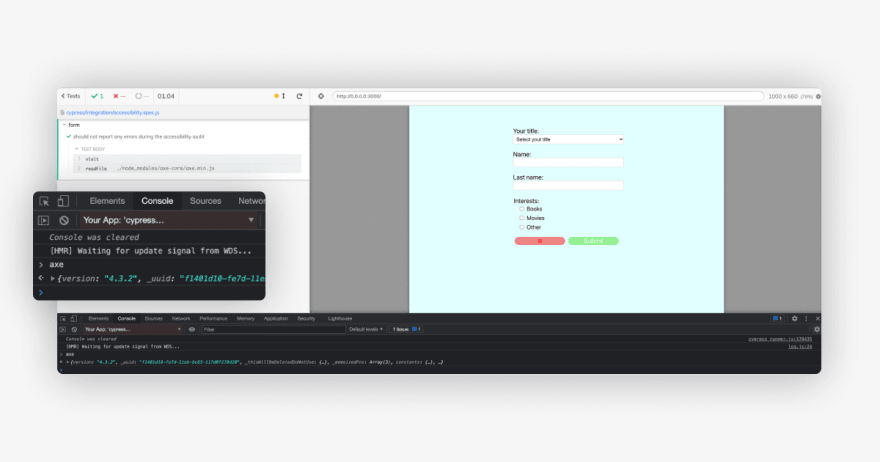
So far, so good the test runs without any errors. After opening the developer tools and switching the console context to our app, we should have access to the axe object, which indicates that it was indeed correctly injected:
Its worth noting that the library also adds a configureAxe command. This corresponds to axe.configure from axe-core, described here. Using it is not needed in most cases but might be useful.
We can now run the audit. This is done with the checkA11y command. It can be run with the following parameters, all optional:
contexta selector to a DOM element that should be analyzed.optionsoverrides for the global axe configuration whenever you want to set custom rules or checks for just that particular audit.violationCallbackcustom handler for reported errors.skipFailuresallows you to prevent the test from failing on error and instead only log the error to the console.
Lets add it to the test and run it (on branch: step-1):
it('should not report any errors during the accessibility audit', () => { cy.injectAxe() cy.checkA11y()})The app fails a test, informing the user about the violations. Upon clicking on each of the violations, the console logs more details, and the element causing the violation in each case is highlighted:

The log for each violation contains the following set of information:
commandinforming us whether a violation is an error, warning, etc.ididentifier of the violated rule, for example,button-nameorcolor-contrast.impactdefining the severity of the violation.tagsmaking it easier to identify which rulesets were violated (e.g.,wcag2a).descriptionbrief details about the rule.helpinformation on how to fix the issue.helpurllink to more details about the issue.nodesaffected elements.
Fixing the bugs
In the example, we had three bugs reported. The first one was about the clear the form button missing discernible text. As you can see, its an icon button. This means that screen reader users wont be able to identify what it does! One way of fixing that is by adding an aria-label attribute to the button.
The second issue reported is informing us that the color contrast on the submit button is incorrect. Using inspect from the browsers dev tools, indeed we can see that the contrast is 1.41, while the rule requires at least 4.5 for smaller texts:
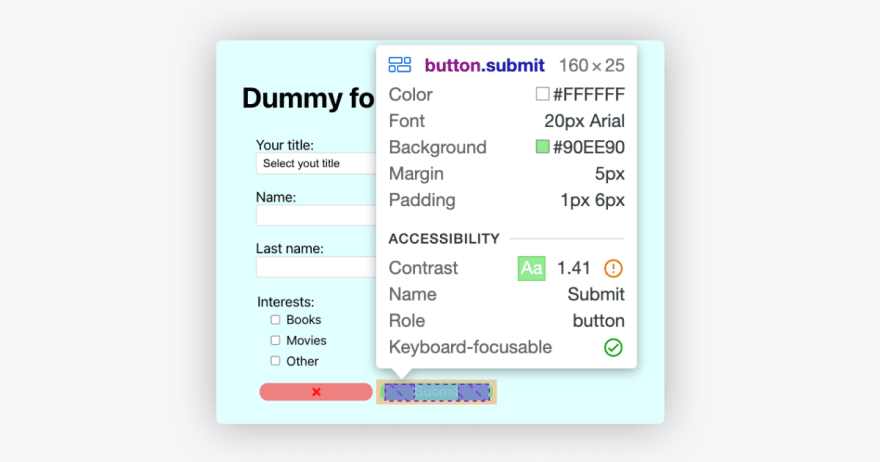
It can be easily fixed, for example by changing the text colors on the buttons to black instead of white:

The last error is caused by the form input missing a label, and each one of them should have it so that screen reader users can easily navigate around. This can be fixed by either setting a for attribute to the id of the given input for the label, or if a label is not present, by adding a corresponding aria- attribute.
Lets apply all of the fixes (branch: step-2) and re-run the tests:
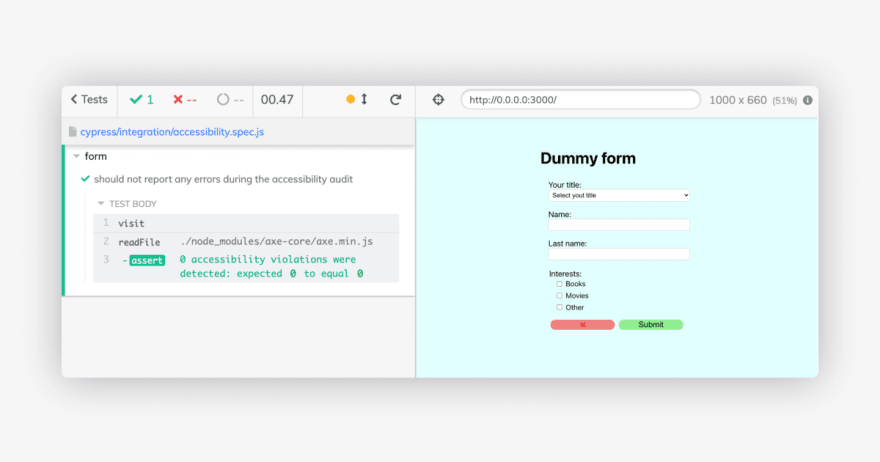
Nice! The app has passed the test, meaning that there were no accessibility violations found during the audit. With that test included in the pipeline, we can make sure we have not introduced any regressions in that area.
Audits are not all there is
Audits are a powerful way of verifying accessibility violations; however, these are not always enough. The application might pass all of the automated audits, yet still not be accessible.
One of the additional layers you can add to make sure you are building a good, accessible app, is to use accessible queries for elements you interact with in the tests. In other words, you find elements by text, labels, roles, aria-attributes, etc., rather than using the IDs or data-test attributes. This applies to all layers of testing. There is a very useful project called Testing Library, which provides you with UI-centric queries out of the box. It has a separate package for many different testing methods and libraries, including the Cypress one: Cypress Testing Library.
Lets take a look at the test we initially had in the repository (file: functional.spec.js):
it('should allow submitting data', () => { cy.get('[id=name]').type('Dummy') cy.get('[id=last-name]').type('Tester') cy.get('[id=books]').click() cy.get('[type=submit]').click() cy.contains('Thanks for submitting the form!').should('be.visible')})It heavily relies on the IDs these dont matter much for the end-user since they rarely browse the web with the developer tools opened. They care much more about the labels we mentioned before, so lets try to rewrite that test with that in mind.
First, we need to install the dependency:
yarn add @testing-library/cypress --dev# ornpm install @testing-library/cypress --save-devNow, we add an appropriate import statement in cypress/support/index.js:
import @testing-library/cypress/add-commandsThats it we can make use of all the queries! Lets apply that to the test (branch: step-3):
it('should allow submitting data', () => { cy.findByLabelText('Name:').type('Dummy') cy.findByLabelText('Last Name:').type('Tester') cy.findByLabelText('Books').click() cy.findByText('Submit').click() cy.findByText('Thanks for submitting the form!').should('be.visible')})After running the test, it still passes:
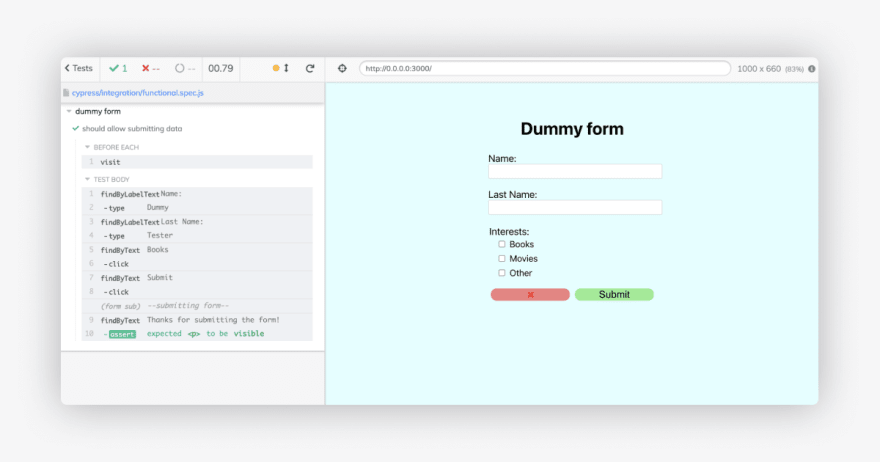
Using the findByLabelText command, we would have found the bug reported by the audit much sooner. Even if you were to decide not to use that package, referring to the priority of the queries description in the Testing Library docs would be beneficial for your users, and the quality of your tests.
Keyboard navigation
Additionally, you can test the flow of your app for just keyboard navigation. A lot of users use just the keyboard to browse the web, and its important that the whole application flow can be completed without using the mouse. You can read more about its importance in the Keyboard navigation article.
The way Cypress is built does not allow simulating real user actions out of the box. All of the actions there are triggered via JavaScript. Usually, this is not a problem; however, in terms of keyboard navigation, it is we wont be able to use a Tab key, which is necessary to simulate how the user would navigate around. Luckily, the Cypress Real Events package comes in handy (or its alternatives, e.g. Cypress Plugin Tab). It uses the Chrome DevTools Protocol (so it only works in Chrome) in order to fire actual system events. Still, it has its downsides, though you wont be able to interact with certain system elements like default selects. If you were to determine that this is an important part of your app, other testing frameworks might be necessary.
Creating a simple test for keyboard navigation
Lets create a simple test for the keyboard flow. Lets add the package to our project:
yarn add cypress-real-events --dev# ornpm install cypress-real-events --save-devAnd, as previously, import it in the cypress/support/index.js to let Cypress know about the new goodies:
import "cypress-real-events/support"Now, we should have access to all of the additional API commands. What interests us most are realPress (for single key presses) and realType (for typing).
Lets add another simple test case, then, in the accesibility.spec.js suite. We must use only the keyboard to navigate around and fill in all of the inputs in the form.
Based on the application overview, after visiting the page, the first Tab stroke should focus us on the "Name" field within the form. Lets check that, then, using both the realPress command from cypress-real-events and the focused one (from Cypress). The latter is from the Cypress API and gets the currently focused DOM element. However, since Cypress wraps the Application Under Test (AUT) in its own, separate iframe, and the events are fired using the CDP, we would need an extra click somewhere in the AUT. This would make sure the events are correctly fired for the AUT and not the Cypress runner.
it('should allow submitting with just keyboard', () => { cy.findByText('Dummy form').should('be.visible').realClick() cy.realPress('Tab')})So far so good. We would need an assertion to make sure that the focused element indeed has the Name: label. Lets add a custom assertion for that:
const assertFocusedInputLabel = (expectedLabel) => { return cy.focused().then(($el) => { cy.get(`label[for="${$el.attr("id")}"]`).should( "have.text", expectedLabel ); });};Now, lets add that to the test, along with the typing action:
it('should allow submitting with just keyboard', () => { cy.findByText('Dummy form').should('be.visible').realClick() cy.realPress('Tab') assertFocusedInputLabel("Name:").realType("Dummy");})And now, lets run it!
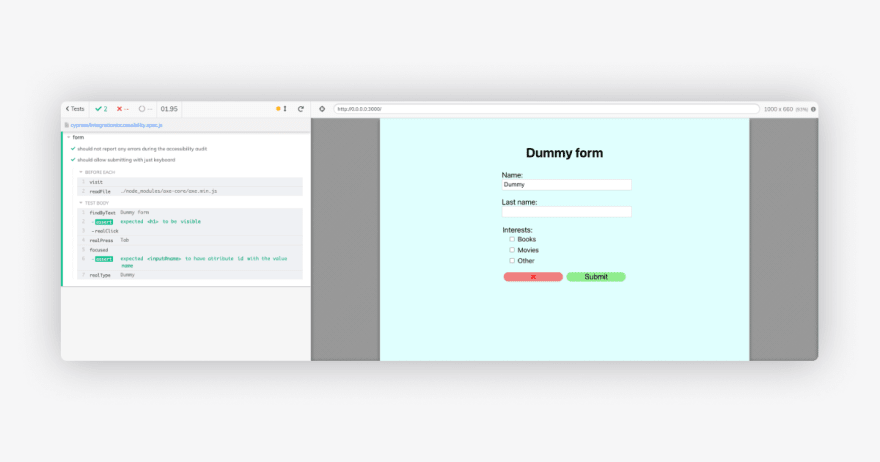
The test passes, hooray! We can now do the same for other form elements, and finally, submit a form using the Enter key (branch: step-4):
it("should allow submitting with just keyboard", () => { cy.findByText("Dummy form").should("be.visible").realClick(); cy.realPress("Tab"); assertFocusedInputLabel("Name:").realType("Dummy"); cy.realPress("Tab"); assertFocusedInputLabel("Last Name:").realType("User"); cy.realPress("Tab"); assertFocusedInputLabel("Books").realPress("Space"); cy.realPress("Enter"); cy.findByText("Thanks for submitting the form!").should("be.visible");});Lets run the test and see how it does:

Oh no, a failure! Upon investigation, it seems that someone has added a tabindex=-1 attribute to the Last name field. That attribute will make the element not tabbable and as a result hide it from keyboard users. Lets remove it (branch: step-5) and re-run the tests:

Perfect, we can see that it would find a bug in such a case. As you can see, the audit has passed, as this attribute is not disallowed. This is why having an additional layer for that would be highly beneficial in the long run.
Static analysis
The other things apart from automated tests you can add to prevent accessibility mistakes, are accessible plugins for the linters. In the same way they let you know about missing semicolons, they can warn you whenever necessary attributes are missing, or any other violations are made.
A good example of such a tool is the axe Accessibility Linter VS code plugin. With the same axe-core rules engine, the plugin will inform you whenever an accessibility bug appears.
The other example is an accessibility eslint plugin for JSX elements: eslint-plugin-jsx-a11y. Although it would not inform you about all of the errors, it would for sure prevent you from making the most basic mistakes. The eslint plugin has a big advantage over any editor plugins it can be run as a pre-commit hook or on the CI before the build process. Thanks to that, the verification can be forced within the project configuration.
Wrap-up
Making our Chat Widget accessible has been really enlightening for us, in many areas. It was also hard work, requiring a lot of learning. We believe in the value automated tests bring, and since accessibility is one of our biggest priorities, we want to make sure that its being thoroughly tested. We hope that with this description of our test setup, youll try it yourself.
Be sure to let us know if you have any questions!
Original Link: https://dev.to/livechat/automated-accessibility-testing-2j8f
Dev To
More About this Source Visit Dev To