
An Interest In:
Web News this Week
- March 21, 2024
- March 20, 2024
- March 19, 2024
- March 18, 2024
- March 17, 2024
- March 16, 2024
- March 15, 2024
Some of Our Sources
- Technology Review
- Simplebits
- Six Revisions
- Inspiredology
- Naldz Graphics
- Noupe
- Wal You
- Design Modo
- Android Dissected
- The Verge
Help Webnuz
Referal links:
How to Preview image before uploading in Javascript
In this article, I am going to show you how to create a custom image upload and preview design. Image Preview is a great system where you can check before uploading an image whether the image is eligible for upload. This is a very simple system that you can only create with the help of HTML and javascript. But here I have used a small amount of CSS to design it.
HTML has many types of input functions, one of which is text, passwords, emails, etc. that we always use. There is also another type of input known as the file input (<input type=" file">). Here you can use any type of file for input.
This is similar to the general input design. Only 'File' will be used instead of 'Password' or 'Email'. It will receive the file from your device and then show it as a preview. However, to do this image preview, you have to take the help of JavaScript or JQuery. Here I have created this image upload and preview design using Pure JavaScript.
Now is the time to fully understand how it is made. Before starting the tutorial, let me tell you some important points. First I designed the web page using some CSS. Then I created a box on the webpage. I made a small button using the input in that box.
I used a level to make this button here. With this, I have made a small display for previewing the image. I implemented it using JavaScript at the end of it all. Let's take a look at how to make it in the full step below.
Step 1: Design the webpage with CSS
First I designed the web page using CSS code. Here we have set the background color of the web page as blue and the height as 100vh.
body { margin:0px; height:100vh; background: #1283da;}
Step 2: Create the basic structure of the image preview
Now I have made a small box on the web page using some basic HTML and CSS. As you can see above, image previews and buttons are all in this box.
The width of the box is 350 px and the background color is white. I have used some box shadows here which have made it brighter and more attractive.
<div class="center"> <div class="form-input"> </div></div> .center { height:100%; display:flex; align-items:center; justify-content:center;}.form-input { width:350px; padding:20px; background:#fff; box-shadow: -3px -3px 7px rgba(94, 104, 121, 0.377), 3px 3px 7px rgba(94, 104, 121, 0.377);}
Step 3: Create a place to preview the image
I made a small display to view the previewed image. Although it cannot be seen in normal conditions. This can only be seen when we implement it with the help of JavaScript.
<div class="preview"> <img id="file-ip-1-preview"> </div>.form-input img { width:100%; display:none; margin-bottom:30px;}Step 4: Create input boxes and buttons
Now I have created an input box using file input and created a button there. I used the level of input to make this button. Later, using CSS, I gave that level the shape of a button. Button height 45 px and width 45%.
<label for="file-ip-1">Upload Image</label> <input type="file" id="file-ip-1" accept="image/*" onchange="showPreview(event);">.form-input input { display:none;}.form-input label { display:block; width:45%; height:45px; margin-left: 25%; line-height:50px; text-align:center; background:#1172c2; color:#fff; font-size:15px; font-family:"Open Sans",sans-serif; text-transform:Uppercase; font-weight:600; border-radius:5px; cursor:pointer;}
Step 5: Activate Image Upload with JavaScript code
As you can see above, we have designed it completely. Now I will implement this image preview system with the help of JavaScript.
function showPreview(event){ if(event.target.files.length > 0){ var src = URL.createObjectURL(event.target.files[0]); var preview = document.getElementById("file-ip-1-preview"); preview.src = src; preview.style.display = "block"; }}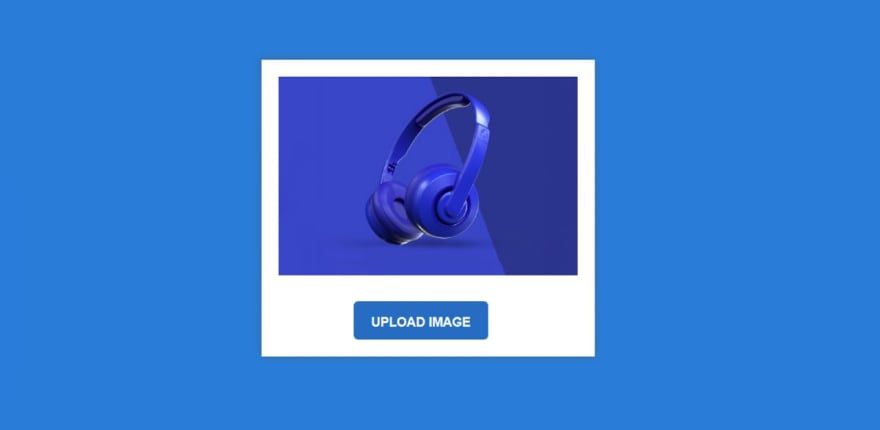
After using js, image preview and upload will be fully effective. Then when you click on the upload button, you will see a preview of any image you select from your file.
Hopefully from the tutorial above you have learned how to make an image upload with preview. I have already created a system of multiple image previews using JQuery.
You can visit my blog for more tutorials like this.
https://www.foolishdeveloper.com/
Original Link: https://dev.to/shantanu_jana/how-to-preview-image-before-uploading-in-javascript-1f6g
Dev To
More About this Source Visit Dev To