
An Interest In:
Web News this Week
- April 20, 2024
- April 19, 2024
- April 18, 2024
- April 17, 2024
- April 16, 2024
- April 15, 2024
- April 14, 2024
Some of Our Sources
- Engadget
- Technology Review
- TutsPlus - Code
- The Logo Smith
- TutsPlus - Design
- Inspiredology
- Web Designer Depot
- Android Headlines
- Daily Now
- Hashedout
Help Webnuz
Referal links:
How I built and Published My First React Native App (Daily Discomfort)
TLDR
- React Native + Redux + NodeJs + MongoDB Atlas + Heroku = Daily Discomfort
What is it?
Daily Discomfort is an app that allows users to swipe on different prompts that are designed to get them out of their comfort zones. After the user swipes right on a prompt their mission is to go out into the real word to complete the challenge. Once completed, or failed, the user comes back to the app to journal about their experiences trying to complete the prompt. It can be found on the Apple AppStore & Google Play Store.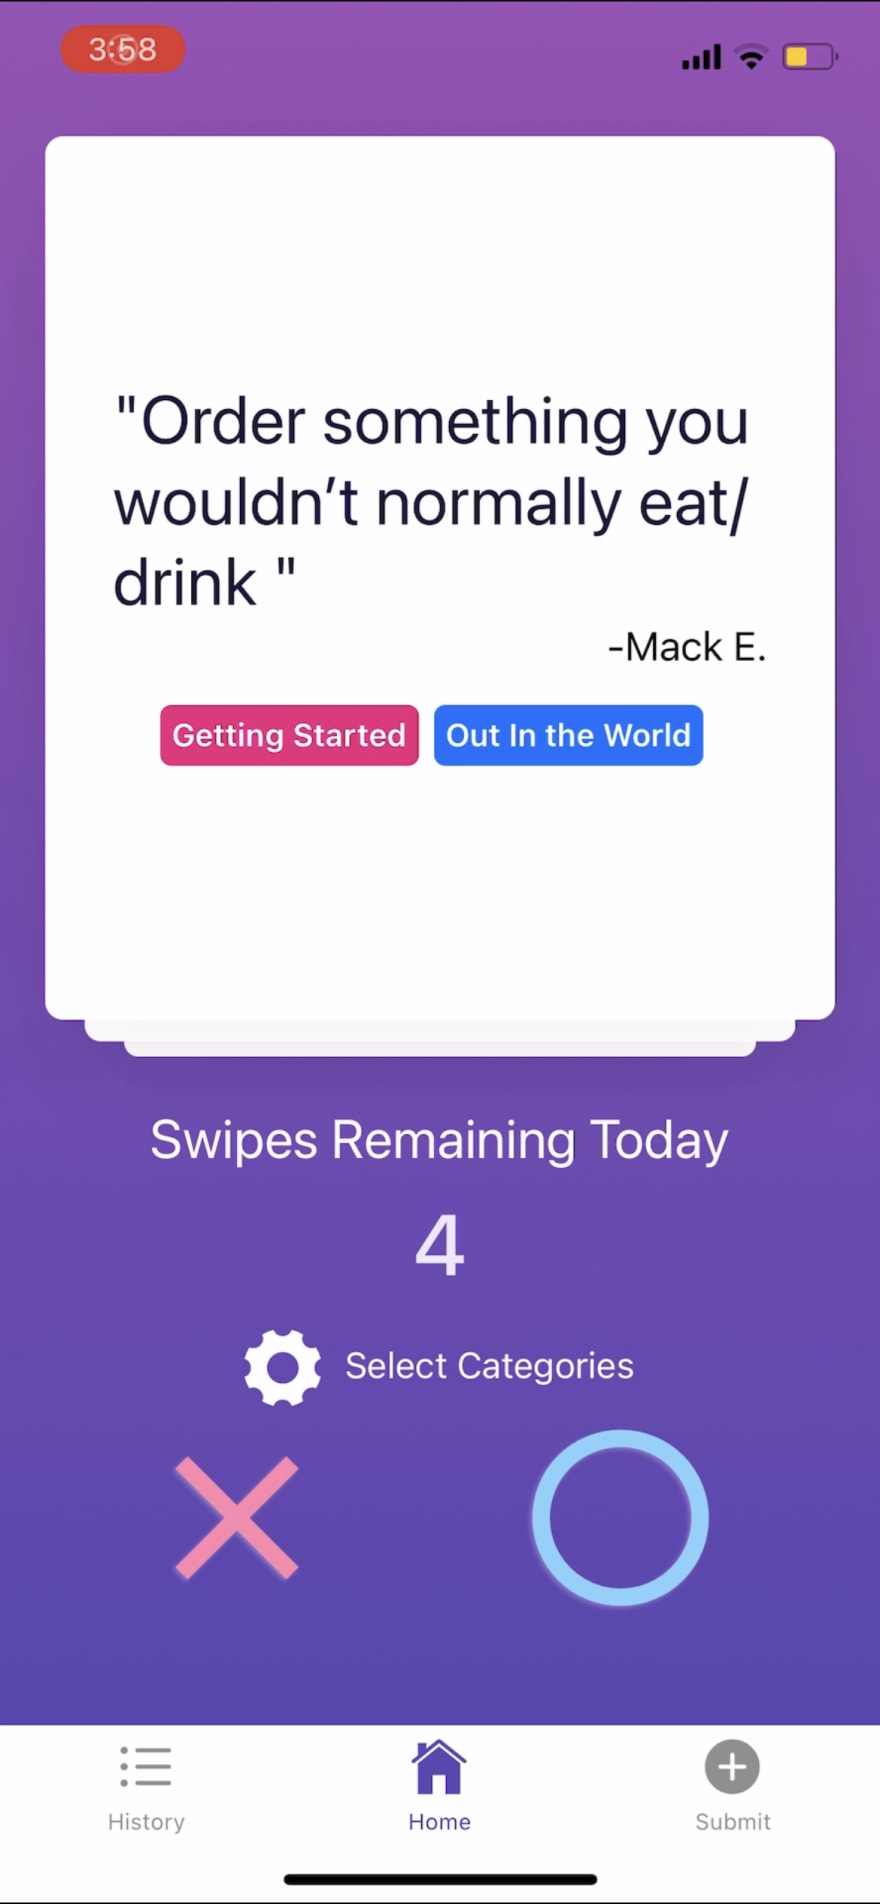
Motivation
The whole reason that I created this app is because I recognize I am terrified to get out of my own comfort zone. I wanted something that would force me each and every day to try something new and to experience things that I might have not had the chance to otherwise. After realizing that there didn't seem to be anything on the market that met my requirements I did what any nerd would do, I opened my laptop and started planning.
Requirements / Features
- Allow users to select the prompts that they wanted to try out.
- Allow users to journal about their experiences after they have completed or attempted the prompt.
- Allow users to submit prompts that once reviewed, will display for other users.
- Allow users to see a notification to remember to complete the prompt and journal about their experiences afterwards.
Project Architecture
The overall architecture for this project is extremely simple. My react native application is talking to a NodeJS api through two different REST endpoints. One is to retrieve a certain amount of approved prompt from the database, and the other to submit a prompt for consideration. I won't be going in to too much detail about the backend I may create another article for that purpose.

Technology
To Expo Or To Not Expo, That Is the Question
- Bare Workflow - This workflows requires you to use Android Studio & xCode. You will have to build and deploy your app by yourself. However you get Full Control of your entire project.
Expo
Expo is a framework and a platform for universal React applications. It is a set of tools and services built around React Native and native platforms that help you develop, build, deploy, and quickly iterate on iOS, Android, and web apps from the same JavaScript/TypeScript codebase. - Expo
Expo allows you to very quickly get started with react native. You won't ever have to open up Xcode or Android Studio. Expo will also take care of building, and signing the App Bundles & IPA files that you submit to Google Play and the Apple AppStore. However, there is the trade off is not being able to use native modules or native code in your app. The cool thing with expo is that if you realize you need to write some native code or use some native module that there is not an expo package for, you can simply
ejectfrom expo. Ejecting will allow you to then write or use any native code that you might need.
I ended up deciding to use Expo because I wanted to try and build this as fast as possible.
I also used Typescript instead of Javascript for this project. I haven't worked with Typescript before and I thought it was the perfect time to get started with it. Now that the project is launched, I can say that I am a huge fan. I don't know if I will be able to go back to normal Javascript now.
NPM Packages
react-navigation- Utilized this package to create different screens & a bottom navigation bar
redux- For a global data store
redux-persist- Allows me to save my global data store onto the users devices
react-native-deck-swiper- Tinder like swiping component. I did face some struggles with this and had to make some changes to its source code, namely having the cards refresh after an API call was made. Unfortunately it does not seem that this project is being actively maintained.
expo-notification- Allows me to send scheduled local notifications on the users devices.
React Native App Structure
daily-discomfort/ actions/ // all redux actions that are dispatched assets/ // all images components/ // all components common/ homescreen/ submitscreen/ historyscreen/ constants/ colors.ts // typescript object that contains all color hex codes types.ts // redux types navigation/ bottomtabbarnavigator.tsx // bottom tab bar for navigation networking/ apiRepository.ts // methods to interact with server notifications/ notificationManager.ts // Handles local notification logic reducers/ // basic redux reducer screens/ history.tsx home.tsx submit.tsx store/ // Basic redux store utils/ // static helper functions App.tsx // main entry point app.json // expo configuration file package.json config.ts // config values types.ts // typescript typesImplementation of Features
- Allow users to select the prompts that they wanted to try out.
- I wanted the users to make a selection on what prompt they wanted to try out instead of just giving them one. This makes the app more engaging while also taking into account the restrictions that a certain user might have with completing the challenge. The second point is also why I incorporated categories. Swiping appears to be the cool and fun thing today so it made sense for that to be the mechanism that allows users to select a prompt. I was able to use the NPM package
react-native-deck-swiperto implement this rather quickly.
- I wanted the users to make a selection on what prompt they wanted to try out instead of just giving them one. This makes the app more engaging while also taking into account the restrictions that a certain user might have with completing the challenge. The second point is also why I incorporated categories. Swiping appears to be the cool and fun thing today so it made sense for that to be the mechanism that allows users to select a prompt. I was able to use the NPM package
- Allow users to journal about their experiences after they have completed the prompt.
- This allows users to look back on their previous experiences and be able to grow. While this feature was simple and didn't require a lot of work to implement, the value is immense. I simply saved an array of previous challenges into redux which then persists onto the device with redux-persist
- Allow users to submit prompts that once reviewed, will display for other users.
- This was an extremely important feature for this app. I wanted it to be a community driven app that allows the community to help each other. To implement this feature I created a new route in the in API that would accept
POSTrequests with the data for the new prompt. However, these prompts won't be automatically added into the prompts that the user is currently seeing. I have to go into the DB and approve this newly submitted prompts. This helps to ensure that only quality prompts are being shown to the user.
- This was an extremely important feature for this app. I wanted it to be a community driven app that allows the community to help each other. To implement this feature I created a new route in the in API that would accept
- Allow users to see a notification to remind them to complete the prompt and journal about their experiences afterwards.
- This was a breeze to setup with Expo's great documentation. You first have to check to make sure that the user has granted your app access to show notifications. Once you do have access you can simply fire off a local notification whenever you want. For my use case, I used scheduled notifications that allowed you to schedule a notification for a future date. I used this to remind users to complete the challenge that they have selected for that day.
export const scheduleNotification = async (title: string, body: string) => { Notifications.scheduleNotificationAsync({ content: { title: title, body: body }, trigger: { seconds: NOTIFICATION_REMINDER_SECONDS, repeats: false } }) };Shipping the Final Product
Backend
- MongoDB Atlas for the database
- Heroku for running the server. Deploying to heroku is extremely simple. You can integrate with your Github repository and automatically deploy once a PR is merged into your main branch.
React Native App
The thing that I love about Expo the most is how it handles the whole build process for you. You don't have to worry about signing your app as well, Expo takes care of that for you. It only takes two commands to build for both Android and iOS:
expo build:androidexpo build:iosAfter running these commands the Expo build servers take care of the rest of the work for you and will give you a link where you can download the App Bundle or the IPA file. Once you have these you are able to put them up on both the Google Play store and the Apple App store
Thanks for reading, I can be found on twitter here https://twitter.com/jeff_codes and my personal site is
https://www.jeffedmondson.dev/
Original Link: https://dev.to/jeff_codes/how-i-built-and-published-my-first-react-native-app-daily-discomfort-311d
Dev To
More About this Source Visit Dev To