
An Interest In:
Web News this Week
- April 23, 2024
- April 22, 2024
- April 21, 2024
- April 20, 2024
- April 19, 2024
- April 18, 2024
- April 17, 2024
Some of Our Sources
- BoingBoing
- Engadget
- Joshua Blankenship
- The Logo Smith
- Spoon Graphics
- 24 Ways
- Stylized Web
- Wal You
- Spyre Studios
- TechPowerUp
Help Webnuz
Referal links:
Next.js Authentication with Netlify Identity
Introduction
Next.js is an open-source development framework built on top of Node.js enabling React-based web applications functionalities such as server-side rendering and generating static websites.
In this guide, I will show you how to add authentication to your Next.js App using Netlify Identity.
Prerequisites
Basics of Next.js
Context in React
1. Next.js App
First, create/select an app you would like to add authentication to. Deploy that app to Netlify so you can use Netlify Identity it's a service provided by Netlify to add authentication to your apps.
If you don't have an app you can download the starter code.
npx create-next-app [your_project_name] -e https://github.com/bhagatpratik07/next-js-auth-blog/tree/blogNote: Change the name of the app before you run the command.
Run the above command in the terminal. You will get a simple next.js application with Home and About Page. We will add authentication to this app.
Installing Netlify Identity in our App
Netlify Identity is a service provided by Netlify to add authentication to our apps.
Before we code we need to install Netlify identity in our app.
npm install netlify-identity-widgetRun the above command in the terminal to install Netlify Identity.
Deploying to Netlify
Now that you have downloaded the starter code it's time to deploy it to Netlify. Head over to https://www.netlify.com/ and deploy your site. After deploying you should see something like this :
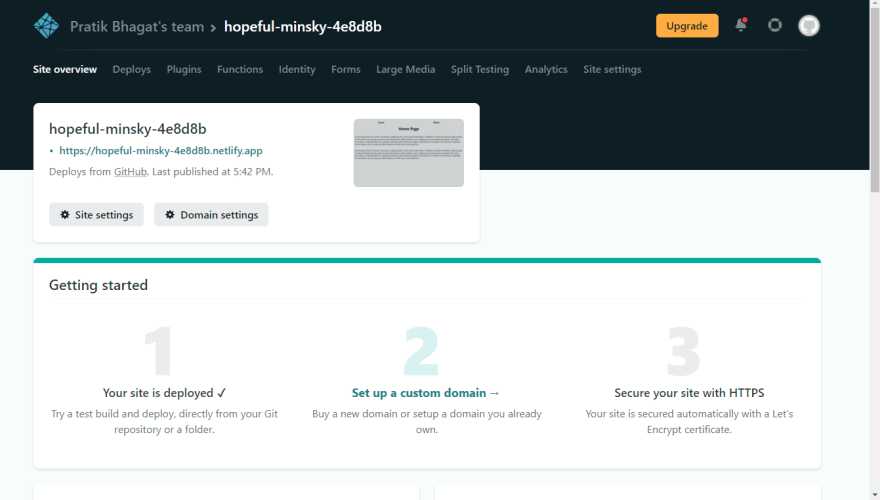
Next, click on Identity in navbar and click on Enable Identity. Now Netlify Identity is enabled in our app.
Let's Start
Create a new contexts directory at the top level of our application and inside contexts create a new file called authContext.js. Our file structure should look something like this : 
Coding our authContext
Add the below code to our AuthContext
import { createContext} from "react";export const AuthContext = createContext({ user: null, login: () => {}, logout: () => {}, authReady: false,});const AuthContextProvider = ({ children }) => { return <AuthContext.Provider>{children}</AuthContext.Provider>;};export default AuthContextProvider;First, we create our AuthContext and give it default values like user initially is set to null. We have default functions for login and logout. We have authReady state, which is a boolean it will keep track of when we have established a connection with Netlify Identity. The reason we have authReady state is that when our app runs in the browser it doesn't know if the user is logged in or not.
Until we establish connection with Netlify authReady will be false, when we do establish a connection with Netlify it will be set to true.
Also, note that we have to wrap our app (pages/_app.js) with our context as we need to access context in our entire app. NavBar and Component are now children to our Context.
// pages/_app.jsimport NavBar from "../components/NavBar";import AuthContextProvider from "../contexts/authContext";import "../styles/globals.css";function MyApp({ Component, pageProps }) { return ( <AuthContextProvider> <NavBar /> <Component {...pageProps} /> </AuthContextProvider> );}export default MyApp;Update your pages/_app.js file accordingly.
Establishing connection with Netlify Identity
To establish a connection with netlify identity we will use the useEffect hook in react
// contexts/authContextimport { createContext, useState, useEffect } from "react";import { netlifyIdentity } from "netlify-identity-widget";export const AuthContext = createContext({ user: null, login: () => {}, logout: () => {}, authReady: false,});const AuthContextProvider = ({ children }) => { useEffect(() => { netlifyIdentity.init(); }, []); return <AuthContext.Provider>{children}</AuthContext.Provider>;};export default AuthContextProvider;We import netlifyIdentity and inside our useEffect hook we simply need to add netlifyIdentity.init( ). All this will do is initialize connection with netlify identity.
Providing value to our App
Next, we need to provide login, logout, user values to our app.
import { createContext, useState, useEffect } from "react";import netlifyIdentity from "netlify-identity-widget";export const AuthContext = createContext({ user: null, login: () => {}, logout: () => {}, authReady: false,});const AuthContextProvider = ({ children }) => { const [user, setUser] = useState(null); useEffect(() => { // on login netlifyIdentity.on("login", (user) => { setUser(user); netlifyIdentity.close(); }); // on logout netlifyIdentity.on("logout", (user) => { setUser(null); }); // connect with Netlify Identity netlifyIdentity.init(); }, []); const login = () => { netlifyIdentity.open(); }; const logout = () => { netlifyIdentity.logout(); }; const context = { login, logout, user, }; return ( <AuthContext.Provider value={context}> {children} </AuthContext.Provider> );};export default AuthContextProvider;That's a lot of code...let me explain
1.Login
We create a login function in which we just use open( ) which is a built-in function of Netlify Identity. All this does is open a login/signup form. We will use this as a callback function on the login button.
2.Logout
Logout function is the same as the login function but we use logout( ) which is a built-in netlify function to log out the user.
Also, we update our useEffect and we add event listeners to log in and log out actions.
On login, the user will be set to the user from null and we close our form.
On logout, we set our user to null.
And we provide all this as context to our app.
Creating Login/Logout Buttons
Now it's time to update our navbar. Open components/navbar file in the code editor.
// components/navbarimport styles from "../styles/Home.module.css";import Link from "next/link";import { useContext } from "react";import { AuthContext } from "../contexts/authContext";const NavBar = () => { const { user, login, logout } = useContext(AuthContext); return ( <nav className={styles.nav}> <Link href="https://dev.to/"> <a>Home</a> </Link> <Link href="https://dev.to/about"> <a>About</a> </Link> <li>{!user && <button onClick={login}>Login/Signup</button>}</li> <li>{user && <button onClick={logout}>Logout</button>}</li> </nav> );};export default NavBar;First, we access login, logout, user values from our context using the useContext hook.
Then we create a login button which on click fires off the login function we created in our context. Same with the logout button.
We conditionally render the buttons based on if the user is logged in or not.
Now click on the login button and voila.

It will ask you for the website URL. You just have to enter the URL of the website you deployed on Netlify.
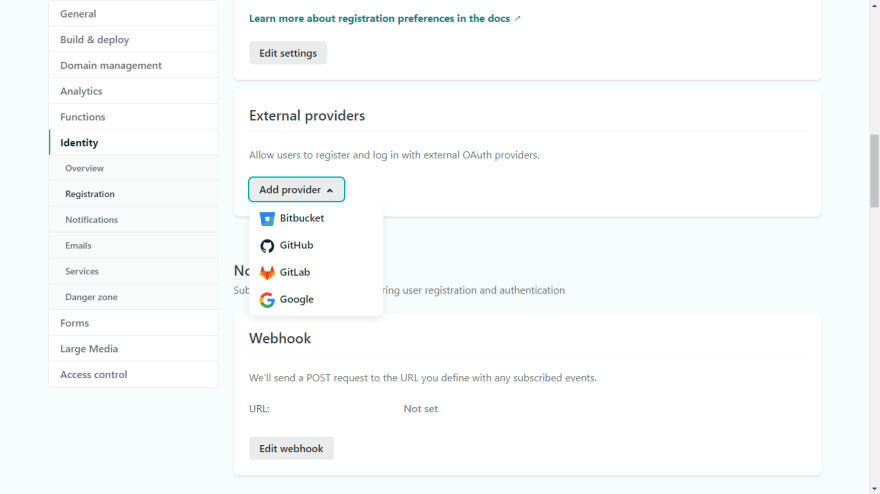
You can also add external providers such as Google, Github as login options. For that head back to Netlify and go to Site Settings -> Identity (on sidebar) and on external providers select the options you want to include.
Conclusion
First, we created authContext to globally provide user values to our Apps. We added user and log-in, logout functions (built-in Netlify Identity functions) in our Context and used them as callback functions to our Login and Logout buttons.
Thank you for reading :)
Drop a like and follow me if you found this useful
Original Link: https://dev.to/bhagatpratik07/next-js-authentication-with-netlify-identity-3ghi
Dev To
More About this Source Visit Dev To