
An Interest In:
Web News this Week
- April 25, 2024
- April 24, 2024
- April 23, 2024
- April 22, 2024
- April 21, 2024
- April 20, 2024
- April 19, 2024
Some of Our Sources
- BoingBoing
- Just Creative
- Pearsonified
- Spoon Graphics
- Smashing Magazine
- Vandelay Design
- Creative Curio
- Noupe
- Dev To
- The Verge
Help Webnuz
Referal links:
Running WordPress on AWS the cheap and easy way
You probably heard a lot of good things about AWS and would like to start (or move) your WordPress site there, but you find it difficult to choose the right service and pricing model for it AWS has over 200 services to choose from with different pricing models. Youre at the right place, this is the article for you! Lets get started!
Advantages
What are the advantages of moving to AWS?
First, it has a global footprint! A large hosting provider has only about 2-3 locations where you can host your website. (Small ones have only one). And not only that, you have to decide this during signup so you are stuck with that location for the rest of your life. On the other hand, AWS has dozens of locations (called regions) to choose from and you arent stuck with any of them. You can have a WordPress site in Tokyo and another one in Singapore. This is good for a number of reasons: getting closer to your clients (thus they can access your site faster) plus compliance with local regulations.
The other advantage compared to hosting providers is security. AWS is built with security in mind and you can expect that if your WordPress site is set up correctly it will be reliably running. Other users will not impact your websites performance.
AWS can adapt to your current needs and you can easily add or remove resources when needed. You only pay for the resources you consume.
Lastly, you will get a free static IP for each website compared to shared hosting where you share the same IP with others. This is excellent for eCommerce websites.
Intro
The service I will guide you through is called Amazon Lightsail. It has a simplified user interface compared to other AWS services and has fixed monthly pricing. The focus of this article is on how we can have a reliable website up and running but with the cheapest option available. We will use Lets Encrypts free SSL certificate compared to Lightsail CDN which is currently free for the first year (up to 50GB) but costs $2.50 USD/month later. Not to mention that if your visitors increase you may be charged $35 USD/mo. This is why we will only use services that have a fixed fee even if your visitor numbers increase.
Setting up an AWS account
If you dont already have an AWS account you can create one by visiting the AWS website and clicking in the Create an AWS Account button on the top right corner. You will be asked to provide your Email address, password, username, personal information including your phone number and your credit card information. Your card will only be charged for the services you use. It is a good idea to secure your account right after creation. Read my First things to set on a newly created AWS account post on how to enable Multi-Factor Authentication on your account.
Amazon Lightsail
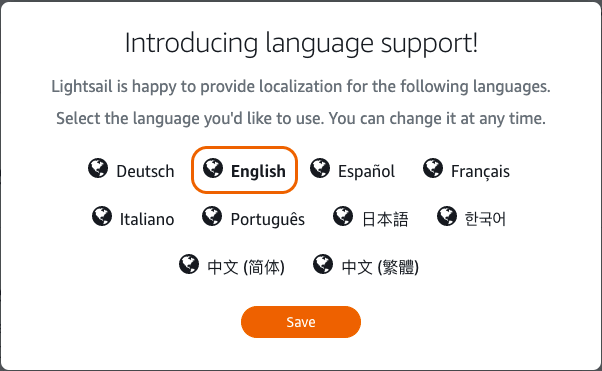
Log in to your AWS account and lets jump into Amazon Lightsail. In the top bar type lightsail and select the Lightsail service or click on this link to start it directly. If this is your first time you will be asked to select your language. Select it, and click on the Lets get started button. You will immediately notice that Lightsail has a much more friendlier interface.
Setting up WordPress
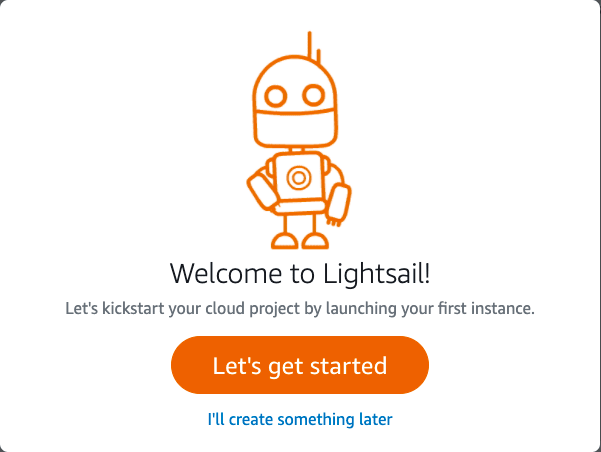
Lets start by creating an Instance. Lightsail will automatically take you to the instance setup with a Welcome message to start your instance. Later you can create it under the Instances tab, with the Create instance button.

Creating an instance
On the select your instance location you choose the location based on the parameters I outlined before. The good thing about Amazon Lightsail, compared to other AWS services, is that the prices are the same in all regions. (This is not true for other AWS services.) You can freely choose a region and the prices wont change. I will select the Frankfurt region due to GDPR.

Next, we select the instance image. Since this article is about WordPress, we will select WordPress.

Now here comes the tricky part, that you may have missed if you havent read this article.
You should always select Enable Automatic Snapshots. AWS doesnt guarantee you that your instance wont fail, and if it fails your data might be lost. This is why we enable automatic snapshots so we can recover our data easily in case of an emergency.

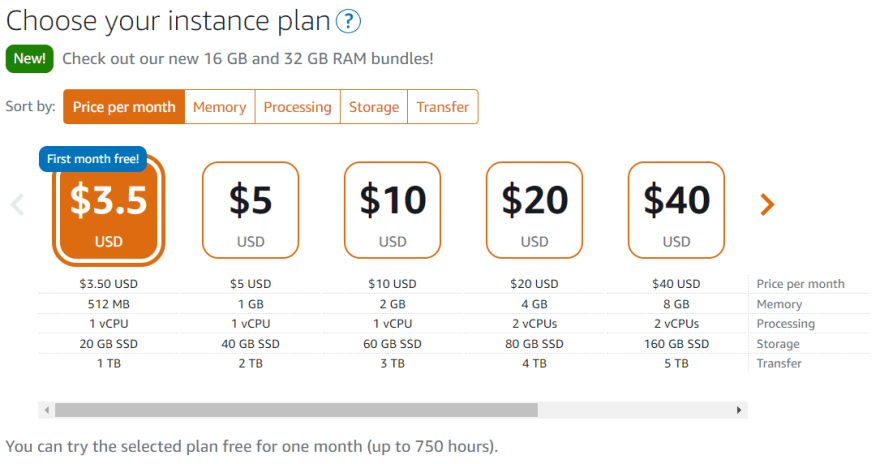
Select a pricing option. Choose the option that meets your needs and fits your budget.
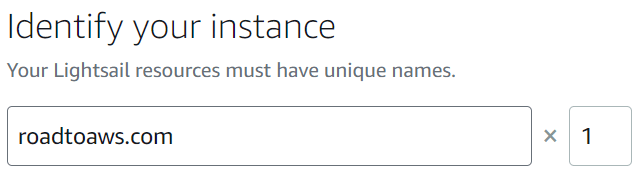
Identify your instance with a friendly name. This is just for display purposes; it has no effect on the instance, but you cannot change it later.
Click on Create instance. Please wait a couple of minutes while your instance is being created in the background. After the instance has been created it will show the state Running on your Instances tab. Your WordPress site is now up and running, but there are a couple of important things we should set before going on a coffee break.
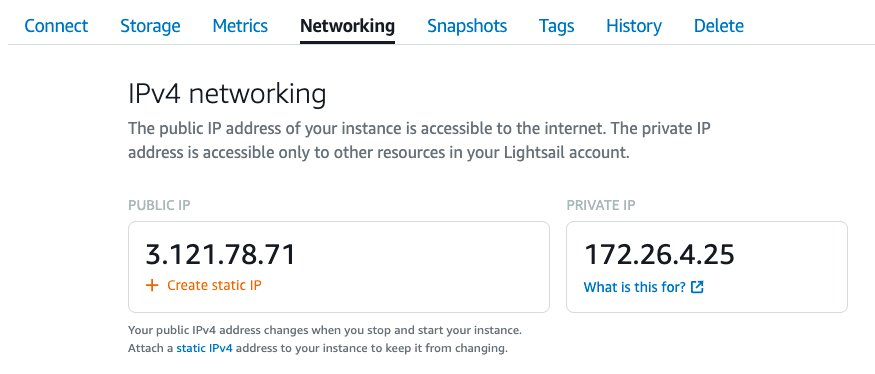
Attaching a static IP
Click on the instance name and select the Networking tab. Select Create static IP. Name your static IP and click Create. You may ask why this is important when there is already an IP address associated with your instance. The problem is that this IP is from a dynamic pool. This means when you restart your instance your IP address will change, and we dont want this. By attaching a free static IP, our IP address will stay the same all the time.
Set up DNS
Now its time to connect your domain with this IP address. If you dont have a domain yet, I suggest registering one at Dynadot because they have cheap and predictable pricing; but if you would like to stick with AWS, you can use Route 53 for that.
Point your domain name to the static IP we created earlier. This can be done by updating your A record with this IP.
If everything is set up correctly by entering your domain name in your browser a fresh new WordPress site will appear.
Setting up SSL
Having an SSL certificate is mandatory nowadays and there are several ways to achieve this. I will be showing how to set up Lets Encrypt, which is a free SSL certificate authority. For this, I have created a simple script that does the heavy work for you. You can find this script on GitHub. To set up SSL first log into your instance via SSH. This is done by selecting the Connect tab on your instance and clicking on the Connect using SSH button. You will be directed to a terminal window but dont worry we wont spend much time here.

A new popup will appear with a terminal. We will paste a simple script in the terminal or you can type it manually. Whichever you prefer.
To paste the script you will find a clipboard icon on the bottom right corner of the window. Click on it and paste the following script in it, then click on the terminal and enter CONTROL + SHIFT + V (or COMMAND + V if you are on a Mac).
wget -O - https://raw.githubusercontent.com/suhajda3/lightsail-ssl/main/lightsail-ssl.sh | sudo bash
The script will ask for your domain name and email address. If everything is set up correctly the script will update your system, set up Lets Encrypt, and will auto-renew it every 90 days, plus it will display your WordPress credentials. Everything we need.
You can run this script any time you would like to update your system.
Make note of your username and password because we will need this later.
Type exit to log out of the terminal and close the window.
Securing your instance (optional)
Since we dont need terminal access to the instance all the time, it is a good idea to disable SSH access. To do this, head over to the Networking tab and click on the trash icon next to the SSH row. Be sure that HTTP and HTTPS are still there because without them we couldnt access our site. When you would like to run the script again or get terminal access, add the SSH rule again.

Finalizing your WordPress install
Our WordPress instance is now set up correctly. Log in to your WordPress site by adding /wp-login.php to the end of your URL. Here you can log into your site with the credentials that the script displayed before.
Before you leave we should change one last thing. Add your Email address in case you lose your password. On the top right corner select Edit Profile and change your Email address then click Update Profile at the bottom of the page. Next click on Settings, General on the left side and change the Administration Email Address as well.
Your WordPress site is now up and running. Congratulations!
Original Link: https://dev.to/aws-builders/running-wordpress-on-aws-the-cheap-and-easy-way-1ff2
Dev To
More About this Source Visit Dev To