
An Interest In:
Web News this Week
- April 1, 2024
- March 31, 2024
- March 30, 2024
- March 29, 2024
- March 28, 2024
- March 27, 2024
- March 26, 2024
Some of Our Sources
- Techcrunch
- TutsPlus - Code
- Just Creative
- Smashing Magazine
- Web Designer Depot
- 24 Ways
- Android Dissected
- Codrops
- Hashedout
- TechPowerUp
Help Webnuz
Referal links:
Using VS Code Teams Toolkit Extension for Teams App Development
In my previous posts related to the Microsoft Teams developer platform, I introduced a few of Teams app types and how to build your first tabs, bots, and message extensions. These tutorials instructed you to use App Studio for manual configurations and minimal local setup, to focus on familiarizing you with the cencept of Teams app features.
However, in this tutorial, I am showing another way to develop, using a newly introduced developer tool, called Teams Toolkit (Preview) for VS Code, which was created to help you build and deploy Teams apps with integrated identity, access to cloud storage, data from Microsoft Graph, and other services in Azure and M365.
Before you begin, let's check if you have set up your working environment to develop on Teams.
Prerequisites
First, make sure if your Teams client allows you to "sideload" custom apps. Check Enable custom Teams apps and turn on custom app uploading before you begin.
Or you can sign up for Microsoft 365 developer program, a free, renewable subscription that comes with a developer tenant sandbox and sample data pack, like mock user data!
And if you haven't using it already, get the latest version of Visual Studio Code. (Earlier versions might not work with the toolkit.)
Installing Teams Toolkit
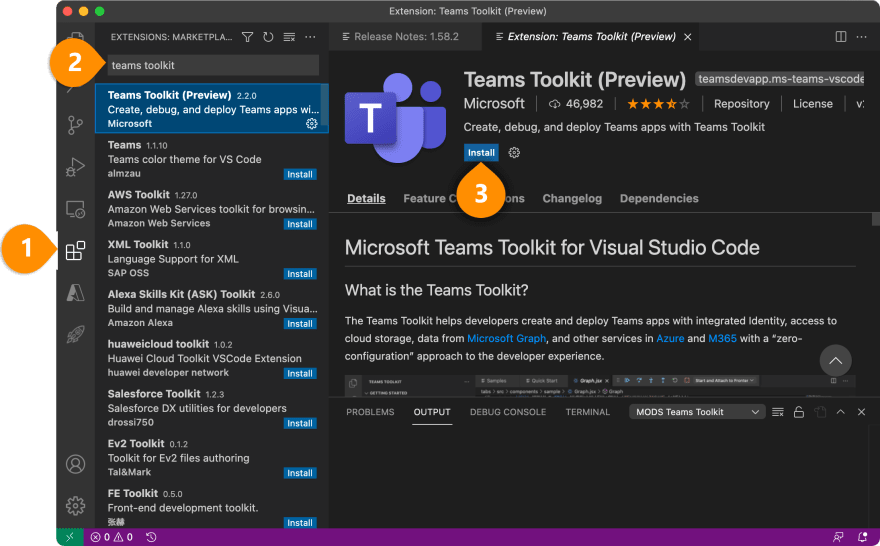
Launch VS Code and now install an extension that helps you develop Teams apps.
Select Extensions icon on the left Activity Bar and install the Microsoft Teams Toolkit. If you see two different versions of Teams, Toolkit, make sure to select the "Preview" version 2.x for this tutorial:
Optional Tools
The following tools will be installed by the Teams Toolkit extension as you need. However, if using Linux (including WSL), you need to install these tools before using:
Creating New Project with Toolkit
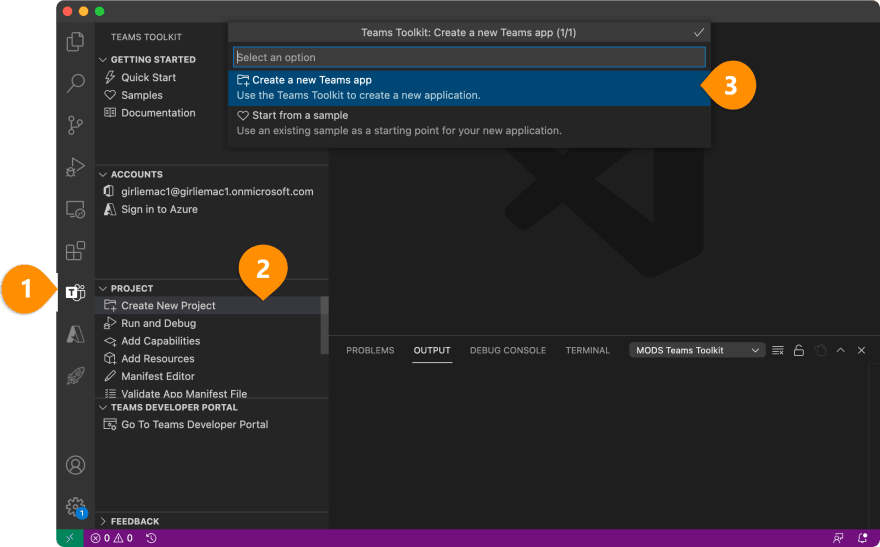
Select Microsoft Teams icon on the left Activity Bar and click Create New Project. At the popup, select Create a new Teams app :
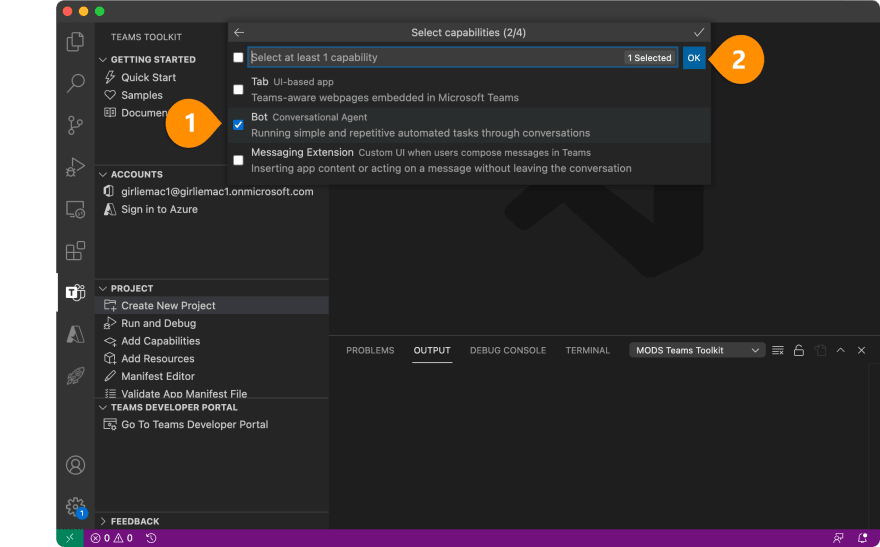
In the Select capabilities section, select one. For this tutorial (and for the next upcoming tutorial - TBD), let's pick Bot, and deselect Tab and select OK.
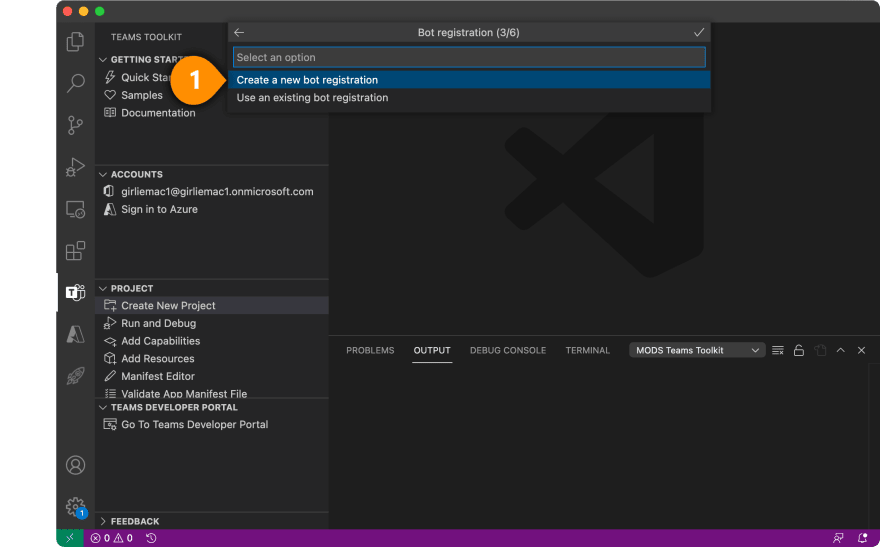
In the Bot registration section, select Create a new bot registration:
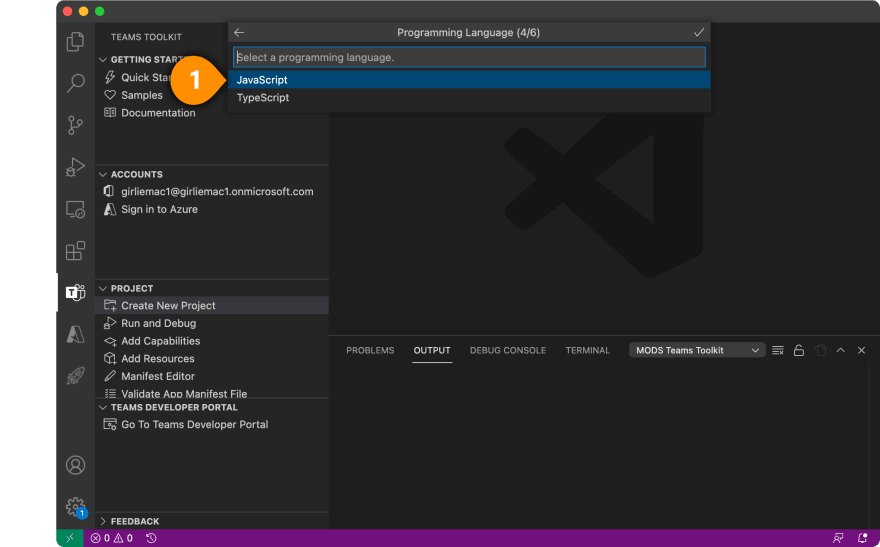
In the Programming Language section, select JavaScript:
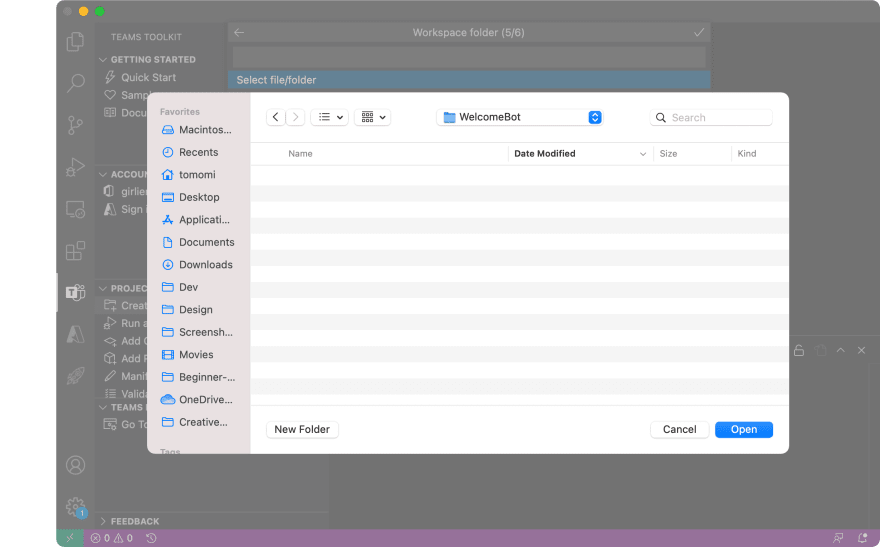
Select a workspace. A new folder will be created within your workspace for the project:
Enter some name for your app. Press Enter to continue:
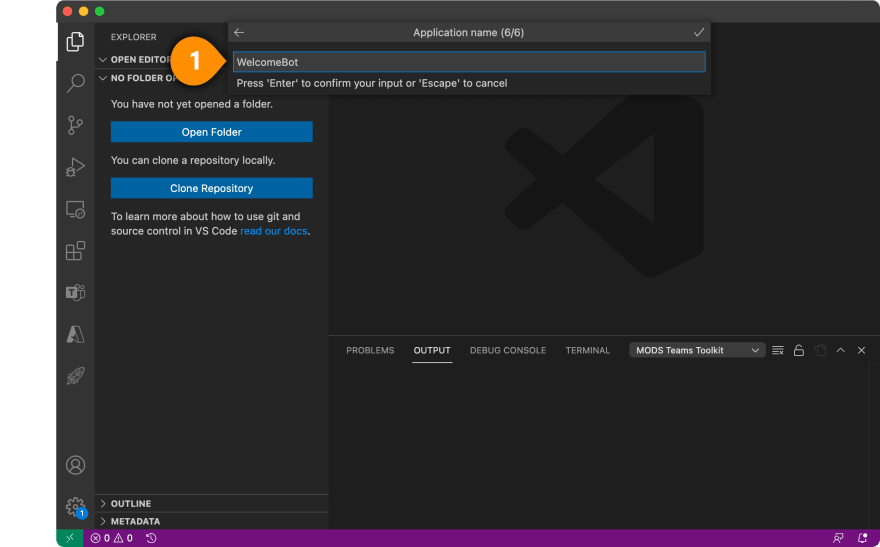
It will take some time to set it up for you.
In this setup process, the toolkit is preparing these for you:
- registering an Azure Active Directory Application within the M365 tenant
- creating an app manifest
- running API locally using Azure Functions Core Tools to support your app
- installing and setting up ngrok, to securely tunnel from your localhost to the Teams client
Running a Sample Bot Locally
Once your project is set up, take a look around and see how the template app looks like:
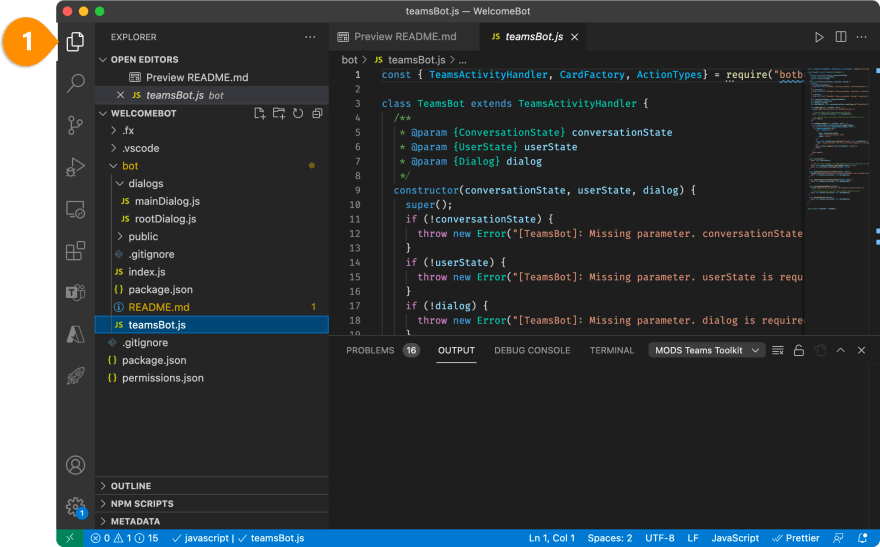
But for now, let's just build this sample app and run it locally.
Press F5 key to enable the debug mode.
Alternativelly, click the debug icon from the side menu:

This can take up a few minutes to complete as all dependencies are downloaded and the app is built for the first time.
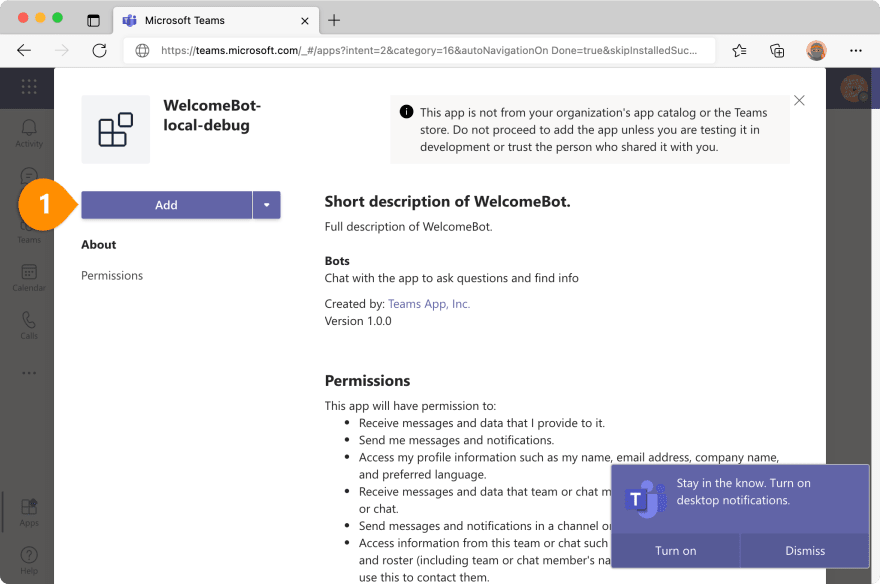
Once it is done, Teams web client will be automatically opened in a browser window. Install it locally by clicking Add:
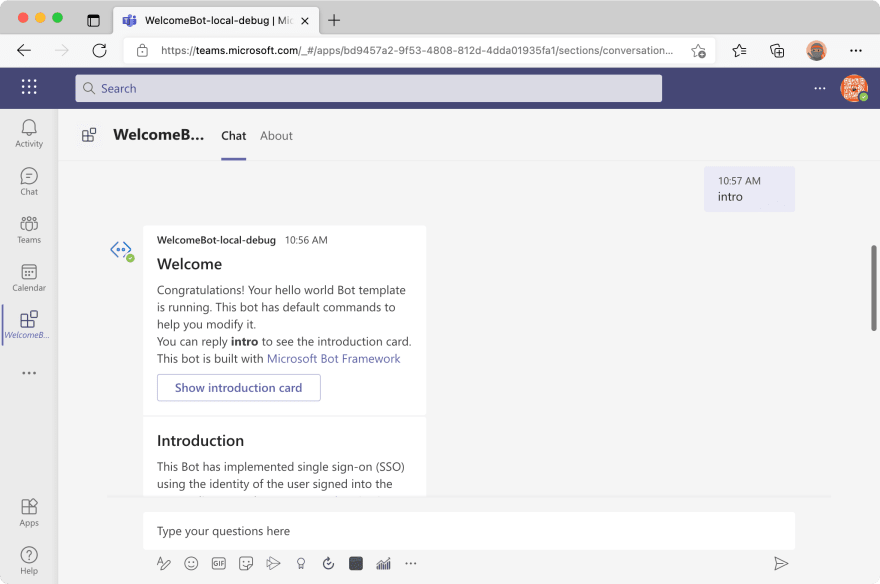
Once the app is intalled, try the bot by typing a command or pick from the menu:
Granting User Permissions
When you try show command, you should notice the app asks your permission to display your information like this:

and once you hit Continue, it will open an authorization screen:
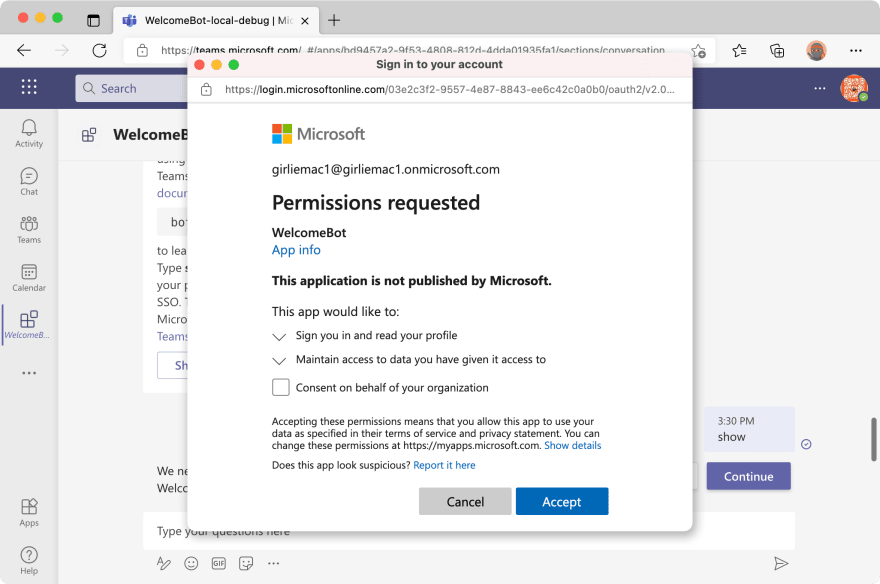
So, it means that your app (and any 3rd party apps!) just cannot automatically grab a user's information without the user's consent!
In next tutorial, I will explain about Microsoft Graph to access user information and how you can implement it for Teams, so stay tuned
Original Link: https://dev.to/azure/using-vs-code-toolkit-for-teams-app-development-2o0g
Dev To
More About this Source Visit Dev To