
An Interest In:
Web News this Week
- April 1, 2024
- March 31, 2024
- March 30, 2024
- March 29, 2024
- March 28, 2024
- March 27, 2024
- March 26, 2024
Some of Our Sources
- Slashdot
- Team Treehouse
- Joshua Blankenship
- Smashing Magazine
- Noupe
- CSS Globe
- Wal You
- Specky Boy
- Android Dissected
- TechPowerUp
Help Webnuz
Referal links:
How To Deploy Python Scrapy Spiders for Free on Cloud
Running Scrapy spiders in your local machine can be very convenient during the early stage of development. But, we would eventually need to deploy and run our spiders in the cloud periodically.
In search of free options for running periodic crawling jobs, I have come across a few options available in the market such as Zyte Scrapy Cloud where you can easily deploy, run and scale your web crawlers.
However, if you intend to multiple spiders periodically, you would have to start paying.
Goal
By the end of this article, you should be able to deploy your Scrapy project and schedule a periodic job to crawl data from your target site for free.
Note that this might not be an ideal solution for large-scale crawler applications where you would need to manage hundreds of spiders.
In that case, using paid service to scale and manage your spiders (with distributed crawling) should be part of your considerations.
Prerequisite
To follow, I would expect you to have your Scrapy project ready to be deployed and running scrapy crawl examplespider command should work.
Your project root directory should contain either one of these requirements.txt, Pipfile or setup.py.
If none of these files is present in your apps root directory, the Python buildpack will fail to identify your application correctly. (source)
Enters Heroku

Heroku is a container-based cloud Platform as a Service (PaaS)
1. Heroku account registration
First, you would need to register an account with Heroku, its free!
2. Installing Heroku CLI
After your account registration, lets use Heroku CLI to create and manage our project. You may check out the installation steps for other OS here.
# For macOS:$ brew tap heroku/brew && brew install heroku3. Login
To log in using Herokus CLI, simply cd to your project folder and run heroku login.
heroku: Press any key to open up the browser to login or q to exit:Opening browser to https://cli-auth.heroku.com/auth/cli/browser/xxxx-xxxx-xxxx-xxxx-xxxx?requestor=xxxx.xxxx.xxxxLogging in... doneLogged in [email protected]4. Git
At this stage, you should already have set up your project with git init and git commit etc.
The next steps are to turn your project into a git repository and push it to Heroku.
# i. To create a Heroku application:$ heroku apps:create scrapy_example_project# ii. Add a remote to your local repository:$ heroku git:remote -a scrapy_example_projectOnce were done here, lets open up our Heroku dashboard page for your newly created Heroku application.
Optional: Setup free tier managed PostgreSQL service on Heroku
You would only need this step if your Scrapy project has a pipeline that stores scraped items in a PostgreSQL database. Take note that the free tier only has a limit of 10,000 rows at the time of writing this.

Select Application Resources tab Find Heroku Postgres Select your plan & Submit Order Form
This step is fairly simple, simply go to the Resources tab on your Heroku dashboard and look for Heroku Postgres, select the free tier (or whichever you deem fit).
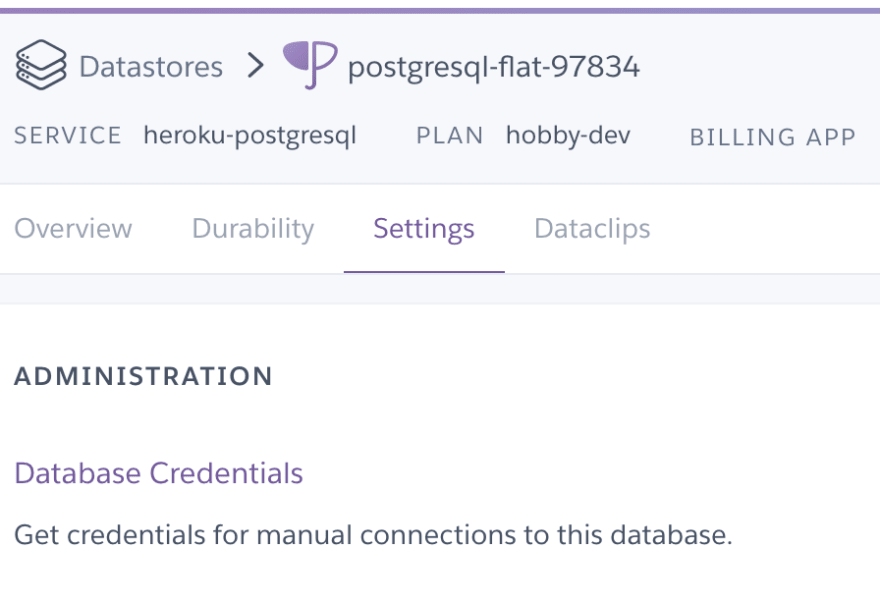
Select View Credentials
To look for your database credentials, simply click on your Heroku Postgres add-on select Settings View Credentials
Finally, configure your Scrapy projects connection to your database accordingly.
# settings.py# This is just an example, you might be using a different variable nameDATABASE_CONNECTION_STRING = '{drivername}://{user}:{password}@{host}:{port}/{db_name}'.format( drivername='postgresql', user=os.environ.get('PG_USERNAME', 'postgres'), password=os.environ.get('PG_PASSWORD'), host=os.environ.get('PG_HOST', 'localhost'), port=os.environ.get('PG_PORT', '5432'), db_name=os.environ.get('PG_DATABASE', 'burplist'),)# Or alternatively:DATABASE_CONNECTION_STRING = postgres://xxxx:[email protected]:5432/xxxxxx5. End Results
By the end of this, if you were to visit your Heroku dashboard activity feed, you should see your application there where the latest activity says that your app has been deployed.
If you try to run heroku run scrapy crawl examplespider on your local terminal, you should see that it will attempt to run the crawler on your Heroku server.
Heroku Scheduler
This section of the article shows you how you can run your crawlers/spiders periodically.
Though Heroku offers several different schedulers that could run your application periodically, I personally prefer Heroku Scheduler as it has a free tier and it is super simple to use.
To use the free tier of this add-on, Heroku requires you to add a payment method to your account.

Select Application Resources tab Find Heroku Scheduler Select your plan & Submit Order Form
1. Configuration
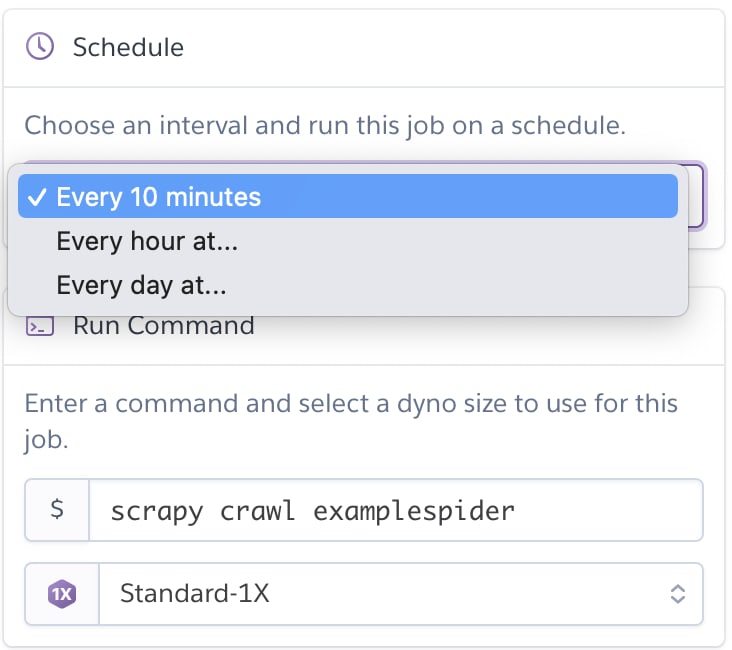
This is how the Add Job screen would look like
Inside your newly added Heroku Scheduler add-on, simply select Add Job on the top right corner and you should see the screen as shown in the picture beside.
To run the scrapy crawl examplespider command periodically, simply select a time interval and save job.
2. How do I run all my spiders in one single command?
Locally:
$ scrapy list | xargs -n 1 scrapy crawlOn Heroku from your local terminal:
$ heroku run scrapy list | xargs -n 1 heroku run scrapy crawl3. How do I schedule a weekly, monthly job?
Simply configure our Heroku Scheduler to run a bash script every day at a time where the bash script checks if today is the day of the week before running your actual scrapy crawl examplespider commands.
Example bash script. E.g.: run bash task.sh weekly 3 to run on every Wednesday
#!/bin/bash# Currently Heroku Scheduler only supports scheduling at every 10min/hour/day interval# Reference: https://dashboard.heroku.com/apps/burplist/scheduler# To run every Monday# ./task.sh weekly 1# To run now# ./task.shif [[ "$1" == "weekly" ]]; then echo "Frequency: <Weekly> | Day of the week: <$2>" if [ "$(date +%u)" = "$2" ]; then echo "Starting to get data from the ..." scrapy list | xargs -n 1 scrapy crawl echo "Finished running all ." fielse echo "Frequency: <Now>" echo "Starting to get data from the ..." scrapy list | xargs -n 1 scrapy crawl echo "Finished running all ."fi
Done!
Closing Thoughts
To wrap things up, I have found a lot of success in deploying and running my spiders periodically with this method. The only downside here is the free tier version of Heroku Postgres which only supports up to 10,000 database rows.
In this case, we can easily opt-in for the paid version of it and scale our database accordingly based on our demand. On a side note, we could also easily swap out our Scrapy projects database instance to use another cloud RDS solution such as Amazon RDS.
On top of these, you can also easily opt-in for other available Heroku add-ons for logging and monitoring purposes.
Another Free Alternative Method
While I am aware that we could use Scrapyd to host your spiders and actually send requests, alongside with ScrapydWeb, I personally prefer to keep my scraper deployment simple, quick, and free.
Thank you for reading and take care!
Original Link: https://dev.to/jerrynsh/how-to-deploy-python-scrapy-spiders-for-free-on-cloud-3l83
Dev To
More About this Source Visit Dev To