
An Interest In:
Web News this Week
- April 25, 2024
- April 24, 2024
- April 23, 2024
- April 22, 2024
- April 21, 2024
- April 20, 2024
- April 19, 2024
Some of Our Sources
- Techcrunch
- Technology Review
- Simplebits
- Just Creative
- Creative Curio
- Fuel Your Creativity
- Web Designer Depot
- Stylized Web
- Spyre Studios
- Hashedout
Help Webnuz
Referal links:
Kubernetes for Dummies
After receiving much positive feedback on my post Docker for Dummies, I wanted to create a post about Dockers often-paired technology Kubernetes. If you havent read Docker for Dummies yet, please read it here. Understanding a container service like Docker is fundamental to having a good grasp of Kubernetes. In fact, Kubernetes is capable of managing other container runtimes that will not be covered in this post. In this post I will explain what Kubernetes is, what problems it solves with containers, and how you can get started using it today.
An Introduction to Kubernetes
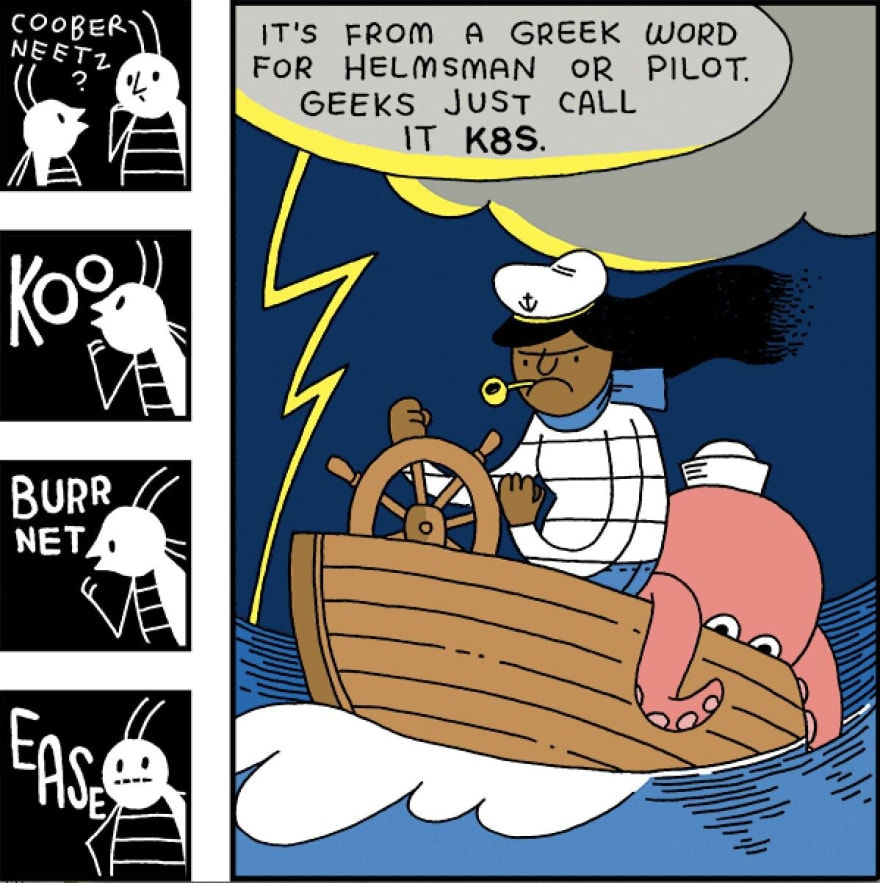
Kubernetes is derived from the Greek word (kubernts), which means pilot or helmsman. The Kubernetes logo of a ship's steering wheel further enforces the idea of piloting or managing, which is exactly what Kubernetes does with Docker containers. Kubernetes manages Docker containers in a variety of ways so it does not have to be done manually. Kubernetes is often referred to as K8s for simplicity because of the 8 letters in between K and s. I will be referring to Kubernetes as K8s from here on.
Using K8s further abstracts machines, storage and networks from their physical implementation. As described in the last post, manually managing numerous containers can create similar issues to managing virtual machines. However, managing containers is especially important because cloud companies bill you for things like computing time and storage. You dont want to have many running containers doing nothing for this reason. In addition, you also dont want one container taking a network load it cannot handle by itself. K8s is designed to solve problems like these.
What services does K8s provide?
- Service discovery and load balancing: K8s can locate a container using a DNS name or IP address and can distribute network traffic to other containers to stabilize deployments.
- Storage orchestration: You can automatically mount a storage system of your choice, whether it be locally, with a cloud provider such as AWS or GCP, or a network storage system such as NFS iSCSI, Gluster, Ceph, Cinder, or Flocker.
- Automated rollouts and rollbacks: You can define the desired state of deployed containers and change the state at a controlled rate. For example, you can automate Kubernetes to create new containers for your deployment, remove existing containers and adopt all their resources to the new container.
- Automatic bin packing: You can provide K8s with a cluster of nodes to run containerized tasks and specify how much CPU and memory each container needs. Kubernetes can automatically fit containers onto nodes to make the best use of resources.
- Self-healing: K8s restarts containers that fail, replaces containers, kills containers that don't respond to your user-defined health check, and doesn't advertise them to clients until they are ready to serve.
- Secret and configuration management: K8s lets you store sensitive information such as SSH keys, OAuth tokens and passwords. You can update these secrets and app configuration without rebuilding your container images and without exposing secrets in your stack configuration.
We will only scratch the surface of these features in this post.
Some Definitions
It is important to understand these basic K8s concepts. Again, you should also be familiar with container services such as Docker before continuing.
Pods are groups of one or more containers. Pods have shared storage and network resources which have specifications on how to run the containers. They are the smallest deployable units of computing that you can create and manage using K8s. Pods run on nodes together as a logical unit, so they all share the same IP address but can reach each other via localhost. Pods can also share storage but do not have to run on the same machine since containers can span multiple machines.
Nodes are physical or virtual machines that are not created by K8s. Typically, you would have several nodes in a cluster but you may have just one node in a learning or resource-limited environment. Nodes are created manually or with public cloud services such as AWS EC2 or OpenStack, so you need to have basic infrastructure laid down before you use K8s to deploy applications. From this point you can define virtual networks, storage, etc. One node can run multiple pods.
Deployments are a set of Pods. A Deployment ensures that a sufficient number of Pods are running at one time to service the app. Deployments can also shut down Pods that are not needed by looking at metrics such as CPU utilization.

Let's Get Started Using K8s
To run K8s locally, I will be using Minikube and Kubectl. You can install the latest version of Minikube at https://minikube.sigs.k8s.io/docs/start/ and Kubectl at https://kubernetes.io/docs/tasks/tools/
Please note that you must also have Docker installed to move forward with this tutorial.
1) Install prerequisites
Use docker --version and minikube version and kubectl version Don't worry about the message stating the connection to localhost:8080 was refused, we will address this later. 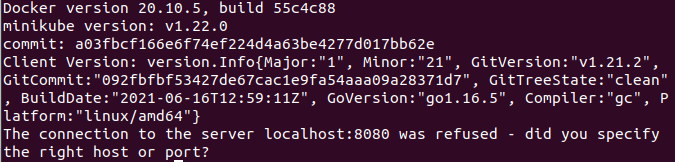
2) Create nodes with Minikube
To create nodes, start up Minikube. For example, starting Minikube with 2 nodes:minikube start --nodes=2
This will take a while the first time around, so be patient. The first time I ran this it easily took 5-10 minutes to complete.
We can check the status of our nodes using minikube status

The first node is the master node. You can see that it has the control plane, running host, kubelet, API, and kubeconfig configured. The second node is the work node.
We can see that we have 2 containers running if we run:docker ps
This image shows the master node as ce3359246578 and the work node as 44697ff120e4 with relevant information for both nodes.
We can view our nodes using:kubectl get nodes
By running kubectl get pods -A, we can retrieve all pods in all namespaces.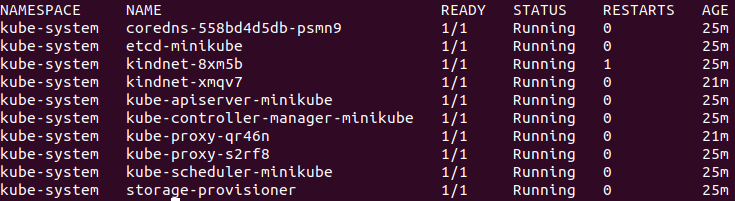
All of the these pods make up the control plane. For example, kube-apiserver-minikube is the API which is exposed for external and internal communications. So when we type kubectl, this is the API server that handles the request for it.
3) Creating a deployment
We can check the Pods by typing kubectl get pod. At this point, you should not have any Pods and it will read No resources found in default namespace
Pods are the smallest unit of the K8s cluster but in practice, you dont create Pods but rather deployments. To create a kubernetes deployment, the usage is kubectl create deployment <NAME> --image=<image>. For this particular deployment, we will be creating a nginx deployment:kubectl create deployment nginx-depl --image=nginx
For those who don't know, NGINX is an open-source webserver that is used to develop server-side applications.
Now when we run kubectl get deployment and kubectl get pod we get the following output.

Our usage of kubectl create deployment <NAME> --image=<image> is the most minimalistic way to create a deployment. The rest of the deployment uses default configuration. Between the deployment and Pod there is another layer which is automatically manages by K8s deployment called ReplicaSet.
The ReplicaSet specifies how to identify Pods that it can acquire, a number of replicas indicating how many Pods it should be maintaining, and a Pod template specifying the data of new Pods it should create to meet the number of replicas criteria. A ReplicaSet then fulfills its purpose by creating and deleting Pods as needed to reach the desired number. When a ReplicaSet needs to create new Pods, it uses its Pod template.
We can view the ReplicaSet with kubectl get replicaset
We can see the ID for the ReplicaSet appended to the deployment name: 5c8bf76b5b. You may notice that the ReplicaSet ID is included in the ID for the Pod; like stated before the ReplicaSet is a layer that sits between the Deployment and the Pod.
So all together, this is how the layers of Abstraction work. A Deployment manages a ReplicaSet,a ReplicaSet manages all the replicas of the Pod, and a Pod is an abstraction of a container.
4) Edit the Deployment
Edit your deployment using:kubectl edit deployment nginx-depl
This will show the auto-generated configuration file. Don't worry, you don't need to understand everything in the config file at this time. For the sake of this tutorial, we will only edit the image version which can be found somewhere in the middle of the file.
When you are finished editing, type :wq for write & quit. This will terminate the old image and create a new one.
Upon invoking kubectl get replicaset, we can see that the old one has no pods in it and a new one has been created as well.
5) Debugging Pods
Another useful command is kubectl logs <Pod Name>.
If you run this on nginx, you will get nothing because nginx did not log anything. To demonstrate logs we can use MongoDB, which is a document database.
kubectl create deployment mongo-depl --image=mongo
Executing kubectl logs mongo-depl-5fd6b7d4b4-vbf2t will produce concise logs and kubectl describe pod mongo-depl-5fd6b7d4b4-vbf2t will produce a more verbose output.
Logging will help with debugging if something goes wrong, and describe produces something a little more intelligible.
Another useful command to see whats going on inside the Pod is kubectl exec -it <Pod Name> -- bin/bash. (-it stands for interactive terminal)
Suppose we want to use this to enter our MongoDB Pod:kubectl exec -it mongo-depl-5fd6b7d4b4-vbf2t --bin/bash and if we type ls we can see our directories. To exit this, simply type exit.

6) Deleting deployments
Deleting a Deployment will delete all of the Pods inside of the Deployment. For example, to delete the MongoDB Deployment type:kubectl delete deployment mongo-depl
The following commands are useful, but you should be careful not to delete anything important
You can delete all the pods in a single namespace with this command:
kubectl delete --all pods --namespace=foo
You can also delete all deployments in namespace which will delete all pods attached with the deployments corresponding to the namespace
kubectl delete --all deployments --namespace=foo
You can delete all namespaces and every object in every namespace (but not un-namespaced objects, like nodes and some events) with this command:
kubectl delete --all namespaces
However, the latter command is probably not something you want to do, since it will delete things in the kube-system namespace, which will make your cluster not usable.
This command will delete all the namespaces except kube-system, which might be useful:
for each in $(kubectl get ns -o jsonpath="{.items[*].metadata.name}" | grep -v kube-system);
do
  kubectl delete ns $each
done
7) Apply configuration files
To apply a configuration file, we must first create one. In a directory you can refer back to, create a config file for the nginx Deployment.
touch nginx-deployment.yaml
Next, copy and paste this configuration to the file:
apiVersion: apps/v1
kind: Deployment
metadata:
name: myapp
labels:
app: nginx
spec:
replicas: 1
selector:
matchLabels:
app: nginx
template:
metadata:
labels:
app: nginx
spec:
containers:
- name: nginx
image: nginx:1.16
ports:
- containerPort: 80
Everything under "template" is the blueprint for the Pods. The first spec tag is specification for Deployments, and the second spec tag is specification for the Pods.
This config file basically states we want one container inside of the pod with an NGINX image and we are going to bind that on port 80.
When we use kubectl apply -f nginx-deployment.yaml, it creates a deployment using the configuration. Lets say that in the config file we changed the Deployment to create 4 replicas instead of 1.
After typing kubectl get pod and kubectl get deployment we get the following output:
As you can see, K8s knows when to create or update deployment.
Conclusion
By following this article you should gain a good understanding of the fundamentals of Kubernetes. In summary, we learned what Kubernetes is and what it can do at a high level. We learned what services K8s provides as well as some important definitions. We then used Docker, Minikube and Kubectl to explore CRUD commands for Deployments. Finally, we learned how to debug Pods and use configuration files for Deployments. It should be mentioned that you can also use kubectl for services, volumes, any other K8s component.

Final thoughts
I hope you enjoyed following along, and I hope you learned something! Kubernetes is a very useful tool for managing containers, so I'm glad you made it this far. You can always find much more thorough documentation at https://kubernetes.io/docs/home/
If you would like for me to expand on this lesson in the future, if you have any questions or if I missed something please let me know. I really value your feedback, so please leave me a comment!
P.S.
I am currently looking for a job in DevOps! If you know someone who is hiring entry-level DevOps engineers please send them my resume which can be found at https://smcgown.com and https://www.linkedin.com/in/steven-mcgown/
Thank you!
Original Link: https://dev.to/stevenmcgown/kubernetes-for-dummies-5hmh
Dev To
More About this Source Visit Dev To