
An Interest In:
Web News this Week
- April 1, 2024
- March 31, 2024
- March 30, 2024
- March 29, 2024
- March 28, 2024
- March 27, 2024
- March 26, 2024
Some of Our Sources
- Slashdot
- Web Designer Wall
- Abduzeedo
- Naldz Graphics
- Web Design Ledger
- 24 Ways
- Wal You
- CSS Tricks
- Spyre Studios
- Daily Now
Help Webnuz
Referal links:
Serving static files and creating websites using Python Flask
No matter who you are - a business owner or a developer - having a website shall be inevitable at a point in your career. There are a wide variety of options at your disposal - from no-code, dropdown website builders to hardcore web development using JavaScript frameworks like React.
In this article, we'll talk about another option to build a basic, static website using Python Flask and HTML/CSS + JavaScript, which falls somewhere in between this spectrum of web development choices. This is also a demonstration of how versatile the Flask microframework is!
Additionally, we'll see how we can publish our website online using Heroku.
You can refer to my previous article to understand how to setup Flask to make simple API calls. It will also serve as a good base for this tutorial.
Source code for this tutorial can be found on my GitHub
Prerequisites
If you haven't already, install Flask with the command:
pip install FlaskFolder structure
Create a folder in a location of your choice and open it using your favorite code editor. This will be our workspace folder.
In this workspace folder, create a file called main.py. This file will hold our Flask code with all the routes and configurations.
Within the same folder, create another folder called static. Leave it empty for the moment.
Flask setup
Open the created main.py file and import the Flask module in the first line.
from flask import FlaskThen we initialize the Flask object as usual. However, we pass in two more parameters to the constructor - static_folder as static (which is our static directory name) and static_url_path, which we'll leave as blank.
app = Flask(__name__, static_folder='static', static_url_path='')Building our webpage
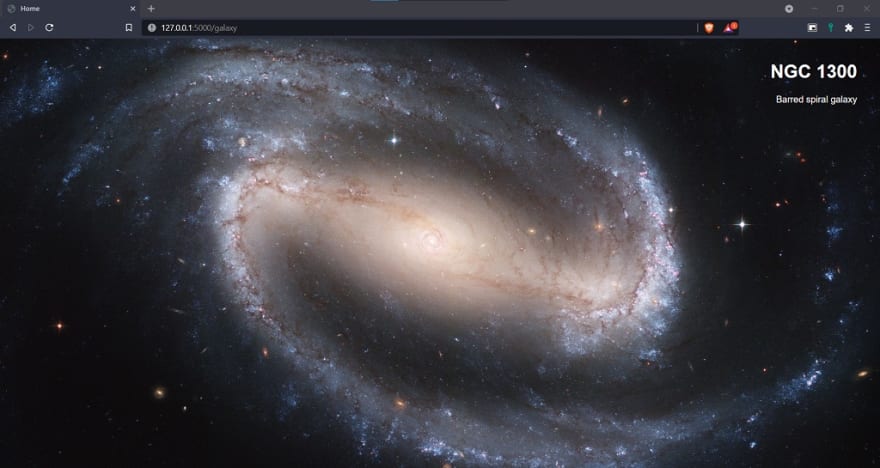
In order to serve a static webpage, we need to make an HTML file that will hold our webpage content. Create a file within the static directory called galaxy.html.
You can put any valid HTML code in this file. I have included a basic webpage with some styling below, feel free to edit this code as it suits you!
<html> <head> <title>Galaxy</title> </head> <style> body { background: url("https://upload.wikimedia.org/wikipedia/commons/thumb/5/52/Hubble2005-01-barred-spiral-galaxy-NGC1300.jpg/2560px-Hubble2005-01-barred-spiral-galaxy-NGC1300.jpg"); background-position: center; background-repeat: no-repeat; background-size: cover; margin: 40px; } .text { color: white; font-family: sans-serif; text-align: end; } </style> <body> <h1 class="text">NGC 1300</h1> <p class="text">Barred spiral galaxy</p> </body></html>Serving our webpage
Now lets serve this static webpage we just created. In the main.py file, we'll add a new GET request with route /galaxy.
@app.route('/galaxy')def galaxy():We will then add the magic code that will automatically serve this static webpage as a route. The Flask object contains a function called send_static_file, which accepts the name of the file located in your static directory as the parameter, and returns it back as a valid HTML response.
@app.route('/galaxy')def galaxy(): return app.send_static_file('galaxy.html')Finally, we'll add the code to execute our Flask server at the bottom of the main.py file. We'll pass in threaded as True to allow multithreaded operations, and set port to 5000.
if __name__ == '__main__': app.run(threaded=True, port=5000)In the end, the entire main.py file looks like this.
from flask import Flaskapp = Flask(__name__, static_folder='static', static_url_path='')@app.route('/galaxy')def galaxy(): return app.send_static_file('galaxy.html')if __name__ == '__main__': app.run(threaded=True, port=5000)Run the code by executing the command python main.py, and navigate to http://localhost:5000/galaxy or http://127.0.0.1/galaxy to see the magic!
You can similarly add more routes and serve other static HTML files to build a complete website!
Deploying online
Now that you have finished building your pages and added the relevant Flask code, its time to publish your website on the internet for everyone to see. To deploy your website online, we will use a combination of GitHub and Heroku.
Uploading your code to GitHub.
Log in to your GitHub account (or create a new one) and create a new repository. Name it as you wish. Once done, with the working directory set as your workspace folder, run the following commands one after the other.
Note: make sure you replace
<YOUR_USERNAME>with your GitHub Username and<YOUR_REPOSITORY_NAME>with the repository name you just created.
git initgit remote add origin https://github.com/<YOUR_USERNAME>/<YOUR_REPOSITORY_NAME>.gitgit branch -M maingit add .git commit -m "Initial commit"git pushSetting up Heroku
Heroku is a cloud platform that allows us to operate applications in the cloud. We will use Heroku to deploy and publish our website on the web.
Publishing to Heroku is free for simple websites with low traffic.
Create a Heroku account on heroku.com and confirm your email address. Once done, go ahead and create a new team and call it anything you wish.
Within that new team, you will find the New button. Click on it and select Create New App
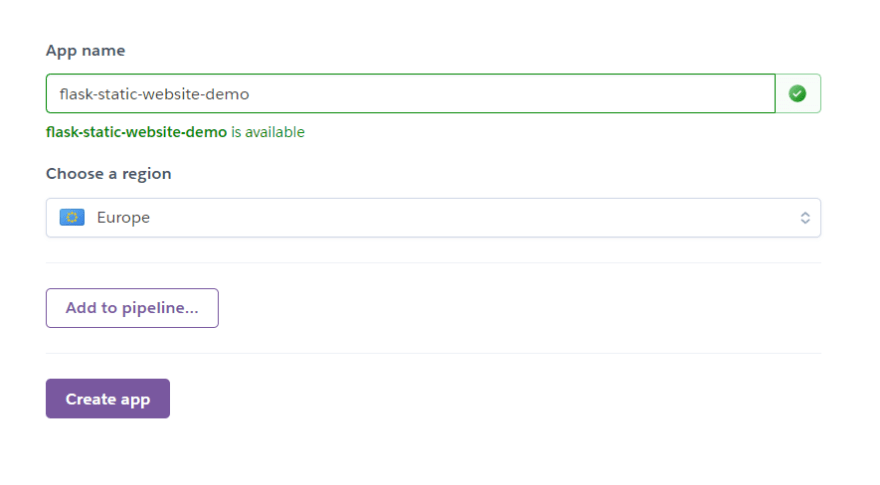
On the following page, you will be asked to name your new app and choose a region. Name your website appropriately and select any region. Click Create App to continue.
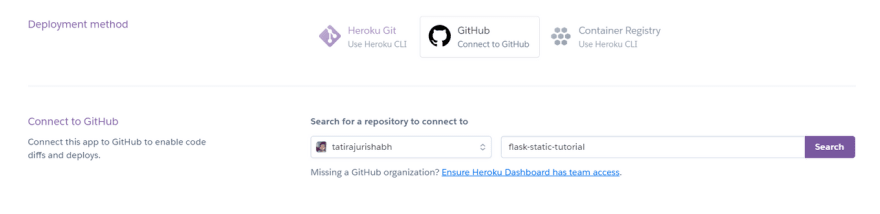
Subsequently, you will be shown a page where you will find an option to select a deployment method. Select GitHub. This will reveal an option to connect your Heroku account with your GitHub account. Follow the steps as instructed.
Once connected, a search bar will appear. Enter your repository name and hit search, and select your repository when it appears in the search results.
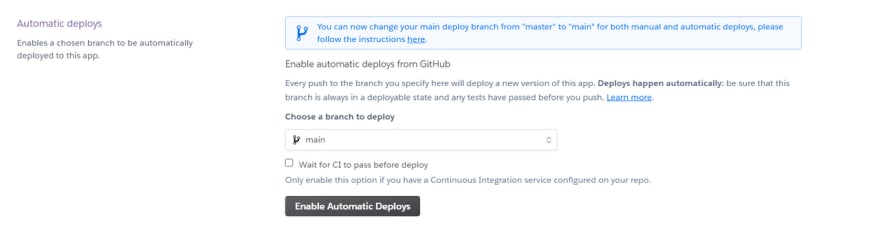
After linking your repository, you will be shown a section titled Automatic Deploys. Select the branch (main by default) where your website code resides, and click Enable Automatic Deploys.
This completes our Heroku setup. Moving along.
Deploying your website
Before deploying your website, Heroku must know in which programming language is the website being served, for which it requires a file called Procfile.
Create a file called Procfile (no extension) in the root of the workspace directory. Include the following line in the file.
web: gunicorn main:appGunicorn is an HTTP web server for Python
We must also create a file called requirements.txt, that tells Heroku what dependencies to install before running our Flask server. Create this file in the root of the workspace directory, and add the following content in it.
FlaskgunicornOnce done, push these changes to GitHub using the following commands.
git add .git commit -m "Added Procfile and Requirements"git pushSince we enabled Automatic Deploys, Heroku will automatically deploy your website to https://<YOUR_HEROKU_APP_NAME>.herokuapp.com/ in a few minutes. Once done, you can visit that link and see your website live on the internet.
Ending Notes
We just saw a simple way to serve static webpages using Flask. We also saw how to easily deploy the same online using Heroku. This method is not only limited to HTML webpages, but also any type of file as long as it exists in the static folder.
In the upcoming articles of the series, well look at advanced features that we can build using Flask, including authentication (login/signup), and data storage.
Let me know in the comments section if you have any feedback or queries, and as always, keep coding!
Original Link: https://dev.to/rtficial/serving-static-files-and-creating-websites-using-python-flask-41c3
Dev To
More About this Source Visit Dev To