
An Interest In:
Web News this Week
- April 24, 2024
- April 23, 2024
- April 22, 2024
- April 21, 2024
- April 20, 2024
- April 19, 2024
- April 18, 2024
Some of Our Sources
- Team Treehouse
- Joshua Blankenship
- Pearsonified
- Spoon Graphics
- Six Revisions
- You The Designer
- Creative Curio
- Fuel Your Creativity
- Android Headlines
- The Verge
Help Webnuz
Referal links:
How to host your React App on your custom domain or its sub-domain using AWS Amplify and Route 53
Hey everyone, hope y'all are safe and sound.
I recently purchased a custom domain for my portfolio from GoDaddy. This was my first time when I was purchasing domain and was all set to host my portfolio on it.
The process was not straight forward, also I couldn't find enough help from the internet. But after few hit&trials, I finally managed to accomplished my goal.
Therefore I am jotting down few steps from my experience, which one can follow to deploy their react app in the easiest way on their custom domain using AWS Amplify.
NOTE: I am assuming that you already have a react-app ready and pushed to your github(or any other version control service) repository.
PART-1: DEPLOY REACT APP ON AWS AMPLIFY
- Visit aws.amazon.com
- Create an account on AWS.
- You will be required to add your basic details, and also a payment method.NOTE: You don't need to pay for anything on AWS in this guide, this payment method will just be used when you exclusively use a paid service.
- Once you sign-up, go to AWS console
- On the top-left corner, can be seen services dropdown which will enlist the services provided by AWS in the following way:
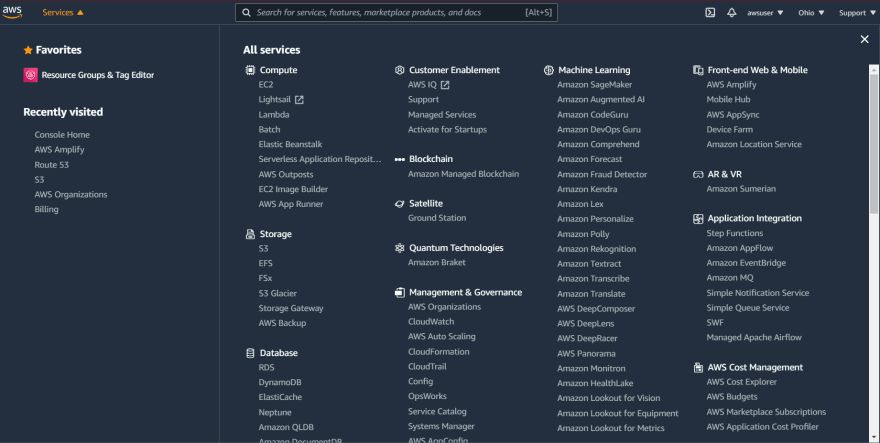
- Look around for AWS Amplify that should be present under Front-end Web & Mobile category.
- Open AWS Amplify, and scroll to bottom of the page to reach here:
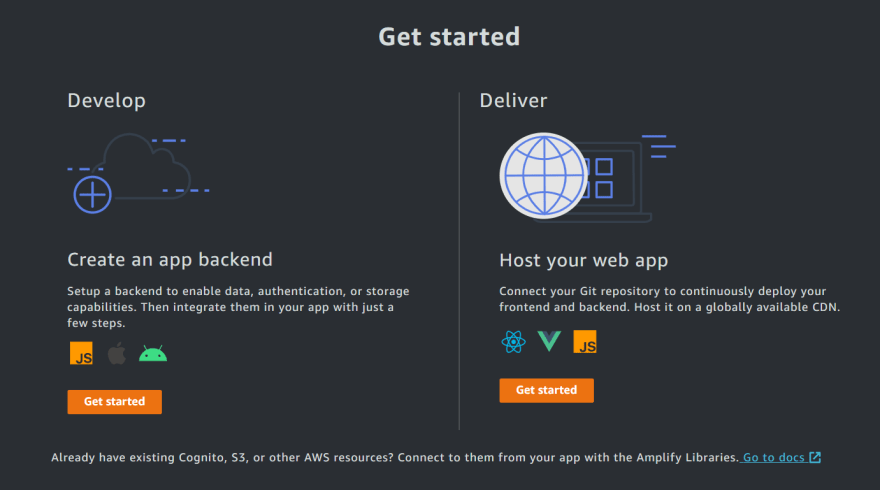
- As we want to host our react-app, we will click on Get Started button under the Deliver section.
- Select any of these version control services where your git repository lies:

- A new user will be required to authorize the selected service.
- Once the authentication is successful, you will be presented with a list of your repositories.

- Once you select the repository, another dropdown with the available branches will appear.
- Select the branch which you want to deploy and click on Next.
- Amplify will now read the build settings of your app from your repository and show you a preview of it.Yoo do not need to change anything, so just click on Next.
- Now, a final review will be shown before deploy.Again no changes are to be made, so click on Save and deploy
- Wait for the deploy to complete:

- BOOM! Your react app is now finally deployed and you can test on the .amplifyapp.com domain url provided down there.
PART-2: ADD A CUSTOM DOMAIN
NOTE: You can purchase a domain from GoDaddy, Google Domains, AWS Route 53, etc.
- From the services provided by AWS (in point 5 of PART-1), select Route 53.
- Click on Create Hosted Zone.NOTE:A. We are doing this so that we don't have to manually add DNS records to our domain's DNS settings.B. The Hosted zone name should be same as your domain name(without https:// and www)
- Fill the domain name. You can keep the zone as public.

- Once the hosted zone is created, open it to find the four nameservers there:

- Go to GoDaddy or any other service from where you have purchased your domain.
- Go to domain settings, and look for nameservers
- Edit the nameservers, remove the default ones and add the 4 nameservers(in point 4).This allows AWS Route 53 to automatically manage the DNS to redirect the traffic.
- Now, go back to AWS Amplify, where you hosted your React App.
- In the app-settings in right bar, select the Domain Management option:

- Click on Add Domain button.
- On the next screen, an input field will be present, which on focus will automatically suggest you the name of the hosted zone that you created.
- Select that hosted zone and click on Configure Domain.
Now the subdomain settings will appear.
A. If you want to host your app on the root of your domain (say example.com), then no changes in these settings are required.
B. If you want to host your app on a subdomain of your
domain(say blog.example.com), then click on Exclude Root and replace www with your sub-domain(here: blog).
Click on Save. Now sit back and relax, and let AWS Amplify do the job:

NOTE: Time taken in this process can vary, so a bit of patience is expected.
Original Link: https://dev.to/karanbd86/host-your-react-app-on-your-custom-domain-or-its-sub-domain-using-aws-amplify-and-route-53-45c
Dev To
More About this Source Visit Dev To