
An Interest In:
Web News this Week
- April 1, 2024
- March 31, 2024
- March 30, 2024
- March 29, 2024
- March 28, 2024
- March 27, 2024
- March 26, 2024
Some of Our Sources
- TutsPlus - Code
- Web Designer Wall
- The Logo Smith
- Spoon Graphics
- Fuel Your Creativity
- Inspiredology
- Web Designer Depot
- CSS Globe
- 24 Ways
- CSS Tricks
Help Webnuz
Referal links:
Create awesome Page Transitions in NextJS using Framer motion
I recently decided to re-design my portfolio in NextJs. So, I started researching around the web for some cool page transitions which I would like to have for my portfolio, and I came across something like this. (Similar to Barba.js)
So, I decided to figure out and create this transition. In this tutorial, I am going to explain the steps I took to create this nice page transition.
Let's start.
Note - In this example, I will only be talking about the CSS relevant to the animations. If you want the whole CSS as well, there is a github repo mentioned at the end of the tutorial.
New project, who-hoo!!
First, we need to create a new NextJS project by typing the below command into your terminal.
npx create-next-app nextjs-page-transition-exampleAnd now open your newly created project folder into your favourite Editor.
Type npm run dev in your terminal to start the dev server on PORT 3000.
Installing Framer motion
Type npm install framer-motion --save to install framer motion to your project.
A little setup
Now that we have installed framer motion, we need to set something up. Open your _app.js in the pages directory and import AnimatePresence from framer-motion and wrap it around the main content like this.
import "../styles/globals.css";import { AnimatePresence } from "framer-motion";function MyApp({ Component, pageProps, router }) { return ( <AnimatePresence exitBeforeEnter> <Component {...pageProps} key={router.route} /> </AnimatePresence> );}export default MyApp;AnimatePresence helps to animate React components when they are removed from React tree. It kind of helps for making exit animations for components. The exitBeforeEnter prop on AnimatePresence tells framer-motion to remove the current component with animation and then start the animation for new component.
Creating the pages
Now, we need to create different pages so that we can actually have transition animation between them. In this example, we are going to create just 3 simple pages. (Home, about, services).
Open index.js in the pages directory, and create a basic React component.
function Home() { return ( <main> <h1>Home Page</h1> </main> );}export default Home;Now, we need to create two more files about.js and services.js like so.
function Services() { return ( <main> <h1>Services Page</h1> </main> );}export default Services;function Services() { return ( <main> <h1>Services Page</h1> </main> );}export default Services;Creating the Navbar
Now that we have created three basic pages, we need navbar with links so that we could transition between pages.
Create a folder called components in the root directory and in that folder create a Navbar.js with the following content.
import Link from "next/link";export default function Navbar() { return ( <nav className="navbar"> <div className="container"> <Link href="/">Home</Link> <Link href="/about">About</Link> <Link href="/services">Services</Link> </div> </nav> );}This is a basic navbar which will help to navigate between the pages. The Link is a built in nextjs module which will create a link in the DOM that will navigate to other pages.
Now, we need to import the Navbar into the pages we've created! So the final files should be looking something like these.
function Home() { return ( <main> <h1>Home Page</h1> </main> );}export default Home;function About() { return ( <main> <h1>About Page</h1> </main> );}export default About;function Services() { return ( <main> <h1>Services Page</h1> </main> );}export default Services;Animating pages - The fun Part
Let's understand the animation first. This animation is divided into two parts. The sliding-in animation on current page and sliding out on the next page. Take a look at the figure below to understand better.
Sliding in animation on page 1
Sliding out animation on page 2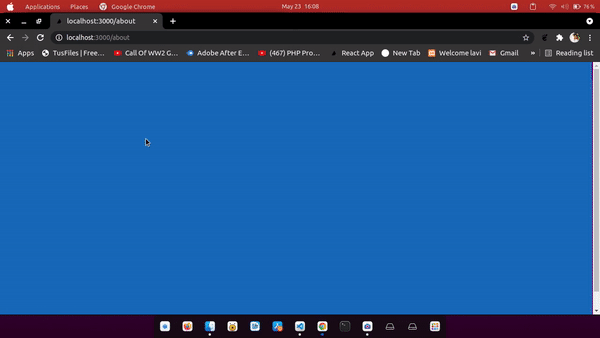
We need to animate two divs (one for sliding in and the other for sliding out animation) for every page we want to have animation for. We can create a component for these two divs, but adding these two divs to every page can be hectic, so we are going to create a Higer Order Component for this purpose.
HOC
Create a folder called HOC and in that folder, create a file called withTransition.js. In this file, we are going to import motion from framer motion and also create a function that is going to return a new component with the animating divs.
import { motion } from "framer-motion";const withTransition = (OriginalComponent) => { return () => ( <> <OriginalComponent /> <motion.div className="slide-in" initial={{ scaleX: 0 }} animate={{ scaleX: 0 }} exit={{ scaleX: 1 }} transition={{ duration: 1, ease: "easeInOut" }} /> <motion.div className="slide-out" initial={{ scaleX: 1 }} animate={{ scaleX: 0 }} exit={{ scaleX: 0 }} transition={{ duration: 1, ease: "easeInOut" }} /> </> );};export default withTransition; .slide-in { position: fixed; top: 0; left: 0; height: 100vh; width: 100%; background: #066bb8; transform-origin: left; } .slide-out { position: fixed; top: 0; left: 0; height: 100vh; width: 100%; background: #066bb8; transform-origin: right; }Now, we need to include this HOC in every page we want to have page transition for. For example, I want to have animations for all 3 of my pages so, I'd import withTransition in every page and pass the component within it like so.
import Navbar from "../components/Navbar";import withTransition from "../HOC/withTransition";function Home() { return ( <> <Navbar /> <main> <h1>Home Page</h1> </main> </> );}export default withTransition(Home);import Navbar from "../components/Navbar";import withTransition from "../HOC/withTransition";function About() { return ( <> <Navbar /> <main> <h1>About Page</h1> </main> </> );}export default withTransition(About);import Navbar from "../components/Navbar";import withTransition from "../HOC/withTransition";function Services() { return ( <> <Navbar /> <main> <h1>Services Page</h1> </main> </> );}export default withTransition(Services);And that's it....
We have now completed the page transition. The demo and GitHub links are provided below
Demo - https://nextjs-transition-example.vercel.app/
GitHub repo - https://github.com/shaan71845/nextjs-page-transition-example
Feel free to leave a
Thanks for reading!!
Original Link: https://dev.to/shaan71845/create-awesome-page-transitions-in-nextjs-using-framer-motion-2pln
Dev To
More About this Source Visit Dev To