An Interest In:
Web News this Week
- April 24, 2024
- April 23, 2024
- April 22, 2024
- April 21, 2024
- April 20, 2024
- April 19, 2024
- April 18, 2024
Full Stack Instagram: Authentication Guest
With Firebase Auth, life is much better in handling authentication.
We can authenticate and manage users from a variety of providers without server-side code.
Features that I love from Firebase Auth:
- CRUD of user
- Handling session cookies
- Forget password emailing system
- Easy sign up with any other platform
- Reliable security
- Can be handled only from client side
And the best part of this, that we can use it for free! For any number of users!
Table of contents:
- Demo
- Overview
- Setting up Firebase
- Sign up
- Sign in
- Anonymous sign in
- Content Update
- Log out
Demo
You can check on the full source code and try them in Replit.
Repl url: https://replit.com/@arnoldschan/AuthManagement
Overview
User flow
- As a user, they can:
- Sign up using: email, username, and password
- Sign in by registered email and password
- Sign in as a guest (without any credentials)
- The page body greets the user with their registered username (if the user is a guest, a random username will be generated)
- The page body shows "Logged out" if the user is not authenticated in the app.
File tree:
This is how the project file tree looks like.
- The main
App.jsxis in root folder - The smaller components in
components/folder - Components' css in
css/folder - Anything related to firebase is inside
firebase/folder
Setting up Firebase
Setting up the project
To use Firebase you need to create a Google Cloud Platform account. Don't worry you don't need to fill in any payment information.
- Login to Firebase
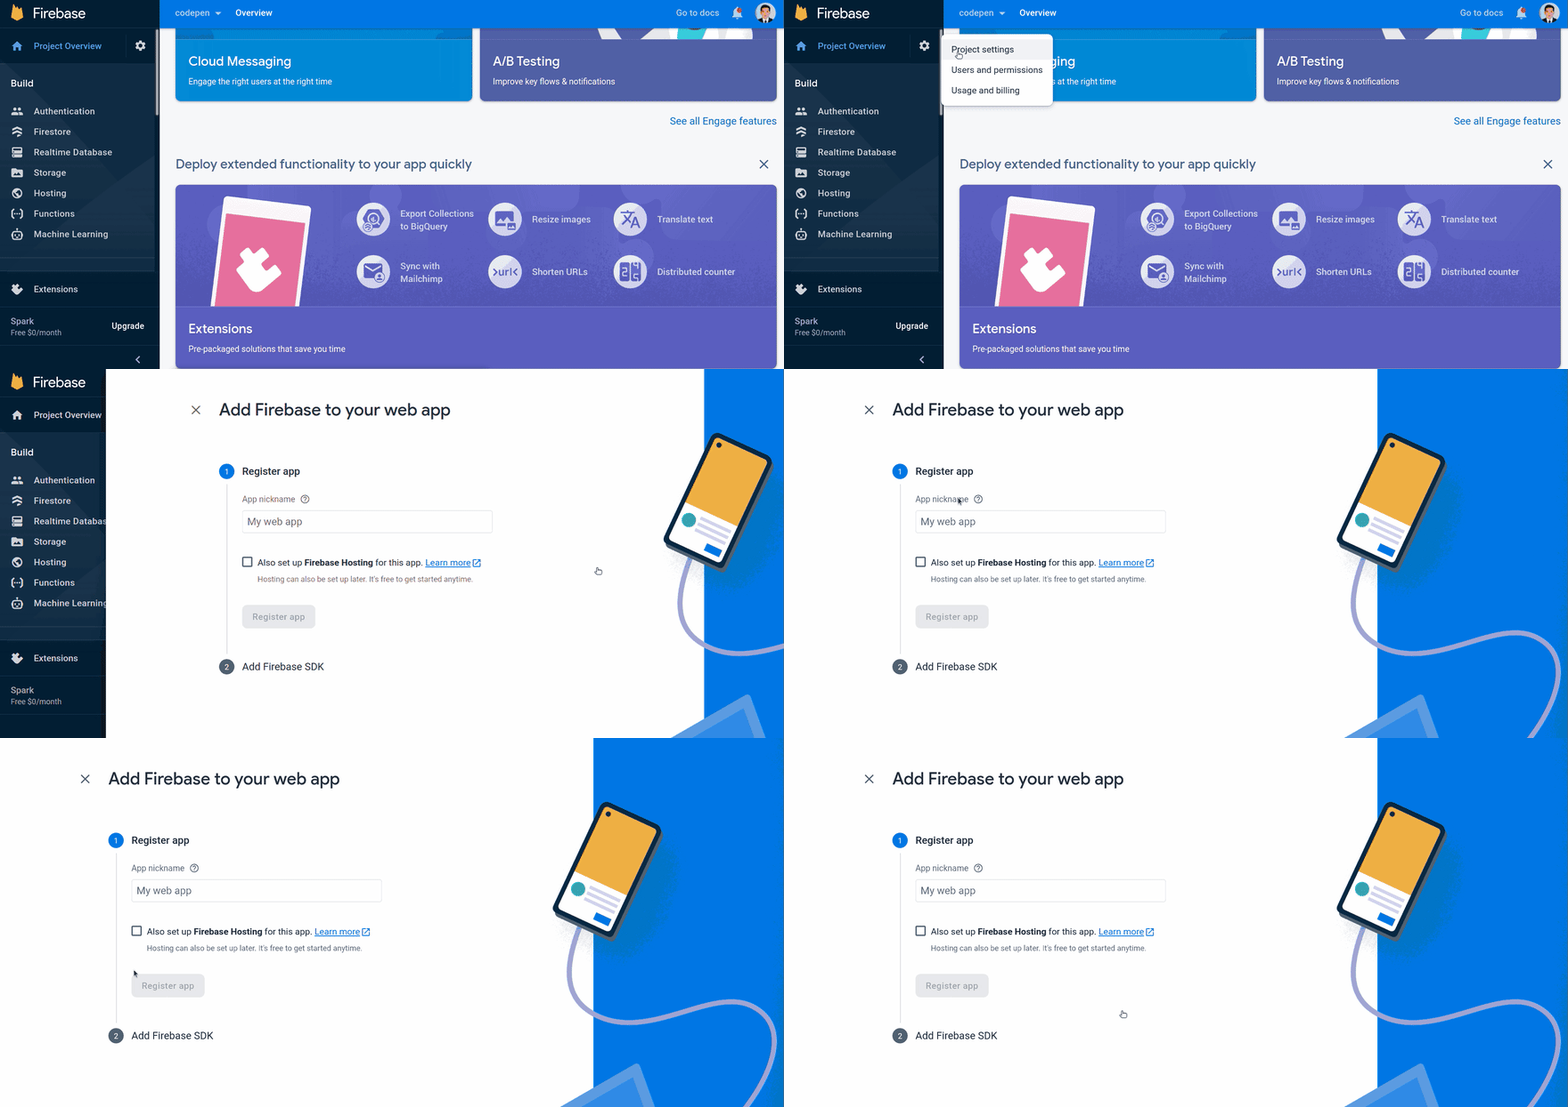
- Create a project, then go to firebase auth
- Add a web app to your project
- Get your config afterward in the "Add Firebase SDK" section. Copy the JSON config and store it in firebaseConfig.js. This how I store the JSON config:
// firebaseConfig.jsconst firebaseConfig = { apiKey: "AIzaSyAdqA_wVseC23-5-q5Fo1f0dGiB-177Tu0", authDomain: "codepen-arnold.firebaseapp.com", projectId: "codepen-arnold", storageBucket: "codepen-arnold.appspot.com", messagingSenderId: "1080777819655", appId: "1:1080777819655:web:5269709a063489308acca2", measurementId: "G-4Y54EK18HW" };export default firebaseConfig;Don't worry this config is needed to be publicly available for interacting with Firebase services. Nothing to hide here
Setting up authentication
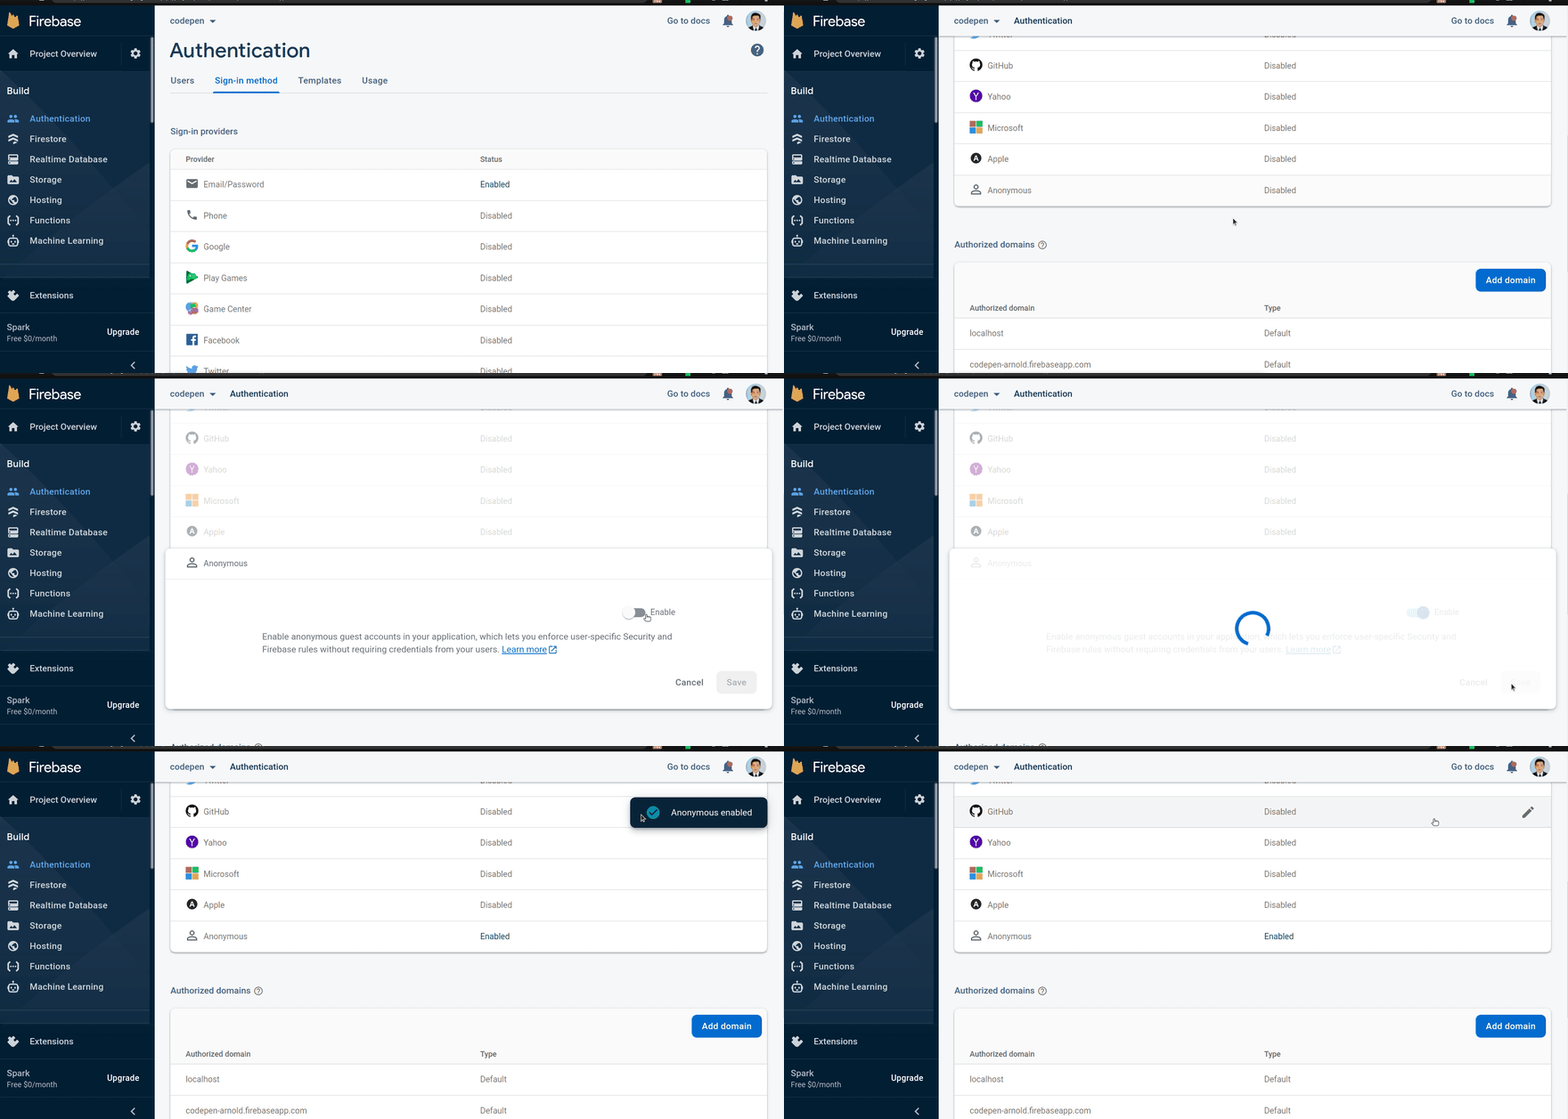
- Activate email sign in method

- Activate anonymous Authentication (optional)

- Initiate firebase module in
firebase.js(don't forget tonpm install firebase)
// firebase.jsimport firebase from 'firebase';import firebaseConfig from "./firebaseConfig";const firebaseApp = firebase.initializeApp( firebaseConfig)const auth = firebaseApp.auth();export { auth }This short and simple lines would boost our app capability!
auth consists of various methods needed for interacting with the user's authentication information. You can read more here in Firebase auth documentation.
Now we're ready to store our user information! Let's move on to handling the user flow scenarios.
State Hooks
const [openModalSignup, setOpenModalSignup] = useState(false)const [openModalLogin, setOpenModalLogin] = useState(false)const [user, setUser] = useState(null)There are 3 state hooks in this App:
openModalSignupandopenModalLogin: Control 2 modals: Sign up and Sign in form. If the state value istruethen the modal will be visible, otherwise closed.user: stores the Firebase user information attached in the app session.
All of the user authentication processes happen in AuthModal.jsx. Because in this modal, the user interacts with their credentials and all of the action needed for authentications.
User sign up
The sign up process is controlled by a single function: registerUser
// AuthModal.jsximport { auth } from "../firebase/firebase";// ...const registerUser = () => { auth.createUserWithEmailAndPassword(email, password) .then((authUser)=>{ authUser.user.updateProfile({ displayName: username }).then((user)=> setUser(user)) }) .catch((error)=> alert(error.message)); setOpenModalSignup(false); }// ...After importing auth module from the initiated firebase modules, we can use auth.createUserWithEmailAndPassword method. It's quite self-explanatory what does this method do, right?
The method takes 2 arguments: email and password . And boom, a new user is created in our Firebase Auth database. Very easy, no more pain in creating the API, Database, and everything!
This method then chained into adding displayName attached to this user through user.updateProfile method. Firebase provides several additional information for users. Check more here. After that, the new user information is updated into user state hooks through setUser. The sign-up modal is then closed through setOpenModalSignup state hooks.
User sign in
The sign in process is controlled by loginUser function
// AuthModal.jsximport { auth } from "../firebase/firebase";// ...const loginUser = () => { auth.signInWithEmailAndPassword(email, password) .catch((error)=> alert(error.message)); setOpenModalLogin(false); }// ...After creating the user through auth.createUserWithEmailAndPassword , we can sign the user in using auth.signInWithEmailAndPassword method. The arguments are email and password as well. The login modal then closed by turning setOpenModalLogin value to false .
Anonymous Sign In
For some apps, it'll be a big barrier for users if they needed to register before trying the apps. Firebase provides an "anonymous sign-in" feature. Here, the user doesn't need to fill any email information, and can try the apps right away!
The anonymous sign-in is controlled by guestButtonPress function
// AuthModal.jsximport { auth } from "../firebase/firebase";// ...const guestButtonPress = () => { let randomName = "guest-" + Math.random().toString(36).replace(/[^a-z]+/g, '').substr(0, 5); auth.signInAnonymously() .then((user) => { user.user.updateProfile({ displayName: randomName }).then((user)=> setUser(user)) setOpenModalLogin(false); }) }There are 3 fields in our registration form: e-mail , display name, and password. We can skip e-mail and password for anonymous sign-in, but we need to manually set the display name information. Otherwise, the missing display name will break our app.
To handle this, the app generates a randomName for the user's display name before firing the firebase auth.signInAnonymously method. The generated randomName has pattern of: guest-xxxxx with x represents a random letter.
Just like in the sign-up process, the new user displayName is updated through user.updateProfile method and then sequentially update our user state hooks by calling setUser. The login modal then closed by setting setOpenModalLogin as false.
Content Update
// App.jsximport { auth } from "./firebase/firebase";// ...useEffect(() => { const unsubscribe = auth.onAuthStateChanged((authUser)=>{ if (authUser){ setUser(authUser); } else { setUser(null); }}) return () => { unsubscribe(); } }, [ user ])//...The useEffect hooks in App.jsx contains the Firebase Auth state listener. Any event done by user in the previous scenarios (sign-in, sign-out) updates the Firebase's auth state.
This listener also remembers the user's previous session (session stored in the user's browser) and automatically loads all of the information. This feature is very convenient as the user doesn't need to re-enter the credentials again.
//App.jsx//...<div className="contents"> <h1> { user ? "Welcome back " + user.displayName + "!" : "Logged out!" } </h1></div>//...By using the ternary operator, the content shows "Welcome back {displayName}" if user contains the session information. Otherwise, the content shows "Logged out!".
User Sign out
Finally, if the user wants to log out from the session, we can call auth.signOut method. Here's the log-out button in AuthButton.jsx.
// AuthButton.jsx// ...<Button onClick={() => { auth.signOut(); }}>Log Out</Button>//...Conclusion
Cool, isn't it?
With Firebase, it's faster for us to implement many basic features. In this article, we can see how easy to interact with Firebase authentication feature. Everything can be done from client-side.
Which benefit of Firebase Auth that you're really love about? Leave your thoughts in the comment below!
Original Link: https://dev.to/arnoldschan/full-stack-react-how-to-build-your-own-instagram-with-react-js-firebase-authentication-guest-m2f
Dev To
 An online community for sharing and discovering great ideas, having debates, and making friends
More About this Source Visit Dev To


