
An Interest In:
Web News this Week
- April 1, 2024
- March 31, 2024
- March 30, 2024
- March 29, 2024
- March 28, 2024
- March 27, 2024
- March 26, 2024
Some of Our Sources
- Spoon Graphics
- Smashing Magazine
- Reencoded
- CSS Globe
- Wal You
- CSS Tricks
- Web Resource Source
- Codrops
- Daily Now
- The Verge
Help Webnuz
Referal links:
Streamline your Vue 3 development with Fauna, Typescript, and GraphQL
Written in connection with the Write with Fauna Program.
Photo by Srinivasan Venkataraman on Unsplash
GraphQL is amazing, but writing reducers and setting up the server side can be a bit daunting. Thankfully Fauna can do the heavy lifting and let us focus on the fun stuff!
To take it up a notch lets sync up our GraphQL types with a code generator so that we can leverage Typescript and and VSCodes intellisense for a seamless coding experience.
To demonstrate we will be building a simple orders list.
Overview
- Set up a vite app
- Build a static version of order list
- Build our schema and upload to Fauna
- Use codegen to create types for our schema
- Wire up the static list to live data
- Bonus: Updating schema workflow
Well be using yarn, and vite for this project but you could just as easily use Vue CLI if you prefer and npm. Also if react is more your cup of coffee, most of this will still be applicable.
Set up a vite app
Setting up vite is delightfully easy. Simply run yarn create @vitejs/app in your terminal and follow the prompts. I called mine fauna-order-list and chose the vue-ts template. Then cd into your directory and run yarn
Thats it!
Go ahead and run your app with yarn dev
Behold the mighty Vue starter template!

Build a static version of order list
For quick styling well be using tailwind. The tailwind documentation is great so go here and follow their instructions.
Note: if you have the dev server running still you will need to restart the process to see tailwinds styles.
Next create a new file src/components/OrderList.vue and paste in the following code:
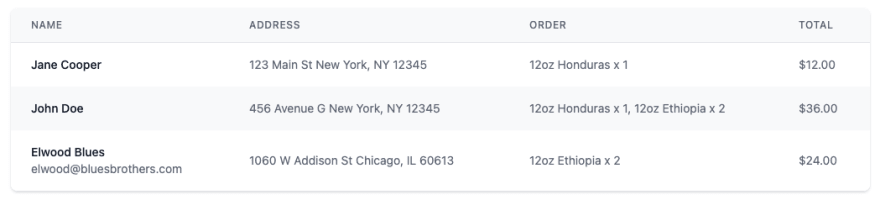
<template> <div class="shadow overflow-hidden border-b border-gray-200 sm:rounded-lg"> <table class="min-w-full divide-y divide-gray-200"> <thead class="bg-gray-50"> <tr> <th scope="col" class="order-header">Name</th> <th scope="col" class="order-header">Address</th> <th scope="col" class="order-header">Order</th> <th scope="col" class="order-header">Total</th> </tr> </thead> <tbody> <tr class="bg-white"> <td class="order-cell"> <span class="bold">Jane Cooper</span> </td> <td class="order-cell">123 Main St, New York, NY 12345</td> <td class="order-cell">12oz Honduras x 1</td> <td class="order-cell">$12.00</td> </tr> <tr class="bg-gray-50"> <td class="order-cell"> <span class="bold">Bob Smith</span> </td> <td class="order-cell">456 Avenue G, New York, NY 12345</td> <td class="order-cell">12oz Honduras x 1, 12oz Ethiopia x 2</td> <td class="order-cell">$36.00</td> </tr> </tbody> </table> </div></template><style>.order-cell { @apply px-6 py-4 whitespace-nowrap text-sm text-gray-500;}.order-header { @apply px-6 py-3 text-left text-xs font-medium text-gray-500 uppercase tracking-wider;}.bold { @apply font-medium text-gray-900;}</style>Now we need to add the OrderList component to our app.
Open up src/App.vue and replace all occurrences of HelloWorld with OrderList. While were in here lets delete the style section and image as well. Ive also wrapped OrderList in a section and added a couple styles to center and pad the list.
Your completed App.vue file should look like this.
<template> <section class="container mx-auto mt-8"> <OrderList /> </section></template><script lang="ts">import { defineComponent } from "vue";import OrderList from "./components/OrderList.vue";export default defineComponent({ name: "App", components: { OrderList, },});</script>Build our schema and upload to Fauna
A basic schema
For our example data we will have two primary data objects. Customers and Orders.
Customers will have a name and address. Orders will have an array of LineItems and a reference to a Customer
Our basic schema looks like this:
type Address { line1: String! line2: String city: String! state: String! postal_code: String!}type Customer { name: String! address: Address}type LineItem { name: String! amount: Int! quantity: Int!}type Order { items: [LineItem!]! customer: Customer!}Here we can see an Address type that could be used to store information like you might gather from a checkout form. Likewise, we have a LineItem type to hold individual items for a given order.
Fauna specific directives
Fauna comes with several directives to help auto generate resolvers for your schema. Theyre powerful and well worth your time to read through the documentation. In this tutorial we will be covering two of them: @collection and @embedded.
In Fauna, all types in a graphql schema are considered @collection by default. If you are coming from a relational database background you can think of collections as being similar to tables.
I prefer to explicitly name my collections using the @collection directive to remove any ambiguity, and because I am finicky about my document names
The @collection directive takes one simple argument: name which is what Fauna will call the document for this collection.
Looking at our current schema we only want customers and orders collections. To prevent Address and LineItem from becoming documents we use the @embedded directive. This simply tells Fauna to not create separate collections for these types. These types are embedded directly in whatever other type references them.
Our final schema should now look like this:
type Address @embedded { line1: String! line2: String city: String! state: String! postal_code: String!}type Customer @collection(name: "customers") { name: String! address: Address orders: [Order!] @relation}type LineItem @embedded { name: String! total: Int! quantity: Int!}type Order @collection(name: "orders") { items: [LineItem!]! customer: Customer!}Save this to src/graphql/schema.graphql
Upload to Fauna
Navigate to https://dashboard.fauna.com and create a new database. I called my fauna-order-list, the same as my vite app. Then select GraphQL'' from the left sidebar.
Click the import button and select schema.graphql
After a few moments you should have the GraphQL Playground open.
Add some data
The GraphQL Playground is actually pretty handy for creating test data. We wont cover updating information from the app in this tutorial, but generally when writing queries I write and execute them in the GraphQL Playground first. Then copy and paste those queries as string constants locally. This way I know that my queries are correct.
Create a customer
Since our orders need a customer to reference, lets start by creating a customer.
Fauna has already generated create mutations for both orders and customers. You can see this in the very helpful auto-completions in the playground. If you have never used a GraphQL playground before you can see what is available at any time by opening up the DOCS tab on the right hand side of the window.
Your query should look like this at this point:
mutation { createCustomer}Note how there is a red indicator to the left of line 2. If you hover over createCustomer you will get a helpful popover with error information. In this case it is asking for subfields to return, and saying that a CustomerInput! is required.
For our purposes we just need the "_id". And for the CustomerInput were going to use a variable, so we add a variable reference as well.
Our final mutation looks like this, and our error messages have all been resolved:
mutation ($data: CustomerInput!) { createCustomer(data: $data) { _id }}Now to provide a value for $data at the bottom of the tab you will find QUERY VARIABLES and HTTP HEADERS
Click QUERY VARIABLES. You can also drag the variables tab up to create more room.
Inside the variables tab we have the same auto-complete functionality as above. You can ctrl+space to see what options are available, or just start typing if you already know what you need.
Here you will see. that since createCustomer needs a data parameter, that is what auto-complete will recommend. Also notice as you add properties, the error hints that show up. These will all guide you toward providing correctly formatted data as per your schema.
Once you have your variable filled out, click the play button to see your result. Since we only asked for _id to be returned that is what you should see in the result tab.
Here is my final variable for reference:
{ "data": { "name": "John Smith", "address": { "line1": "123 Main St", "city": "Austin", "state": "TX", "postal_code": "12345" } }}Create an order
Since orders need a customer reference were going to leave this tab open and start a new tab for the orders. Click the + tab right next to the createCustomer tab. As a quick aside, notice how the tabs are helpfully named after the query that is being run and that the type of query is labeled as well. In this case, M for mutation.
The createOrder mutation follows the same process as before. The interesting part here is how we connect customers to orders. Take a look at the final variable here:
{ "data": { "customer": { "connect": "294049263884698114" }, "items": [ { "name": "12oz Honduras", "total": 1200, "quantity": 1 } ] }}That connect parameter is what links an order to a customer. In the auto-complete when writing this variable you may have noticed another option, create.
This is one of the really cool and powerful things about GraphQL. This kind of flexibility allows us to create a customer and an order at the same time, while simultaneously linking them together. And Fauna took care of all the resolvers for us, so we get all of this functionality for free!
Here is an example variable parameter to use with createOrder that does all of the above:
{ "data": { "items": [ { "name": "12oz Ethiopia", "quantity": 1, "total": 1200 } ], "customer": { "create": { "name": "Jane Doe", "address": { "line1": "456 Ave A", "city": "New York", "state": "NY", "postal_code": "11111" } } } }}Listing the orders
Now that we have some test data lets open another GraphQL Playground tab and write the select query. Using ctrl+space you should notice something missing. Currently it looks like we can only findByCustomerID'' and findByOrderID
At the time of this writing we need to explicitly create an @index to display our Orders.
In plain GraphQL we are simply defining a Query. Since we want to return all orders lets call this one allOrders. This will be an array of Orders and we want to insist that it return something so our basic GraphQL query looks like this:
type Query { allOrders: [Order!]!}And to define the index we simply add an @index directive with a name so our final query looks like this:
type Query { allOrders: [Order!]! @index(name: "all_orders")}We add this to our schema.graphql file, then back in GraphQL Playground select UPDATE SCHEMA from the top of the screen and upload our updated schema.
After a brief moment the schema is updated and we have our allOrders query available like so:
{ allOrders { data { _id customer { name address { line1 line2 city state postal_code } } items { name total quantity } } }}Execute this query in the playground and we see our two orders! Awesome.
Notice the nested data object. This is because there are three top level properties to the return object when querying GraphQL. data holds the data for the current result set. before and after hold cursors for paginating the results. We will not go over pagination in this tutorial, but its good to remember that when extracting this information later that you need to reference data since the array is not available at the top level.
Now that we have a working query lets save it locally for use later in our app. Save this query to src/graphql/queries.ts like this:
export const allOrders = `{ allOrders { data { _id customer { name address { line1 line2 city state postal_code } } items { name total quantity } } }}`;Use codegen to create types for our schema
Now that our data is ready to go, let's set up codegen to generate types for us to use in our app.
For detailed instructions follow the documentation here. The quick version is listed below.
Execute the following commands:
yarn add graphqlyarn add -D @graphql-codegen/cli @graphql-codegen/typescriptyarn graphql-codegen initHere are the responses I used for the prompts:

Now if you try running yarn codegen you will get an error.
We need to provide an authorization header to connect to Fauna.
Add authorization header
- Go to the Fauna dashboard for this database and select Security from the left side menu
- Click the NEW KEY button
- Choose Server for the role and save
- Copy the keys secret to your clipboard
- Create a
.envfile in you apps root directory - Save the keys secret to
.envlike so:VITE_FAUNA_KEY=PASTE_HERE - In
package.jsonupdate thecodegenscript by adding -r dotenv/config so that it looks like this:"codegen": "graphql-codegen --config codegen.yml -r dotenv/config" Open
codegen.ymland add the Authorization header, and remove the documents key like so:overwrite: true
schema: - https://graphql.fauna.com/graphql: headers: Authorization: Bearer ${VITE_FAUNA_KEY} generates: src/schema.d.ts: plugins: - "typescript"
Try running yarn codegen again. Hooray
Go take a look at schema.d.ts and see all the typing you just saved. Its not important to understand every line that was created here. Just that these types will help ensure that we correctly format our GraphQL queries correctly, and that our data structures locally are in sync with the server.
Some notes on security and best practices
We are using Vites built in dotenv functionality to easily store our secret key locally, but in a real application you should never do this. The reason is that when we use the secret key later in our app Vite will actually include it in the bundled code which means anyone picking through your source could see it.
In a real application this would be stored in an environment variable on a server and you would access that api instead of hitting Fauna directly. This is beyond the scope of this tutorial, just know that you should never include secret keys in a repository, or expose them publicly.
Wire up the static list to live data
Finally we get to pull it all together.
Use Suspense to display async components
First open up App.vue and wrap OrderList in a Suspense tag to prepare for rendering components with async data
<Suspense> <OrderList /></Suspense>Use fetch to retrieve the orders
For simplicity were going to just use fetch to natively retrieve the orders.
Open OrderList.vue and add a script tag using typescript and the setup option <script lang="ts" setup> Note that setup is still in RFC so it may not make it into the final version of Vue 3. But it has a ton of support from the community and is most likely stable at this point. I believe it greatly reduces unnecessary boilerplate and makes for a better development experience so Im using it in these examples.
Also note that well be using Vue 3s composition API.
Thinking through our data, the first thing well need is a ref to an array to hold the orders. Then well await a fetch post to Fauna and store the data in orders.value
import { ref } from "vue";import { allOrders } from "../graphql/queries";import type { Order } from "../schema";const orders = ref<Order[]>([]);orders.value = await fetch("https://graphql.fauna.com/graphql", { method: "POST", body: JSON.stringify({ query: allOrders }), headers: { Authorization: `Bearer ${import.meta.env.VITE_FAUNA_KEY}`, },}) .then((res) => res.json()) .then(({ data }) => data.allOrders.data);Run the dev server yarn dev and open up the app in your browser. Using vue-devtools inspect the OrderList component and see that it now has an orders property under setup populated with our data. Neat!
Prepare the data for easier display
Well use a computed value to map the orders array into an easier to consume format. For example, customer.address is currently an object as you might expect it to be stored. But we just want a string to display in the table, so we will use map to create a new parsedOrders array formatted how we want it.
const parsedOrders = computed(() => { return orders.value.map((o) => ({ _id: o._id, name: o.customer.name, address: `${o.customer.address?.line1} ${o.customer.address?.city}, ${o.customer.address?.state} ${o.customer.address?.postal_code}`, items: o.items.map((i) => `${i.name} x ${i.quantity}`).join(", "), total: new Intl.NumberFormat("en-US", { style: "currency", currency: "USD", }).format(o.items.reduce((pre, cur) => pre + cur.total, 0) / 100), }));});Thanks to our generated schema types our IDE gives us helpful autocomplete for our deeply nested objects such as o.customer.address?.line1 and even knows to safely check that nullable fields are available.
Now we just swap out our static HTML for our parsedOrders data:
<tr v-for="(order, index) in parsedOrders" :key="order._id" :class="{ 'bg-gray-50': index % 2 !== 0 }" class="bg-white" > <td class="order-cell"> <span class="bold">{{ order.name }}</span> </td> <td class="order-cell">{{ order.address }}</td> <td class="order-cell">{{ order.items }}</td> <td class="order-cell">{{ order.total }}</td></tr>Our final OrderList component should look like this:
<template> <div class="shadow overflow-hidden border-b border-gray-200 sm:rounded-lg"> <table class="min-w-full divide-y divide-gray-200"> <thead class="bg-gray-50"> <tr> <th scope="col" class="order-header">Name</th> <th scope="col" class="order-header">Address</th> <th scope="col" class="order-header">Order</th> <th scope="col" class="order-header">Total</th> </tr> </thead> <tbody> <tr v-for="(order, index) in parsedOrders" :key="order._id" :class="{ 'bg-gray-50': index % 2 !== 0 }" class="bg-white" > <td class="order-cell"> <span class="bold">{{ order.name }}</span> </td> <td class="order-cell">{{ order.address }}</td> <td class="order-cell">{{ order.items }}</td> <td class="order-cell">{{ order.total }}</td> </tr> </tbody> </table> </div></template><script lang="ts" setup>import { ref, computed } from "vue";import { allOrders } from "../graphql/queries";import type { Order } from "../schema";const orders = ref<Order[]>([]);orders.value = await fetch("https://graphql.fauna.com/graphql", { method: "POST", body: JSON.stringify({ query: allOrders }), headers: { Authorization: `Bearer ${import.meta.env.VITE_FAUNA_KEY}`, },}) .then((res) => res.json()) .then(({ data }) => data.allOrders.data);const parsedOrders = computed(() => { return orders.value.map((o) => ({ _id: o._id, name: o.customer.name, address: `${o.customer.address?.line1} ${o.customer.address?.city}, ${o.customer.address?.state} ${o.customer.address?.postal_code}`, items: o.items.map((i) => `${i.name} x ${i.quantity}`).join(", "), total: new Intl.NumberFormat("en-US", { style: "currency", currency: "USD", }).format(o.items.reduce((pre, cur) => pre + cur.total, 0) / 100), }));});</script><style>.order-cell { @apply px-6 py-4 whitespace-nowrap text-sm text-gray-500;}.order-header { @apply px-6 py-3 text-left text-xs font-medium text-gray-500 uppercase tracking-wider;}.bold { @apply font-medium text-gray-900;}</style>Bonus: Updating schema workflow
Most of our schemas evolve over time as new requirements come in. Lets walk through a very simple schema update and how we would update our app to accommodate.
In this example lets say we now want to collect email addresses. First we add email to our schema.graphql
type Customer @collection(name: "customers") { name: String! address: Address email: String orders: [Order!] @relation}Note: for simplicitys sake I am leaving email as not required. If we made email required like this email: String! then we would also have to write a data migration script to update all the existing documents, because our allOrders query would now fail.
Now that our schema is updated locally, we update the schema in Faunas dashboard just as we did before by going to the GraphQL tab, clicking UPDATE SCHEMA and uploading our updated schema file.
While were in the dashboard lets go ahead and update a customer to have an email address. I found this easiest to do by going to the Collections tab and editing a document directly. Pick your first customer and add an email field.
Go back to the GraphQL tab and select the allOrders tab. Add email to your query under customer and you should now see emails being returned.
Copy and paste this query back into queries.ts and now we should be ready to display emails in our app.
Run yarn codegen to sync up with Fauna
Open up OrderList.vue and add email to the parsedOrders computed variable.
Then simply display order.email next to the customers name. Note, you might have to refresh the page to get the schema updates to take effect.
Thats it!
Conclusion
Ive been really enjoying using Faunas GraphQL endpoint. It has greatly streamlined my process for development. Considering it is still in early stages its only going to get better from here, which is pretty incredible.
Original Link: https://dev.to/unclejustin/streamline-your-vue-3-development-with-fauna-typescript-and-graphql-59oo
Dev To
More About this Source Visit Dev To