
An Interest In:
Web News this Week
- April 1, 2024
- March 31, 2024
- March 30, 2024
- March 29, 2024
- March 28, 2024
- March 27, 2024
- March 26, 2024
Some of Our Sources
- Slashdot
- Engadget
- Technology Review
- Simplebits
- Fuel Your Creativity
- Naldz Graphics
- Crazy Leaf Design
- Design Modo
- Willems Lab
- Hashedout
Help Webnuz
Referal links:
Creating an API With Python Flask to Upload Files to Cloudinary
Creating an API With Python Flask to Upload Files to Cloudinary
Meta Title: Creating an API With Python Flask to Upload Files to Cloudinary
Meta Description: Learn how to build an API with Python Flask and Cloudinary's Python SDk to upload files of any format to Cloudinary.
Cloudinary offers SDKs for many programming languages and frameworks. Even though it also offers an Upload API endpoint for both back-end and front-end code, most developers find the SDKs very helpful. If you're working with a powerful back-end framework like Python Flask, you'll be happy to hear that a Python SDK is now available.
This tutorial walks you through the process of building an API to upload images to Cloudinary. You can also upload other file types, including video and even nonmedia files, with the API.
Understanding the Difference Between Back End and Front End
Generally, code that runs on the server is back end, and code that runs on the browser is front end. However, since server code can render HTML, CSS, and JavaScript, which all run on the browser, confusion sometimes results.
In the context of the Cloudinary SDKs, the back-end ones can read secret credentials, which should not be shared in the front end. In other words, you must never expose the back-end environment variables in the front end because front-end SDKs cannot hide credentials that are meant to be kept secret. As a solution, you can upload browser code with Cloudinarys unsigned presets without revealing secret credentials. A better way would be to build a back-end API for secure uploads, keeping your API_SECRET credential hidden. Read on to see how to do that with Cloudinarys Python SDK and Python Flask or Python Django.
Coding a Flask API to Upload to Cloudinary
The Flask framework makes it easy to define routes and their functionalities. To get started, first create a route named /upload, which accepts a POST that contains multipart/form-data. You then package up the image file input into a FormData object in a submit handler and POST it to your own Flask API to call Cloudinarys Upload API, which is configured with your full set of Cloudinary credentials.
Flask's request option enables you to get data from the client. When submitting files, such as uploading images, you can call upon request to access them.
from flask import Flask,render_template, requestif request.method == 'POST': file_to_upload = request.files['file']The data retrieved from request.files['file'] is an instance of werkzeug.FileStorage. The object can be handed off to the Python SDKs Upload function. Flask then wraps Werkzeug, which handles the details of the Web Server Gateway Interface (WSGI).
if file_to_upload: upload_result = cloudinary.uploader.upload(file_to_upload) app.logger.info(upload_result)For uploads to Cloudinary, the default resource_type is image. To expand or create a new Flask API, add resource_type: 'video' or resource_type: 'raw' for video or raw files, respectively. Raw refers to nonmedia file formats, including text and JSON.
Finally, upload_result is an object that contains the upload response. To complete the actions of your upload API, return that response to the client, like this:
from flask import jsonifyreturn jsonify(upload_result)Below is the complete code of your upload API.
@app.route("/upload", methods=['POST'])def upload_file(): app.logger.info('in upload route') cloudinary.config(cloud_name = os.getenv('CLOUD_NAME'), api_key=os.getenv('API_KEY'), api_secret=os.getenv('API_SECRET')) upload_result = None if request.method == 'POST': file_to_upload = request.files['file'] app.logger.info('%s file_to_upload', file_to_upload) if file_to_upload: upload_result = cloudinary.uploader.upload(file_to_upload) app.logger.info(upload_result) return jsonify(upload_result)Setting Up the Flask App
Next, follow the steps below to build the app.
Set Up the Virtual Environment
The command below establishes your virtual environment. This is an important step for encapsulating the libraries you'll be using in this app.
python3 -m venv envsource env/bin/activateTo deactivate the environment, type:
deactivatesource env/bin/activateInstall Flask
Install Flask with this command:
python3 -m pip install Flask==1.1.1 Add a requirements.txt File
Create a requirements.txt file to keep track of all the versioned libraries you need for the app and to facilitate future deployment.
python3 -m pip freeze > requirements.txtUpgrade the Python Package Installer
If necessary, upgrade the Python package installer, called PIP, with the command below. The command might vary, depending on your local Python installation. As shown below, the freeze command writes the library and version to the requirements.txt file.
usr/local/opt/[email protected]/bin/python3.9 -m pip install --upgrade pippython3 -m pip freeze > requirements.txtInstall Cloudinary
Next, install Cloudinary to gain access to its Upload API for the Python SDK.
python3 -m pip install cloudinary python3 -m pip freeze > requirements.txtAdd CORS support
If you want to access your upload API from a client served from a different host, add Cross Origin Resource Sharing (CORS) support:
python3 -m pip install flask-corspython3 -m pip freeze > requirements.txtNow you can add code to configure CORS for all the APIs and, specifically, the upload API. The code below demonstrates both options.
from flask_cors import CORS, cross_originapp = Flask(__name__)# After creating the Flask app, you can make all APIs allow cross-origin access.CORS(app)# or a specific API@app.route("/upload", methods=['POST'])@cross_origin()Work With Environment Variables
You can easily load environment variables with Python. Conveniently, the python-dotenv library is modeled on the Node.js dotenv package. You need three Cloudinary environment variables, i.e., CLOUD_NAME, API_KEY, and API_SECRET, for your code, but don't share API_SECRET. You can export those variables to the local environment. When you deploy to Heroku, you can add them to make them available to the app when it runs in a Heroku container.
from dotenv import load_dotenvload_dotenv()In your upload API, you read in the environment variables with the cloudinary.config() function. You then access those variables with the os.getenv() function in the dotenv library.
cloudinary.config(cloud_name = os.getenv('CLOUD_NAME'), api_key=os.getenv('API_KEY'), api_secret=os.getenv('API_SECRET'))When working locally, you can create a gitignore'd .env file that contains your Cloudinary credentials for local testing. The values for those credentials are displayed in your Cloudinary console.
CLOUD_NAME=CLOUD_NAMEAPI_KEY=API_KEYAPI_SECRET=API_SECRETNext, install the python-dotenv library:
python3 -m pip install python-dotenvpython3 -m pip freeze > requirements.txtTesting the API Locally
You're now ready to test the app locally. You can do end-to-end testing with Postman and a local form that points at a server running on localhost.
Create your app with an upload function by downloading, cloning, or copying from this GitHub repository. Add your credentials to a .env file and then start your server on localhost.
python3 app.pyThe above command opens a server at http://127.0.0.1:5000/. Note that the default port is 5000.
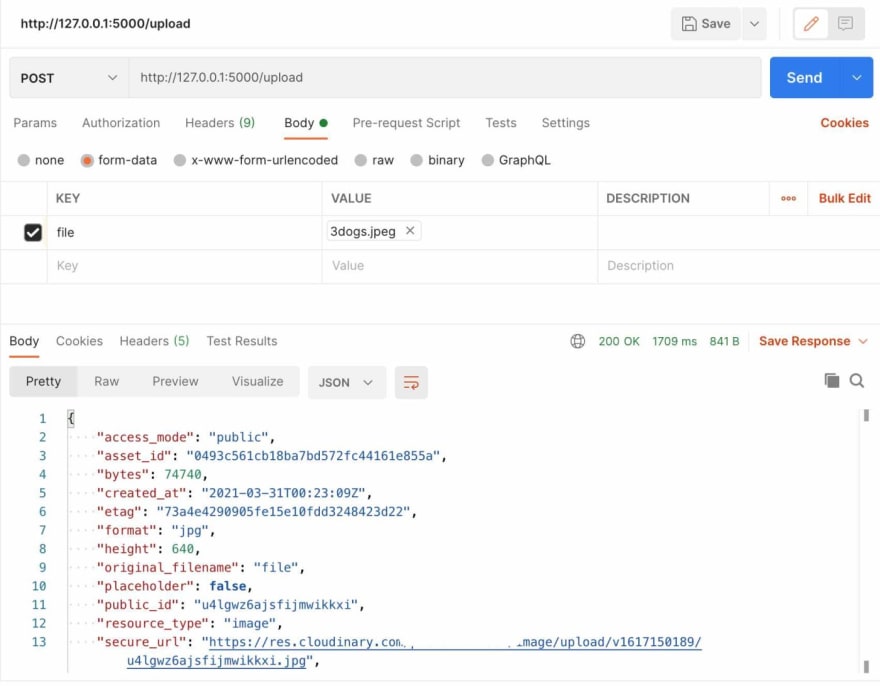
Test With Postman
In Postman, do the following:
- Set the method to
POST. - Set the body type to
form-data. - Establish Key/Value pairs for input. Set the value for the Key to
file. Mouse over the Key field and choose Text or File from the drop-down menu. Under File is a Select Files button; click it to select a file from your local drive. - Click Send to process the request.
The Cloudinary Upload API response is displayed at the bottom of the page
Test With a Local Form
Follow these steps:
- Open the
index.htmlfile with a local HTTP server. Choose a local file and click Upload. Run the JavaScript code below. The
fetchcommand calls the server that runs onlocalhost.fetch("http://127.0.0.1:5000/upload", options).then((response) => {return response.json();}).then((data) => {console.log(data);}).catch((error) => {console.log(error);});If the process is successful, the Cloudinary Upload API response is displayed in the console. Don't forget to set
event.preventDefault();for the submit handler. Otherwise, you'll get a page refresh and won't see your log.Post a file in a submit handler by creating a
FormDataobject and appending the file, as shown in the code below.const formData = new FormData();formData.append("file", fileInput.files[0]);const options = {method: "POST",body: formData,};
The above code packages up the file you select in your form input as if you had submitted a multipart form. A multipart form is important for submitting files because each input is sent as a block of data, separated by boundaries.
The result is then displayed in your console, like this: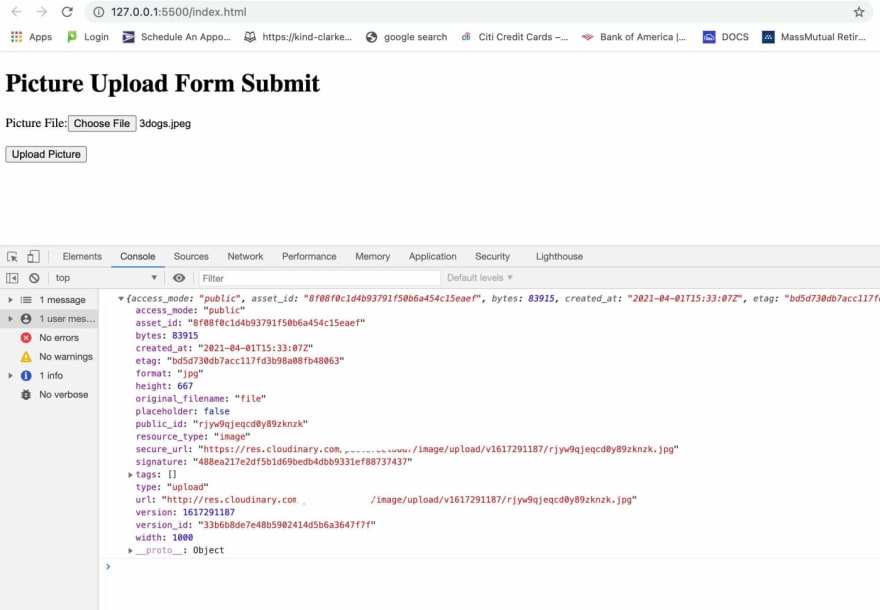
Deploying the Flask App to Heroku
Heroku is a platform as a service (PaaS) for serving prototypes or production-ready apps. Host the API you just built on Heroku by doing the following:
Create a free account on Heroku.
Install Gunicorn, short for Green Unicorn, a Python WSGI HTTP server for hosting apps.
python3 -m pip install gunicorn==20.0.4python3 -m pip freeze > requirements.txtCreate a file called
Prodfilewith instructions for Heroku to start your app with Gunicorn:web: gunicorn app:appCreate a file called
runtime.txtthat contains the Python version you want to use:python-3.9.1Deploy with Git:
git initgit add .git commit -m"my first commit"# Create a new Heroku appheroku create# You will get a URL where the app will be hostedgit remote -v# will confirm that you have set up a remote to push to Heroku
If you have an existing Heroku app that you created in the Heroku GUI
you can add it with this command instead of creating a new one
heroku git:remote -a thawing-inlet-61413
To deploy, you can now just push to Heroku
git push heroku master
Open your server (it's nice to have a GET method so you can verify like this)
heroku open
To log in to Heroku from the command line, type:
heroku login
Youll then be prompted to open the webpage to log in
You can build the new Heroku app with the CLI. However, as noted above, if you built it on the heroku.com dashboard, you can just add the link Heroku created for you to a `git:remote` command.### Loading Environment Variables on HerokuTo load environment variables on Heroku, open the dashboard and navigate to your new server instance. Click the **Settings** tab and scroll down to the **Config Vars** section. Click **Reveal Config Vars**, where you can enter Key/Value pairs. This is where you load your Cloudinary environment variables: `CLOUD_NAME`, `API_KEY`, and `API_SECRET`.For more options for setting up `prod` and `dev` instances, see the [Heroku documentation](https://devcenter.heroku.com/articles/git).## Testing the API Deployed on HerokuIf you have a `GET` method API like the "Hello World!" in the `app.py` example, you can open the Heroku app in the browser.For end-to-end testing, you can `POST` to the Heroku server link from Postman. The result is similar to that for local testing.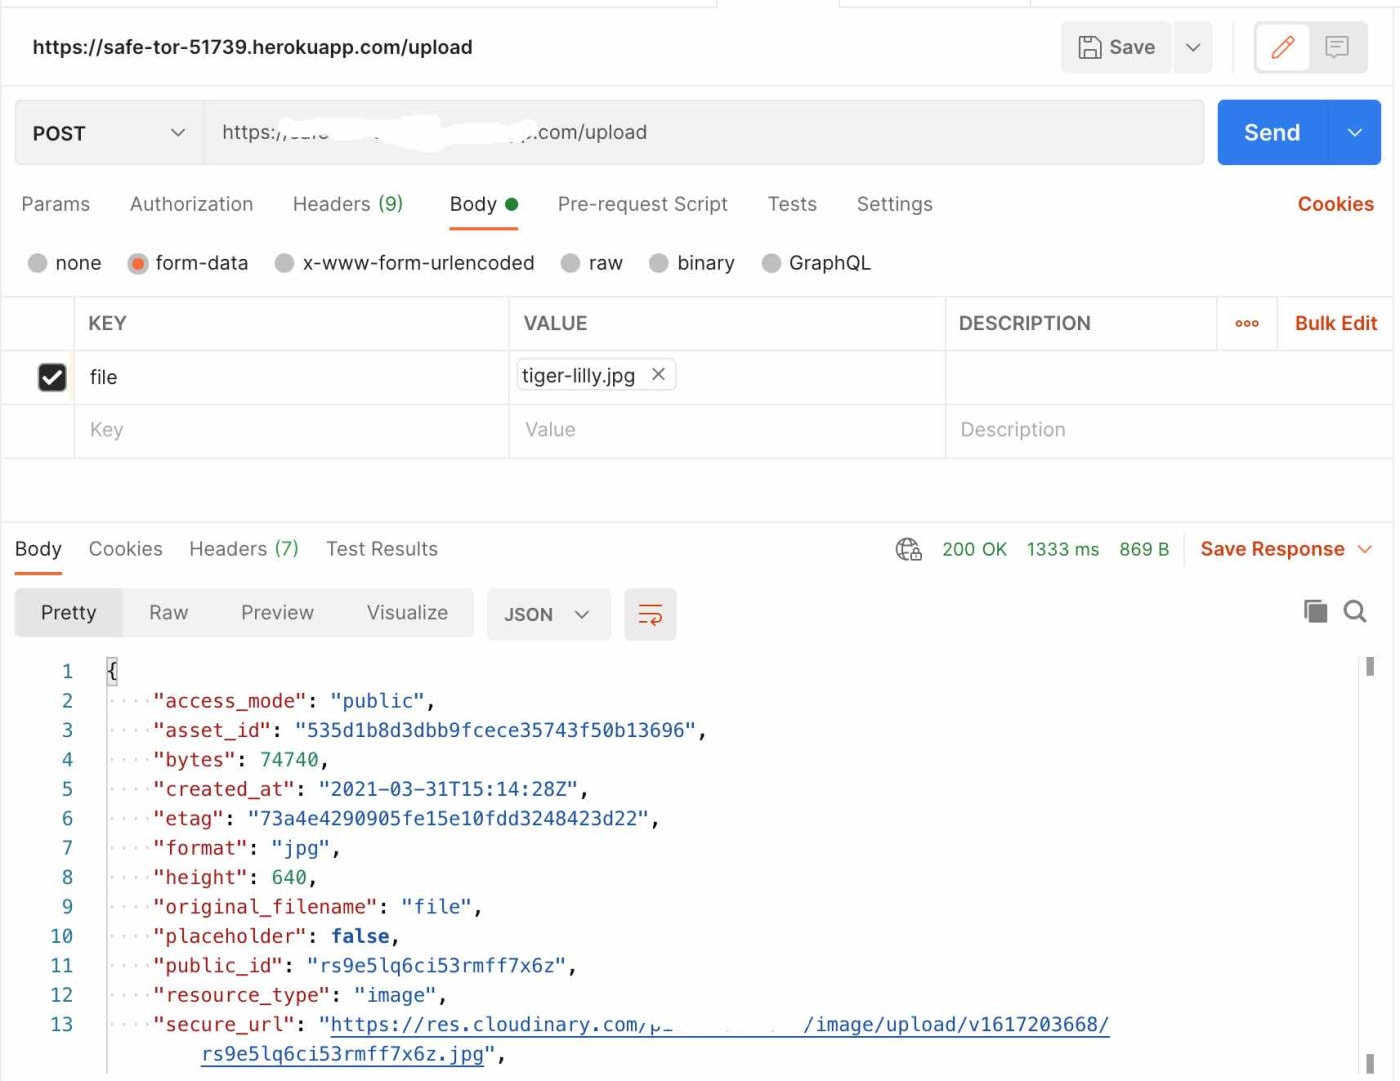Alternatively, modify the `index.html` file to post to your Heroku server. Just add your Heroku server link to the `fetch` command, like this:```JavaScriptfetch("https://xxxx.herokuapp.com", options)Securing the App
You might have noticed that the Heroku deployment link has been erased from the images above. Thats for security. Deploying this app to Heroku enables you to upload data to Cloudinary. If the link is not secured for use on an authenticated webpage only, anyone can upload to your Cloudinary cloud. Even though you are hiding your environment variables, youd have created a public method to change data on your cloud.
This tutorial does not cover how to set up authentication. Many options are available for authentication of API routes. You might want to look into Auth0, Google, or GitHub. Alternatively, build your own process based on your user database for this type of authentication.
Moving On
Once you get this API running, you can build other media APIs with the Cloudinary Python SDK by following the same pattern. Have fun!
Original Link: https://dev.to/rebeccapeltz/creating-an-api-with-python-flask-to-upload-files-to-cloudinary-1a0a
Dev To
More About this Source Visit Dev To