
An Interest In:
Web News this Week
- April 23, 2024
- April 22, 2024
- April 21, 2024
- April 20, 2024
- April 19, 2024
- April 18, 2024
- April 17, 2024
Some of Our Sources
- Slashdot
- Techcrunch
- Pearsonified
- Vandelay Design
- Fuel Your Creativity
- FanExtra - PSD
- Noupe
- Wal You
- Spyre Studios
- Design Modo
Help Webnuz
Referal links:
How to properly internationalize a React application using i18next
Overcoming the language barrier for users who use your software is an important topic.
English is no longer the universal language of the internet.
As of March 2020, only 25.9% of internet users were English speakers.
The chances are high that your users will skip past your website if non-localized.
Therefore, without a multilingual website you might missing out on a large share of potential users.
In the JavaScript ecosystem, there are a lot of internationalization frameworks. Here you can find some details about some JavaScript internationalization frameworks.
In this article, we will be using the i18next framework to internationalize a React.js app.
So first of all: "Why i18next?"
When it comes to React localization. One of the most popular is i18next with it's react extension react-i18next, and for good reasons:
i18next was created in late 2011. It's older than most of the libraries you will use nowadays, including your main frontend technology (react, vue, ...).
sustainable
Based on how long i18next already is available open source, there is no real i18n case that could not be solved with i18next.
mature
i18next can be used in any javascript (and a few non-javascript - .net, elm, iOS, android, ruby, ...) environment, with any UI framework, with any i18n format, ... the possibilities are endless.
extensible
There is a plenty of features and possibilities you'll get with i18next compared to other regular 18n frameworks.
rich
Here you can find more information about why i18next is special.
Let's get into it...
Prerequisites
Make sure you have Node.js and npm installed. It's best, if you have some experience with simple HTML, JavaScript and basic React.js, before jumping to react-i18next.
Getting started
Take your own React project or create a new one, i.e. with create-react-app.
npx create-react-app my-app
We are going to adapt the app to detect the language according to the users preference.
And we will create a language switcher to make the content change between different languages.
Let's install some i18next dependencies:
npm install i18next react-i18next i18next-browser-languagedetector
Let's prepare an i18n.js file:
import i18n from 'i18next';import { initReactI18next } from 'react-i18next';import LanguageDetector from 'i18next-browser-languagedetector';i18n // detect user language // learn more: https://github.com/i18next/i18next-browser-languageDetector .use(LanguageDetector) // pass the i18n instance to react-i18next. .use(initReactI18next) // init i18next // for all options read: https://www.i18next.com/overview/configuration-options .init({ debug: true, fallbackLng: 'en', interpolation: { escapeValue: false, // not needed for react as it escapes by default }, resources: { en: { translation: { // here we will place our translations... } } } });export default i18n;Let's import that file somewhere in our index.js file:
import React from 'react';import ReactDOM from 'react-dom';import './index.css';import App from './App';// import i18n (needs to be bundled ;))import './i18n';ReactDOM.render( <React.StrictMode> <App /> </React.StrictMode>, document.getElementById('root'));Now let's try to move some hard coded text out to the translations.
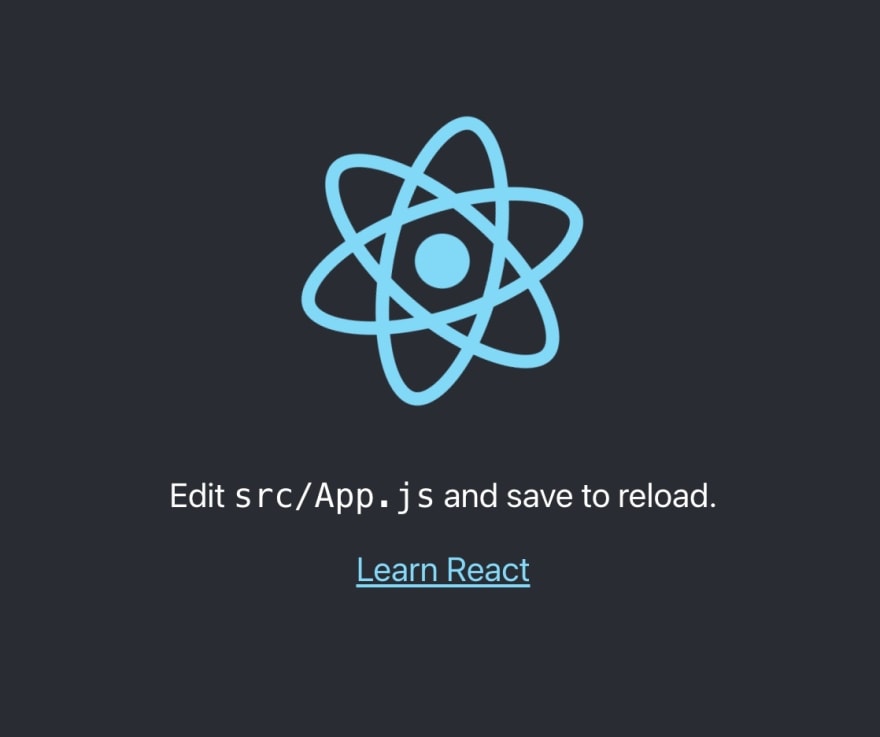
We have used the Trans component for the first text and the useTranslation hook for the second text:
import logo from './logo.svg';import './App.css';import { useTranslation, Trans } from 'react-i18next';function App() { const { t } = useTranslation(); return ( <div className="App"> <header className="App-header"> <img src={logo} className="App-logo" alt="logo" /> <p> <Trans i18nKey="description.part1"> Edit <code>src/App.js</code> and save to reload. </Trans> </p> <a className="App-link" href="https://reactjs.org" target="_blank" rel="noopener noreferrer" > {t('description.part2')} </a> </header> </div> );}export default App;The texts are now part of the translation resources:
import i18n from 'i18next';import { initReactI18next } from 'react-i18next';import LanguageDetector from 'i18next-browser-languagedetector';i18n // detect user language // learn more: https://github.com/i18next/i18next-browser-languageDetector .use(LanguageDetector) // pass the i18n instance to react-i18next. .use(initReactI18next) // init i18next // for all options read: https://www.i18next.com/overview/configuration-options .init({ debug: true, fallbackLng: 'en', interpolation: { escapeValue: false, // not needed for react as it escapes by default }, resources: { en: { translation: { description: { part1: 'Edit <1>src/App.js</1> and save to reload.', part2: 'Learn React' } } } } });export default i18n;Language Switcher
Now let's define a language switcher:
import logo from './logo.svg';import './App.css';import { useTranslation, Trans } from 'react-i18next';const lngs = { en: { nativeName: 'English' }, de: { nativeName: 'Deutsch' }};function App() { const { t, i18n } = useTranslation(); return ( <div className="App"> <header className="App-header"> <img src={logo} className="App-logo" alt="logo" /> <div> {Object.keys(lngs).map((lng) => ( <button key={lng} style={{ fontWeight: i18n.language === lng ? 'bold' : 'normal' }} type="submit" onClick={() => i18n.changeLanguage(lng)}> {lngs[lng].nativeName} </button> ))} </div> <p> <Trans i18nKey="description.part1"> Edit <code>src/App.js</code> and save to reload. </Trans> </p> <a className="App-link" href="https://reactjs.org" target="_blank" rel="noopener noreferrer" > {t('description.part2')} </a> </header> </div> );}export default App;And also add some translations for the new language:
import i18n from 'i18next';import { initReactI18next } from 'react-i18next';import LanguageDetector from 'i18next-browser-languagedetector';i18n // detect user language // learn more: https://github.com/i18next/i18next-browser-languageDetector .use(LanguageDetector) // pass the i18n instance to react-i18next. .use(initReactI18next) // init i18next // for all options read: https://www.i18next.com/overview/configuration-options .init({ debug: true, fallbackLng: 'en', interpolation: { escapeValue: false, // not needed for react as it escapes by default }, resources: { en: { translation: { description: { part1: 'Edit <1>src/App.js</1> and save to reload.', part2: 'Learn React' } } }, de: { translation: { description: { part1: 'ndere <1>src/App.js</1> und speichere um neu zu laden.', part2: 'Lerne React' } } } } });export default i18n;
Awesome, you've just created your first language switcher!
Thanks to i18next-browser-languagedetector now it tries to detect the browser language and automatically use that language if you've provided the translations for it. The manually selected language in the language switcher is persistet in the localStorage, next time you visit the page, that language is used as preferred language.
Interpolation and Pluralization
i18next goes beyond just providing the standard i18n features.
But for sure it's able to handle plurals and interpolation.
Let's count each time the language gets changed:
import logo from './logo.svg';import './App.css';import { useTranslation, Trans } from 'react-i18next';import { useState } from 'react';const lngs = { en: { nativeName: 'English' }, de: { nativeName: 'Deutsch' }};function App() { const { t, i18n } = useTranslation(); const [count, setCounter] = useState(0); return ( <div className="App"> <header className="App-header"> <img src={logo} className="App-logo" alt="logo" /> <div> {Object.keys(lngs).map((lng) => ( <button key={lng} style={{ fontWeight: i18n.language === lng ? 'bold' : 'normal' }} type="submit" onClick={() => { i18n.changeLanguage(lng); setCounter(count + 1); }}> {lngs[lng].nativeName} </button> ))} </div> <p> <i>{t('counter', { count })}</i> </p> <p> <Trans i18nKey="description.part1"> Edit <code>src/App.js</code> and save to reload. </Trans> </p> <a className="App-link" href="https://reactjs.org" target="_blank" rel="noopener noreferrer" > {t('description.part2')} </a> </header> </div> );}export default App;...and extending the translation resources:
import i18n from 'i18next';import { initReactI18next } from 'react-i18next';import LanguageDetector from 'i18next-browser-languagedetector';i18n // detect user language // learn more: https://github.com/i18next/i18next-browser-languageDetector .use(LanguageDetector) // pass the i18n instance to react-i18next. .use(initReactI18next) // init i18next // for all options read: https://www.i18next.com/overview/configuration-options .init({ debug: true, fallbackLng: 'en', interpolation: { escapeValue: false, // not needed for react as it escapes by default }, resources: { en: { translation: { description: { part1: 'Edit <1>src/App.js</1> and save to reload.', part2: 'Learn React' }, counter: 'Changed language just once', counter_plural: 'Changed language already {{count}} times' } }, de: { translation: { description: { part1: 'ndere <1>src/App.js</1> und speichere um neu zu laden.', part2: 'Lerne React' }, counter: 'Die Sprache wurde erst ein mal gewechselt', counter_plural: 'Die Sprache wurde {{count}} mal gewechselt' } } } });export default i18n;Based on the count value i18next will choose the correct plural form.
Read more about pluralization and interpolation in the official i18next documentation.

i18next is also able to handle languages with multiple plural forms, like arabic:
// translation resources:{ "key_0": "zero", "key_1": "singular", "key_2": "two", "key_3": "few", "key_4": "many", "key_5": "other"}// usage:t('key', {count: 0}); // -> "zero"t('key', {count: 1}); // -> "singular"t('key', {count: 2}); // -> "two"t('key', {count: 3}); // -> "few"t('key', {count: 4}); // -> "few"t('key', {count: 5}); // -> "few"t('key', {count: 11}); // -> "many"t('key', {count: 99}); // -> "many"t('key', {count: 100}); // -> "other"Formatting
Now, lets check out how we can use different date formats with the help of i18next and Luxon to handle date and time.
npm install luxon
We like to have a footer displaying the current date:
import './Footer.css';const Footer = ({ t }) => ( <div className="Footer"> <div>{t('footer.date', { date: new Date() })}</div> </div>);export default Footer;// imported in our App.js and used like this// <Footer t={t} />import luxon and define a format function in the interpolation options of i18next, like documented in the documentation and add the new translation key:
import i18n from 'i18next';import { initReactI18next } from 'react-i18next';import LanguageDetector from 'i18next-browser-languagedetector';import { DateTime } from 'luxon';i18n // detect user language // learn more: https://github.com/i18next/i18next-browser-languageDetector .use(LanguageDetector) // pass the i18n instance to react-i18next. .use(initReactI18next) // init i18next // for all options read: https://www.i18next.com/overview/configuration-options .init({ debug: true, fallbackLng: 'en', interpolation: { escapeValue: false, // not needed for react as it escapes by default format: (value, format, lng) => { if (value instanceof Date) { return DateTime.fromJSDate(value).setLocale(lng).toLocaleString(DateTime[format]) } return value; } }, resources: { en: { translation: { description: { part1: 'Edit <1>src/App.js</1> and save to reload.', part2: 'Learn React' }, counter: 'Changed language just once', counter_plural: 'Changed language already {{count}} times', footer: { date: 'Today is {{date, DATE_HUGE}}' } } }, de: { translation: { description: { part1: 'ndere <1>src/App.js</1> und speichere um neu zu laden.', part2: 'Lerne React' }, counter: 'Die Sprache wurde erst ein mal gewechselt', counter_plural: 'Die Sprache wurde {{count}} mal gewechselt', footer: { date: 'Heute ist {{date, DATE_HUGE}}' } } } } });export default i18n;Cool, now we have a language specific date formatting!
English: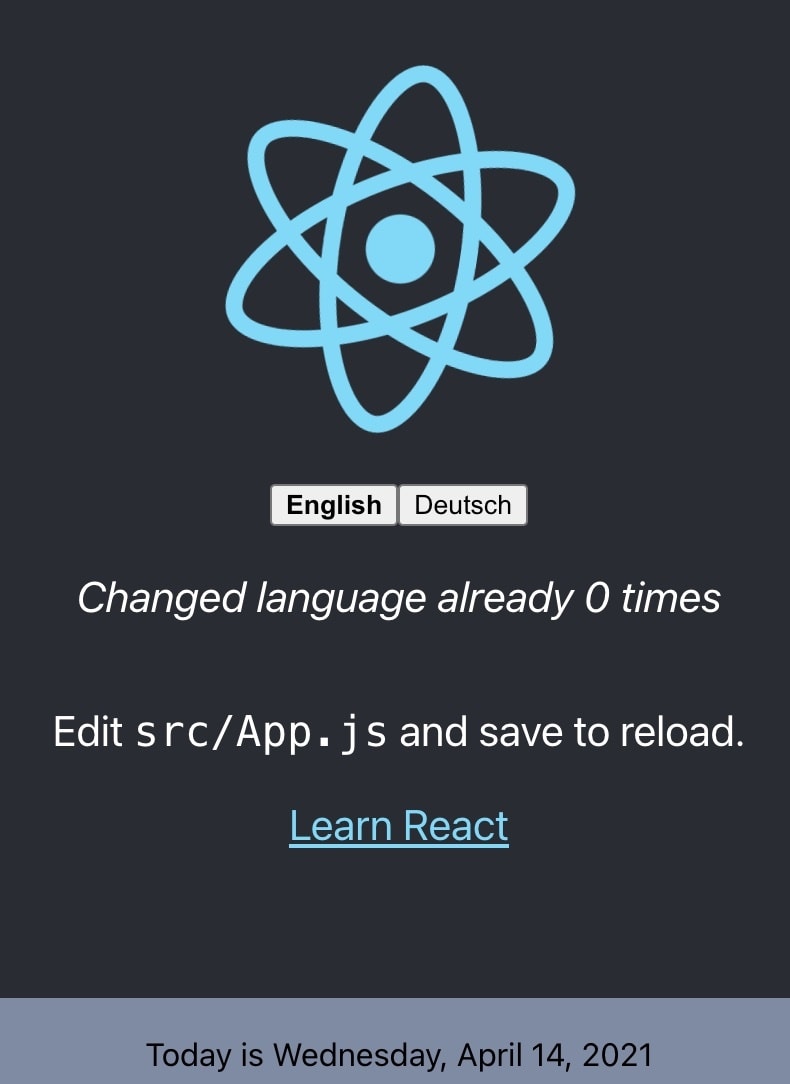
German: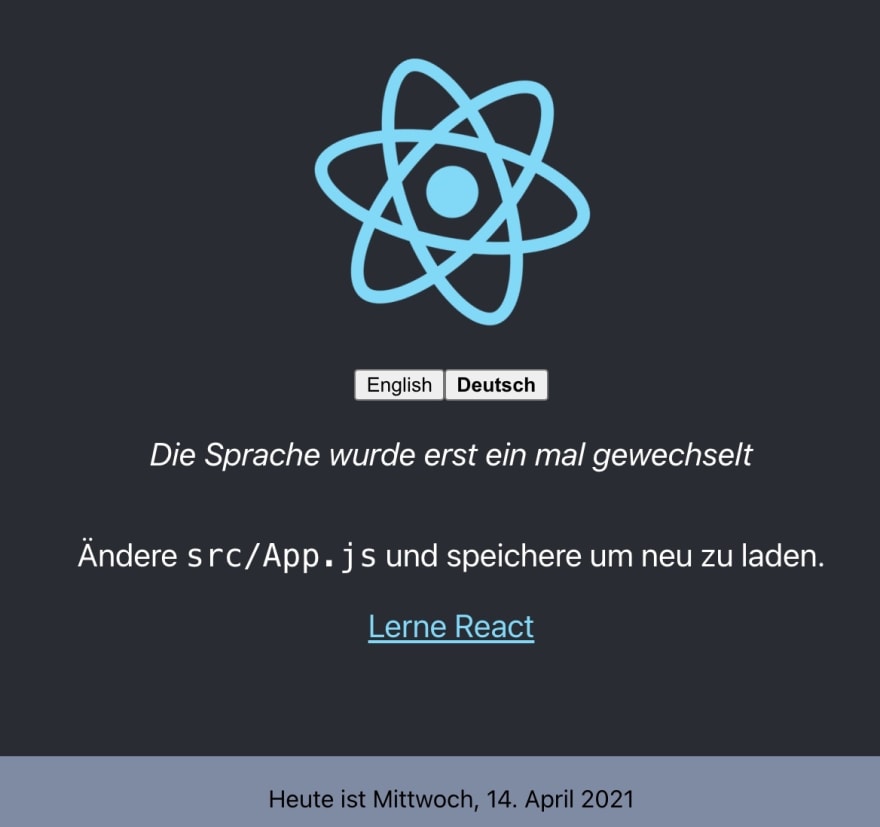
Context
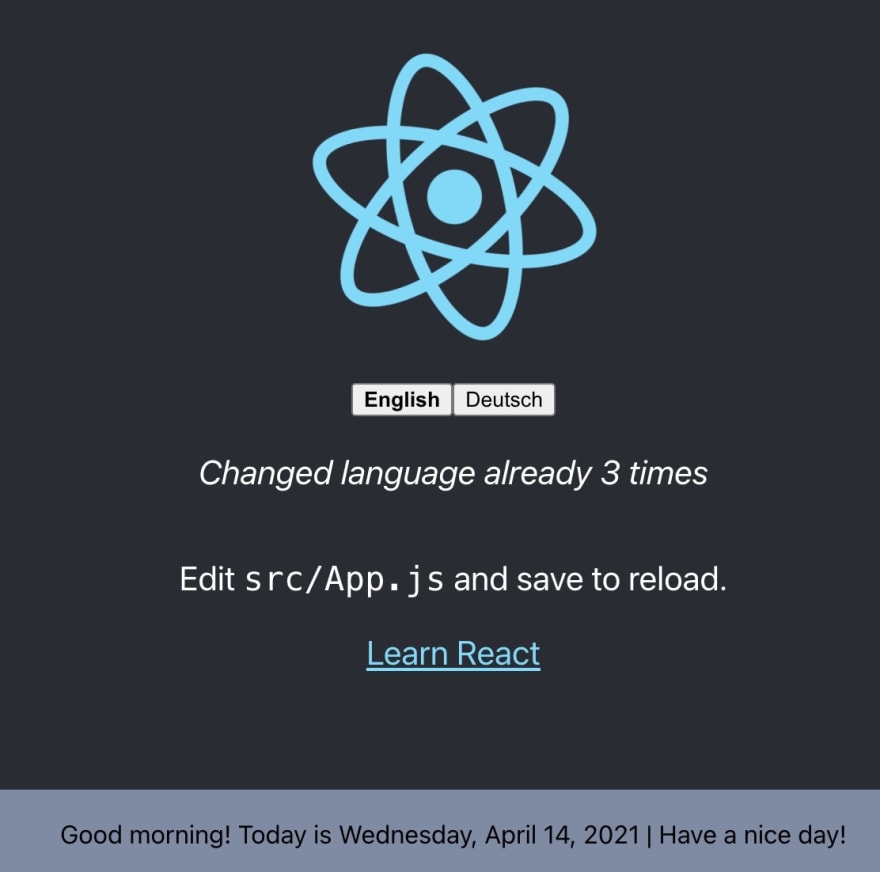
What about a specific greeting message based on the current day time? i.e. morning, evening, etc.
This is possible thanks to the context feature of i18next.
Let's create a getGreetingTime function and use the result as context information for our footer translation:
import { DateTime } from 'luxon';import './Footer.css';const getGreetingTime = (d = DateTime.now()) => { const split_afternoon = 12; // 24hr time to split the afternoon const split_evening = 17; // 24hr time to split the evening const currentHour = parseFloat(d.toFormat('hh')); if (currentHour >= split_afternoon && currentHour <= split_evening) { return 'afternoon'; } else if (currentHour >= split_evening) { return 'evening'; } return 'morning';}const Footer = ({ t }) => ( <div className="Footer"> <div>{t('footer.date', { date: new Date(), context: getGreetingTime() })}</div> </div>);export default Footer;And add some context specific translations keys:
import i18n from 'i18next';import { initReactI18next } from 'react-i18next';import LanguageDetector from 'i18next-browser-languagedetector';import Backend from 'i18next-http-backend';import { DateTime } from 'luxon';i18n // i18next-http-backend // loads translations from your server // https://github.com/i18next/i18next-http-backend .use(Backend) // detect user language // learn more: https://github.com/i18next/i18next-browser-languageDetector .use(LanguageDetector) // pass the i18n instance to react-i18next. .use(initReactI18next) // init i18next // for all options read: https://www.i18next.com/overview/configuration-options .init({ debug: true, fallbackLng: 'en', interpolation: { escapeValue: false, // not needed for react as it escapes by default format: (value, format, lng) => { if (value instanceof Date) { return DateTime.fromJSDate(value).setLocale(lng).toLocaleString(DateTime[format]) } return value; } }, resources: { en: { translation: { description: { part1: 'Edit <1>src/App.js</1> and save to reload.', part2: 'Learn React' }, counter: 'Changed language just once', counter_plural: 'Changed language already {{count}} times', footer: { date: 'Today is {{date, DATE_HUGE}}', date_morning: 'Good morning! Today is {{date, DATE_HUGE}} | Have a nice day!', date_afternoon: 'Good afternoon! It\'s {{date, DATE_HUGE}}', date_evening: 'Good evening! Today was the {{date, DATE_HUGE}}' } } }, de: { translation: { description: { part1: 'ndere <1>src/App.js</1> und speichere um neu zu laden.', part2: 'Lerne React' }, counter: 'Die Sprache wurde erst ein mal gewechselt', counter_plural: 'Die Sprache wurde {{count}} mal gewechselt', footer: { date: 'Heute ist {{date, DATE_HUGE}}', date_morning: 'Guten Morgen! Heute ist {{date, DATE_HUGE}} | Wnsche einen schnen Tag!', date_afternoon: 'Guten Tag! Es ist {{date, DATE_HUGE}}', date_evening: 'Guten Abend! Heute war {{date, DATE_HUGE}}' } } } } });export default i18n;Yeah, It works!
Separate translations from code
Having the translations in our i18n.js file works, but is not that suitable to work with, for translators.
Let's separate the translations from the code and pleace them in dedicated json files.
Because this is a web application, i18next-http-backend will help us to do so.
npm install i18next-http-backend
Move the translations to the public folder:

Adapt the i18n.js file to use the i18next-http-backend:
import i18n from 'i18next';import { initReactI18next } from 'react-i18next';import LanguageDetector from 'i18next-browser-languagedetector';import Backend from 'i18next-http-backend';import { DateTime } from 'luxon';i18n // i18next-http-backend // loads translations from your server // https://github.com/i18next/i18next-http-backend .use(Backend) // detect user language // learn more: https://github.com/i18next/i18next-browser-languageDetector .use(LanguageDetector) // pass the i18n instance to react-i18next. .use(initReactI18next) // init i18next // for all options read: https://www.i18next.com/overview/configuration-options .init({ debug: true, fallbackLng: 'en', interpolation: { escapeValue: false, // not needed for react as it escapes by default format: (value, format, lng) => { if (value instanceof Date) { return DateTime.fromJSDate(value).setLocale(lng).toLocaleString(DateTime[format]) } return value; } } });export default i18n;Now the translations are loaded asynchronously, so make sure you wrap your app with a Suspense component to prevent this error: Uncaught Error: App suspended while rendering, but no fallback UI was specified.
import { Suspense } from 'react';function App() { // your app's code...}// here app catches the suspense from page in case translations are not yet loadedexport default function WrappedApp() { return ( <Suspense fallback="...is loading"> <App /> </Suspense> );}Now your app looks still the same, but your translations are separated.
If you want to support a new language, you just create a new folder and a new translation json file.
This gives you the possibility to send the translations to some translators.
Or if you're working with a translation management system you can just synchronize the files with a cli.
btw: you can also have multiple translation files thanks to the namespaces feature of i18next
The code of this first part can be found here.
Better translation management
By sending the translations to some translators or translator agency you have more control and a direct contact with them. But this also means more work for you.
This is a traditional way. But be aware sending files around creates always an overhead.
Does a better option exist?
For sure!
i18next helps to get the application translated, and this is great - but there is more to it.
- How do you integrate any translation services / agency?
- How do you keep track of new or removed content?
- How you handle proper versioning?
- How you deploy translation changes without deploying your complete application?
- and a lot more...
Looking for something like this
- Easy to integrate
- Continuous deployment? Continuous localization!
- Manage the translation files with ease
- Order professional translations
- Analytics & Statistics
- Profit from our content delivery network (CDN)
- Versioning of your translations
- Automatic and On-Demand Machine Translation
- Riskfree: Take your data with you
- Transparent and fair pricing
- and a lot more...

How does this look like?
First you need to signup at locize and login.
Then create a new project in locize and add your translations. You can add your translations either by using the cli or by importing the individual json files or via API.
Done so, we're going to replace i18next-http-backend with i18next-locize-backend.
npm install i18next-locize-backend
After having imported the translations to locize, delete the locales folder:

Adapt the i18n.js file to use the i18next-locize-backend and make sure you copy the project-id and api-key from within your locize project:
import i18n from 'i18next';import { initReactI18next } from 'react-i18next';import LanguageDetector from 'i18next-browser-languagedetector';import Backend from 'i18next-locize-backend';import { DateTime } from 'luxon';const locizeOptions = { projectId: '0bbc223a-9aba-4a90-ab93-ab9d7bf7f780', apiKey: 'aaad4141-54ba-4625-ae37-657538fe29e7', // YOU should not expose your apps API key to production!!! referenceLng: 'en',};i18n // i18next-locize-backend // loads translations from your project, saves new keys to it (saveMissing: true) // https://github.com/locize/i18next-locize-backend .use(Backend) // detect user language // learn more: https://github.com/i18next/i18next-browser-languageDetector .use(LanguageDetector) // pass the i18n instance to react-i18next. .use(initReactI18next) // init i18next // for all options read: https://www.i18next.com/overview/configuration-options .init({ debug: true, fallbackLng: 'en', interpolation: { escapeValue: false, // not needed for react as it escapes by default format: (value, format, lng) => { if (value instanceof Date) { return DateTime.fromJSDate(value).setLocale(lng).toLocaleString(DateTime[format]) } return value; } }, backend: locizeOptions });export default i18n;i18next-locize-backend offers a functionality to retrieve the available languages directly from locize, let's use it:
import logo from './logo.svg';import './App.css';import { useTranslation, Trans } from 'react-i18next';import { useState, Suspense, useEffect } from 'react';import Footer from './Footer'function App() { const { t, i18n } = useTranslation(); const [count, setCounter] = useState(0); const [lngs, setLngs] = useState({ en: { nativeName: 'English' }}); useEffect(() => { i18n.services.backendConnector.backend.getLanguages((err, ret) => { if (err) return // TODO: handle err... setLngs(ret); }); }, []); return ( <div className="App"> <header className="App-header"> <img src={logo} className="App-logo" alt="logo" /> <div> {Object.keys(lngs).map((lng) => ( <button key={lng} style={{ fontWeight: i18n.language === lng ? 'bold' : 'normal' }} type="submit" onClick={() => { i18n.changeLanguage(lng); setCounter(count + 1); }}> {lngs[lng].nativeName} </button> ))} </div> <p> <i>{t('counter', { count })}</i> </p> <p> <Trans i18nKey="description.part1"> Edit <code>src/App.js</code> and save to reload. </Trans> </p> <a className="App-link" href="https://reactjs.org" target="_blank" rel="noopener noreferrer" > {t('description.part2')} </a> </header> <Footer t={t} /> </div> );}// here app catches the suspense from page in case translations are not yet loadedexport default function WrappedApp() { return ( <Suspense fallback="...is loading"> <App /> </Suspense> );}save missing translations
Thanks to the use of the saveMissing functionality, new keys gets added to locize automatically, while developing the app.
Just pass saveMissing: true in the i18next options:
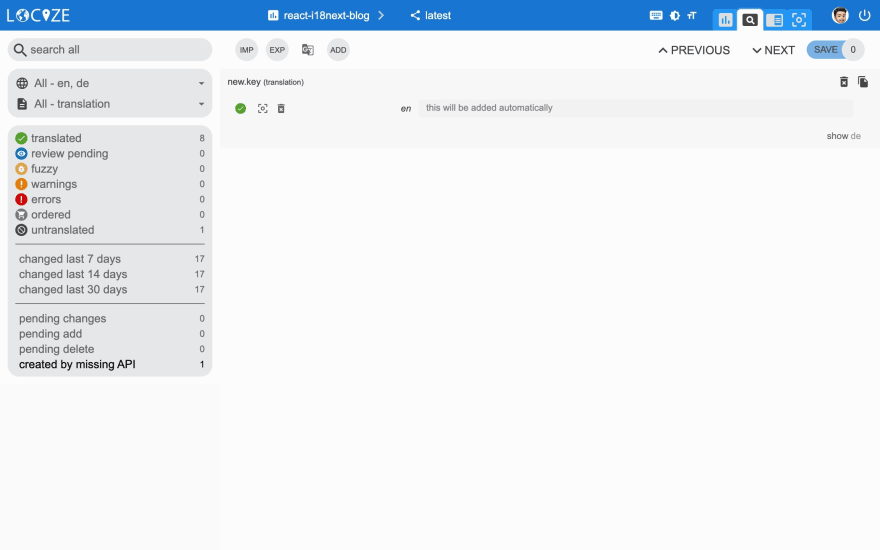
import i18n from 'i18next';import { initReactI18next } from 'react-i18next';import LanguageDetector from 'i18next-browser-languagedetector';import Backend from 'i18next-locize-backend';import { DateTime } from 'luxon';const locizeOptions = { projectId: '0bbc223a-9aba-4a90-ab93-ab9d7bf7f780', apiKey: 'aaad4141-54ba-4625-ae37-657538fe29e7', // YOU should not expose your apps API key to production!!! referenceLng: 'en',};i18n // i18next-locize-backend // loads translations from your project, saves new keys to it (saveMissing: true) // https://github.com/locize/i18next-locize-backend .use(Backend) // detect user language // learn more: https://github.com/i18next/i18next-browser-languageDetector .use(LanguageDetector) // pass the i18n instance to react-i18next. .use(initReactI18next) // init i18next // for all options read: https://www.i18next.com/overview/configuration-options .init({ debug: true, fallbackLng: 'en', interpolation: { escapeValue: false, // not needed for react as it escapes by default format: (value, format, lng) => { if (value instanceof Date) { return DateTime.fromJSDate(value).setLocale(lng).toLocaleString(DateTime[format]) } return value; } }, backend: locizeOptions, saveMissing: true });export default i18n;Each time you'll use a new key, it will be sent to locize, i.e.:
<div>{t('new.key', 'this will be added automatically')}</div>will result in locize like this:
but there's more...
Thanks to the locize-lastused plugin, you'll be able to find and filter in locize which keys are used or not used anymore.
With the help of the locize plugin, you'll be able to use your app within the locize InContext Editor.
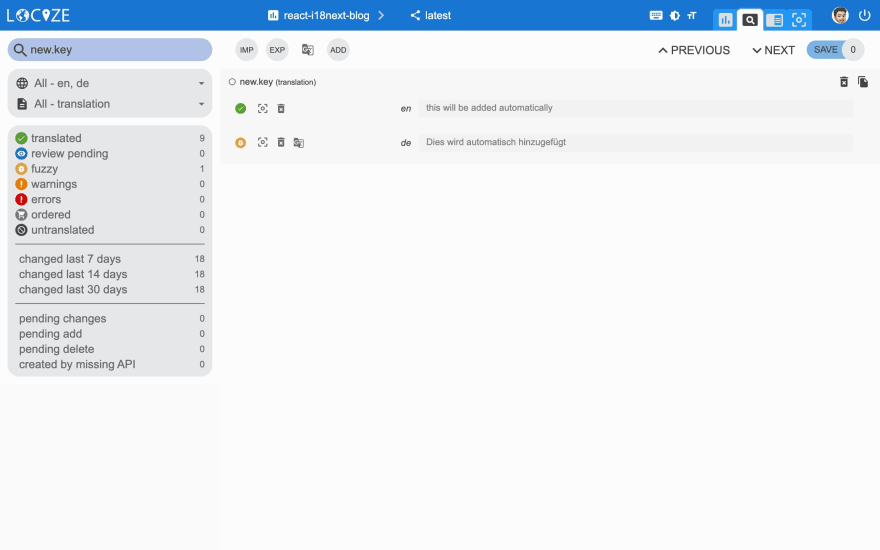
Lastly, with the help of the auto-machinetranslation workflow and the use of the saveMissing functionality, new keys not only gets added to locize automatically, while developing the app, but are also automatically translated into the target languages using machine translation.
Check out this video to see how the automatic machine translation workflow looks like!
npm install locize-lastused locize
use them in i18n.js:
import i18n from 'i18next';import { initReactI18next } from 'react-i18next';import LanguageDetector from 'i18next-browser-languagedetector';import Backend from 'i18next-locize-backend';import LastUsed from 'locize-lastused';import { locizePlugin } from 'locize';import { DateTime } from 'luxon';const locizeOptions = { projectId: '0bbc223a-9aba-4a90-ab93-ab9d7bf7f780', apiKey: 'aaad4141-54ba-4625-ae37-657538fe29e7', // YOU should not expose your apps API key to production!!! referenceLng: 'en',};i18n // locize-lastused // sets a timestamp of last access on every translation segment on locize // -> safely remove the ones not being touched for weeks/months // https://github.com/locize/locize-lastused .use(LastUsed) // locize-editor // InContext Editor of locize .use(locizePlugin) // i18next-locize-backend // loads translations from your project, saves new keys to it (saveMissing: true) // https://github.com/locize/i18next-locize-backend .use(Backend) // detect user language // learn more: https://github.com/i18next/i18next-browser-languageDetector .use(LanguageDetector) // pass the i18n instance to react-i18next. .use(initReactI18next) // init i18next // for all options read: https://www.i18next.com/overview/configuration-options .init({ debug: true, fallbackLng: 'en', interpolation: { escapeValue: false, // not needed for react as it escapes by default format: (value, format, lng) => { if (value instanceof Date) { return DateTime.fromJSDate(value).setLocale(lng).toLocaleString(DateTime[format]) } return value; } }, backend: locizeOptions, locizeLastUsed: locizeOptions, saveMissing: true });export default i18n;Automatic machine translation:
Last used translations filter:


Let's prepare for production
Now, we prepare the app for going to production.
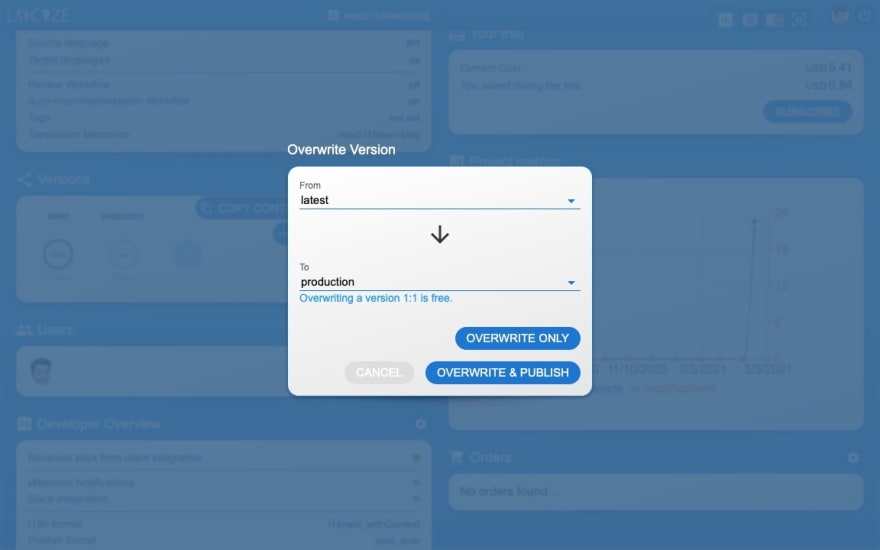
First in locize, create a dedicated version for production. Do not enable auto publish for that version but publish manually or via API or via CLI.
Lastly, enable Cache-Control max-age for that production version.
Let's making use of the environment feature of react-scripts.
Lets' create a default environment file and one for development and one for production:
.env:
SKIP_PREFLIGHT_CHECK=trueREACT_APP_VERSION=$npm_package_version# locizeREACT_APP_LOCIZE_PROJECTID=0bbc223a-9aba-4a90-ab93-ab9d7bf7f780REACT_APP_LOCIZE_REFLNG=en.env.development:
REACT_APP_LOCIZE_VERSION=latestREACT_APP_LOCIZE_APIKEY=aaad4141-54ba-4625-ae37-657538fe29e7.env.production:
REACT_APP_LOCIZE_VERSION=productionNow let's adapt the i18n.js file:
import i18n from 'i18next';import { initReactI18next } from 'react-i18next';import LanguageDetector from 'i18next-browser-languagedetector';import Backend from 'i18next-locize-backend';import LastUsed from 'locize-lastused';import { locizePlugin } from 'locize';import { DateTime } from 'luxon';const isProduction = process.env.NODE_ENV === 'production';const locizeOptions = { projectId: process.env.REACT_APP_LOCIZE_PROJECTID, apiKey: process.env.REACT_APP_LOCIZE_APIKEY, // YOU should not expose your apps API key to production!!! referenceLng: process.env.REACT_APP_LOCIZE_REFLNG, version: process.env.REACT_APP_LOCIZE_VERSION};if (!isProduction) { // locize-lastused // sets a timestamp of last access on every translation segment on locize // -> safely remove the ones not being touched for weeks/months // https://github.com/locize/locize-lastused i18n.use(LastUsed);}i18n // locize-editor // InContext Editor of locize .use(locizePlugin) // i18next-locize-backend // loads translations from your project, saves new keys to it (saveMissing: true) // https://github.com/locize/i18next-locize-backend .use(Backend) // detect user language // learn more: https://github.com/i18next/i18next-browser-languageDetector .use(LanguageDetector) // pass the i18n instance to react-i18next. .use(initReactI18next) // init i18next // for all options read: https://www.i18next.com/overview/configuration-options .init({ debug: true, fallbackLng: 'en', interpolation: { escapeValue: false, // not needed for react as it escapes by default format: (value, format, lng) => { if (value instanceof Date) { return DateTime.fromJSDate(value).setLocale(lng).toLocaleString(DateTime[format]) } return value; } }, backend: locizeOptions, locizeLastUsed: locizeOptions, saveMissing: !isProduction // you should not use saveMissing in production });export default i18n;Now, during development, you'll continue to save missing keys and to make use of lastused feature. => npm run start
And in production environment, saveMissing and lastused are disabled, and also the api-key is not exposed. => npm run build && npm run serve

The complete code can be found here.
Congratulations
I hope youve learned a few new things about i18next, React.js localization and modern localization workflows.
So if you want to take your i18n topic to the next level, it's worth to try locize.
The founders of locize are also the creators of i18next. So with using locize you directly support the future of i18next.
Original Link: https://dev.to/adrai/how-to-properly-internationalize-a-react-application-using-i18next-3hdb
Dev To
More About this Source Visit Dev To