
An Interest In:
Web News this Week
- March 24, 2024
- March 23, 2024
- March 22, 2024
- March 21, 2024
- March 20, 2024
- March 19, 2024
- March 18, 2024
Some of Our Sources
- Mashable
- Smashing Apps
- Abduzeedo
- Inspiredology
- My Ink Blog
- CSS Globe
- Line 25
- Freelance Switch
- Codrops
- Willems Lab
Help Webnuz
Referal links:
API's From Dev to Production - Part 3
Series Introduction
Welcome to Part 3 of this blog series that will go from the most basic example of a .net 5 webapi in C#, and the journey from development to production with a shift-left mindset. We will use Azure, Docker, GitHub, GitHub Actions for CI/C-Deployment and Infrastructure as Code using Pulumi.
In this post we will be looking at:
- GitHub Actions:
- Build the docker image
- Publish the docker image to the GitHub Container Registry
TL;DR
Instead of building locally like we did previously, we utilised GitHub Actions and the GitHub Container Registry to store our Docker image. GitHub Actions workflow is basic YAML, and we used a few actions to achieve what we needed. We checked-out the repository, docker build, logged into our GitHub Container Registry and executed a docker push command. We used a Personal Access token and stored it in GitHub secrets to use in our workflow, and finally, we pulled down our public image from the GitHub Container Registry and tested locally using Postman.
Requirements
We will be picking-up where we left off in Part 2, which means youll need the end-result from GitHub Repo from - Part 2 to start with.
What are GitHub Actions?
GitHub Actions makes it easy to automate all kinds of software workflows, right inside GitHub. You can build, test, and deploy your code and more. Workflows can be triggered off many GitHub events like push, issue creation and more. There is support for Linux, macOS, Windows, ARM and of course containers Even matrix builds - so you can build the same software across multiple OSs. There are live logs, secret store and more, plus the UX is rather nice too! All of this is driven by YAML files, nice and neat, and stored under source control management.
There is also GitHub Packages which has various package management providers like npm, nuget and more. For containers, there is a new GitHub Container Registry, so images no longer need to be stored in GitHub Packages but there is a real container registry - We will use this in this blog post :D
Lets get started
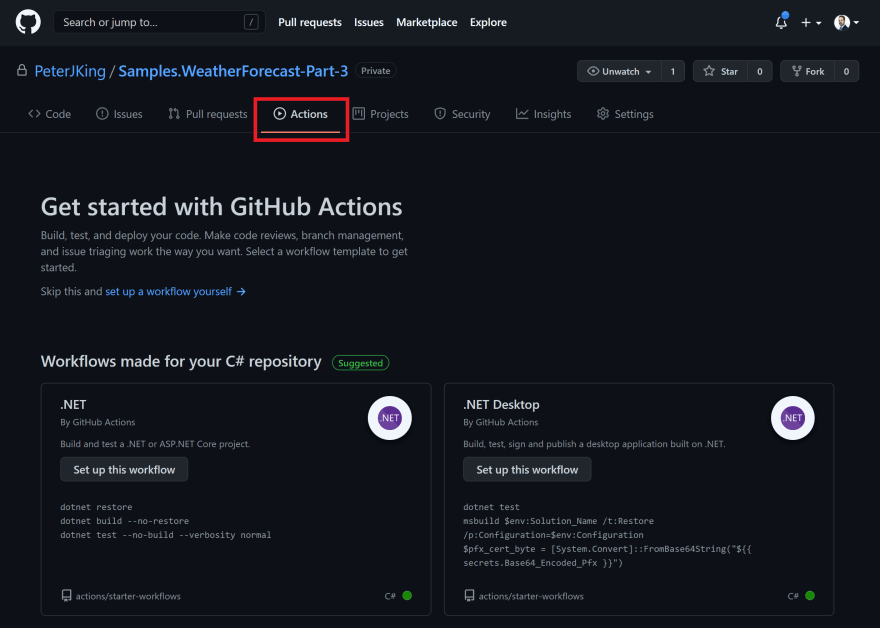
If you navigate to GitHub Actions in your repository, youll be presented with the above screen. There are various starter workflows or you can simply start from scratch.
Build your Workflow from scratch
Were going to build it from scratch, there isnt much to it, and its easier to learn and see what happening this way.
Select set up a workflow yourself
You will see a default workflow created for you with some helpful, guiding comments.
I have changed the workflow file name to build-and-publish.yml and the name (line 3) to, Build and Publish.

You have the on section where you can set triggers for various GitHub events.
They are fairly self-explanatory, but if youre struggling, there is some decent documentation on GitHub about about it here: GitHub Actions - Workflow Syntax
For now, lets remove all the comments as it is slightly more verbose for my liking, but please make sure you do understand what commands we are utilising. If not, things will become more clear as we edit this workflow now.
If we remove all the comments and cut out some of the default template code, you should be left with something like this, fairly barebones:
name: Build and Publishon: push: branches: [ main ] pull_request: branches: [ main ] workflow_dispatch:jobs: build-and-publish: runs-on: ubuntu-latest steps:The above is telling us that when a push, or a pull request event happens on the main branch, execute this workflow, which when then run the jobs, and within jobs there are steps.
Lets focus on the steps and add the checkout of the git repository.
- name: Checkout the repo uses: actions/checkout@v2The uses is key to understand, its an action, and you can even have a look at the code in the GitHub Marketplace
Youll find useful documentation on what it does and how to use it, and you can even create your own GitHub Action to do whatever you want - and guess what? They too can be based on Docker containers!
For more information about how to create custom GitHub Actions and use them to your advantage, or you want to share yours with the rest of us, please visit, GitHub - Creating Actions
Next up is the Docker build.
- name: Build docker image run: docker build . -t ghcr.io/peterjking/samples-weatherforecast:${{ github.sha }}Here we are simply running docker build, our Dockerfile is in the current directory, hence the period . and we set the image tag to my GitHub Container Registry : github.sha.
Each GitHub Account has a Container Registry, AKA GitHub Packages, for more information please visit - https://ghcr.io
You image tag must be lowercase - if you have a GitHub username like mine where there is uppercase letters, you can either hardcode it here like I have for the moment, store this in a GitHub Secret or convert to lowercase dynamically.
Now we have built the Docker image, we now would like to push it to our GitHub Container Registry, for this, we need valid credentials. For something like this, we can use a GitHub Access Token and securely store it in our GitHub Secrets area of our repo. Lets go set this up now.
Navigate to Settings (on your profile)
Select Developer Settings
Select Personal Access Tokens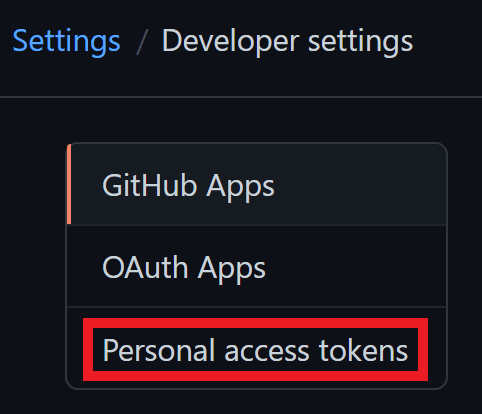
Click Generate new token
Youll see a new screen whereby you can set the name of the PAS (Personal Access Token) and set the OAuth scopes for it. In our case, we only need write:packages, read:packages and delete:packages.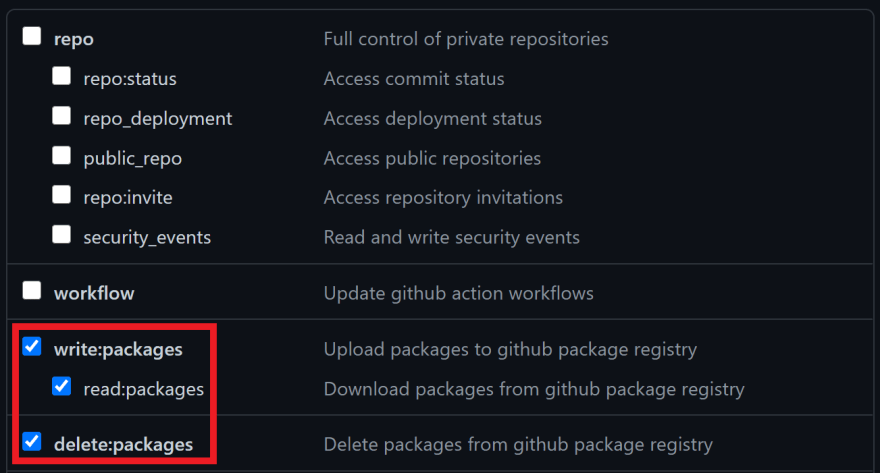
Give the access token a name, Ive called mine, ghcr.
Copy your access token.
Once youve generated the token, you wont be able to get the value again, however, you can always regenerate a new value.
Navigate to your GitHub repository Settings Secrets Click New repository secret.
Enter a name, paste in your value, and click Add secret.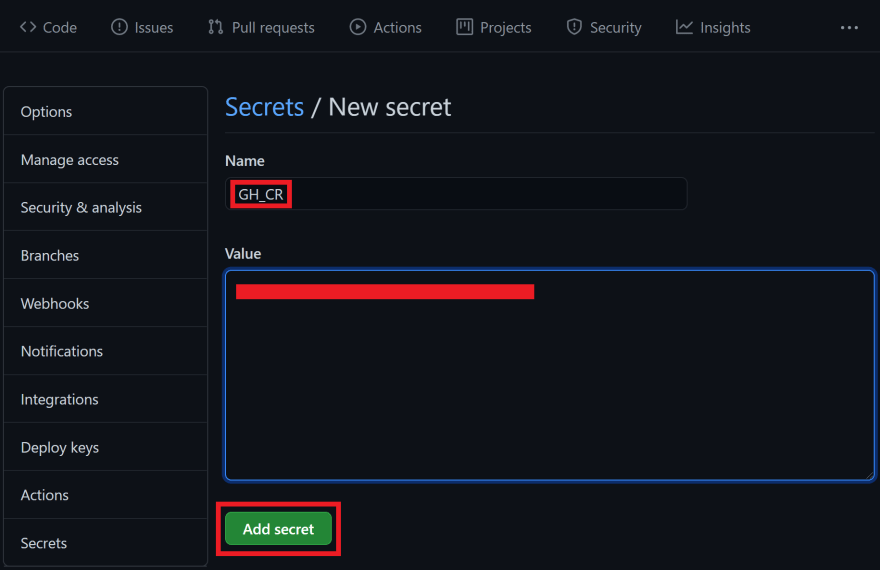
Now we have successfully stored our Personal Access Token as a secret, we can use that to access our GitHub Container Registry and push our image.
Below we use a GitHub Action called login-action@v1 and set it with some variables.
For more information about this action, please visit, GitHub Actions Marketplace - docker-login
- name: Login to GitHub Container Registry uses: docker/login-action@v1 with: registry: ghcr.io username: ${{ github.repository_owner }} password: ${{ secrets.GH_CR }}Youll notice we are using an another internal GitHub environment variable called repository_owner, this contains the repository owner, which equates to my username, and therefore, my GitHub Container Registry.
Next there is the secret we created earlier, GH_CR.
Now we have login action setup, we can finally do our docker push.
- name: Push docker image run: docker push ghcr.io/peterjking/samples-weatherforecast:${{ github.sha }}Thats it!
However, we can make a minor enhancement given we are using the image tag in two places.
Ive added an env section which enables variables within my workflow, Ive called it, image-name, and used it in the docker build and docker push commands.
Full Dockerfile
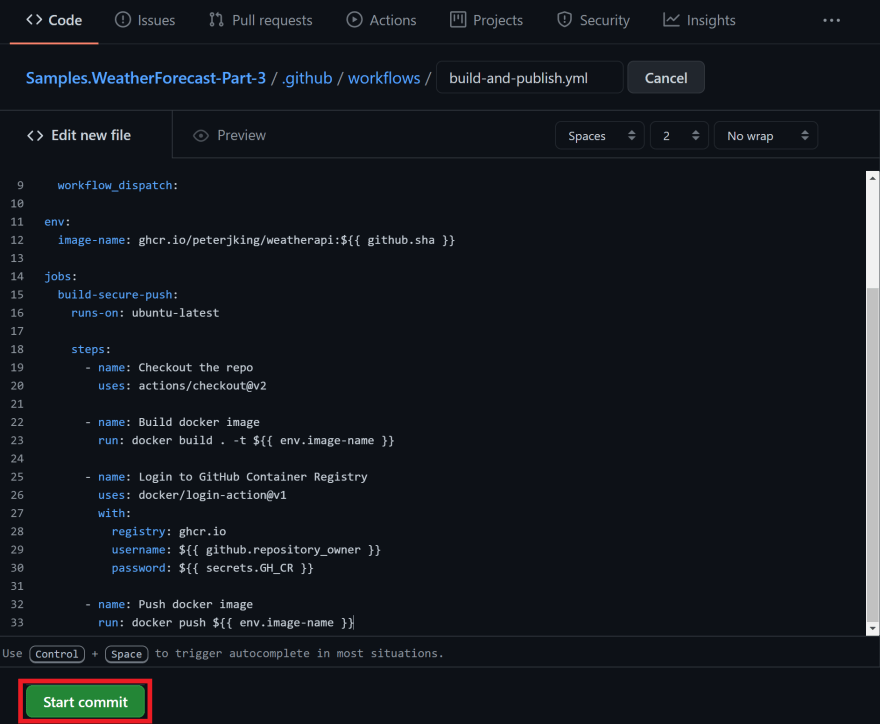
name: Build and Publishon: push: branches: [ main ] pull_request: branches: [ main ] workflow_dispatch:env: image-name: ghcr.io/peterjking/samples-weatherforecast:${{ github.sha }}jobs: build-secure-push: runs-on: ubuntu-latest steps: - name: Checkout the repo uses: actions/checkout@v2 - name: Build docker image run: docker build . -t ${{ env.image-name }} - name: Login to GitHub Container Registry uses: docker/login-action@v1 with: registry: ghcr.io username: ${{ github.repository_owner }} password: ${{ secrets.GH_CR }} - name: Push docker image run: docker push ${{ env.image-name }}Make sure you workflow looks like the above, except the username in the
envimage-namevariable of course; this should be your username.
Now youre ready to press Start commit!
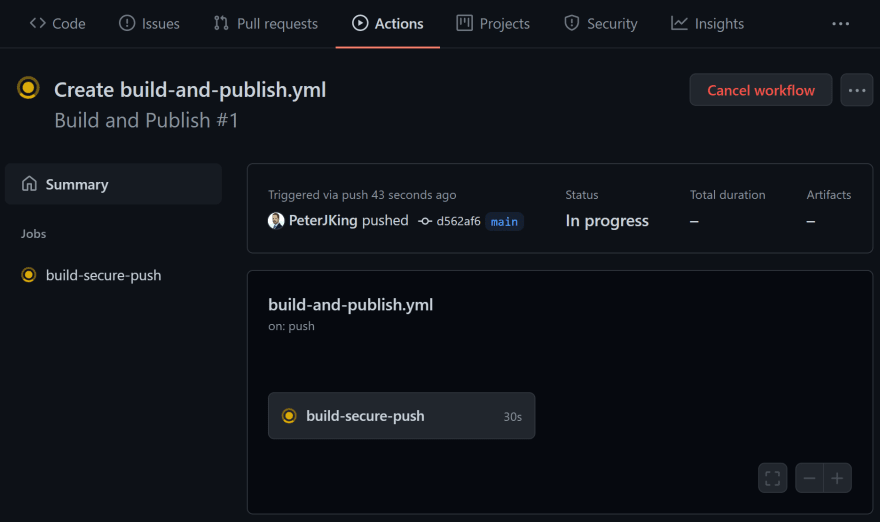
Once the GitHub Action kicks into Action - Youll see it queued and then move into in progress.
The time delay between Queued to In Progress, if youre used to an older style build system where you can be waiting minutes or even hours in some cases, youll be happy to learn this is ultrafast!

The build has now started and In progress.
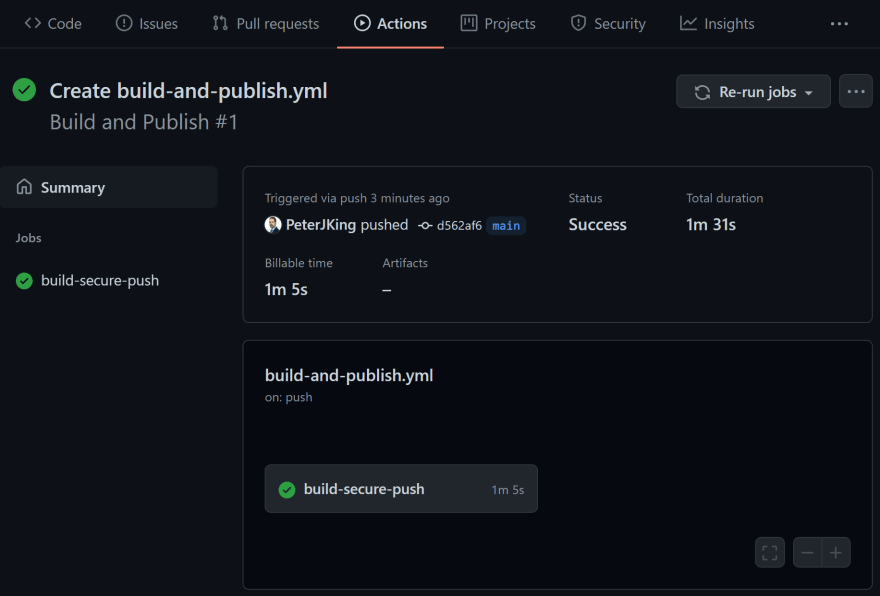
All green... It worked!

Below we can now see the summary, the build has taken 1 minute and 31 seconds.
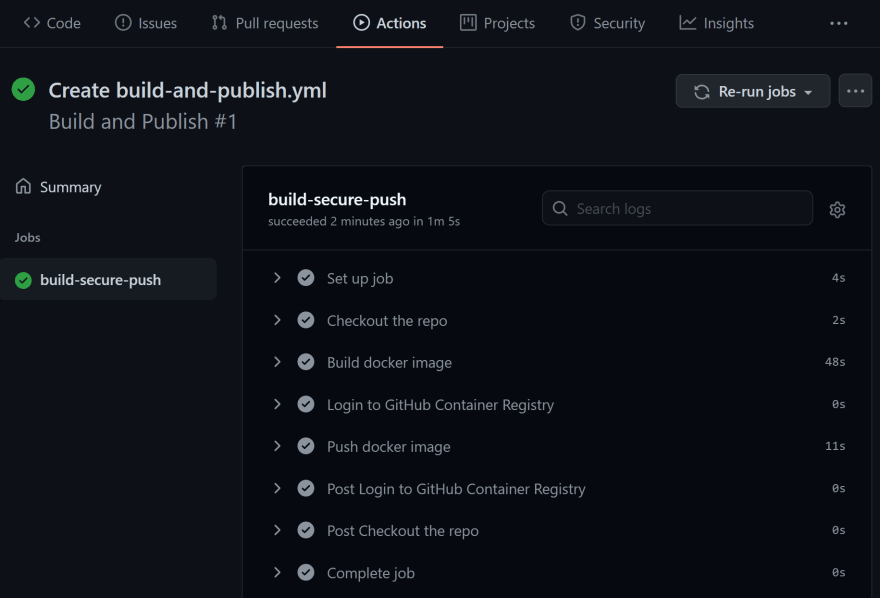
By clicking build-secure-push you will see the steps and their logs.
Now, lets check that our Docker image has actually been stored in our GitHub Container Registry by navigating to Packages.

Click the package link.
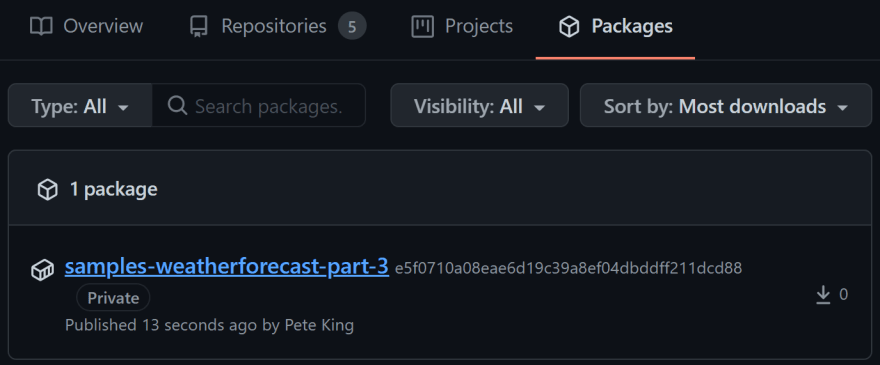
You can see a helpful section at the top where there is a sample commandline.
Copy this now as we'll need it in the very next step to test.

Lets test this image
docker pull ghcr.io/peterjking/samples-weatherforecast-part-3:e5f0710a08eae6d19c39a8ef04dbddff211dcd88`Note your image name will have a unique SHA1 as the Docker tag.
Copy the docker pull from your package, head-on over to the command line and execute.
If you are working on a private package, you will most certainly receive unauthorized.
One way to solve this is to open your package to the public by changing the visibility settings in the Package Settings.
Once you make the package public, you cannot go back.
The alternative is to login to your GitHub Container Registry first with docker login.
For now, Ive simply made the package public, for more information on docker login, please see, Docker Docs - Commandline - Login

Docker run
docker run -it --rm -p 8080:8080 ghcr.io/peterjking/samples-weatherforecast-part3:e5f0710a08eae6d19c39a8ef04dbddff211dcd88`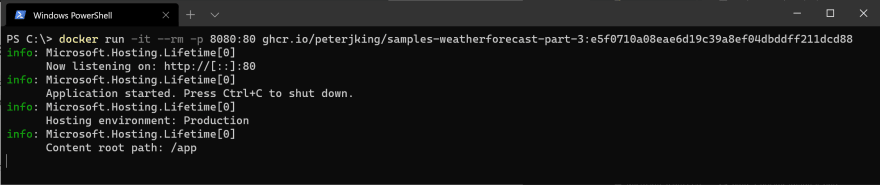
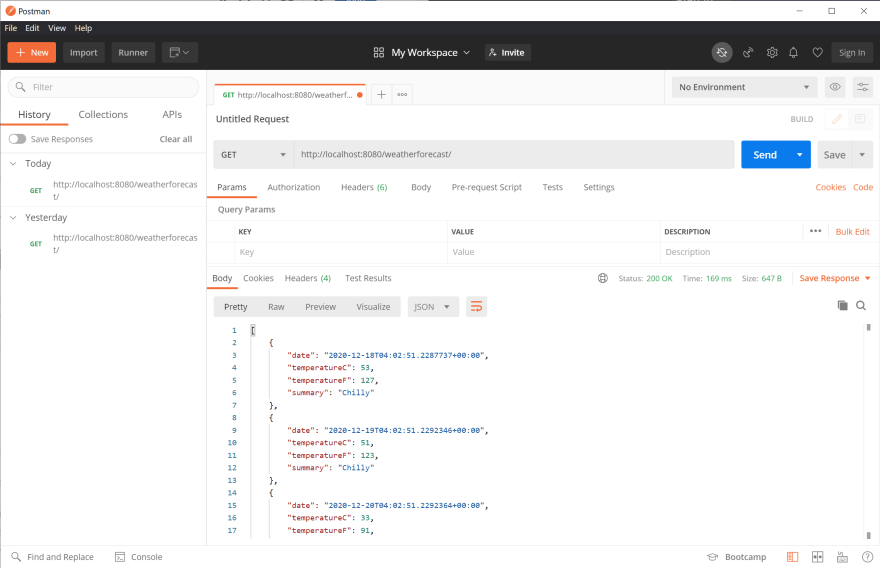
Send a request
What have we learned?
Well, weve learned a bunch here havent we? We have learned the very basics of GitHub Actions, how to write your own workflow, pretty much from scratch, generate a Personal Access Token and store that token in your repository Secrets area.
In our workflow we added the docker build, logging into the GitHub Container registry, and finally the docker push command.
Weve seen GitHub Actions in Action! The workflow summary and the workflow job output too.
Finally, weve pulled down our Docker image from our public GitHub Container Registry and tested it locally. There is different compared to how weve done it before in this blog series, previously weve built the docker image locally and its already in our local Docker repository. We are now using the same flow as the base images youve used in our Dockerfile, and what other companies / individuals have stored in Docker Hub. Equally, you do not have to use the GitHub Container Registry, you could simply sign-up to Docker Hub. Not to forget there are other 3rd party solutions such as:
- Azure Container Registry AKA - ACR.
- Google Container Registry
- Amazon Container Registry
- Mirantis Container Registry
- Harbor
- Quay.io - from Red Hat.
- Scaleway
...and the list goes on!
Up next
Part 4 in this series will be about:
Add container scanning to our GitHub Action workflow
Resolve security vulnerabilities
More information
Original Link: https://dev.to/newday-technology/api-s-from-dev-to-production-part-3-7dn
Dev To
More About this Source Visit Dev To