
An Interest In:
Web News this Week
- March 21, 2024
- March 20, 2024
- March 19, 2024
- March 18, 2024
- March 17, 2024
- March 16, 2024
- March 15, 2024
Some of Our Sources
- Engadget
- Techcrunch
- Technology Review
- Spoon Graphics
- Smashing Magazine
- Creative Curio
- Line 25
- CSS Tricks
- Design Modo
- Daily Now
Help Webnuz
Referal links:
Next.js Trash Course - Part 1/3
Hi, devs.
Whatup? I hope everybody is fine and healthy.
I have been very busy lately, also making some (non-sense ) assignments and for those reasons I haven't post anything for a while.
Fortunately (or not), I've found some spare time these last days so I decided to create a Trash Course that is something like a crash course but worst. This article tries to cover all the basics of Next.js and at the same time to go straight to the point. (with few exceptions )!
I hope you guys enjoy it and also can learn something new from here.
Requirements
- A good understanding of
React(andJavaScriptof course) Node.js(10.13 or later version installed)- Your favorite code editor (e.g.
VSCode,Notepadetc) Git/GitHub(optional)
What will be covered in this part 1/3?
- What and Why
Next.js, - A Quick Walk-through Folders and Files,
- Routes and Pages,
- Creating and Reusing Components,
- Linking Between Pages.
Next.js
What is Next.js?
It is a React framework that allows creating pre-rendered React applications either as Server Side Rendering (SSR) or Static Site Generation (SSG).
SSR:
Reactcomponents are rendered intoHTMLpages on the server after a page request comes from the browser.SSG: Components are rendered into
HTMLpages at build time. In other words, after deploying the web pages,Javascriptbundles it to web.
Why use it?
React without Next.js renders components in the browser (client-side rendering.)
With Next.js, our React components are already rendered into HTML pages by the time they reach the browser, so the application behaves as a SPA (Simple Page Application) and all routes can be handled on the client-side. The benefits of SSR and SSG are improvement of performance because components are pre-rendered, meaning less work in the browser. Also results in better SEO (Search Engine Optimization) than the traditional SPA because the response from the server is a fully rendered HTML page rather than the blank one returned from a regular React application without Next.js.
Initial Settings
In our terminal type:
npx create-next-app nextSamplecd nextSamplecode . // if you are using VSCodePart 1 - A Quick Walk-through Folders and Files
-
node_modules/: where all the project dependencies are stored. -
pages/: where all the different components will be created. The idea is that every page represents its own React component.-
index.js: The Home page component. -
_app.js: The Root Component. All the different components are rendered there. -
api/: for API endpoints.
-
-
public/: where all the public assets are stored (e.g. images etc) -
styles/: where differentCSSfiles and modules are placed. -
.gitignore: a file for version control that ignores, for example, thenode_modulesfolder when pushing your code toGitHub/BitBucketand so on. -
package.jsonandpackage-lock.json: to keep track of the different project dependencies, creating scripts, the project version etc. e.g."dev: "next dev"is the script to start a local development server. -
README.md: Is the file where you (should) keep important info about the project. It was there where I first wrote this article you are reading now before I publish it.
Starting the development server
npm run dev
If everything went well you should see something like this in your browser (http://localhost:3000/):
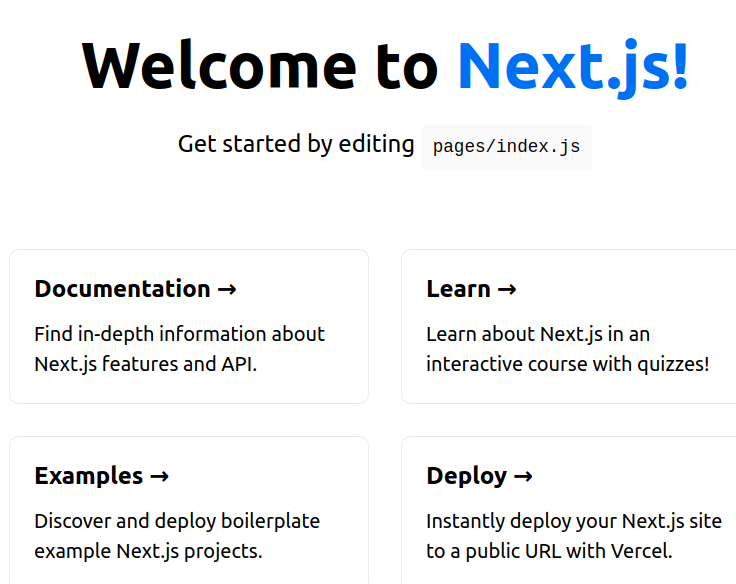
That, in short, is the pages/index.js file you saw before during the Walk-Through's section.
import Head from 'next/head';import styles from '../styles/Home.module.css';export default function Home() { return ( <div className={styles.container}> <Head> <title>Create Next App</title> <link rel="icon" href="/favicon.ico" /> </Head> <main className={styles.main}> <h1 className={styles.title}> Welcome to <a href="https://nextjs.org">Next.js!</a> </h1> <p className={styles.description}> Get started by editing{' '} <code className={styles.code}>pages/index.js</code> </p> <div className={styles.grid}> <a href="https://nextjs.org/docs" className={styles.card}> <h3>Documentation →</h3> <p>Find in-depth information about Next.js features and API.</p> </a> <a href="https://nextjs.org/learn" className={styles.card}> <h3>Learn →</h3> <p>Learn about Next.js in an interactive course with quizzes!</p> </a> <a href="https://github.com/vercel/next.js/tree/master/examples" className={styles.card} > <h3>Examples →</h3> <p>Discover and deploy boilerplate example Next.js projects.</p> </a> <a href="https://vercel.com/new?utm_source=create-next-app&utm_medium=default-template&utm_campaign=create-next-app" className={styles.card} > <h3>Deploy →</h3> <p> Instantly deploy your Next.js site to a public URL with Vercel. </p> </a> </div> </main> <footer className={styles.footer}> <a href="https://vercel.com?utm_source=create-next-app&utm_medium=default-template&utm_campaign=create-next-app" target="_blank" rel="noopener noreferrer" > Powered by{' '} <img src="/vercel.svg" alt="Vercel Logo" className={styles.logo} /> </a> </footer> </div> );}Don't be overwhelmed. We are going to clean up this file before starting because your aim is to start from scratch. The new version of the index.js file should look like this:
export default function Home() { return ( <div> <h1>Hello Next.js</h1> </div> );}Remember, in Next.js components are pre-rendered before they reach the browser. During the development it is done via server-side rendering (SSR) meaning that the server first renders the components and then sends the HTML to the browser. This happens in each page request from the browser, for example, if we type a different URL it will look for the page component corresponding to that URL, pre-render it and send it to the the browser. We will check about it more in deep later.
Part 2 - Routes and Pages
The pages folder is where we create our page components. Each page in Next.js is driven by a React component, for example, for an "About Page" we have an "About Component", for a "Contact Page" a "Contact Component" and so on.
When we create a file inside of the pages folder, for example /pages/contact.js, the component placed there is bond to the route of the same name. The only exception is the index.js file there which corresponds to the root of the domain /.
Let's do it together so it becomes easier to understand. Inside of the pages folder create a new file called about.js and paste the content below inside of it.
const About = () => { return ( <div> <h1>About</h1> <p>This is our About Page</p> </div> );};export default About;Now if we visit http://localhost:3000/about we can see there the page component we have just created. Particularly, I see it as an amazing feature since I don't need to care about installing the React Router as I would do in an usual React application.
By the way, It works the same way if you create a sub-folder inside of the pages folder. Next.js will create a sub-route for the application. Nice, isn't it?
Talking about "same way", if you create a sub-folder and inside of it you place an index.js file, it will become the root path of this route. (e.g /pages/dev/index.js when you access http://localhost:3000/dev/ the content of index.js will be rendered). I replicated this exact example so if you are somehow confused you can check it here. SPOILER ALERT!
Part 3 - Creating and Reusing Components
Like in regular React applications we can have components that are not only page components such as buttons, navbars, footers and the like, which can be reused through the application if needed.
We don't create those components inside of the pages folder. Of course you can do it but as soon as your application grows one can easily lose track of it.
I usually place reusable components inside of a folder called components at the project root directory. Again, you can do it as you wish.
I've created a very ugly Button component, inside of the components folder, just to serve as an example.
export const Button = ({ children }) => { return <button onClick={() => console.log('Clicked!')}>{children}</button>;};and imported it on the /pages/dev/index.js as following.
import { Button } from '../../components/Button';export default function Home() { return ( <div> <h1>Hello Devs</h1> <Button>Dev Button</Button> </div> );}My apologies for all the examples used in this article. My creativity didn't show up today.
I also created a Navbar component there because we are going to used it later on when learning more about "linking" and "styling" so stay tuned.
export const Navbar = () => { return ( <nav> <div className="brand"> <h3>Dev Brand</h3> </div> <a>Home</a> {/** We will change the anchor tags later on*/} <a>About</a> <a>Dev</a> </nav> );};and don't forget to import is at pages/index.js:
import { Navbar } from '../components/Navbar'; /** Here */export default function Home() { return ( <div> <Navbar /> {/** Also Here */} <h1>Hello Next.js</h1> </div> );}Now at http://localhost:3000/ we can see the Navbar component there. If you have a minimal React background there is nothing new here.
As the Navbar I have also created an additional Footer component (/components/Footer.js) because combining them we will get to know how to create "layouts" on Part 2 / 3. Did I mention yet about my lack of creativity today? So don't judge.
export const Footer = () => { return <footer>Copyright 2021 | Next.js</footer>;};The final version (for now) of our Home page component will be similar to the following:
import { Navbar } from '../components/Navbar';import { Footer } from '../components/Footer'; export default function Home() { return ( <div> <Navbar /> <h1>Hello Next.js</h1> <Footer /> </div> );}It is simple as that to create components and reuse them through the application.
Part 4 - Linking Between Pages
The way we link pages in Next.js is by using a special component called Link component. It adds the ability to do client-side navigation in the browser, it is saying, the different pages are loaded using Javascript and NOT by making new HTML page requests to the server.
After import the Link component from next/link we can use in the application as the Navbar component example shows:
import Link from 'next/link'; // This lineexport const Navbar = () => { return ( <nav> <div className="brand"> <h3>Dev Brand</h3> </div> <Link href="/">Home</Link> {/** usage :)*/} <Link href="/about">About</Link> <Link href="/dev/">Dev</Link> </nav> );};This is an another example just because we do love examples, don't we? So, in your Home page component (/pages/index.js):
import { Navbar } from '../components/Navbar';import { Footer } from '../components/Footer';import Link from 'next/link'; // Again we import the Link Componentexport default function Home() { return ( <div> <Navbar /> <h1>Hello Next.js</h1> <Link href="/about">About Page</Link>{' '} {/** And use it here as following */} <Footer /> </div> );}We are done for the part 1/3 of this article. In the Next part (pun intended ) I will bring to the table some stuff like:
- Layouts,
- Adding styles (global stylesheets and CSS modules),
- Creating a customized Not Found page,
- Redirecting.
Thanks for reading and see you (in the Next part) later.
Original Link: https://dev.to/vinicius77/next-js-trash-course-part-1-3-2dlb
Dev To
More About this Source Visit Dev To