
An Interest In:
Web News this Week
- April 24, 2024
- April 23, 2024
- April 22, 2024
- April 21, 2024
- April 20, 2024
- April 19, 2024
- April 18, 2024
Some of Our Sources
- Web Designer Wall
- Six Revisions
- Vandelay Design
- FanExtra - PSD
- Line 25
- Spyre Studios
- Web Resource Source
- Android Headlines
- Dev To
- Hashedout
Help Webnuz
Referal links:
Let's Make a Redux Material UI OAuth Starter template! Pt 1. What's OAuth??
In this 4 part tutorial series we will set up a starting template using Material UI , Redux and Google OAuth 2.0. As seen in the cover image this template will help bootstrap front-end projects while taking care of some harder things to implement in the front-end world, namely...
1) An alert/notification system setup through the Redux store
2) An easily customizable theme system with the built in CSS-in-JS solutions offered by Material-UI
3) Client-side OAuth and a mobile responsive navbar that is filled with the user's info when logged in
Prerequisites
- Familiarity with React hooks and Redux
- Have NPM/Node installed
- Know about the concept of a component library in React (it's okay if you've never used one!)
- Know about the concepts of CSS in JS (also okay if never used before)
- A Google Cloud Platform account (free) and an OAuth 2.0 Client ID (also free, may require gmail account)
What's OAuth?
In the past years these buttons that allow you to sign in with some other social media account have become more and more prevalent on the web.
As users we all know the advantages; less passwords to keep track of and a better sense of trust if you can log-in to an unfamiliar app with an already created account.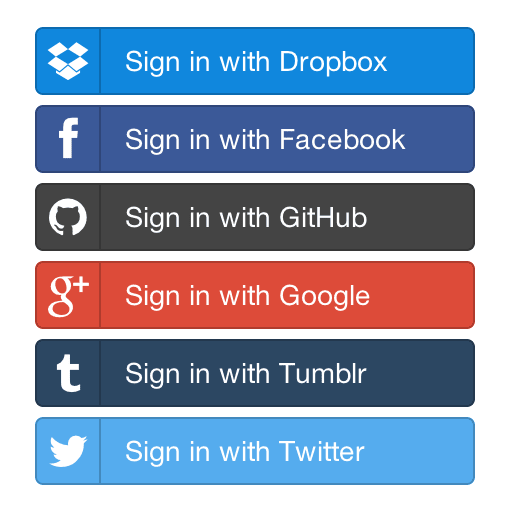
As developers OAuth gives all the above advantages to your users PLUS the ability to easily use a users public information and associate a user with a Google (or Twitter etc...) account ID.
Without getting too much into the weeds I think this Digital Ocean Post does a great job of explaining the concept
It seems complex at first but much this process is abstracted away by the React library used here called react-google-login. It helps to visualize these steps in the context of the application so let's see how that looks...
1) Our App sends a request to user to ask for permission this is triggered when our button is clicked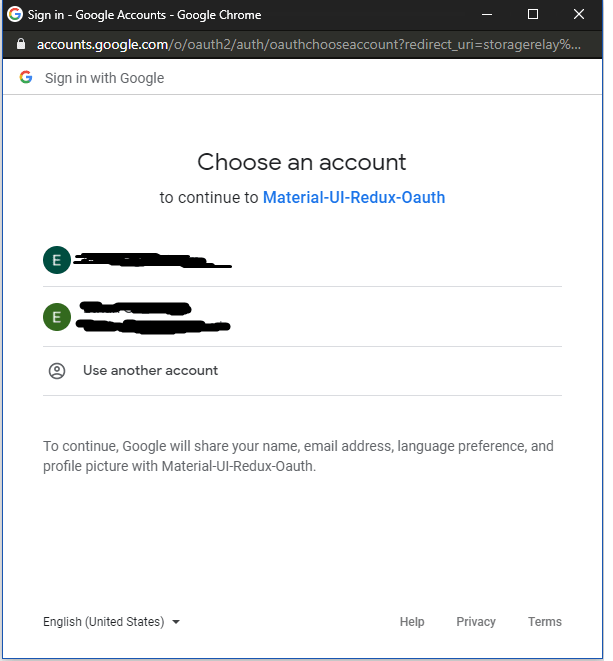
2) The user logins in and grants permission
3) react-google-login (if step 2 succeeded) initiates step 3 and requests access for the users info from their servers
4) The token for OAuth access and some public user profile info is sent back to client side and stored in the redux store.
In this template we never actually do anything with the token so 5 and 6 are left to be implemented later.
Getting Setup through Google Cloud Platform
The first thing you need to have your web app communicate with Google's OAuth client is a Google Cloud Platform account, for this you need a free gmail account.
Steps
- Go to https://console.cloud.google.com/ and sign up for an individual account. Yes, you need to enter a credit card for the free trial but the platform will never charge you after you used up your credit and additionally getting an OAuth client ID to use is also free
- Once on the dashboard (if this is your first time) you should see in the navbar a "My First Project" tab. This is a default project started for you automatically; for simplicity's sake we'll use that.
- On the left side you should see a hamburger menu which once expanded you should see a "APIs and Services" tab, which has the sub-section called "Credentials"
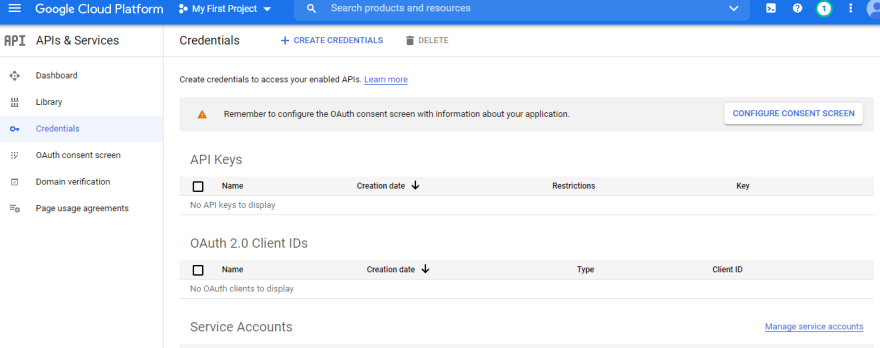
- Afterwards we have to click "configure consent screen", select user type "External" and then click Create
- You will be taken to a form to fill with app information (your email, app name etc...). Fill out only the required fields and DON'T add any authorized domains, you can do this later when creating the clientID.
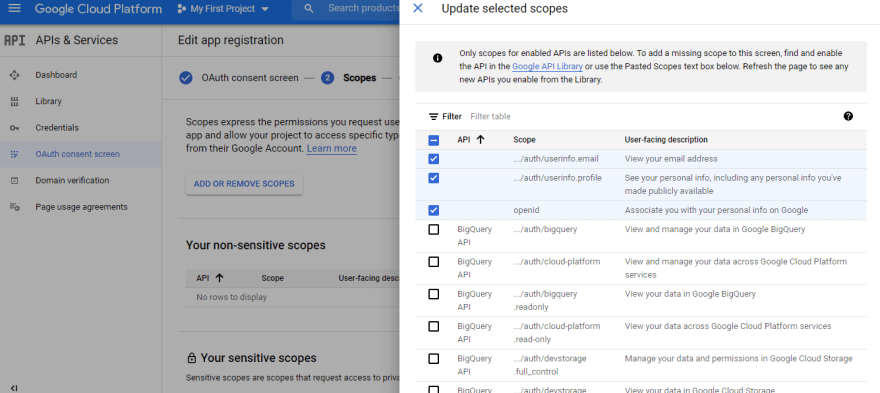
- Next we are taken to a scopes screen in which you have to configure what type of access you want from Google OAuth;
- Click "Add or Remove Scopes" while keeping in mind the default scope for react-google-login is as follows "profile email" and let's also add openid scope to get their Google ID.
Just a little further
- Next it will ask how many test users out of 100 you wish to register BUT we're going to leave that blank since you are only bound by this restriction while you have an OAuth client that requests sensitive scopes. We only request email, personal info and ID which are not considered non-sensitive scopes so we don't have to worry about that. Your actual limit with this OAuth is 10,000 token grants per day.
- Finally go to save/continue now we can finally go back to the "API & Services" on Credentials.
Near the top of the page click the "+ create credentials", select "OAuth Client Id", choose web application, name the app again (just used internally) and now we can add Authorized JavaScript origins. For now let's just make it so it works on http://localhost:3000 and click create.

Done! A screen should pop up with both a client ID and a client Secret. The client secret is used server-side so we don't need it here but we will take the Client ID and copy it somewhere.
Note! : You don't need to hide your clientID in .env ! We restricted the URLs that can access it so it should be fine out in the open.
Next article we will make the Login and Logout components using your clientID, store the fetched user info in the redux store, and examine how the library persists the users logged in state through client-side storage!
Original Link: https://dev.to/ethanny2/let-s-make-a-redux-material-ui-oauth-starter-template-pt-1-what-s-oauth-479j
Dev To
More About this Source Visit Dev To