
An Interest In:
Web News this Week
- April 1, 2024
- March 31, 2024
- March 30, 2024
- March 29, 2024
- March 28, 2024
- March 27, 2024
- March 26, 2024
Some of Our Sources
- BoingBoing
- Joshua Blankenship
- Smashing Magazine
- Six Revisions
- Web Design Ledger
- 24 Ways
- Stylized Web
- Freelance Switch
- Android Headlines
- TechPowerUp
Help Webnuz
Referal links:
Build a Telegram bot with Node js
I enjoy looking for new technologies to experiment with during my free time, last weekend I stumbled across IBM Watson. It has numerous interesting services, so I thought it would be nice to use it in a project. In this article, I will guide you through the entire process of building a speech-to-text Telegram bot.
Here is a table with our sections:
- Set up your bot with the BotFather
- Get your Watson API key
- Set up environment
- Set up the convert.js file
- Create the bot.js file
- Run your bot
Set up your bot with the Bot father:
Creating our Telegram bot is very simple, first, navigate to the BotFather and start a chat to get your API key.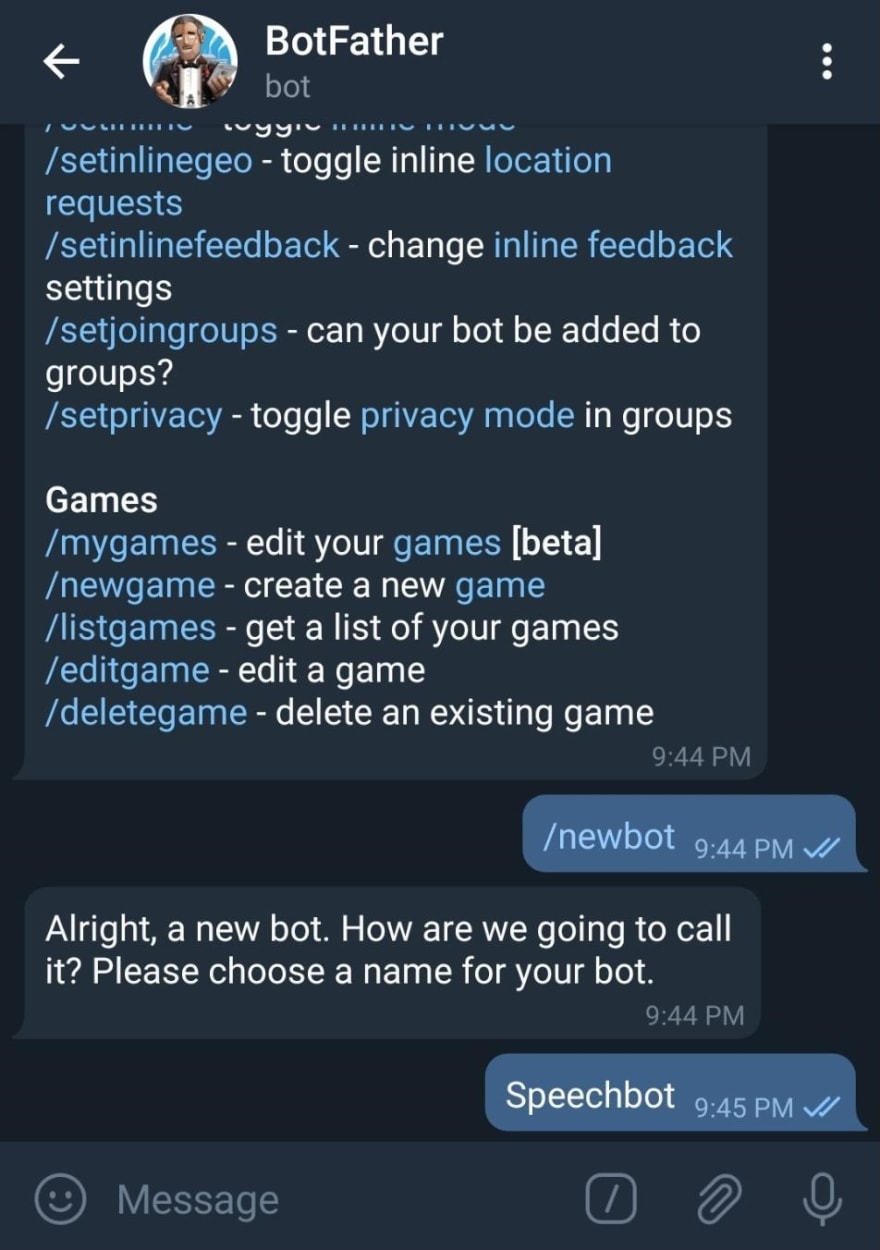
After creating a new bot, the bot father will prompt you to enter a name and a username. After entering the credentials, you will be provided with your access token, save this token for later.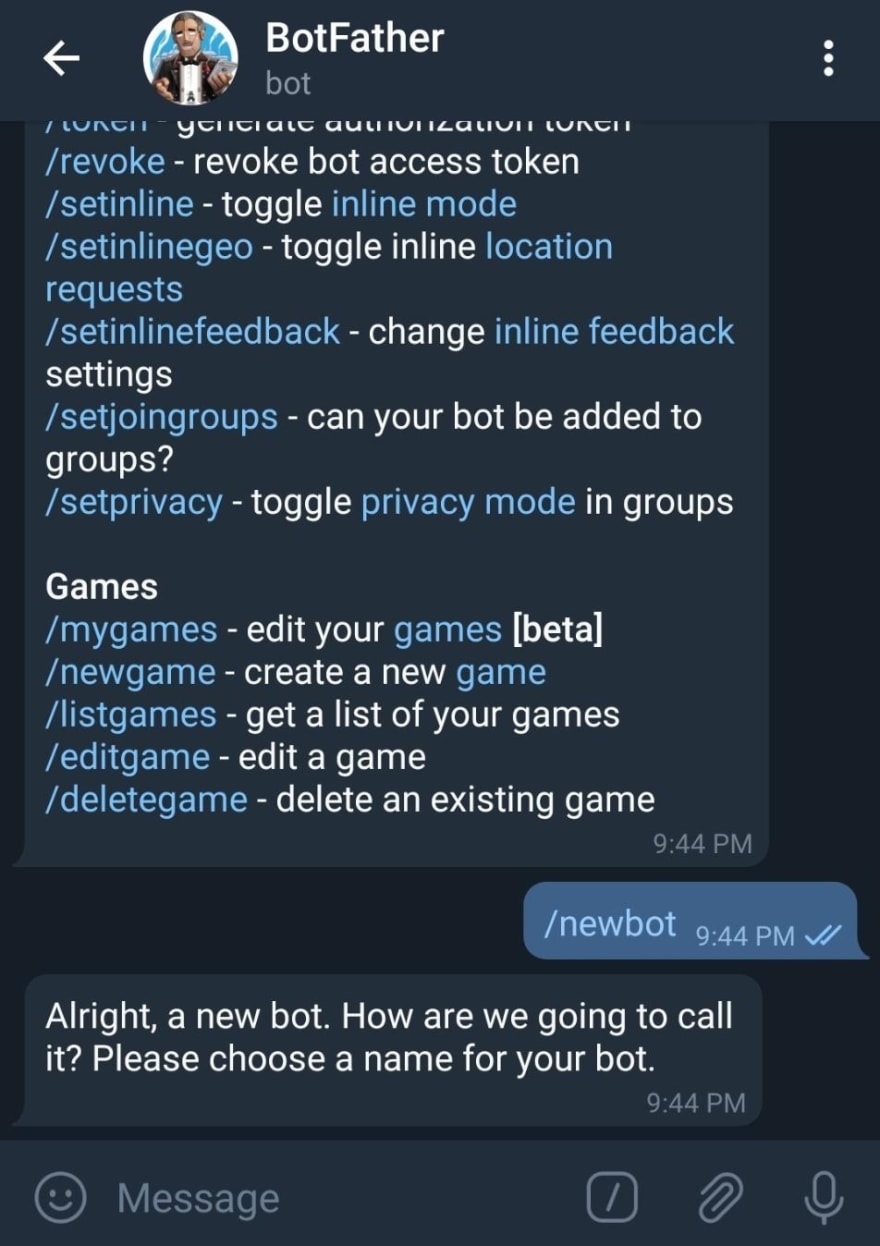
Keep your secrets safe
Please keep your keys safe, as anyone who has access to them can use them. For this reason, we will create a dotenv file to store them. Ensure to add the file to your .gitignore file.
Get your IBM API key:
We will use its speech to text API. Head over to ibm watson and create an account if you don't have one.

Once logged in, sign up for IBM cloud:
Create your IBM cloud account and sign in.
Create a new speech to text resource.
Navigate to your speech-to-text dashboard and copy your API Key
Now we are ready to start coding our bot!
Environment set up:
Now that we have our access token and API key, we can begin coding our bot. Lets start by heading to our terminal and creating a folder named telegram-bot. Use npm init -y to create your package.json file.
$ mkdir telegram-bot && cd telegram-bot $ npm init -yThen, head over to your terminal and create the following files.
$ touch bot.js convert.js .envOur bot.js file will contain the logic to handle requests to our bot. Our convert.js file will handle the function that will call on the IBM speech to text API. Finally, we will keep our secrets in the .env file.
Install dependencies
$ npm install telegraf axios ibm-watson- Telegraf is a library that simplifies creating Telegram bots, read more its documentation here.
- Axios is a library that simplifies making HTTP requests.
- ibm-watson is an SDK that allows us to interact with the Watson API, read more on the speech to text documentation here.
- The dotenv package allows us to load our secrets.
Add secrets to .env file:
You can name your secrets whatever you would like. Replace the brackets with your API keys.
TELEGRAM_ACCESS_TOKEN=<Place token here>IBM_API=<Place token here>Our convert.js
I'll copy the code for the convert.js and explain each step below.
const SpeechToTextV1 = require('ibm-watson/speech-to-text/v1');const { IamAuthenticator } = require('ibm-watson/auth');require('dotenv').config();const speechToText = new SpeechToTextV1({ authenticator: new IamAuthenticator({ apikey: process.env.IBM_API }), serviceUrl: 'https://api.us-south.speech-to-text.watson.cloud.ibm.com'});//function for tranlating text with IBM APIfunction getText(audio) { const params = { audio: audio, contentType: 'audio/ogg' }; return new Promise((resolve, reject) => { speechToText.recognize(params) .then(response => { const message = response.result.results; if(message.length === 0) { resolve('Please speak louder, unable to translate'); } resolve(message[0].alternatives[0].transcript); }) .catch(err => { reject(err); }); })}module.exports = getText;const SpeechToTextV1 = require('ibm-watson/speech-to-text/v1');const { IamAuthenticator } = require('ibm-watson/auth');require('dotenv').config();const speechToText = new SpeechToTextV1({ authenticator: new IamAuthenticator({ apikey: process.env.IBM_API }), serviceUrl: 'https://api.us-south.speech-to-text.watson.cloud.ibm.com'});Here we import the SpeechToTextV1 and IamAuthenticator module from the Watson SDK. We proceed and initialize a new SpeechToTextV1 instance. Inside we pass into it an object containing our API key and service URL.
//function for tranlating text with IBM APIfunction getText(audio) { const params = { audio: audio, contentType: 'audio/ogg' };//promise}The getText function will be responsible for sending our request to transcribe the audio. The params object contains the details about the audio file we will be sending. Since Telegram saves audio files in oga format, we will pass audio/ogg as our content type. Read more about Watsons supported audio formats here.
return new Promise((resolve, reject) => { speechToText.recognize(params) .then(response => { const message = response.result.results; if(message.length === 0) { resolve('Please speak louder, unable to translate'); } resolve(message[0].alternatives[0].transcript); }) .catch(err => { reject(err); }); })Inside our function, we return a promise. Then, we call on the recognize method and pass in our params object as an argument. The recognize method returns a results array. If our results array is empty, we resolve the promise with an error message. If we receive a transcript, we resolve the translation. In the end, we add a catch block in case we have any other errors.
Our bot.js
I'll copy the code for the bot.js and explain each step below.
//import necessary librariesconst { Telegraf } = require('telegraf');const axios = require('axios');const getText = require('./convert');require('dotenv').config();//create new instance of telegrafconst bot = new Telegraf(process.env.TELEGRAM_ACCESS_TOKEN);bot.on('voice', async ctx => { //assign the file id to a variable const fileID = ctx.message.voice.file_id; //receive url and pass it into axios request try { const { href } = await ctx.telegram.getFileLink(fileID) const audio = await axios({ url: href, method: 'GET', responseType: 'stream' }); const message = await getText(audio.data); return ctx.reply(message); } catch (err) { ctx.reply('Opps an error occured'); }})bot.launch();console.log('Telegram bot is running...');const { Telegraf } = require('telegraf');const axios = require('axios');const getText = require('./convert');First import Telegraf and axios, then the getText function we created earlier.
const bot = new Telegraf(process.env.TELEGRAM_ACCESS_TOKEN);Here, we create a new instance of the Telegraf bot. Any requests we send will be passed into this instance and resolved with our handlers. We are using the on handler method, which listens for any voice clips we send within our conversation. The ctx instance contains the botInfo, update, and Telegram, which we will use to make bot API requests. Read the different handler methods here.
bot.on('voice', async ctx => { //assign the file id to a variable})The on handler receives an event and a callback, the callback will run when an event triggers. Upon receiving a message, we assign our voice messages file_id into a variable that we can use later. Now, we create a try and catch block that will contain our asynchronous code.
try { const { href } = await ctx.telegram.getFileLink(fileID) const audio = await axios({ url: href, method: 'GET', responseType: 'stream' }); const message = await getText(audio.data); return ctx.reply(message); } catch (err) { ctx.reply('Opps an error occured'); }We can access our particular voice file by using the getFileLink function, which will return an object with the file URL. Then, we fetch the file using an Axios request; upon receiving the file we will pass our data into our getText function as an argument. We then wait for the promise to resolve with our translation, upon receiving the translation, we will send the translation results to our user.
bot.launch();console.log('Telegram bot is running...');Run your bot
Open your terminal and run node bot.js, then send the bot a voice message, our bot is now transcribing our messages.
$ node bot.js
Congratulations, you have created your Telegram bot! If you want, you can deploy it over at Heroku or use an always-on repl.it to host it. The bot we created is only scratching the surface of the fantastic things we can do with Watson and Telegram. Go over the documentation and experiment, challenge yourself by expanding upon this project.
Original Link: https://dev.to/benjami51033333/build-a-bot-with-telegram-and-ibm-watson-io5
Dev To
More About this Source Visit Dev To