
An Interest In:
Web News this Week
- April 1, 2024
- March 31, 2024
- March 30, 2024
- March 29, 2024
- March 28, 2024
- March 27, 2024
- March 26, 2024
Some of Our Sources
- The Logo Smith
- Spoon Graphics
- FanExtra - PSD
- Fudge Graphics
- Web Design Ledger
- Reencoded
- Line 25
- Android Headlines
- Daily Now
- Hashedout
Help Webnuz
Referal links:
Deploy a Docker App to AWS using ECS
Deploy a Docker App to AWS using ECS
AWS proposes two container orchestrations services: ECS and Kubernete.
Well integrated with the AWS ecosystem, ECS is the proprietary version.
What we will build
In this tutorial we will explain how to:
- Package and build a node application and package a simple node application with Docker
- Create an ECR repository to store our Docker Image
- Upload the Docker image to the repository
- Create and launch an Elastic Container Cluster (ECR)
- Launch our application as a task within the Elastic Container Cluster
- Expose and open this application on the internet

- Docker is a technology that helps to package and ship applications easily in production.
- ECS stands for Elastic Container Service. It is a fully managed container orchestration service
- ECR stands for Elastic Container Repository. ECR allows storage of Docker Images on AWS.
Concepts:
- A cluster is a logical grouping of hardware resources.
- A task is a set of metadata (memory, CPU, port mapping, environmental variables, etc) that describes how a container should be deployed.
- Services are responsible for managing advanced configurations such as load balancing
The NodeJS application to deploy
We want to deploy a basic express node application that displays the current time each time the index page is refreshed.
package.json
{ "name": "docker_web_app", "version": "1.0.0", "description": "Node.js on Docker", "author": "Raphal MANSUY [email protected]>", "main": "server.js", "scripts": { "start": "node server.js" }, "dependencies": { "express": "^4.17.1" }} server.js
"use strict"const express = require("express")// Constantsconst PORT = 8080const HOST = "0.0.0.0"// Appconst app = express()app.get("/", (req, res) => { res.send(`Hello World - ${new Date().toISOString()}`)})app.listen(PORT, HOST)console.log(`Running on http://${HOST}:${PORT}`)https://nodejs.org/en/docs/guides/nodejs-docker-webapp/
Package the node.js application with a Docker file
In the same directory of this application, we can create a Dockerfile that explains how to build a container with this application:
Dockerfile
FROM node:14# Create app directoryWORKDIR /usr/src/app# Install app dependencies# A wildcard is used to ensure both package.json AND package-lock.json are copied# where available (npm@5+)COPY package*.json ./RUN npm install# If you are building your code for production# RUN npm ci --only=production# Bundle app sourceCOPY . .EXPOSE 8080CMD [ "node", "server.js" ]This file defines the following steps:
- start from the node:14 image
- create a directory
/usr/src/apinside the container - copy the local file with pattern
package*.jsonin the container - run
npm install - copy all the local files to the container
- expose the port
8080inside the container - run
nodewith the fileserver.jswhen the container starts
Building the image
Run the following command to build an image with the tag node-web-app
docker build -t node-web-app .Running the image
Run the following command to start the application in detached mode:
docker run -p 80:8080 -d node-web-appThe container is now running and the 8080 port within the container is exposed as the 80 port on your local machine.
We can now test the application with the CURL command
curl http://localhost:80Results:
Hello World - 2021-02-11T05:06:12.739ZWe are now ready to deploy this container to the cloud.
Connect to AmazonECR
Prerequisites
aws climust be installed- your aws profile must be configured and have ECS admin rights enabled
Run the following command:
aws ecr get-login-password --region us-west-2 | docker loginIf you have access, you should have this displayed on the terminal:
Authenticating with existing credentials...Login SucceededCreate your AmazonECR in the AWS Console
Connect to the AWS Console and to the ECS Administration screen to create a new repository.

Click on Create Repository and choose testrepository as a name for your repository:

The ECR repository is now created:

Upload the image on AWS ECR
Click now on the push commands button on the repository screen:

Copy and execute each command on your machine:

connect:
aws ecr get-login-password --region us-west-2 | docker login --username AWS --password-stdin 3680199100XXX.dkr.ecr.us-west-2.amazonaws.combuild:
docker build -t testrepository .build:
docker tag testrepository:latest 3680199100XXX.dkr.ecr.us-west-2.amazonaws.com/testrepository:latestpush to ECR:
docker push 3680199100XXX.dkr.ecr.us-west-2.amazonaws.com/testrepository:latestThe image is now published and available on ECR ready to be deployed:
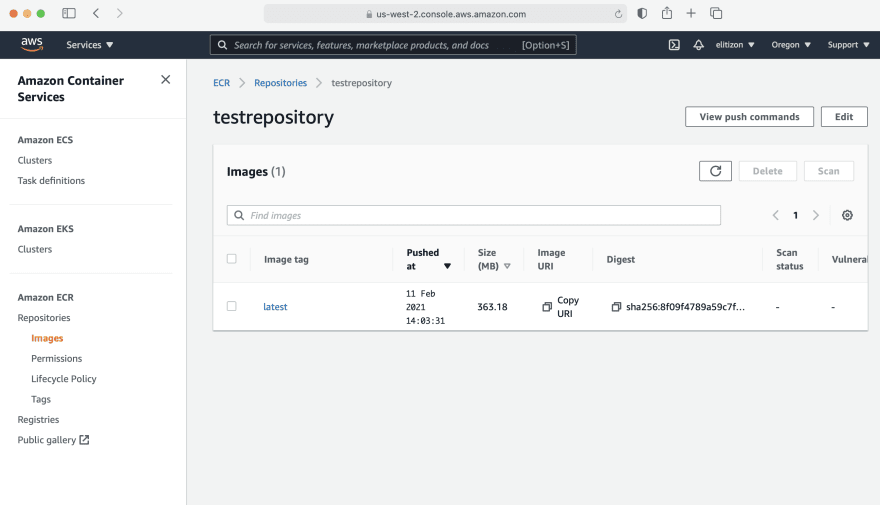
If you look at AmazonECR, repositories we can see the newly created image.


Copy the image URI: we need to keep this to create a task definition for the following steps.
368019910004.dkr.ecr.us-west-2.amazonaws.com/testrepository:latestCreate an ECS Cluster
Go to the ECS home page and click on the create cluster button:

Choose EC2 Linux + Networking and then click next:

Then enter the following information:
- name of the cluster:
ecs01 - EC2 instance type:
t3-micro - Number of instances:
1

Then choose:
- Default VPC
- Auto assign IP:
Enabled - Security group:
default - Choose one of the subnet
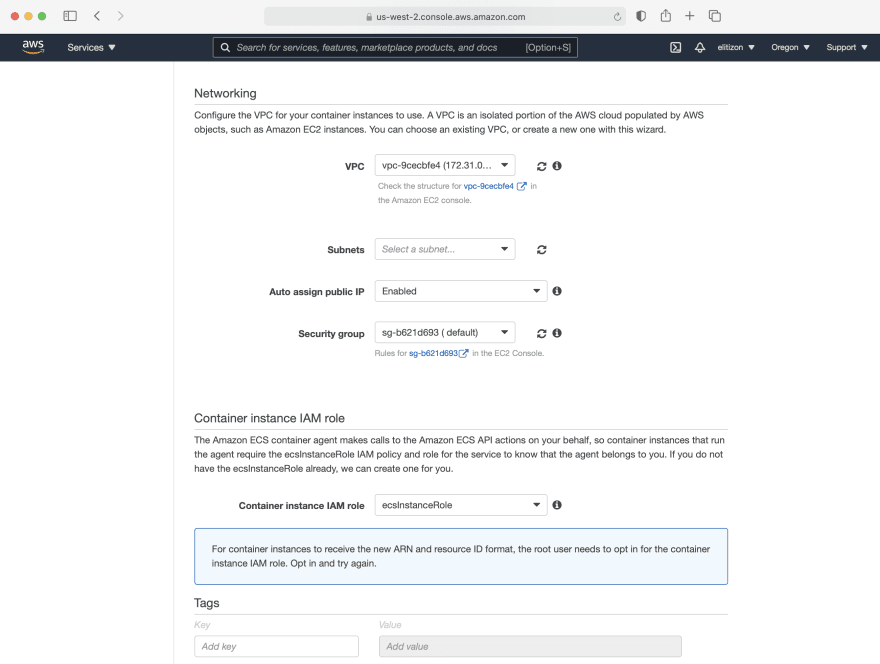
And then next press Enter
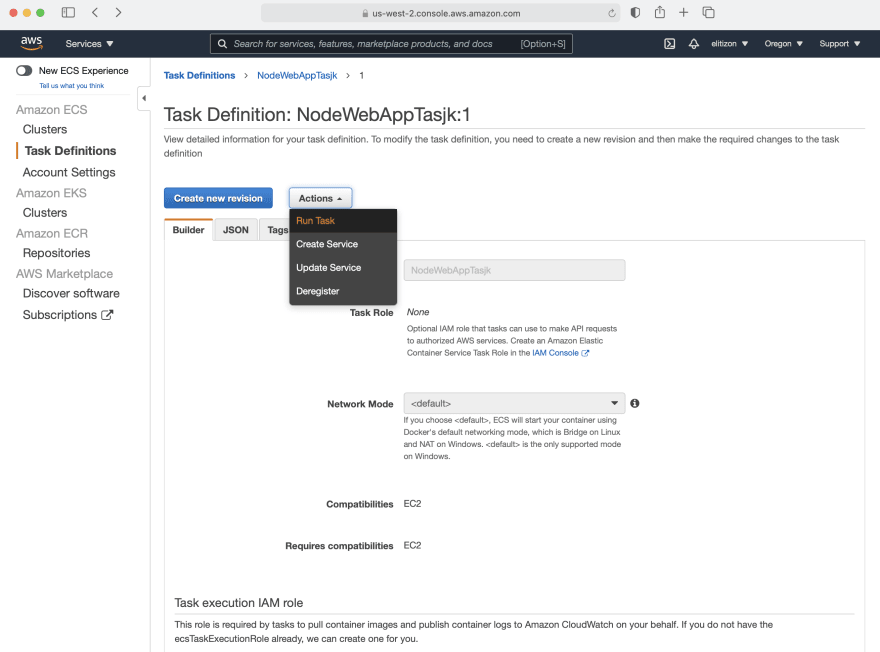
Create a new Task definition
A task a set of metadata (memory, cpu, port mappings, environment variables, etc) that describes how a container should be deployed.
Click on new Task definition
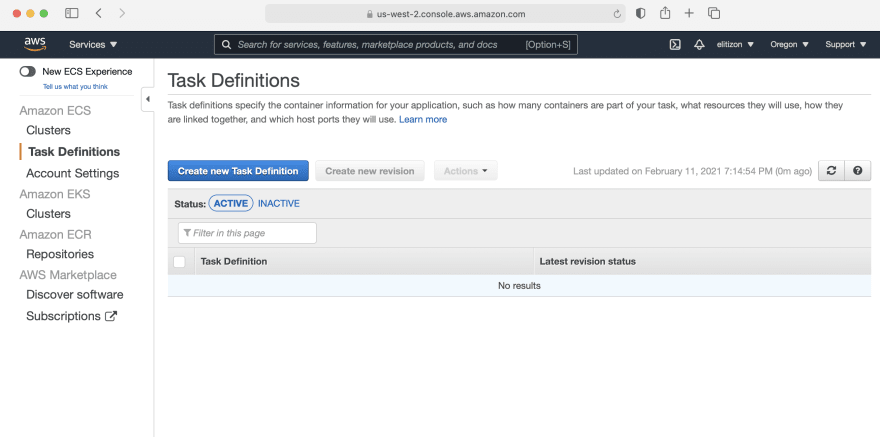
Choose EC2

Then next
Choose NodeWebAppTask for the name of the task definition.
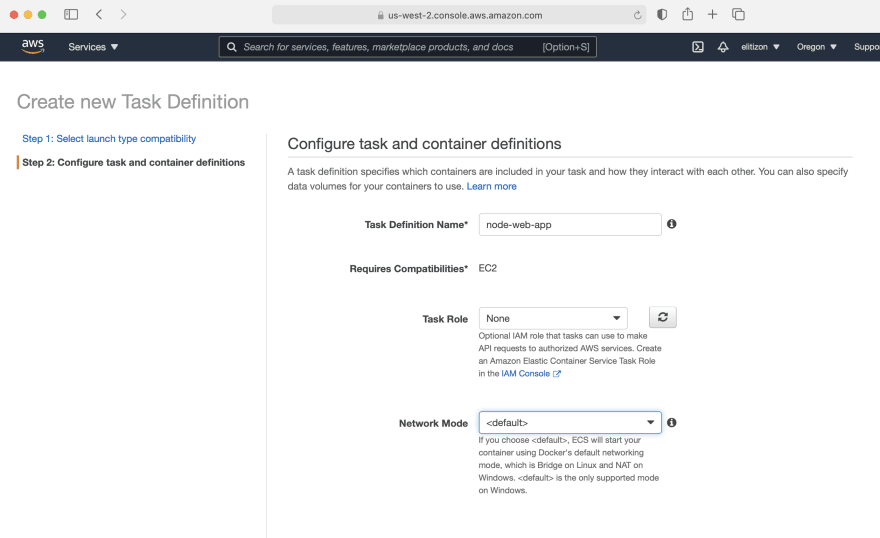
Enter 128for memory size.
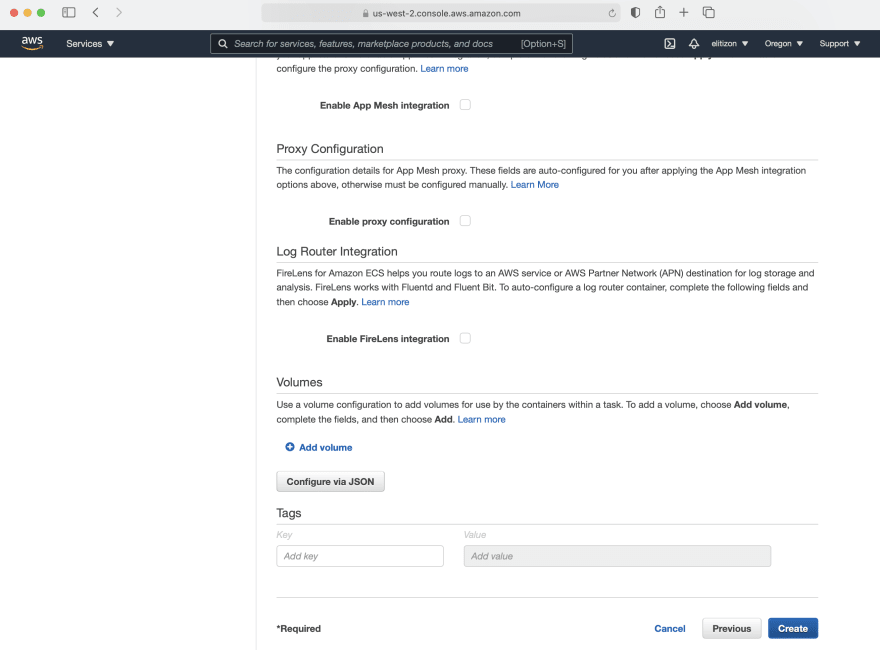
Click Add Container:

- Add the name of the container:
NodeWebApp - Set the image URI that we have saved add the end of the
add imagestep - Set the port mappings 80:8080

Click create.
Then go to Run Task
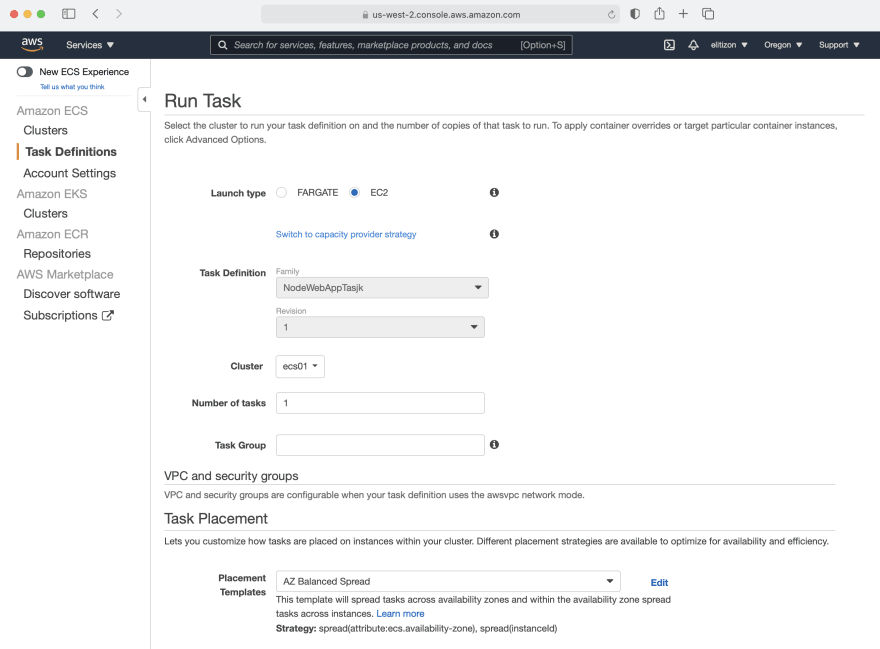
The task is now running:

If we click on the container instance:

We can modify the security group associated with instance to open the port 80

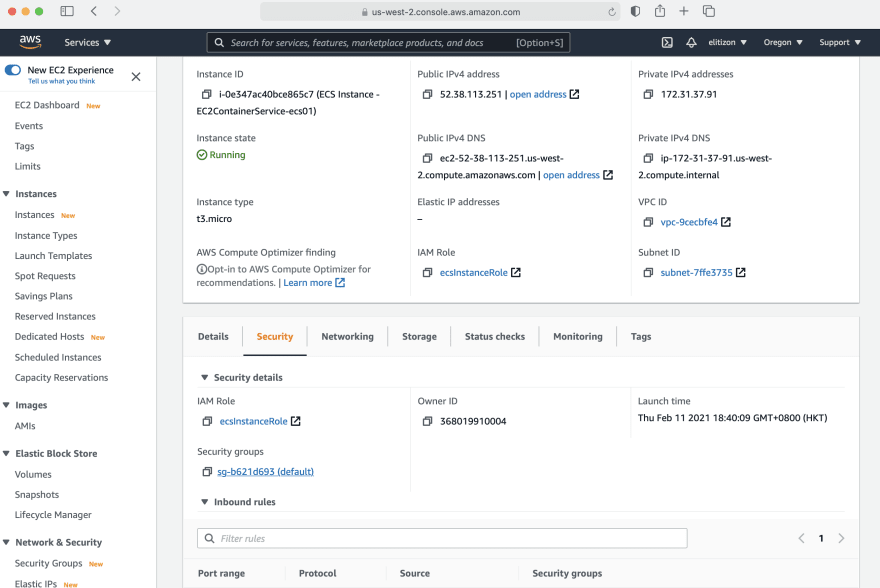
Add 80 in the inbound rule to the security group:

If we try now to open the url: http://ec2-52-38-113-251.us-west-2.compute.amazonaws.com:

Et voil
Our cluster and node application is now deployed.
Original Link: https://dev.to/raphaelmansuy/deploy-a-docker-app-to-aws-using-ecs-3i1g
Dev To
More About this Source Visit Dev To