
An Interest In:
Web News this Week
- April 25, 2024
- April 24, 2024
- April 23, 2024
- April 22, 2024
- April 21, 2024
- April 20, 2024
- April 19, 2024
Some of Our Sources
- Technology Review
- TutsPlus - Code
- Just Creative
- Reencoded
- Line 25
- Stylized Web
- Codrops
- Android Headlines
- Hashedout
- The Verge
Help Webnuz
Referal links:
How I built Realtime in Laravel VueJS
In this article, I will introduce the simplest integration of Realtime, after many learning and optimization in the most effective way.
Technologies used in the article:
- Backend Laravel 6x
- Fronent VueJS 2x
- GraphQL - Lighthouse (A framework for serving GraphQL from Laravel)
- Pusher Channels
I will skip the steps to install Laravel + VueJS and to register Pusher, you can learn how to set up at the paths I quoted above.
#Fontend VueJS
I will guide the setup on the fontend VueJS side.
Install the support package from the pusher + laravel echo side provided.
npm install --save laravel-echo pusher-jsHere I install a package named vue-echo
.
npm install vue-echo-laravel --saveNext add the below configs to the main.js, app.js or bootstrap.js file (depending on your file).
import Pusher from "pusher-js";import VueEcho from "vue-echo-laravel";// Enable pusher logging - don't include this in productionPusher.logToConsole = true;Vue.use(VueEcho, { broadcaster: "pusher", key: "xxxxxxxxxxxxx", cluster: "ap3", forceTLS: true, authEndpoint: "/broadcasting/auth", auth: { headers: { // authorization: token ? `Bearer ${token}` : null // Enabled - If you are using Bearer for authentication } }});This is the content I added to my project
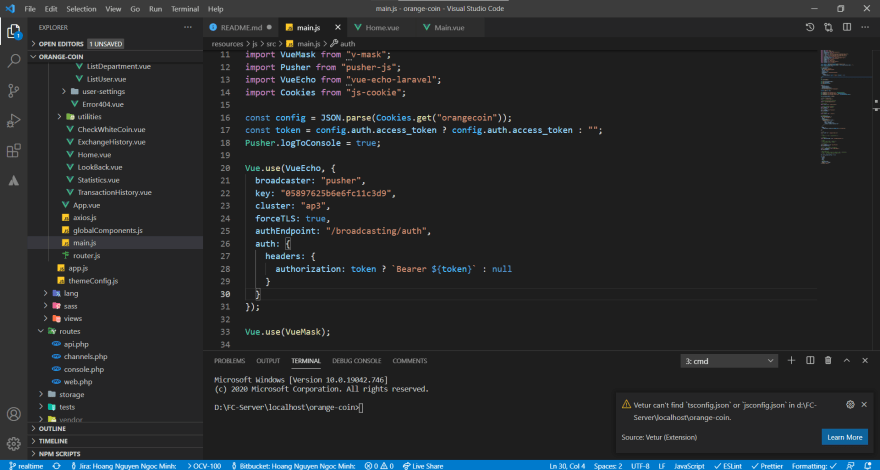
Once vue-echo is registered, every vue instance is able to subscribe to channels and listen to events through the this.$echo property on the connection you specified earlier.
var vm = new Vue({ mounted() { // Listen for the 'NewMessageNotification' event in the 'synchronized' private channel this.$echo.private('synchronized').listen('NewMessageNotification', (payload) => { console.log(payload); }); }});This is the content I added to my project
#Backend Laravel
Terminal
composer require pusher/pusher-php-serverAt config/app.php you need to unhide or add this line
App\Providers\BroadcastServiceProvider::class
Finally, you will need to change your broadcast driver to pusher in your .env file:
PUSHER_APP_ID=xxxxxxxxPUSHER_APP_KEY=xxxxxxxxxxPUSHER_APP_SECRET=xxxxxxxxxxxPUSHER_APP_CLUSTER=xxxxxxBROADCAST_DRIVER=pusherCACHE_DRIVER=fileQUEUE_CONNECTION=syncSESSION_DRIVER=fileSESSION_LIFETIME=120#Create Event - From Backend
I will quickly create an Events named NewMessageNotification at app\Events
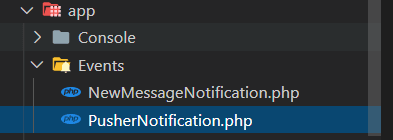
<?phpnamespace App\Events;use Illuminate\Broadcasting\Channel;use Illuminate\Broadcasting\InteractsWithSockets;use Illuminate\Broadcasting\PresenceChannel;use Illuminate\Broadcasting\PrivateChannel;use Illuminate\Contracts\Broadcasting\ShouldBroadcast;use Illuminate\Foundation\Events\Dispatchable;use Illuminate\Queue\SerializesModels;use Illuminate\Contracts\Broadcasting\ShouldBroadcastNow;class NewMessageNotification implements ShouldBroadcastNow{ use Dispatchable, InteractsWithSockets, SerializesModels; public $message; /** * Create a new event instance. * * @return void */ public function __construct($message) { $this->message = $message; } /** * Get the channels the event should broadcast on. * * @return \Illuminate\Broadcasting\Channel|array */ public function broadcastOn() { return new PrivateChannel('synchronized'); }}Register channels at routes/channels.php withreturn Auth::check(); . I force the Client-side to log in to listen to the event.
Broadcast::channel('synchronized', function ($user) { return Auth::check();});
Check the dashboard in Pusher, if successful connection will be displayed.

I'm going to use the Debug console function in Pusher to do the event quick send.

Or you can also use the Laravel Backend to post events, I will guide you in the following post, or refer here.
And this is the result
Have any questions, please comment below. Good luck.
Original Link: https://dev.to/hoangit/how-i-built-realtime-in-laravel-vuejs-1hgk
Dev To
More About this Source Visit Dev To