
An Interest In:
Web News this Week
- April 24, 2024
- April 23, 2024
- April 22, 2024
- April 21, 2024
- April 20, 2024
- April 19, 2024
- April 18, 2024
Some of Our Sources
- Slashdot
- BoingBoing
- Just Creative
- The Logo Smith
- Fuel Your Creativity
- My Ink Blog
- Web Design Ledger
- Wal You
- Web Resource Source
- The Verge
Help Webnuz
Referal links:
Routing in React for Beginners: Learn the React Router in 5 minutes!
What is React Router?
So, you're trying to learn React.js. Maybe you've even built a couple of simple projects in it. Whether you're a new developer or have a bit of experience, you'll probably find yourself having to develop a web app with different pages and routes. That's when React Router comes into play.
React Router provides an easy way to implement routes in your React or React Native applications. It's fairly simple to get started. In this guide, I will explain how to easily implement routing in your React applications.
Complete code for this article can be found in this github repo. You can also try the live demo here. Let's start!
1. Installing React Router
In order to get started with routing, you'll need to install the react-router-dom npm package. This can be done by issuing the following command:
$ npm install react-router-domGreat work! Now that you have installed the React Router npm package, you can follow along with the rest of the tutorial.
2. Creating the Basic Structure
In order to create routes, you'll have to import BrowserRouter from react-router-dom. It's also a good idea to import Route and Switch along with BrowserRouter as well.
import { BrowserRouter as Router, Route, Switch } from "react-router-dom";It's a standard practice to import BrowserRouter as Router in React.
To create routes, you'll need to wrap everything in App.js in <Router> tags. This ensures that your routes will be accessible throughout the application. Then, you can wrap your routes in <Switch> tags. <Switch> tag will only render the first component that matches the path. Once, a route is matched, it will not try to look for another matching route. Thus, your components will render correctly.
If you don't use <Switch> tags, React Router will try to match all the routes, even after finding a match. This can result in multiple components being rendered at once. Using the <Switch> tag this problem can be solved.
Now, your App.js structure will start to look something like this:
import React from "react";import { BrowserRouter as Router, Route, Switch } from "react-router-dom";function App() { return ( <Router> <div> <Switch> {/* You're routes will go here */} </Switch> </div> </Router> );}3. Defining your Routes
In order to actually define your routes, you'll use the <Route> tag. The <Route> tag takes 2 parameters path and component. The path is where you want your route to go to, and the component is the React component you want to render on that route.
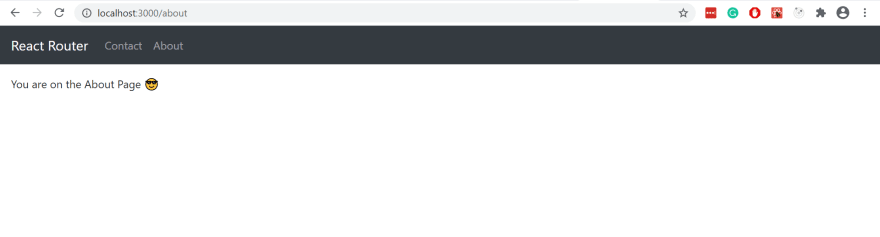
Let's say I have an About component as follows:
import React from "react";export const About = () => { return ( <div> <p className="m-3">You are on the About Page </p> </div> );};And I want to render out this component on the /about route. Thus, I will define my route as follows:
import React from "react";import { BrowserRouter as Router, Route, Switch } from "react-router-dom";function App() { return ( <Router> <div> <Switch> <Route path="/about" component={About} /> </Switch> </div> </Router> );}Now, every time I go to /about, the About component will be rendered.
Thus, you can define as many routes as you require, in the same manner inside the <Switch> tags:
<Switch> <Route path="/" component={Home} /> <Route path="/about" component={About} /> <Route path="/contact" component={Contact} /> <Route path="/posts" component={Posts} /></Switch> 4. Exact is your best friend!
The <Route> tag also takes an optional parameter exact. This ensures that the router will match the exact path. For Example, if you don't use the exact keyword and define your route as /about, even if your path is /about/me, the /about route will be matched.
This can create problems if you have multiple routes with the same URLs.
Let's say you have defined your routes as follows:
<Switch> <Route path="/posts" component={Posts} /> <Route path="/posts/new" component={NewPost} /></Switch>Now, if you go to the /posts route, the first route will be matched as expected. But if you try to go to the /posts/new URL, the first route will be matched again. This happens because the React Router does partial matching and since, both the routes have the same initial part of /posts, the first route will be matched every time.
That's when the exact keyword comes in handy. So, you can add the exact keyword with any route and it will make sure that a route will be matched only if the path matches exactly with the route.
So, your routes will now look like this:
<Switch> <Route exact path="/posts" component={Posts} /> <Route exact path="/posts/new" component={NewPost} /></Switch>5. Start using the Routes
Now that you have created your routes, you can use them in your application. In order to use any route you can use Link from react-router-dom.
import { Link } from "react-router-dom";And use it as follows:
<Link to="/about"> About</Link>The to is the path you want the Link to go to. As soon as the link is clicked, the /about route will be hit and the About component will be rendered.
If you're using links in your navbar(as in most cases), you can also use the NavLink from react-router-dom.
import { NavLink } from "react-router-dom";And it can be used as follows:
<NavLink to="/about"> About</NavLink>The difference between Link and NavLink is that with NavLink, you can add additional styles to the Link. One of them is the activeClassName which is applied by default. It will highlight the selected Link in the Navbar as follows:

That's all well and good, but there is another way that you can access routes in your applications.
That is by using the history object. The history object can be accessed via props. Thus, in order to change the path you can use history.push() method. In order to change the path on button click you would do something like this:
import React from "react";export const About = ({ history }) => { return ( <div> <p className="m-3">You are on the About Page </p> <button className="btn btn-dark mx-3 my-2" onClick={() => { history.push("/"); }} > Back To Home </button> </div> );};In history.push(), you can specify the path that you want to go to as shown in the above example.
Bonus Point: URL Params
Now moving on to the last topic about URL parameters. In order to make your routes dynamic, you can define your routes as follows:
<Route path="/posts/:id" component={SpecificPost} />Here, the :id indicates that the path can change dynamically and can take up any string value.
Now, say you want to access that value inside a react component. You can do so by using the match object. The match has a property of params, which can be used to access the dynamic path value. The match object can be accessed via props, similar to the history object.
Here's an example of this in action:
import React from "react";export const SpecificPost = ({ history, match }) => { return ( <div> <p className="m-3">This is post number {match.params.id} </p> <button className="btn btn-dark mx-3 my-2" onClick={() => { history.push("/posts"); }} > Back To Posts </button> </div> );};Here the match.params.id will include the id value specified in the path as follows:
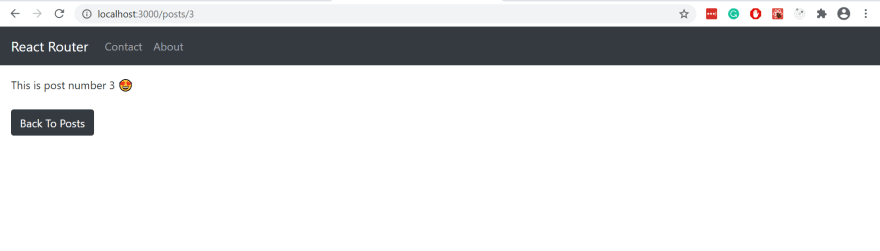
Notice that the value from the URL i.e. 3 is also being rendered in the component. Thus, in this way, you can make your routes dynamic and access URL params in your react components.
That's all folks!
So, that pretty much sums it up. I am in no way an expert, but I thought about sharing a simple guide on the basics of React Router and how to implement it in your React apps.
If you enjoyed reading this blog, feel free to read my other blogs on dev.to @fahadimran. Thanks for reading and happy coding!
Cover photo by Nick Tiemeyer on Unsplash
Original Link: https://dev.to/fahadimran/routing-in-react-for-beginners-learn-the-react-router-in-5-minutes-kg1
Dev To
More About this Source Visit Dev To