
An Interest In:
Web News this Week
- March 26, 2024
- March 25, 2024
- March 24, 2024
- March 23, 2024
- March 22, 2024
- March 21, 2024
- March 20, 2024
Some of Our Sources
- Techcrunch
- Just Creative
- Pearsonified
- Six Revisions
- Inspiredology
- Naldz Graphics
- Noupe
- Stylized Web
- Wal You
- The Verge
Help Webnuz
Referal links:
Create a PHP Login Form
A user login and registration system is super helpful when we want to store information about the users of our website. This applies to everything from educational websites which might store course progress and marks to e-commerce websites which will store information about customers' past purchases.
In this tutorial, I'll teach you how to create your own PHP login and registration forms from scratch.

20 Best PHP Email Forms

18 Best Contact Form PHP Scripts for 2020

Comparing the 5 Best PHP Form Builders (And 4 Free Scripts)
19 PHP Login and Registration Forms to Download
Creating the Login and Registration Forms
Our first step will be the creation of a login form and a registration form. The forms will actually be pretty simple. The registration form will only ask for a username, email, and password. The username and email will be unique for everyone who registers. If anyone tries to create two accounts using the same email address, we will show them an error message letting them know that the email is already in use.
Coding the Registration Form
Here is the HTML for creating the registration form. You have to put it in a file named register.php.
<form method="post" action="" name="signup-form">
<div class="form-element">
<label>Username</label>
<input type="text" name="username" pattern="[a-zA-Z0-9]+" required />
</div>
<div class="form-element">
<label>Email</label>
<input type="email" name="email" required />
</div>
<div class="form-element">
<label>Password</label>
<input type="password" name="password" required />
</div>
<button type="submit" name="register" value="register">Register</button>
</form>
The form is very basic, but we do use HTML5 in order to do some very basic input validation. For instance, the use of type="email" will alert users when the email address that they entered is not in the proper format. Similarly, the use of the pattern attribute on the username will make sure that the username only consists of alphanumeric characters.
You can read the tutorial titled Form Input Validation Using Only HTML5 and Regex if you want to learn more about the topic. You can also take client-side form validation to the next level with jQuery by getting more power over the error messages that are shown and their placement and appearance. If you want to learn more about client-side validation, check out those posts.


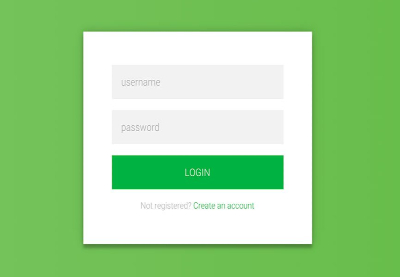
Coding the Login Form
Here is the HTML for the login form. You can put it in a file named login.php.
<form method="post" action="" name="signin-form">
  <div class="form-element">
    <label>Username</label>
    <input type="text" name="username" pattern="[a-zA-Z0-9]+" required />
  </div>
  <div class="form-element">
    <label>Password</label>
    <input type="password" name="password" required />
  </div>
  <button type="submit" name="login" value="login">Log In</button>
</form>
Style the Forms With CSS
Here is some CSS that you can apply to these forms:
* {
    padding: 0;
    margin: 0;
    box-sizing: border-box;
}
body {
    margin: 50px auto;
    text-align: center;
    width: 800px;
}
h1 {
    font-family: 'Passion One';
    font-size: 2rem;
    text-transform: uppercase;
}
label {
    width: 150px;
    display: inline-block;
    text-align: left;
    font-size: 1.5rem;
    font-family: 'Lato';
}
input {
    border: 2px solid #ccc;
    font-size: 1.5rem;
    font-weight: 100;
    font-family: 'Lato';
    padding: 10px;
}
form {
    margin: 25px auto;
    padding: 20px;
    border: 5px solid #ccc;
    width: 500px;
    background: #eee;
}
div.form-element {
    margin: 20px 0;
}
button {
    padding: 10px;
    font-size: 1.5rem;
    font-family: 'Lato';
    font-weight: 100;
    background: yellowgreen;
    color: white;
    border: none;
}
p.success,
p.error {
    color: white;
    font-family: lato;
    background: yellowgreen;
    display: inline-block;
    padding: 2px 10px;
}
p.error {
    background: orangered;
}
This contains some additional styling rules for error messages and headings. The HTML and CSS from this section can be used as the basis of your project when you create your own forms which might require different styling and input fields.
Creating the User Table and Connecting to the Database
The next step is the creation of a user table that will store all the information about the registered users. In our case, the table simply consists of four columns: an auto-incrementing id, a unique username, an email, and a password.
You can use the following SQL to create the table quickly.
CREATE TABLE `users` (
    `id` int(10) unsigned NOT NULL AUTO_INCREMENT,
    `username` varchar(25) NOT NULL,
    `password` varchar(255) NOT NULL,
    `email` varchar(100) NOT NULL,
    PRIMARY KEY (`id`),
    UNIQUE KEY `username` (`username`)
) ENGINE=InnoDB  DEFAULT CHARSET=utf8 COLLATE=utf8_unicode_ci AUTO_INCREMENT=1;
Now, create a file called config.php and write the following code in it to connect to the database.
<?php
    define('USER', 'root');
    define('PASSWORD', '');
    define('HOST', 'localhost');
    define('DATABASE', 'test');
    try {
        $connection = new PDO("mysql:host=".HOST.";dbname=".DATABASE, USER, PASSWORD);
    } catch (PDOException $e) {
        exit("Error: " . $e->getMessage());
    }
?>
Change the database name to whatever the name of your database is. This file will be used to establish a connection to the database.
Code the User Registration
It is finally time to implement the registration functionality. The main function of this code is to check if the supplied email is already registered. If it is not, we enter the username, email and password into the database.
Place the following code at the top of registration.php.
<?php
    session_start();
    include('config.php');
    if (isset($_POST['register'])) {
        $username = $_POST['username'];
        $email = $_POST['email'];
        $password = $_POST['password'];
        $password_hash = password_hash($password, PASSWORD_BCRYPT);
        $query = $connection->prepare("SELECT * FROM users WHERE email=:email");
        $query->bindParam("email", $email, PDO::PARAM_STR);
        $query->execute();
        if ($query->rowCount() > 0) {
            echo '<p class="error">The email address is already registered!</p>';
        }
        if ($query->rowCount() == 0) {
            $query = $connection->prepare("INSERT INTO users(username,password,email) VALUES (:username,:password_hash,:email)");
            $query->bindParam("username", $username, PDO::PARAM_STR);
            $query->bindParam("password_hash", $password_hash, PDO::PARAM_STR);
            $query->bindParam("email", $email, PDO::PARAM_STR);
            $result = $query->execute();
            if ($result) {
                echo '<p class="success">Your registration was successful!</p>';
            } else {
                echo '<p class="error">Something went wrong!</p>';
            }
        }
    }
?>
The first step is to include config.php and start the session. This helps us store any information that we want to preserve across the pages.
Next, we check if the user has clicked on the Register button to submit the form by checking if $_POST['register']has been set. Always remember that it is not a good idea to store passwords as plain text. For this reason, we use the password_hash() function and then store that hash in our database. This particular function creates a 60-character hash using a randomly generated salt.
Finally, we execute the query and check if a non-zero row number exists for a given email address. If it does, the user will get a message saying the email address is already registered.
If no row exists with the given email address, we enter the supplied information into our database and let the users know that the registration was successful.
Implementing the Login Functionality
In our last step, we wrote the code for logging users in. This time, we simply check the information in the database to see if the username and password combination entered into the form is correct.
Here is the code that goes at the top of login.php.
<?php
    session_start();
    include('config.php');
    if (isset($_POST['login'])) {
        $username = $_POST['username'];
        $password = $_POST['password'];
        $query = $connection->prepare("SELECT * FROM users WHERE username=:username");
        $query->bindParam("username", $username, PDO::PARAM_STR);
        $query->execute();
        $result = $query->fetch(PDO::FETCH_ASSOC);
        if (!$result) {
            echo '<p class="error">Username password combination is wrong!</p>';
        } else {
            if (password_verify($password, $result['password'])) {
                $_SESSION['user_id'] = $result['id'];
                echo '<p class="success">Congratulations, you are logged in!</p>';
            } else {
                echo '<p class="error">Username password combination is wrong!</p>';
            }
        }
    }
?>
One important thing to note here is that we don't compare the usernames and password in a single step. Because the password is actually stored in a hashed form, we first need to fetch the hash with the help of the supplied username. Once we have the hash, we can use the password_verify() function to compare the password and the hash.
Once we've successfully confirmed the password, we set the $_SESSION['user_id'] variable to the ID of that user in the database. You can also set the value of other variables here.
Restricting Access to Pages
Most websites where users are asked to register have some other pages where users access and store private data. You can use session variables to protect these pages. If the session variable is not set, simply redirect the users to the login page. Otherwise, show them the contents of the page.
<?php
    session_start();
    if(!isset($_SESSION['user_id'])){
        header('Location: login.php');
        exit;
    } else {
        // Show users the page!
    }
?>
The only thing that you have to do is to ensure the script contains session_start() at the beginning.
Resolving Common Errors
There are three types of errors that you might encounter when using this script:
1. Errors Due to Wrong Variable Names
One of the most common sources of error is having the wrong capitalization for a variable somewhere. Therefore, it is important to stick with the same naming convention for all your variables. As an example, consider the keys in the $_POST superglobal are based on the value of name assigned to input elements in the form. This means that $_POST['USERNAME'] and $_POST['username'] will have different values.
2. The " Headers already sent" Error
Some functions like session_start() and header() modify HTTP headers. Since PHP flushes all headers before it outputs something, it is important to call all such functions before you output anything. This includes any raw HTML or unintentional spaces before the opening <?php tag.
3. Session Variables not Persisting Across Pages
You can access session variables on a page only if you called the function session_start() on that page. If you cannot access the values in $_SESSION superglobal on a page, this is probably because you forgot to call session_start(). Also remember to call the function before you output anything on the page. Otherwise, you will encounter the " Headers already sent" error.
Final Thoughts
In this tutorial, we learned how to create a basic user registration and login system using PHP. Once you've grasped the basics of login and registration systems, you can create more complicated logic, for example allowing users to reset their password, or verify their email address.
You can also add more front-end validation with HTML5 attributes or jQuery to make the form more user-friendly.
Learn PHP With a Free Online Course
If you want to learn PHP, check out our free online course on PHP fundamentals!
In this course, you'll learn the fundamentals of PHP programming. You'll start with the basics, learning how PHP works and writing simple PHP loops and functions. Then you'll build up to coding classes for simple object-oriented programming (OOP). Along the way, you'll learn all the most important skills for writing apps for the web: you'll get a chance to practice responding to GET and POST requests, parsing JSON, authenticating users, and using a MySQL database.

Original Link: https://code.tutsplus.com/tutorials/create-a-php-login-form--cms-33261
TutsPlus - Code
 Tuts+ is a site aimed at web developers and designers offering tutorials and articles on technologies, skills and techniques to improve how you design and build websites.
More About this Source Visit TutsPlus - Code