
Some of Our Sources
- Techcrunch
- Simplebits
- Smashing Magazine
- Abduzeedo
- FanExtra - PSD
- Noupe
- Crazy Leaf Design
- Web Design Ledger
- Stylized Web
- Daily Now
Help Webnuz
Referal links:
Build File Upload/Download Functionality with Image Preview using MERN stack
Introduction
In this article, we will create a file upload and download functionality with a preview of the image using the MERN stack.
By creating this App, you will learn
- How to upload a file using drag and drop
- How to upload and download any type of file
- How to restrict the type of the file while uploading
- How to restrict the size of the file while uploading
- How to show a preview of the image after selecting it
- How to use MongoDB to store and get the details of the file
and much more.
Instead of storing the file in the MongoDB database as base64 encoded, we will be storing the file on the server and only storing the path of the file inside the database so as to keep the database size smaller and to easily access and move the files as per the need.
We're using a very popular react-dropzone npm library for implementing the drag and drop functionality.
For actual file upload, we're using multer npm library which is also very popular for uploading files.
We will be using React Hooks for building this application, so If you're not familiar with it, check out my previous article here for the introduction to Hooks.
We will be using the MongoDB database so make sure you install it locally by following my previous article here
Initial Setup
Create a new project using create-react-app
create-react-app react-upload-download-filesOnce the project is created, delete all files from the src folder and create index.js and styles.scss files inside the src folder. Also create components, router and utils folders inside the src folder.
Install the necessary dependencies:
yarn add axios@0.20.0 bootstrap@4.5.2 downloadjs@1.4.7 node-sass@4.14.1 react-bootstrap@1.3.0 react-dropzone@11.2.0 react-router-dom@5.2.0Open styles.scss and add the contents from here inside it.
Creating Initial Pages
Create a new file with name Header.js inside the components folder with the following content:
import React from 'react';import { NavLink } from 'react-router-dom';const Header = () => { return ( <div className="header"> <h1>File Upload And Download</h1> <nav> <NavLink activeClassName="active" to="/" exact={true}> Home </NavLink> <NavLink activeClassName="active" to="/list"> Files List </NavLink> </nav> </div> );};export default Header;Create a new file with name App.js inside the components folder with the following content:
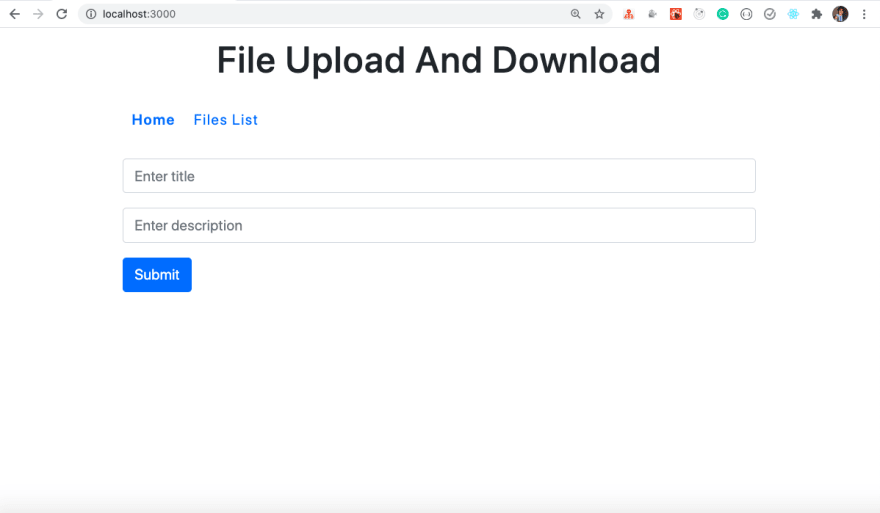
import React, { useState, useRef } from 'react';import { Form, Row, Col, Button } from 'react-bootstrap';const App = (props) => { const [file, setFile] = useState(null); // state for storing actual image const [previewSrc, setPreviewSrc] = useState(''); // state for storing previewImage const [state, setState] = useState({ title: '', description: '' }); const [errorMsg, setErrorMsg] = useState(''); const [isPreviewAvailable, setIsPreviewAvailable] = useState(false); // state to show preview only for images const dropRef = useRef(); // React ref for managing the hover state of droppable area const handleInputChange = (event) => { setState({ ...state, [event.target.name]: event.target.value }); }; const handleOnSubmit = async (event) => { event.preventDefault(); }; return ( <React.Fragment> <Form className="search-form" onSubmit={handleOnSubmit}> {errorMsg && <p className="errorMsg">{errorMsg}</p>} <Row> <Col> <Form.Group controlId="title"> <Form.Control type="text" name="title" value={state.title || ''} placeholder="Enter title" onChange={handleInputChange} /> </Form.Group> </Col> </Row> <Row> <Col> <Form.Group controlId="description"> <Form.Control type="text" name="description" value={state.description || ''} placeholder="Enter description" onChange={handleInputChange} /> </Form.Group> </Col> </Row> <Button variant="primary" type="submit"> Submit </Button> </Form> </React.Fragment> );};export default App;In this file, we're rendering a form to add the title and description for now. We will add the option to add the file later in this article.
For each input field, we have added an handleInputChange handler that updates the state of each input field. We have added a name attribute to each input field which matches exactly with the name of the state variables so we're able to use ES6 shorthand syntax for updating the state.
const handleInputChange = (event) => { setState({ ...state, [event.target.name]: event.target.value });};In the case of Hooks, the state is not merged automatically, so we're first spreading all the properties of the state and then updating the respective input field.
Create a new file with name AppRouter.js inside the router folder with the following content:
import React from 'react';import { BrowserRouter, Switch, Route } from 'react-router-dom';import App from '../components/App';import Header from '../components/Header';const AppRouter = () => ( <BrowserRouter> <div className="container"> <Header /> <div className="main-content"> <Switch> <Route component={App} path="/" exact={true} /> </Switch> </div> </div> </BrowserRouter>);export default AppRouter;Now, open src/index.js file and add the following contents inside it:
import React from 'react';import ReactDOM from 'react-dom';import AppRouter from './router/AppRouter';import 'bootstrap/dist/css/bootstrap.min.css';import './styles.scss';ReactDOM.render(<AppRouter />, document.getElementById('root'));Now, start the application by executing the yarn start command from the terminal.
You will see the following screen:
Adding File Upload Functionality
Now, let's add the option to upload the file from the UI.
Open src/App.js file and before the submit button and after the ending Row tag, add the following code
<div className="upload-section"> <Dropzone onDrop={onDrop}> {({ getRootProps, getInputProps }) => ( <div {...getRootProps({ className: 'drop-zone' })} ref={dropRef}> <input {...getInputProps()} /> <p>Drag and drop a file OR click here to select a file</p> {file && ( <div> <strong>Selected file:</strong> {file.name} </div> )} </div> )} </Dropzone> {previewSrc ? ( isPreviewAvailable ? ( <div className="image-preview"> <img className="preview-image" src={previewSrc} alt="Preview" /> </div> ) : ( <div className="preview-message"> <p>No preview available for this file</p> </div> ) ) : ( <div className="preview-message"> <p>Image preview will be shown here after selection</p> </div> )}</div>Here, we're using the DropZone component with React render props pattern where the text we need to display in the drop area is added after the input field inside the DropZone component.
Add the import for DropZone and axios at the top of the App.js file.
import Dropzone from 'react-dropzone';import axios from 'axios';Add the OnDrop function after the handleInputChange handler.
const onDrop = (files) => { const [uploadedFile] = files; setFile(uploadedFile); const fileReader = new FileReader(); fileReader.onload = () => { setPreviewSrc(fileReader.result); }; fileReader.readAsDataURL(uploadedFile); setIsPreviewAvailable(uploadedFile.name.match(/\.(jpeg|jpg|png)$/));};Here, the onDrop function receives a files array with the dropped or selected files.
We're uploading only one file at a time so the uploaded file will be available files[0] so we're using array destructuring syntax to get that file value.
const [uploadedFile] = files;To display the preview of the image, we're using JavaScript FileReader API.
To convert the file to dataURL we call the fileReader.readAsDataURL method.
Once the file is successfully read as dataURL, the onload function of fileReader will be called.
fileReader.onload = () => { setPreviewSrc(fileReader.result);};The result of the read operation will be available in the result property of the fileReader which we're assigning to the previewSrc state variable.
We're showing preview only for images so we're checking if the uploaded file is of correct format (only jpg, jpeg and png image) and updating the state of previewAvailable variable.
setIsPreviewAvailable(uploadedFile.name.match(/\.(jpeg|jpg|png)$/));Now, restart the application by running the yarn start command and verify the functionality.

Here, we've added a file by browsing it. You can even add a file by drag and drop as shown below.

If you select a file, other than an image, we'll not show the preview indicated by the message No preview available for this file.
Add drop indication
If you saw the drop functionality, we're not showing any indication that the file is being dropped into the drop area so let's add that.
We've already added a ref to the div with class drop-zone inside the App.js file.
<div {...getRootProps({ className: 'drop-zone' })} ref={dropRef}>and also created the dropRef variable at the top using useRef hook.
Add the onDragEnter and onDragLeave props to the Dropzone component.
<Dropzone onDrop={onDrop} onDragEnter={() => updateBorder('over')} onDragLeave={() => updateBorder('leave')}>The onDragEnter function will be triggered when the file is over the drop area and onDragLeave function will be triggered when the file is removed from the drop area.
Create a new updateBorder function inside the App component before the handleOnSubmit handler.
const updateBorder = (dragState) => { if (dragState === 'over') { dropRef.current.style.border = '2px solid #000'; } else if (dragState === 'leave') { dropRef.current.style.border = '2px dashed #e9ebeb'; }};As we've added the dropRef ref to the div with class drop-zone, it will point to that div and we can use its current property to update the border of the drop area using dropRef.current.style.border.
Also, inside the onDrop function, add the following line at the end of the function.
dropRef.current.style.border = '2px dashed #e9ebeb';so when we drop the file over the drop area, the border will return to its normal state.
Now, If you check the application, you will see the dropping effect with the changing border.

Calling API For File Upload
Create a new file with the name constants.js inside the src/utils folder with the following content
export const API_URL = 'http://localhost:3030';We will be starting our Express server on port 3030 soon so we have mentioned that here.
Now, let's write the code inside the handleOnSubmit handler of App.js to call the backend API.
Replace the handleOnSubmit handler with the following code
const handleOnSubmit = async (event) => { event.preventDefault(); try { const { title, description } = state; if (title.trim() !== '' && description.trim() !== '') { if (file) { const formData = new FormData(); formData.append('file', file); formData.append('title', title); formData.append('description', description); setErrorMsg(''); await axios.post(`${API_URL}/upload`, formData, { headers: { 'Content-Type': 'multipart/form-data' } }); } else { setErrorMsg('Please select a file to add.'); } } else { setErrorMsg('Please enter all the field values.'); } } catch (error) { error.response && setErrorMsg(error.response.data); }};Also, import the API_URL at the top of the file.
import { API_URL } from '../utils/constants';Inside the handleOnSubmit handler, we're first checking if the user has entered all the field values and selected the file and we're making an API call to /upload API which we will be writing in the next section.
await axios.post(`${API_URL}/upload`, formData, { headers: { 'Content-Type': 'multipart/form-data' }});We're making a POST request with the formData object and sending title, description and the actual file to the API.
Note that, mentioning the content type of multipart/form-data is very important otherwise the file will not be sent to the server.
Adding server-side code for file upload
Now, let's add the server-side functionality to upload the file.
Create a folder with name server inside the react-upload-download-files folder and execute the following command from the server folder
yarn init -yThis will create a package.json file inside the server folder.
Install the required dependencies by executing the following command from the terminal from inside the server folder
yarn add cors@2.8.5 express@4.17.1 mongoose@5.10.7 multer@1.4.2 nodemon@2.0.4Create a new file with the name .gitignore inside the server folder and add the following line inside it so node_modules folder will not be added in your Git repository.
node_modulesNow create db, files, model, routes folder inside the server folder. Also, create index.js inside the server folder.
Inside the server/db folder, create a new file db.js with the following content
const mongoose = require('mongoose');mongoose.connect('mongodb://127.0.0.1:27017/file_upload', { useNewUrlParser: true, useUnifiedTopology: true, useCreateIndex: true});Provide your MongoDB database connection details here. file_upload is the name of the database we will use.
Create a new file with name file.js inside the model folder with the following content
const mongoose = require('mongoose');const fileSchema = mongoose.Schema( { title: { type: String, required: true, trim: true }, description: { type: String, required: true, trim: true }, file_path: { type: String, required: true }, file_mimetype: { type: String, required: true } }, { timestamps: true });const File = mongoose.model('File', fileSchema);module.exports = File;Here, we have defined the schema for the collection as we're using a very popular mongoose library to work with MongoDB. We will be storing the title, description, file_path and file_mimetype in the collection so we have described the type of each in this file.
Note that, even though we have defined the model name as File, MongoDB creates a plural version of the collection. So the collection name will be files.
Now, create a new file with name file.js inside the routes folder with the following content
const path = require('path');const express = require('express');const multer = require('multer');const File = require('../model/file');const Router = express.Router();const upload = multer({ storage: multer.diskStorage({ destination(req, file, cb) { cb(null, './files'); }, filename(req, file, cb) { cb(null, `${new Date().getTime()}_${file.originalname}`); } }), limits: { fileSize: 1000000 // max file size 1MB = 1000000 bytes }, fileFilter(req, file, cb) { if (!file.originalname.match(/\.(jpeg|jpg|png|pdf|doc|docx|xlsx|xls)$/)) { return cb( new Error( 'only upload files with jpg, jpeg, png, pdf, doc, docx, xslx, xls format.' ) ); } cb(undefined, true); // continue with upload }});Router.post( '/upload', upload.single('file'), async (req, res) => { try { const { title, description } = req.body; const { path, mimetype } = req.file; const file = new File({ title, description, file_path: path, file_mimetype: mimetype }); await file.save(); res.send('file uploaded successfully.'); } catch (error) { res.status(400).send('Error while uploading file. Try again later.'); } }, (error, req, res, next) => { if (error) { res.status(500).send(error.message); } });Router.get('/getAllFiles', async (req, res) => { try { const files = await File.find({}); const sortedByCreationDate = files.sort( (a, b) => b.createdAt - a.createdAt ); res.send(sortedByCreationDate); } catch (error) { res.status(400).send('Error while getting list of files. Try again later.'); }});Router.get('/download/:id', async (req, res) => { try { const file = await File.findById(req.params.id); res.set({ 'Content-Type': file.file_mimetype }); res.sendFile(path.join(__dirname, '..', file.file_path)); } catch (error) { res.status(400).send('Error while downloading file. Try again later.'); }});module.exports = Router;In this file, as we're using multer library for handling file upload. We're creating a multer configuration that we're storing in the variable with the name upload.
const upload = multer({ storage: multer.diskStorage({ destination(req, file, cb) { cb(null, './files'); }, filename(req, file, cb) { cb(null, `${new Date().getTime()}_${file.originalname}`); } }), limits: { fileSize: 1000000 // max file size 1MB = 1000000 bytes }, fileFilter(req, file, cb) { if (!file.originalname.match(/\.(jpeg|jpg|png|pdf|doc|docx|xlsx|xls)$/)) { return cb( new Error( 'only upload files with jpg, jpeg, png, pdf, doc, docx, xslx, xls format.' ) ); } cb(undefined, true); // continue with upload }});The multer function takes an object as a parameter with many properties some of which are storage and limits and fileFilter function.
The multer.diskStorage function takes an object with destination and filename functions.
Here we're using ES6 function shorthand syntax so
destination(req, file, cb) {is same as
destination: function(req, file, cb) {The destination and filename function receives three input parameters namely req(request), file(actual uploaded file object) and cb(callback function).
For the callback function(cb) arguments,
- If there is an error, it will be passed as the first argument
- If there is no error, then the first argument will be null or undefined and the second argument will contain the data be passed to the callback function.
In the destination function, we pass the path of the folder where we will be storing the uploaded files. In our case, it will be a files folder inside the server folder.
In the filename function, we provide the name we want to give for each uploaded file. In our case, it will be current_timestamp_name_of_the_file.
For the limits property we specify the maximum file size allowed for the uploaded file. In our case we have provided 1MB as the max file limit.
Then inside the fileFilter function, we can decide to either accepts the file to be uploaded or reject it.
If the file extension matches with either jpeg|jpg|png|pdf|doc|docx|xlsx|xls then we allow the file to upload by calling the callback function cb(undefined, true) otherwise we will throw an error.
If we call cb(undefined, false) inside the fileFilter function, then the file will always be rejected and will not be uploaded.
Now, let's look at the /upload route
Router.post( '/upload', upload.single('file'), async (req, res) => { try { const { title, description } = req.body; const { path, mimetype } = req.file; const file = new File({ title, description, file_path: path, file_mimetype: mimetype }); await file.save(); res.send('file uploaded successfully.'); } catch (error) { res.status(400).send('Error while uploading file. Try again later.'); } }, (error, req, res, next) => { if (error) { res.status(500).send(error.message); } });Here, we're passing the upload.single function as the second parameter to the /upload route so it will act as a middleware and will be executed first before executing the function body.
Note that, the file parameter to the upload.single has to match with the name used while uploading the file in the front-end.
Remember the code we used previously for making the API call from the App.js file.
const formData = new FormData();formData.append('file', file);we were adding the file to formData inside the property with the name file. This has to match with the upload.single parameter name otherwise the file upload will not work.
Inside the function, we will get the title and description inside the req.body and actual file inside the req.file object just because we've used the multer library.
Then we're passing those values to the object of the File model we created.
const file = new File({ title, description, file_path: path, file_mimetype: mimetype});and calling the save method on the object will actually save the data in the MongoDB database.
If the file type does not match with jpeg|jpg|png|pdf|doc|docx|xlsx|xls or the file size is larger than we mentioned (1MB) then the below code will be executed
(error, req, res, next) => { if (error) { res.status(500).send(error.message); }};and we send back the error message to the client(our React Application).
Now, open server/index.js file and add the following contents inside it.
const express = require('express');const cors = require('cors');const fileRoute = require('./routes/file');require('./db/db');const app = express();app.use(cors());app.use(fileRoute);app.listen(3030, () => { console.log('server started on port 3030');});In this file, we're using Express server to start our Node.js application on port 3030.
We're also using the cors npm package as a middleware, so we will not get a CORS error when we make an API call from React application running on port 3000 to the Node.js application running on port 3030.
Now, let's run the application, to check the upload functionality.
Open server/package.json file and add the start script inside the scripts property.
"scripts": { "start": "nodemon index.js"}Now, open another terminal keeping the React terminal running and execute the following command from inside the server folder
yarn startThis will start our Node.js express server so we can make API calls to it.
Also start the MongoDB database server by running the following command from the terminal(If you have followed this article mentioned previously)
./mongod --dbpath=<path_to_mongodb-data_folder>So now you will have three terminals open: one for React application, one for Node.js server, and another for MongoDB server.
Let's verify the upload functionality now.

As you can see, when we upload a file, its added to the files folder, and entry is also in the MongoDB database. So file upload is successful.
But we're not showing any indication on the UI that the file is successfully uploaded. Let's do that now.
Create a new file FilesList.js inside the components folder with the following content
import React, { useState, useEffect } from 'react';import download from 'downloadjs';import axios from 'axios';import { API_URL } from '../utils/constants';const FilesList = () => { const [filesList, setFilesList] = useState([]); const [errorMsg, setErrorMsg] = useState(''); useEffect(() => { const getFilesList = async () => { try { const { data } = await axios.get(`${API_URL}/getAllFiles`); setErrorMsg(''); setFilesList(data); } catch (error) { error.response && setErrorMsg(error.response.data); } }; getFilesList(); }, []); const downloadFile = async (id, path, mimetype) => { try { const result = await axios.get(`${API_URL}/download/${id}`, { responseType: 'blob' }); const split = path.split('/'); const filename = split[split.length - 1]; setErrorMsg(''); return download(result.data, filename, mimetype); } catch (error) { if (error.response && error.response.status === 400) { setErrorMsg('Error while downloading file. Try again later'); } } }; return ( <div className="files-container"> {errorMsg && <p className="errorMsg">{errorMsg}</p>} <table className="files-table"> <thead> <tr> <th>Title</th> <th>Description</th> <th>Download File</th> </tr> </thead> <tbody> {filesList.length > 0 ? ( filesList.map( ({ _id, title, description, file_path, file_mimetype }) => ( <tr key={_id}> <td className="file-title">{title}</td> <td className="file-description">{description}</td> <td> <a href="#/" onClick={() => downloadFile(_id, file_path, file_mimetype) } > Download </a> </td> </tr> ) ) ) : ( <tr> <td colSpan={3} style={{ fontWeight: '300' }}> No files found. Please add some. </td> </tr> )} </tbody> </table> </div> );};export default FilesList;In this file, initially inside the useEffect hook, we're making an API call to the /getAllFiles API.
The /getAllFiles API from routes/file.js looks like this:
Router.get('/getAllFiles', async (req, res) => { try { const files = await File.find({}); const sortedByCreationDate = files.sort( (a, b) => b.createdAt - a.createdAt ); res.send(sortedByCreationDate); } catch (error) { res.status(400).send('Error while getting list of files. Try again later.'); }});Here, we're calling the .find method of mongoose library on the File model to get the list of all files added in the database and then we're sorting them by the createdAt date in the descending order so we will get the recently added file first in the list.
Then we're assigning the result from the API to the filesList array in the state
const { data } = await axios.get(`${API_URL}/getAllFiles`);setErrorMsg('');setFilesList(data);Then we're using the Array map method to loop through the array and display them on the UI in a table format.
We have also added a download link inside the table. We're calling the downloadFile function when we click on the download link
const downloadFile = async (id, path, mimetype) => { try { const result = await axios.get(`${API_URL}/download/${id}`, { responseType: 'blob' }); const split = path.split('/'); const filename = split[split.length - 1]; setErrorMsg(''); return download(result.data, filename, mimetype); } catch (error) { if (error.response && error.response.status === 400) { setErrorMsg('Error while downloading file. Try again later'); } }};Inside the downloadFile function, we're making call to the /download/:id API. Note that, we're setting the responseType to blob. This is very important otherwise you will not get the file in the correct format.
The /download API from routes/file.js file looks like this:
Router.get('/download/:id', async (req, res) => { try { const file = await File.findById(req.params.id); res.set({ 'Content-Type': file.file_mimetype }); res.sendFile(path.join(__dirname, '..', file.file_path)); } catch (error) { res.status(400).send('Error while downloading file. Try again later.'); }});Here, first, we're checking if any such file exists with the provided id. If it exists then we're sending back the file stored in the files folder by setting the content-type of the file first.
Setting the content-type is very important to get the file in the correct format as we're not just uploading images but also doc, xls and pdf files. So to correctly send back the file content, the content-type is required.
Once we got the response from the /download API inside the downloadFile function, we're calling the download function provided by the downloadjs npm library.
downloadjs is a very popular library for downloading any type of file. You just have to provide the file content, its content type and name of the file you want the file to have while downloading and it will trigger the download functionality of the browser.
Now, open router/AppRouter.js file and add a route for the FilesList component.
Your AppRouter.js file will look like this now:
import React from 'react';import { BrowserRouter, Switch, Route } from 'react-router-dom';import App from '../components/App';import Header from '../components/Header';import FilesList from '../components/FilesList';const AppRouter = () => ( <BrowserRouter> <div className="container"> <Header /> <div className="main-content"> <Switch> <Route component={App} path="/" exact={true} /> <Route component={FilesList} path="/list" /> </Switch> </div> </div> </BrowserRouter>);export default AppRouter;Now, open src/App.js and inside the handleOnSubmit handler after calling the /upload API, add a statement to redirect the user to the FilesList component
await axios.post(`${API_URL}/upload`, formData, { headers: { 'Content-Type': 'multipart/form-data' }});props.history.push('/list'); // add this lineSo now, once the file is uploaded, we will be redirected to the FilesList component where we will see the list of files uploaded.
If there is some error while uploading the file, you will see the error message on the UI and you will not be redirected to the list page.
Assuming that, you have executed the yarn start command in two separate terminals for starting React and Node.js application and another terminal for running the MongoDB server. Now, let's verify the application functionality.
Uploading Image File Demo
Uploading PDF File Demo

Uploading Excel File Demo

Uploading Doc file Demo

Uploading un-supported File Demo

As you can see, we're able to successfully upload and download any type of file which is in our supported format list.
Removing the Need of CORS
As previously mentioned, to stop getting CORS error while calling API from React App to Node.js App, we're using cors library at the server-side like this:
app.use(cors());Try removing this line from the file and you will see that the API calls from React to Node.js fail.

To prevent this error we're using the cors middleware. But because of this, anyone in the world can access our APIs directly from their app which is not good for security reasons.
So to remove the need of cors, we will run the Node.js and React application on the same port which will also remove the need for running two separate commands.
So First, remove the use of cors from server/index.js file and also remove the require statement of cors.
Then add the following code before the app.use(fileRoute) statement.
app.use(express.static(path.join(__dirname, '..', 'build')));Here, we're telling express to serve the contents of the build folder statically.
The build folder will be created when we run yarn build command for our React App.
To learn in details about how this actually work, check out my previous article here
and import the path Node.js package at the top of the file.
const path = require('path');Your server/index.js file will look like this now:
const express = require('express');const path = require('path');const fileRoute = require('./routes/file');require('./db/db');const app = express();app.use(express.static(path.join(__dirname, '..', 'build')));app.use(fileRoute);app.listen(3030, () => { console.log('server started on port 3030');});Now, open the main package.json file add start-app script in the scripts section.
"scripts": { "start": "react-scripts start", "build": "react-scripts build", "test": "react-scripts test", "eject": "react-scripts eject", "start-app": "yarn build && (cd server && yarn start)" },Now, Assuming you have already started the MongoDB server, you just need to run yarn run start-app command from the terminal.
This command will create a build folder which will contain all of our React application and then starts our Node.js server on port 3030.
So now, we can access our React and Node.js application on the same 3030 port. So there is no need of running two separate commands and you can access the application at http://localhost:3030/
Conclusion
We have now finished creating the complete file upload and download functionality using MERN stack.
You can find the complete source code for this application in this repository.
Don't forget to subscribe to get my weekly newsletter with amazing tips, tricks and articles directly in your inbox here.
Original Link: https://dev.to/myogeshchavan97/drag-and-drop-file-upload-with-image-preview-and-download-file-functionality-using-mern-stack-5dgn
Dev To
More About this Source Visit Dev To