
An Interest In:
Web News this Week
- April 3, 2024
- April 2, 2024
- April 1, 2024
- March 31, 2024
- March 30, 2024
- March 29, 2024
- March 28, 2024
Some of Our Sources
- Techcrunch
- Team Treehouse
- Joshua Blankenship
- Six Revisions
- Fuel Your Creativity
- Inspiredology
- Fudge Graphics
- CSS Globe
- Spyre Studios
- Willems Lab
Help Webnuz
Referal links:
4 Ways of Deploying Web Apps in 2020
As the years in the calendar add up, we see a growing number of people pouring their ideas into web pages. The people we mean may or may not be familiar with the technicalities of web designing and publishing and thus, might be stuck with quite a few problems while setting up their platform (website). What hosting service to use? How to set up DNS and SSL? And most importantly, how to deploy web-apps? Here today, we are going to discuss and compare different platforms for deploying such apps and find the one that is most suitable for you!
For starters, lets look at the options you have:
- Regular hosting (Digital Ocean, AWS, GCP) + Jenkins
- GitHub Actions/Bitbucket Pipelines + Heroku
- Travis-CI/Circle-CI
- Fully automated cloud platforms
Regular cloud hosting + Jenkins
Jenkins is one of the biggest horsemen of the CI/CD platform. It is an automated CI/CD software (of course, right?) that works on a Master Agent Architecture. So what is the Master/Agent? Well, an agent is just a fancy way of saying a software, installed on a machine that is used to coordinate [and bind] different builds. Jenkins uses one master which connects and co-ordinates between all of the available agents. So what machines can you use for such tasks? Most commonly, virtual machines (VMs) that contain dockers are preferred, since it is easier to do, however, dockers are not mandatory. Some others that can be used are a Physical Server or even an ephemeral container running on Kubernetes.
Pros:
- It is highly customizable.
- It is highly flexible since it has more than 1.5K plugins. So for any test case you want to try, chances are someone has already done it for you :D.
- Even if you are the first to run a particular test case, you can build your own plugin and/or shared library => A friendly community.
- It supports faster builds and cached modules. Because it doesnt force us to use docker images, unlike its competitors, anything within the service can be cached for later use, thereby making it faster than many of its rivals.
- It is not limited to the systems based on Linux. We can use Windows systems as well.
Cons:
- It is an unmanaged service.
- You need to ensure at regular intervals that the server is running, has SSL locked down, has security patches, or has internet access.
- You need to manually solve all the operational issues. For instance, if something goes wrong, it is upon you to trace it and fix it.
Bitbucket Pipelines/ Github Actions with Heroku
Bitbuckets Pipeline is another platform similar to Jenkins, but a bit easier to use. Bitbucket Pipeline works in a similar way to Github Actions; with the Git version control system. You can choose either depending on which platform you use.
The pipeline is a feature you do not want to miss here. With Pipeline, most of the SDLC (Software Development Life Cycle) can be completely automated. So an easier alternative to Jenkins (though with limited features), would be Bitbucket Pipeline.
Bitbucket uses Docker images to run your builds. The images can also be varied in each step, thereby making it easier to separate each step of SDLC.
Pros:
- It is, of course, easier than doing it manually, or even using Jenkins (if your concern is easiness).
Cons:
- It is slower than Jenkins since it uses Docker images.
- It cant share artefacts across Pipelines.
- Pipeline works off a docker image. Hence you get a fresh image each time it is updated, so unless cached, no data will be preserved from the previous pipeline. However, even if cached, the data will be lost after 7 days. This means any files that are not brought from a remote location will be lost, which doesnt fare well for large tests (with an immense number of inputs or baseline fields.)
Below is a step-by-step example of how you can use Bitbucket Pipelines + Heroku to do automated Continuous Integration and Deployment:
- Go to bitbucket.com and create a new repo (you may skip this if you already have a repo for your project)

- Push your project's code to bitbucket.
- Set up a cloud provider, Which in my case is going to be Heroku. [New to Heroku as well? No worries, just follow through to the end)
- Go to Heroku.com Create Project:

- Set Up the Environment variables within Heroku: (Project Settings Config Vars):

- Once you make your Project compatible with Heroku (Check https://devcenter.heroku.com/categories/reference), Lets Configure the Bitbucket Settings.
- Go to Heroku.com Create Project:
- Within Bitbucket Project Repository Settings Repository Variables, add all your Environment variables for the app.

- dd the following two variables on bitbucket:
HEROKU_APP_NAME: <'Name of Your Heroku App'>
HEROKU_API_KEY: <'API Key for Your Heroku Account'>
You can get the API Key from Heroku Profiles API Key
- Setting Up the Pipeline:
- Go to Bitbucket Pipelines select your language and continue from there.Here's an example:
image: python:3.7.2pipelines: default: - step: name: Testing The WebApp script: - pip install -r requirements.txt - ./manage.py test - step: name: Build Process script: - git archive --format=tar.gz master -o sample-app.tar.gz artifacts: - sample-app.tar.gz - step: name: Deploying to production Using Heroku deployment: production caches: - pip script: - git push -f https://heroku:[email protected]/$HEROKU_APP_NAME.git $BITBUCKET_BRANCH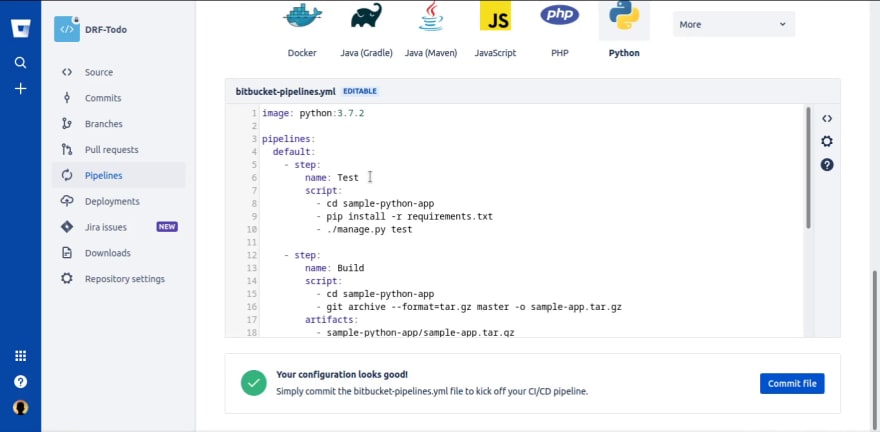
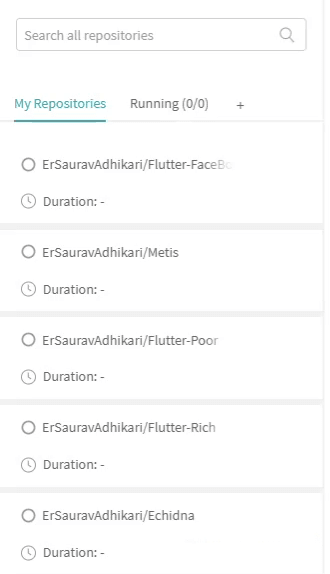
- Once you have configured the pipeline, commit/push the changes. Now, within the pipeline tab, you can find the logs for your running and/or completed pipelines.
- If the Test, Build and Deploy Process is Successful, You will Get a Green Tick Saying Successful:

- If the Test, Build, and Deploy Process are unsuccessful, You will Get a Red error Saying Failed:
 *If the code passed the test and there were no Build Errors, the deployment will continue, and as such, the new code will be live. You will now be able to see your website using your Domain Name or a subdomain given by Heroku:
- If the Test, Build and Deploy Process is Successful, You will Get a Green Tick Saying Successful:
Travis-CI/ Circle-CI
Travis-CI is a well-known hosted CI service in the community for...well, many reasons. One of the prime reasons being that it is free for open-source projects, which means you only have to pay for private projects. Its Continuous Integration Environment also provides multiple runtimes i.e. Node.JS, PHP, Python versions, data stores and so on. So, when hosting on this platform, the testing of your libraries against multiple runtimes/ data stores can easily be accomplished without bearing the burden of installing them locally.
Pros:
- Travis is an easy-to-set-up platform. Add some basic build instructions to your project, commit the code...and Voila! Your website is live.
- A large number of services and databases like MySQL, PostgreSQL, Elasticsearch, Redis, Riak, RabbitMQ, Memcached are already installed and waiting to be enabled in the configuration.
- Travis supports a lot of deployment platforms such as Heroku, Cloud Foundry, OpenShift, cloud Control, Nedejitsu, etc.
- Travis CI is a mature platform as of now, and most, if not all the common complaints have been improved. This includes documentation and logs with colour support...[Nice, isnt it?]
Cons:
- Though it is free for Open Source Projects, there is a heavy price to pay for a paid plan -- $69/month being the steppingstone.
- The repos cant be directly modified on Travis [which you can if you are paying...], so it is quite bothersome to go to the file in the repository every time [even] a small tweak has to be made.
- Setting up the build matrix on travis.yml file is quite difficult.
- For the free plan, due to limited infrastructures, build queues get very long at times.
Okay, since we have discussed so much about Travis-CI, starting another thread for Circle-CI would be a bit redundant they are essentially the same in most of the aspects. However, if your goal is a small project, you would want to opt for Circle-CI, whereas Travis-CI is more preferred for open source projects which require testing in different environments.
How to CI-CD with Travis-CI? Here are the steps:
- Create a GitHub repository, set up Travis-CI account and create a new Heroku Project. It is quite like what we did in Bitbucket pipelines.*Note: By default; Travis will deploy your Project to Herokus app with an app name same as the GitHub repo name. You can change this default behaviour in the configuration file.
While Working with bitbucket, Its already shown how you can set up a Heroku project. Its the same steps here as well, so I wont be redundant.*
- Once you create and link Travis-CI to your GitHub account you will be able to see all the repositories from your GitHub. All repos will be shown in Travis but Any repository that has .tavis.yml file will be included in Travis-CI builds:
- In your projects root directory create a .travis.yml file and add the following config (for Python).
language: python python: - "3.8" # command to install dependencies install: - pip install -r requirements.txt # command to run tests script: - ./manage.py test # command to deploy to heroku deploy: provider: Heroku api_key: $HEROKU_API_KEYNote that this is not the only way to write the config file, but since I read this method in the Travis-CI docs I will be writing like their recommended format. You can find your language-specific references in their docs
- In your Travis-CI account, go to the repos setting and add the environment variables. You will need to add the $HEROKU_API_KEY environment variable as you did with bitbucket pipelines. Go to settings -> Variables -> Add variables.

- Now you can push your repository to GitHub, once you push it Travis-CI will automatically start the process and you can see the logs within Travis-CI as.
- Once the Build Completes:
- If Succeed You will see Text saying #[Number] passed in green. Your website should go live then.
- If the build failed, then you will see Text saying #[Number] failed in red. Below is an example of Deployment failure due to Improperly configured API_KEY: The failure may arise during Testing as well.
By default, email notifications are sent to the committer and the commit author when they are members of the repository, that is they have:
- push or admin permissions for public repositories.
- pull, push or admin permissions for private repositories.Emails are sent when, on the given branch:
- a build was just broken or still is broken.
- a previously broken build was just fixed.You can also configure additional Notification Options like Slack or IRC, etc by adding additional parameters to your configuration file (.travis.yml):
notifications: slack: on_success: alwaysRefer to their docs for more info
Automated cloud platforms
Finally, for a complete and easy automated solution, we can opt for one of the many Automated Cloud Platforms. [Among which, I personally prefer Hostman, but we'll, that's completely subjective.] Basically, most of the behind-the-curtains works of coding and such are already done for you, so that you can deploy your code right from your git repository.
All the worries regarding setting up a cloud server, web server, and similar tedious tasks are not for you to worry about.
For the most part, you will be provided with free SSL and CDN for up-to-date security and many other perks. Being cheaper than other services and much easier to use, the majority of the usage is covered by these platforms. So unless you have a dedicated team ready to go full throttle for Manual testing or want to pay for other automated systems such as Jenkins (which has plenty of manual work to do, still), the most intelligent choice is to go for Automated Cloud Platforms like Hostman.
Pros:
- It is very easy to set up.
- It is completely automated, so not many manual operations are on the menu.
- All the operational issues will be taken care of by providers like Hostman.
- After setting it up once, there is no need to manage it at regular intervals. You can wholly focus on writing awesome codes.
- It supports Automatic Git Deployment out of the box, so you dont need to configure.
- No Vendor Lock In.
Cons:
- The features might be limited as compared to other platforms such as Jenkins.
- As of now, the Languages and Frameworks out of the box are a bit limited. As an example, Hostman supports 22 Frameworks. But providers like Jenkins supports more than 100 plugins and more can be built, if necessary.
Updates solve most of the problems these days, so we are optimistic about how future updates can migrate the number of cons toward the pros section.
Meanwhile, lets have a look at an easy way to set up your website for Automated Continuous Integration and Deployment:
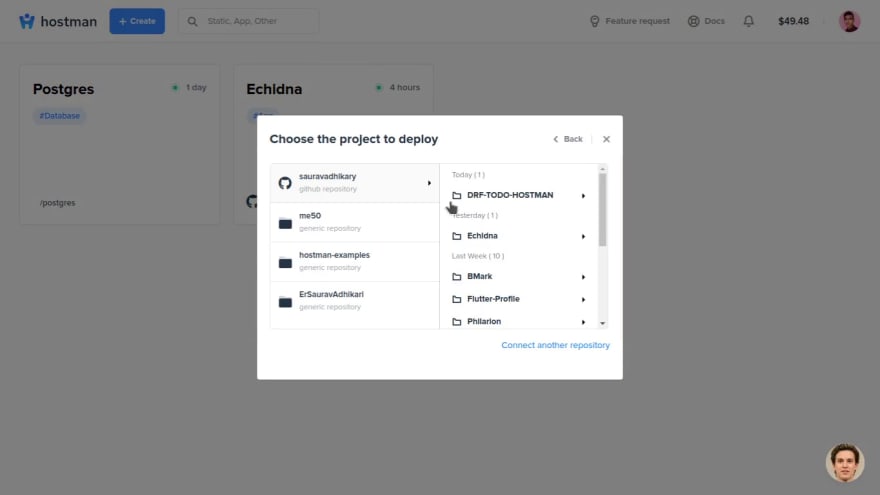
- Create a repo on Github or BitBucket and push your code.
- Now open up the Hostman Dashboard and click on the
+Createbutton on the top left: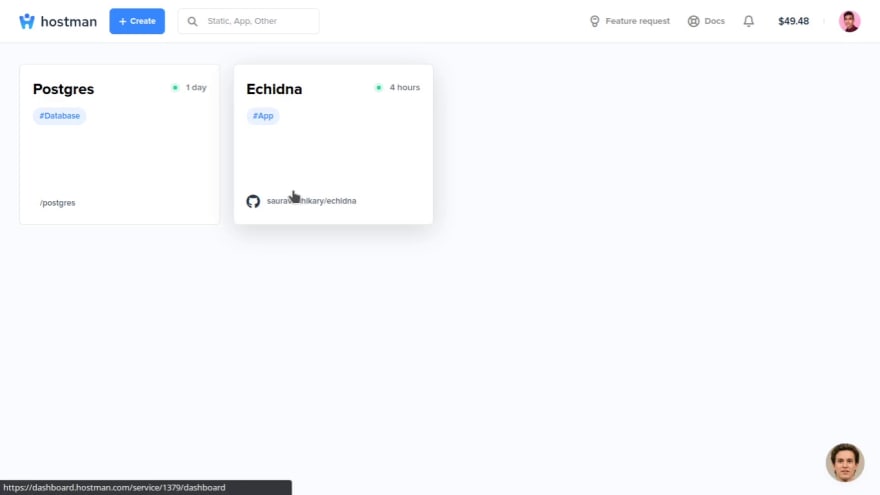
- Select the type of website you want to host. In my case, it is a backend for Django hence I will select the backend app:

- It will Now ask me to choose a repository, I am going to select my repo, hosted on GitHub account, linked to my hostman account. You can also provide the link to your repo without adding your GitHub account, but make sure that it's a public repo
- Select the server's specs you want. You can easily scale later on.
- After selecting the Repo, It will ask me to customize the app. Input the correct build command and start command depending upon the language you've used. In my case, I'm deploying a Django project, so here's my config:
- Build command:
Python manage.py collectstatic --noinput && python manage.py test - Start command:
gunicorn <projectname>.wsgi
- Click
Deployand wait for the deployment to complete.- If your project passes the test, you will receive an email or a Slack message saying build successful. You can also view this info in the Dashboard.
- If your project fails the test, you will receive an email or a Slack message saying build unsuccessful. You can also view this info in the Dashboard.
If your build was successful, your website will be live instantly. You can configure your environment variables from the Dashboard itself.
Tabular Comparison Between All Deployment Methods:
| Comparison Type/ Development Method | Travis-CI/Circle-CI | Cloud + Jenkins | Bitbucket Pipelines/Github Actions | Automated Cloud Platforms |
|---|---|---|---|---|
| Knowledge needed | Average | High | Average | Low |
| Flexibility | High | High | Medium | Low |
| Price | Free for Open Source Projects, Medium for Private ones. | High | Medium | Low |
| Learning Curve | Low | High | Medium | Low |
Original Link: https://dev.to/ersauravadhikari/4-ways-of-deploying-web-apps-in-2020-1a55
Dev To
More About this Source Visit Dev To