
An Interest In:
Web News this Week
- April 21, 2024
- April 20, 2024
- April 19, 2024
- April 18, 2024
- April 17, 2024
- April 16, 2024
- April 15, 2024
Some of Our Sources
- Just Creative
- The Logo Smith
- TutsPlus - Design
- Vandelay Design
- Creative Curio
- Inspiredology
- Crazy Leaf Design
- CSS Tricks
- Willems Lab
- Daily Now
Help Webnuz
Referal links:
SVG made easy
SVG is everywhere. Almost every website includes an SVG image, and its popularity keeps on increasing.
This article will try to demystify what is SVG, bridge the gaps on some concepts related to SVG and at last a bit of practice by creating a web page using SVG as a background.
Content
- SVG image
- Why SVG
- Viewport and viewBox
- 3D Viewer toy analogy
- Adding SVG background to web page
- Useful Resources for SVG
SVG image
SVG stands for Scaling Vector Graphics. It is a type of image format calculated using mathematical formulas. The benefit is, it is scalable without losing any resolution.
To create an SVG image, use a tag to describe the shape of the image.
Why SVG
There are many reasons why you would like to use SVG. The obvious one is that it scales without losing quality. The sharpness of the image remains unchanged.
That brings us to the next point.
Have you ever surfed a website that has a curvy shape background? Do you think the developers use png, jpg or some other image format? Why not?
SVG uses mathematical formulas to draw its shape. Therefore, the file size is relatively small compared to other image formats.
Before we go any further, we need to understand more about the space SVG is made to be able to change its size and position. That is where Viewport and viewBox come into play.
Viewport and viewBox
Viewport defines what part of an SVG image you see. Think of it as a window frame. It should not be misunderstood as the image content of the picture. Usually, you will define it as the width and height attributes of the tag.
If you have not understood at this point, do not worry; the analogy in the next section will make it clear.
ViewBox is viewed as a viewport. It provides the ability to position and describe the number of units that is perceived. Compared to the viewport, it is an attribute that requires values: min-x, min-y, width and height. The x and y are to move the viewport position. The width and height to "zoom" in and out.
Example of viewBox attribute in an tag:
<svg viewBox="0 0 100 100"> 3D Viewer toy analogy

Do you still remember the 3d viewer from your childhood? Where you would, you will stick your eyes to those two views to see the 3d images? And at times you would pull down the handle to switch pictures.
Guess what, when you are pulling down the handle to change the images, it is moving the position of the pictures. That is how you can view a different image. In terms of the viewBox, the values of min-x and min-y are what you change to move between shapes defined in an SVG image.
Another component of the 3d viewer was the circular wheel found in the middle of it to move the image closer or farther from our view. So what I am referring to when talking about viewBox is the width and height value which allows it to zoom in and zoom out.
If you consider the two lenses, in the case of the 3d viewer, it will be the two lenses through which you look. A viewBox has its viewport, and a viewport is also defined for the SVG image using width and height on the tag.
Adding SVG background to web page
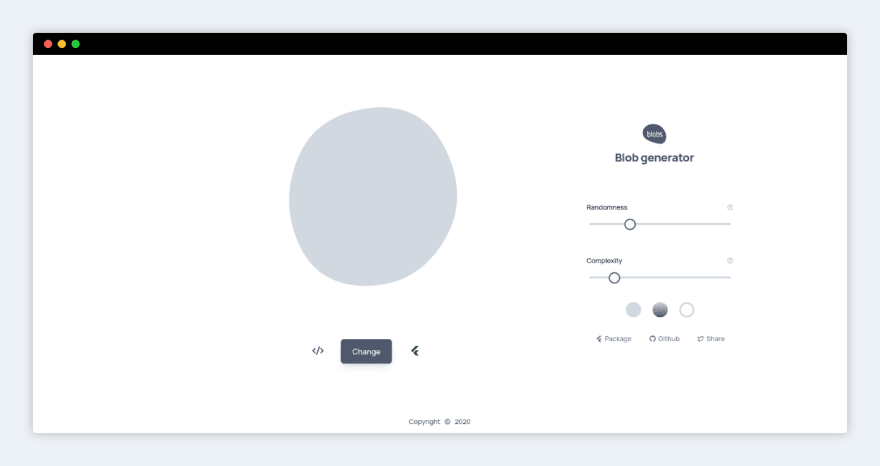
Now, get ready to have a bit of fun creating some unique background. For this example, we will create a background that includes two SVG images. The images can be generated and downloaded from blobapp.com.
Step 1: Create an HTML file
Create an index.html file. Inside it, add the below HTML5 code. If you are using VScode, you can add the code snippet by typing html:5.
<!DOCTYPE html><html lang="en"><head> <meta charset="UTF-8"> <meta name="viewport" content="width=device-width, initial-scale=1.0"> <title>SVG blob example</title></head><body></body></html>Step 2: Add two DIVs for the SVG image
In the body tag, add two DIVs with the following class names. The bg-blob class selector inherits the style to move our DIV around. And the other class is to specify the exact position of the blob image.
<body> <div class="bg-blob bg-medium-blob"></div> <div class="bg-blob bg-large-blob"></div> </body>Step 3: Download and save blob image
Head over to blobs.app to generate a random blob image to your liking and save it to your local directory where the index.html resides.
Step 4: Add CSS Styling
First, add a background colour to your body to make it more attractive.
body { background-color: #e2e8f0;}Next, add the bg-blob class which set the position to absolute for moving our DIV around. It also has z-index as -1 so that other content appears on top of our image.
.bg-blob { position: absolute; z-index: -1; box-sizing: content-box; height: 0; padding: 0; background-size: cover; background-repeat: no-repeat;}To use our SVG image as a background, we need a hacky way of using padding so that the DIV content is not treated as part of the HTML document flow. So that is why we set box-sizing and height to 0.
Next, add the below CSS style for the position of our blob image.
.bg-large-blob { top: 0; left: 0; width: 70%; padding-bottom: 70%; background-image: url(./large-blob.svg);}Use the width and padding-bottom to decide how big you want the SVG to render on the screen. Then, using top, left or right position the SVG according to your liking. At last, import the SVG file as background-image.
Step 5: Edit the SVG image
Most of the time, to create a fantastic background using blobs, we tend to cut out the shape a bit. Using only the mix-x and mix-y values of the viewBox, we can achieve this behaviour.
For one of my blob images, I set the viewBox as follows to move the shape to the left and down the web page. The first value of the viewBox, 150, moves the image 150 units to the left. Considering a unit is a px. Same goes for the second value 200.
<svg viewBox="150 200 500 500" width="500" xmlns="http://www.w3.org/2000/svg" id="blobSvg"> <path id="blob" d="M482,295.5Q471,341,405.5,340.5Q340,340,330.5,381Q321,422,285.5,449.5Q250,477,222,431.5Q194,386,144,396Q94,406,69.5,370.5Q45,335,48,292.5Q51,250,40.5,204.5Q30,159,92.5,157Q155,155,161,102Q167,49,208.5,55Q250,61,293,52Q336,43,369.5,70Q403,97,394,145.5Q385,194,439,222Q493,250,482,295.5Z" fill="#7fd1ae"></path></svg>The SVG should look as follows:

Useful resources for SVG
- Blob Maker and Blobs - SVG generators to create blob shape
- Get Waves - A SVG generator to create wavy shape
- Scaling SVG Elements - An interactive demo about how viewBox works
If you want to have a look at the source code on my GitHub repository and here is the result.
Below is another example where I used SVG to create a background for a File Simulator project.

I hope that by now, you do not have an excuse not to make your next project background unique. If you enjoy what you read, follow me on Twitter for more tips and tricks like this.
Original Link: https://dev.to/dinmon/svg-made-easy-517i
Dev To
More About this Source Visit Dev To