
An Interest In:
Web News this Week
- April 2, 2024
- April 1, 2024
- March 31, 2024
- March 30, 2024
- March 29, 2024
- March 28, 2024
- March 27, 2024
Some of Our Sources
- Just Creative
- Joshua Blankenship
- TutsPlus - Design
- My Ink Blog
- Fudge Graphics
- Stylized Web
- Spyre Studios
- Freelance Switch
- Design Modo
- Web Resource Source
Help Webnuz
Referal links:
Renaming your master branch to main in Github
How I learned about the main branch
When I started to code in March this year, I have always used the master branch as my default branch. From all the tutorials I learned from Youtube or Tech blogs, they all used the master branch. I never had any clue that you can change it until recently(Talking about being a newbie, no judgment here ). Last week, when I was contributing to an Open Source project in Github, one of the issues was changing the master branch to main and also the existing open pull requests. At first, I didn't understand but I decided to do my research.

PS: That's why I started to love open source contribution, I get to learn a lot from more experienced engineers.
After a while, I found different ways to rename your master branch, from using Git or just changing a few things in your GitHub account.
Something to note my newbies, the owner of the GitHub repository is the only person who can change the default branch. You can't do it from a pull request for open source contribution.
Step 1 - Changing your upcoming repositories to the main branch as a default.
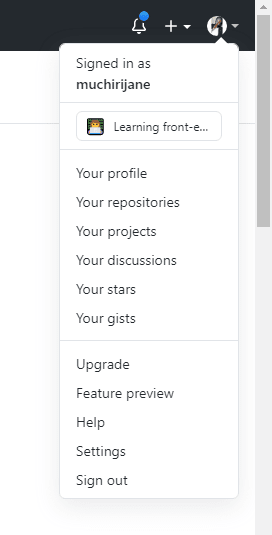
- Click your profile icon on the top right
![]()
- Click on the settings
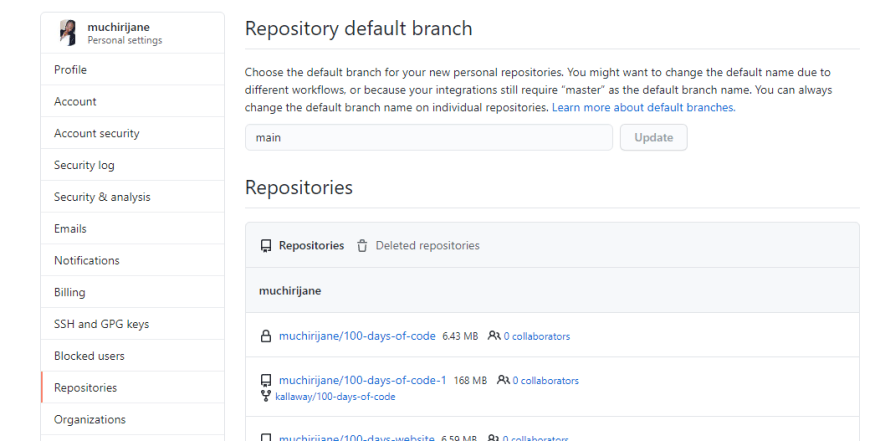
- Go to the Repositories tab.
Here we are going to change the default branch of all your new personal repositories that you will be creating. You can also change the default branch in each repos individually (I will show you how to do it in step 2).
Just create a new default branch and click the update button. For me, I went with the main branch.
With this step, any new repository you will create in Github, it will have the main branch as the default branch.
A quick step
When creating a new repository you will see some text from Github, just above the create a repository button, which directs you to change your default branch directly. (This will set main as the default branch. Change the default name in your settings.)
Step 2 - Updating your existing repository and the open pull requests to the main branch.
In this step, you can use git or just change it from Github directly.
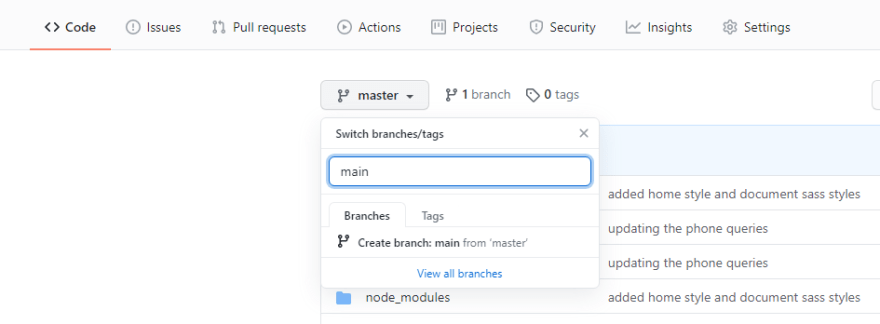
Using Github directly
- Click on the master branch and create a new branch called main. The main branch will be equal or have the same code as your master branch. (Don't panic your code files will still be the same.)
Click on the setting tab of your repository

Select the branches tab in the left menu
When you select the master option you will a drop-down of the branches you created. Since we want to change the default branch to main, you will select the main branch. Then you will click on the update button on your right.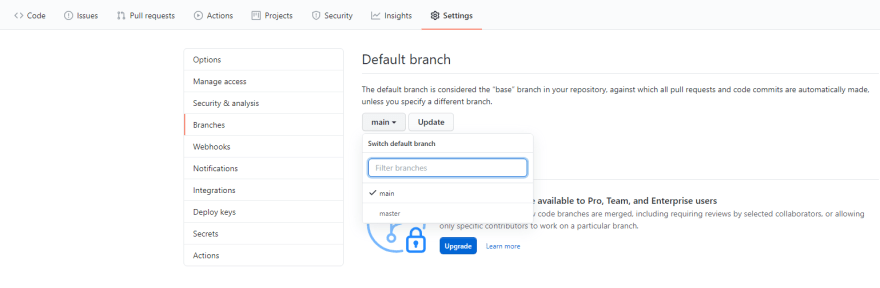
You will see a warning alert that if you change your default branch your open pull requests will be affected. Just click the I understand button and you have finally updated your default branch.
- Delete the master branchLet's just say, I didn't know how to delete a branch from GitHub, I only used Git. (It's called beginner struggles don't laugh too hard. ) We learn as we engage in different projects don't put yourself down.
Click the branches tab 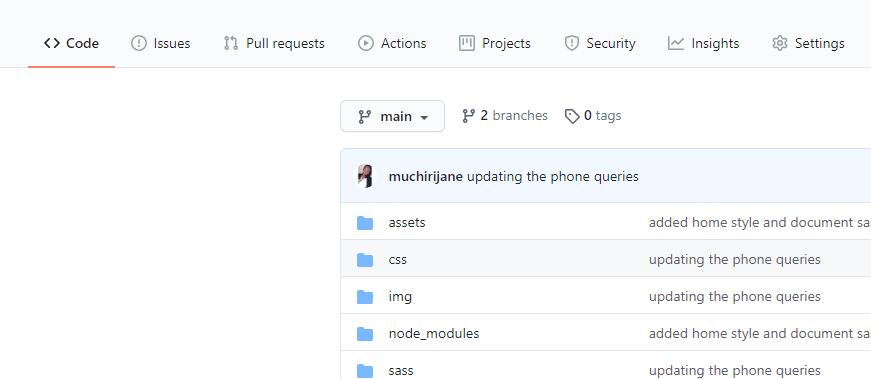
Go and select the delete icon on the master branch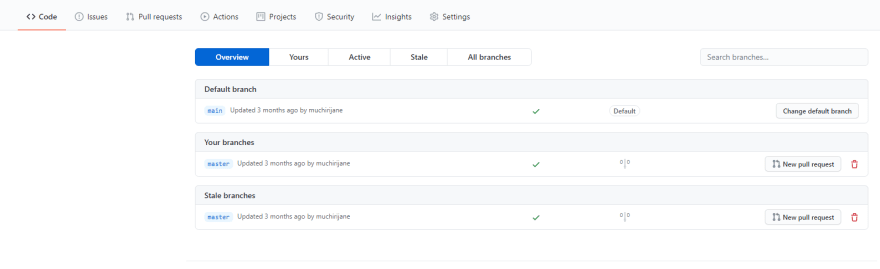
How to update your existing pull requests
This time we are using Git to change our branch to set the existing pull request to the main branch. This action was created by Edward Thomson who works at Github. He has amazing projects go check them out and one of them is a node package - retarget prs that helps to update your open pull request to the main branch.
Steps to take
After you have created and set the main branch as the default, do the following:
Install Node Js software if you don't have it
Create a personal token
It is used for authentication and can be used instead of a password in Git over HTTPS.
Go to your profile pic and click settings.
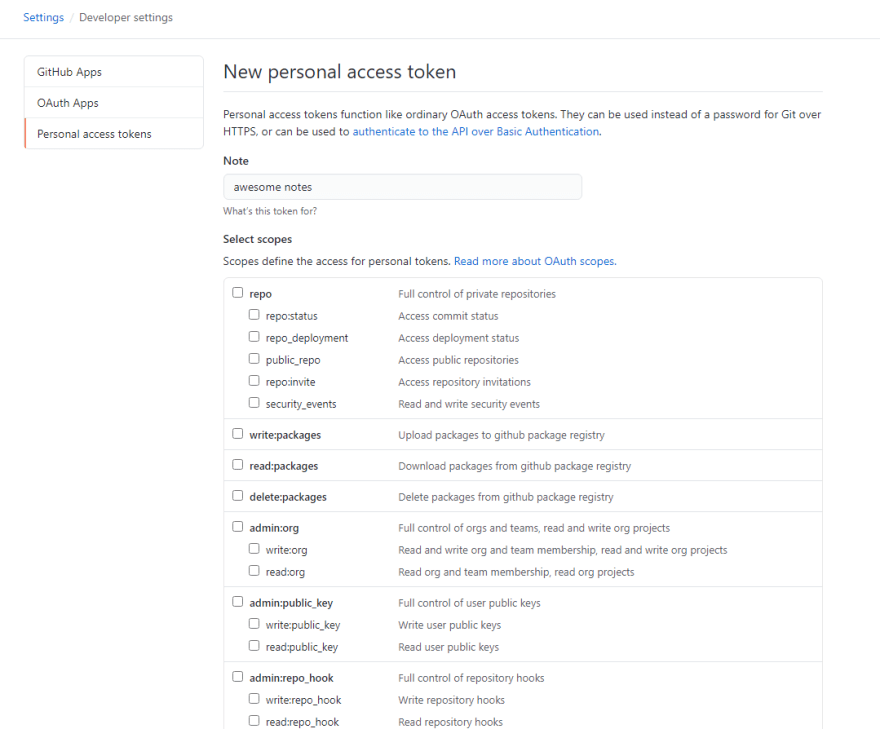
On the left side menu, select the Developer settings tab.
Click on the personal access token tab.
Select the Generate new token button to create a token.

- Check on the boxes on that define the access of your personal token. You can also name the token. For this example, I named it awesome notes. (It's good to confuse people, who love snupping in your things/account.)After you are done selecting the checkboxes, click on the green Generate token button which will be at the bottom and our token will be generated. It will contain numbers and letters plus it's long, copy it somewhere safe. (You won't remember it off-head unless you are a genius or something. )
Please note: You should not share your token with anyone. Keep it somewhere you know it's safe.
- Go to your Git terminal and write the following
npx retarget_prs --token your_pat https://github.com/your/repo master mainReplace your_path with your GitHub token and paste in your repo URL.
Congratulations!!
You have moved your open pull requests to the new default main branch.

In Conclusion
You can now go and change your default branch easily with the above simple steps. Always remember you learn as you get more exposure to different projects, don't be so surprised when you hear or see something you don't know or never heard about.
If you find this post useful share it with your peers or beginners who want to start open-source contribution. You can also buy me a Cappuccino.
![]()
Original Link: https://dev.to/tracycss/renaming-your-master-branch-to-main-in-github-24cm
Dev To
More About this Source Visit Dev To