An Interest In:
Web News this Week
- April 25, 2024
- April 24, 2024
- April 23, 2024
- April 22, 2024
- April 21, 2024
- April 20, 2024
- April 19, 2024
Building a Single Page App without frameworks
In today's post we'll be building a Single Page Application using only vanilla JavaScript - this means we don't need to use any frameworks!
Frameworks are great, and in many cases you'd probably want to use one, but for those smaller projects, or if you'd just like more control, doing it yourself from scratch could be a viable option
What are we going to be creating?
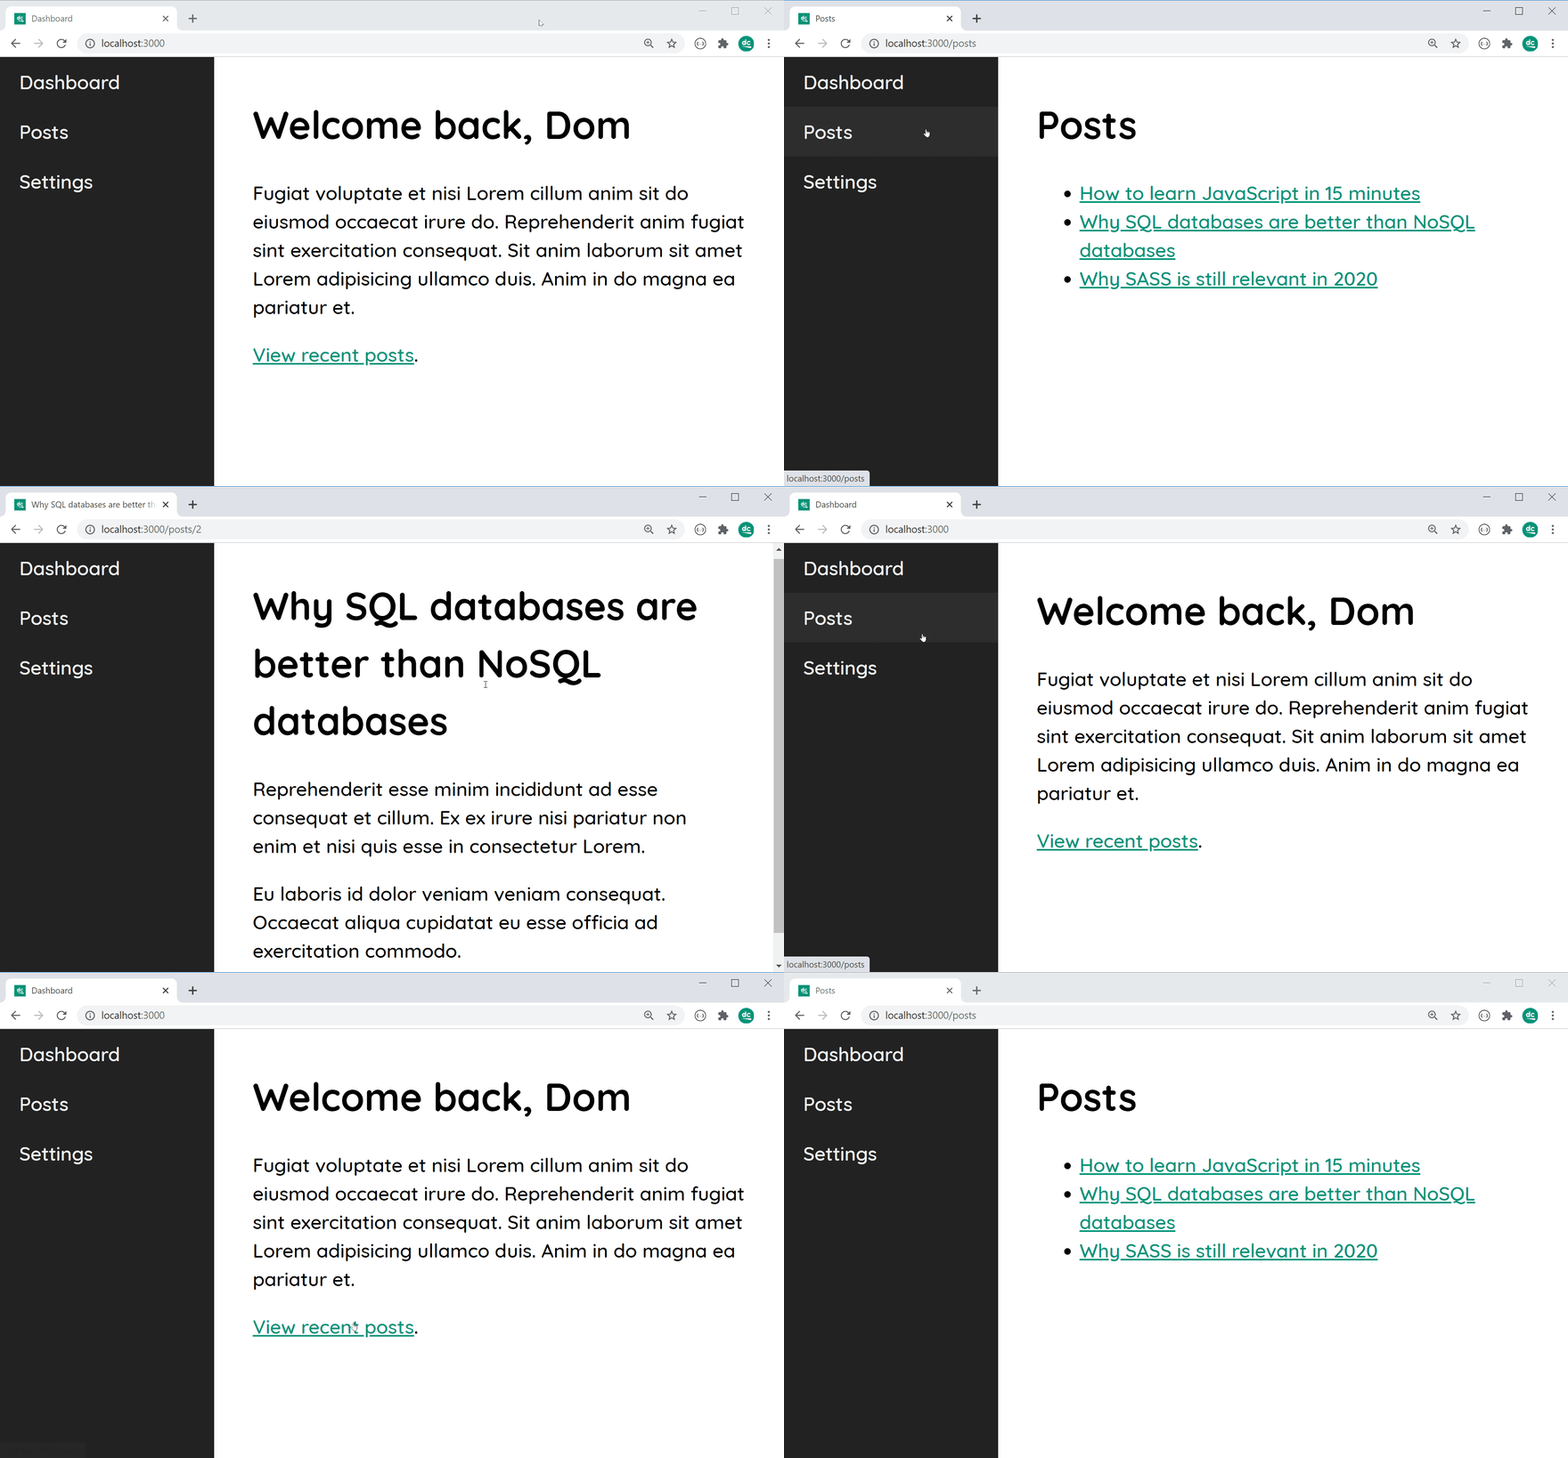
This will be a fairly simple Single Page Application which features a navigation bar and a "view" section on the right side that'll change as the navigation items are clicked on.
Video Tutorial
First up, as usual, if you'd prefer to see this tutorial in video form, feel free to check it out below.
Follow along with the source code
I recommend cloning the repository or simply viewing the source code while doing this tutorial.
single-page-app-vanilla-js
Taken from my YouTube Tutorial:https://www.youtube.com/watch?v=6BozpmSjk-Y
Creating the Web Server
We'll be using Express for our web server, so lets start by installing the dependencies and creating our directory structure.
npm init -ynpm i expressmkdir -p frontend/staticNext, we can create a server.js file and include the following.
const express = require("express");const path = require("path");const app = express();/* Ensure any requests prefixed with /static will serve our "frontend/static" directory */app.use("/static", express.static(path.resolve(__dirname, "frontend", "static")));/* Redirect all routes to our (soon to exist) "index.html" file */app.get("/*", (req, res) => { res.sendFile(path.resolve("frontend", "index.html"));});app.listen(process.env.PORT || 3000, () => console.log("Server running..."));After this, create an index.html file within the frontend directory and start up your server:
node server.jsNavigating to http://localhost:3000 should now display your HTML file.
Writing the HTML
For the markup within index.html, we can include:
- our soon-to-exist CSS stylesheet
- our soon-to-exist JavaScript module
- a navigation menu
- an app container
<!DOCTYPE html><html lang="en"><head> <meta charset="UTF-8"> <meta name="viewport" content="width=device-width, initial-scale=1.0"> <title>Single Page App (Vanilla JS)</title> <link rel="stylesheet" href="/static/css/index.css"></head><body> <nav class="nav"> <a href="/" class="nav__link" data-link>Dashboard</a> <a href="/posts" class="nav__link" data-link>Posts</a> <a href="/settings" class="nav__link" data-link>Settings</a> </nav> <div id="app"></div> <script type="module" src="/static/js/index.js"></script></body></html>Note: the
data-linkattributes on our<a>tags - any links marked with this attribute will use the History API to enable changes to the view (#app) without a page refresh. We'll learn more about this shortly.Also note: the #app div is used as the container for each view (Dashboard, Posts etc.) which we'll be learning more about a bit later on.
Adding the CSS
We may as well get the CSS over and done with so we have something pretty to look at - let's make a new file within frontend/static named main.css.
body { --nav-width: 200px; margin: 0 0 0 var(--nav-width); font-family: 'Quicksand', sans-serif; font-size: 18px;}/* Creates a full-height, left-mounted navigation menu */.nav { position: fixed; top: 0; left: 0; width: var(--nav-width); height: 100vh; background: #222222;}/* Making these look fantastic */.nav__link { display: block; padding: 12px 18px; text-decoration: none; color: #eeeeee; font-weight: 500;}.nav__link:hover { background: rgba(255, 255, 255, 0.05);}#app { margin: 2em; line-height: 1.5; font-weight: 500;}/* The 'dcode' green always needs to make an appearance */a { color: #009579;}As the CSS isn't the main focus of this tutorial, I'm not going to go into detail on what those styles do - plus, most are quite self explanatory
Moving onto the JavaScript
Let's create a new file within static/js named index.js. This will be the main entry point for the client-side JavaScript and will contain the code for the router.
Supporting client-side URL parameters
First things first, we need to write a function that will help with client-side URL parameters. For example, if I want to define a route for /posts/:id, I want to be able to access the Post ID within my code.
As we'll be matching with regular expressions, let's write a function that will convert our /posts/:id route into a regular expression pattern:
const pathToRegex = path => new RegExp("^" + path.replace(/\//g, "\\/").replace(/:\w+/g, "(.+)") + "$");Now, calling pathToRegex("/posts/:id") will give us /^\/posts\/(.+)$/. We can now use the capture group to grab the Post ID value in the router.
Writing the router
Let's create another function called router - this one will be called on page load, when clicking on links and when navigation changes.
const router = async () => { const routes = [ { path: "/" }, { path: "/posts" }, { path: "/posts/:id" }, { path: "/settings" } ];}Very shortly, we'll be including a reference to a "view", in the form of a JavaScript class, to each route.
For now though, let's write some code which will match a route with the current URL path.
const potentialMatches = routes.map(route => { return { route, result: location.pathname.match(pathToRegex(route.path)) };});As you can see, we're simply providing a map function for each route, and returning an extra field called result - this will contain the regular expression result when matching location.pathname with our route.
Next, let's figure out which one of routes matched, and provide a default (not found) route if none of them matched.
let match = potentialMatches.find(potentialMatch => potentialMatch.result !== null);/* Route not found - return first route OR a specific "not-found" route */if (!match) { match = { route: routes[0], result: [location.pathname] };}As you can see, we're simply finding the first route that had a regular expression result.
If none are found, we're just "mocking" the first route. Feel free to add your own "not-found" route here.
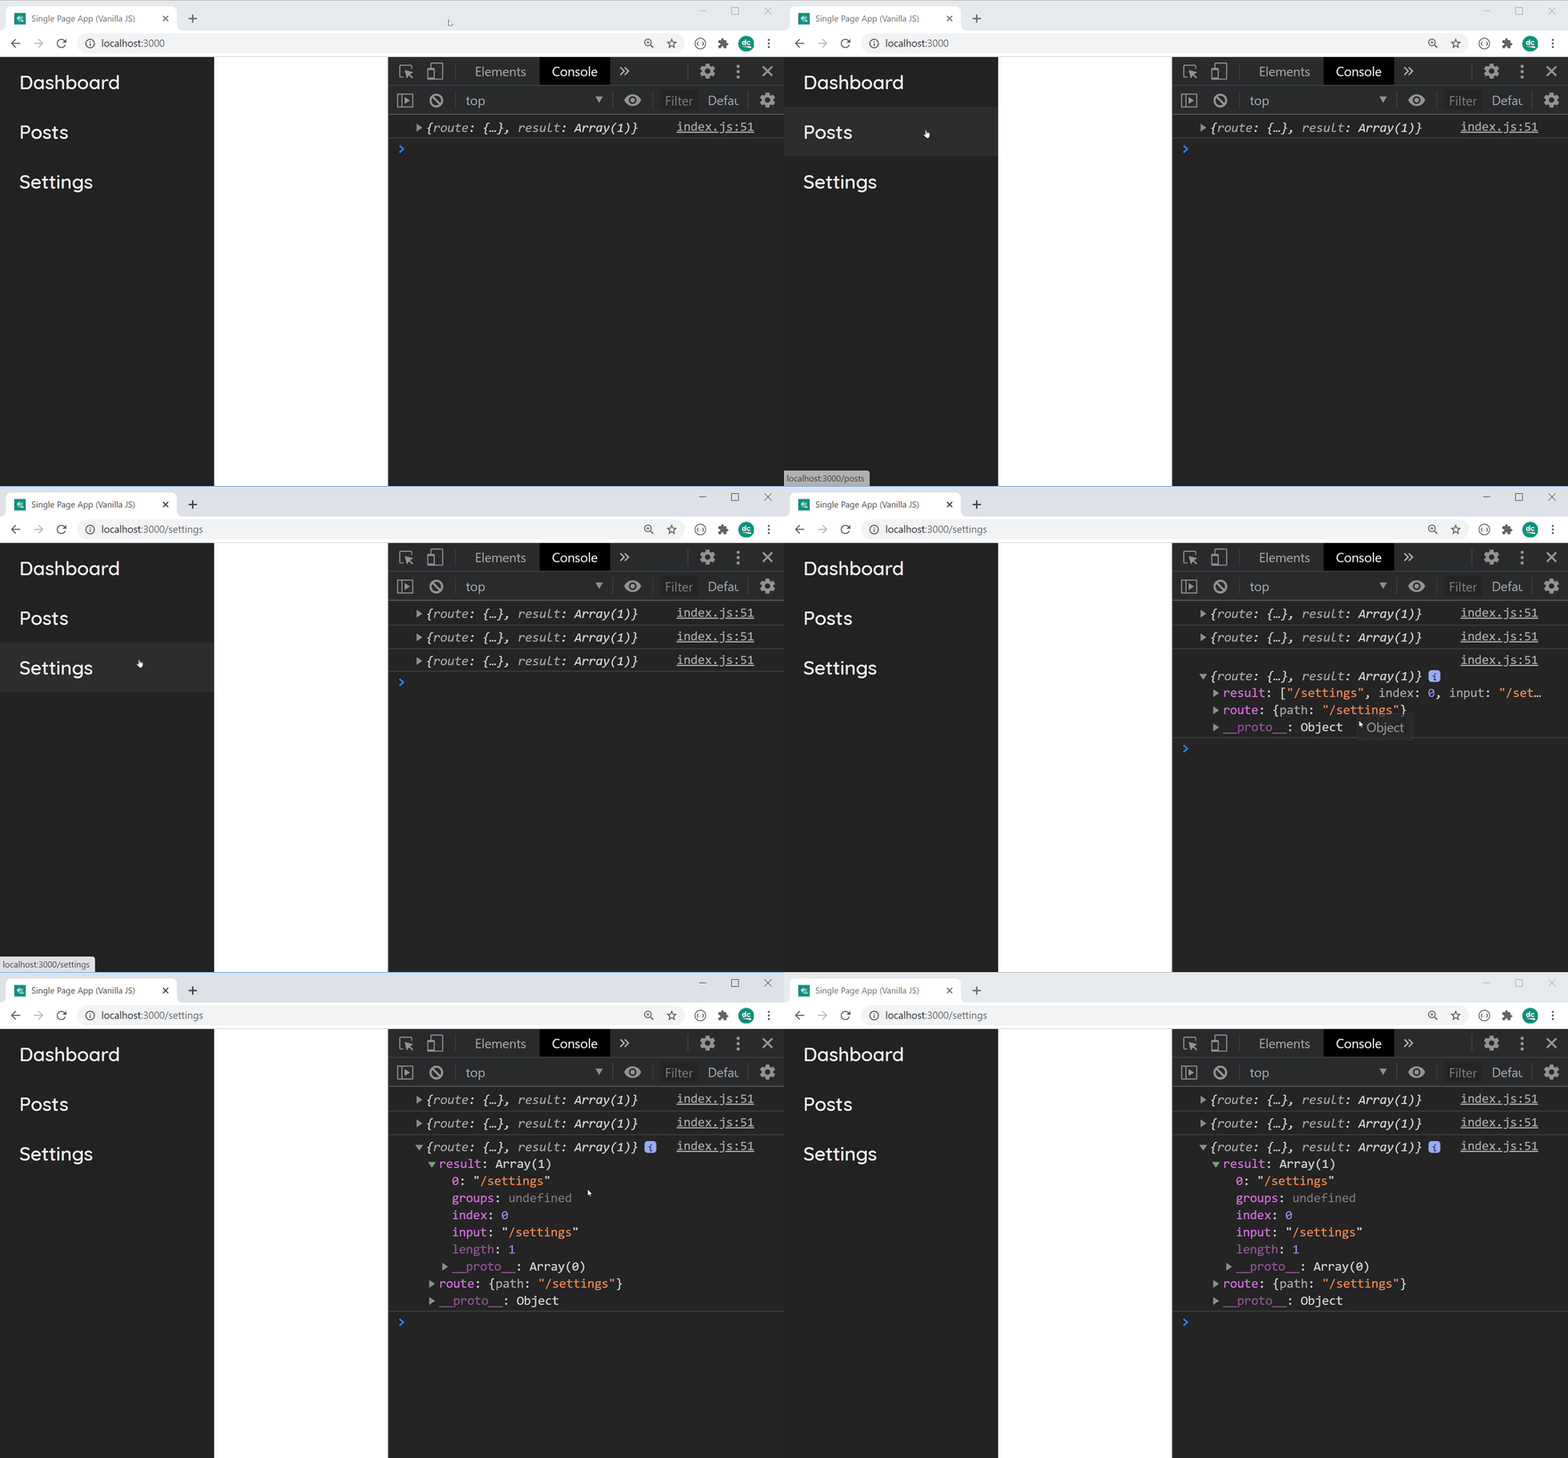
Lastly, we can log out the matched route. Shortly, we'll be adding some content within #app based on the matched route.
console.log(match);Tying it all together
Before we continue creating the views and finishing up on our router, we should write some code which will tie all this together.
Let's start by defining a function that uses the History API to navigate to a given path.
const navigateTo = url => { history.pushState(null, null, url); router();};Next, we can enable all links with the data-link attribute to make use of this function. Also, we can run the router on document load.
document.addEventListener("DOMContentLoaded", () => { document.body.addEventListener("click", e => { if (e.target.matches("[data-link]")) { e.preventDefault(); navigateTo(e.target.href); } }); /* Document has loaded - run the router! */ router();});We'll also want to run the router when the user navigates with the back and forward buttons.
window.addEventListener("popstate", router);With all this complete, you should now be able to hop inside the browser and try clicking on one of the navigation links.
Upon clicking on the links, notice how the URL changes based on each link without a page refresh. Also, check the console for your match - it should all be there
Parsing the client-side URL parameters
Before moving onto writing the code for each of our views, we need a way to parse the client-side URL parameters. Let's define a function to do so.
const getParams = match => { const values = match.result.slice(1); const keys = Array.from(match.route.path.matchAll(/:(\w+)/g)).map(result => result[1]); return Object.fromEntries(keys.map((key, i) => { return [key, values[i]]; }));};This function will take in a "match" - the same one we found via potentialMatches and the find method above.
Once it's got a match, it will take all of the capture group matches, from index 1 to the end. In the case of /posts/:id/:anotherParam and /posts/2/dcode, the value of values will be ["2", "dcode"].
In terms of keys, this will use a regular expression to grab each identifier prefixed with a : in our path. So, it will take /posts/:id/:anotherParam and give us ["id", "anotherParam"].
Lastly, we take the result of both values and keys, and stick them together with Object.entries which will give us a returned value of something like
{ "id": "2", "anotherParam": "dcode"}We can now move onto writing the code for each view - after that though, we can make use of the getParams within the router.
Writing the views
Each "view" is going to be represented by a JavaScript class within frontend/static/js/views. We can first define an abstract class which each view will extend.
// frontend/static/js/views/AbstractView.jsexport default class { constructor(params) { this.params = params; } setTitle(title) { document.title = title; } async getHtml() { return ""; }}This is quite straight forward - we're going to store the parameters for each view as an instance property, and provide a convenience method for setting the page title.
Most notably though, we have the async getHtml method - this one is going to be implemented by each view, and will return the HTML for them.
Let's write the code for the Dashboard view.
// frontend/static/js/views/Dashboard.jsimport AbstractView from "./AbstractView.js";export default class extends AbstractView { constructor(params) { super(params); this.setTitle("Dashboard"); } async getHtml() { return ` <h1>Welcome back, Dom</h1> <p>Hi there, this is your Dashboard.</p> <p> <a href="https://dev.to/posts" data-link>View recent posts</a>. </p> `; }}As you can see, we're simply extended the AbstractView and calling a method to set the page title. You can also find the HTML for the Dashboard returned via getHtml.
Feel free to create as many views as you need.
Note: If your route had parameters, you can reference them within the views with
this.params.your-param-here, for example, if you had aViewPostview, get the Post ID by doingthis.params.id.
Going back to the router
Now that we've got our views, let's make some slight adjustments to the index.js file.
Let's import our views.
import Dashboard from "./views/Dashboard.js";import Posts from "./views/Posts.js";import PostView from "./views/PostView.js";import Settings from "./views/Settings.js";Now, we can reference them in the routes within the router function.
const routes = [ { path: "/", view: Dashboard }, { path: "/posts", view: Posts }, { path: "/posts/:id", view: PostView }, { path: "/settings", view: Settings }];Lastly, we can make a new instance of the matched view and set the HTML of the #app container to be the HTML provided by the view.
const view = new match.route.view(getParams(match));document.querySelector("#app").innerHTML = await view.getHtml();Note: We use a
awaithere as thegetHtmlfunction may need to perform a request for data or HTML from the server-side.
And that's it! You should have a fully functional Single Page Application. Please provide any suggestions below
Original Link: https://dev.to/dcodeyt/building-a-single-page-app-without-frameworks-hl9
Dev To
 An online community for sharing and discovering great ideas, having debates, and making friends
More About this Source Visit Dev To


