
An Interest In:
Web News this Week
- April 1, 2024
- March 31, 2024
- March 30, 2024
- March 29, 2024
- March 28, 2024
- March 27, 2024
- March 26, 2024
Some of Our Sources
- BoingBoing
- TutsPlus - Code
- Team Treehouse
- Just Creative
- Joshua Blankenship
- Creative Curio
- 24 Ways
- Willems Lab
- Dev To
- TechPowerUp
Help Webnuz
Referal links:
Full Stack Serverless - Building a Real-time Chat App with GraphQL, CDK, AppSync, and React
Cover image by Scott Webb
In this tutorial you will learn how to build and deploy a real-time full stack cloud application to AWS using CDK, React, GraphQL, and AWS AppSync.
To see the completed app, check out the repo here
One of the most powerful things about Full Stack Serverless applications is the ability to share and deploy scalable full stack apps to the cloud in only a few minutes.
This is enabled using a combination of Infrastructure as Code(IAC) and decoupled frontends integrated into an end-to-end solution.
In the past, the barrier to entry for IAC has been fairly high, making it hard for traditionally front-end developers or developers not familiar with the cloud to get started using it.
We are now seeing tooling like AWS CDK and the Amplify CLI making it easier for developers to get started building cloud applications with IAC using their existing skillset.
When I say use their existing skillset, I'm assuming that the typical front end or full stack developer is familiar with the following:
- JavaScript, TypeScript, or Python
- Interacting with a CLI
- A basic understanding of interacting with RESTful or GraphQL APIS
Amplify vs CDK
If you've read any of my posts in the past few years, you've probably seen me talk about the Amplify CLI. The Amplify CLI generates and manages IAC for you under the hood using a category-based approach. CDK on the other hand allows you to use programming languages like Python, Typescript, Java, and C#/. Net to build cloud infrastructure.
Because Amplify also has client-side libraries that are not exclusive to the CLI, you can use CDK with Amplify to build full stack cloud applications.
In this tutorial, this will be our stack:
- React for the Single page application
- CDK written in TypeScript for the infrastructure
- Amplify libraries to handle API calls from the client-side code.
Getting started
To get started, you will first need to install and configure the AWS CLI.
Next, install the CDK CLI:
npm install -g aws-cdkThe CDK CLI
Once you have CDK installed, you should be able to run cdk from your terminal and see a list of available commands.
Here are the commands you will probably be using the most:
init - Initializes a new project
deploy - Deploys the infrastructure to AWS
diff - Compares the specified stack with the deployed stack and give you feedback about changes that will be made the next time you run deploy
Typically the workflow will be something like this:
- Initialize a new project with
init - Write some code
- Run
cdk diffto see what will be deployed / changed the next time you deploy - Run
deployto deploy the updates
Creating the CDK project
First, create a folder that you'd like this project to live:
mkdir cdk-chatcd cdk-chatNext, you can create the CDK project using the init command:
cdk init --language=typescriptThe language flag can be either
csharp,java,javascript,pythonortypescript
Once the project has been created you should see a bunch of files and folders created for you. The main code for the project will be in lib/cdk-chat-stack.ts.
In order for us to use certain AWS service constructs in our project, they first need to be installed. This project will be using the following services:
- Amazon DynamoDB (database)
- Amazon Cognito (authentication)
- AWS AppSync (GraphQL API, real-time)
- AWS IAM (managing IAM permissions)
Now, let's install the libraries necessary for these services using either npm or yarn:
npm install @aws-cdk/aws-appsync @aws-cdk/aws-cognito @aws-cdk/aws-dynamodb @aws-cdk/aws-iamOnce you have installed these dependencies, check your
package.jsonfile to make sure that@aws-cdk/coreis the same version of these packages. If not, I would bump@aws-cdk/coreup to the same version of the installed packages and runnpm installagain.
Defining the GraphQL Schema
Now that the CDK project is created, we'll need the GraphQL schema that describes the chat app. In the root of the CDK project, create a new folder called graphql and a new file called schema.graphql in this folder. In this file, add the following schema:
The main things to take note of here are the following:
- GraphQL types for
RoomandMessage - Typical
MutationandQuerydefinitions for basic operations like getting a room by ID, listing rooms, and a query for listing messages for a room by ID - Subscription definitions for
onCreateRoomandonCreateMessageByRoomId. By decorating a subscription definition with@aws_subscribe, AppSync will automatically create the subscription in the service. By passing in an array of mutations, we can specify what events we want this subscription receive notifications for.
Writing the CDK code
The final CDK code is located here for your reference, but we will be walking through it step by step below.
Now that the Schema is created we can begin defining our CDK code.
Next, open lib/cdk-chat-stack.ts. At the top of the file, add the following imports:
You can either import the top level construct of the API you'd like to use or you can import the individual APIs themselves. In this case, we've imported the individual APIs from each of the libraries.
Creating the authentication service
Next, we'll begin creating the services. First, we'll create the authentication service using Amazon Cognito. To do so, add the following code in the constructor below the call to super:
CfnOutputis a way to print out useful values that you will need, in our case we will be using these values in the client-side application.
This code has created the authentication service and configured a few things:
- Enable users to sign themselves up by setting
selfSignUpEnabledtotrue - Send an email notification for MFA on sign up (
autoVerify) - Defined the required sign up attributes (email)
- Created a client ID for you to use on the React client
After saving the file you should be able to now see the infrastructure that will be created by running the diff command from the CLI:
cdk diffCreating the DynamoDB tables and GSIs
Next we need to create the two DynamoDB tables and also configure a GSI (Global Secondary Index) to enable the querying of messages by Room ID.
We'll also need to give permission to DynamoDB to allow querying on the global secondary index using IAM.
This has created two DynamoDB tables (CDKRoomTable and CDKMessageTable) as well as a GSI (messages-by-room-id) on the message table.
Creating the AppSync API
Now that the authentication service and Database tables are configured we can create the API. AWS AppSync is a managed GraphQL service and what we will be using for the GraphQL API.
When creating the API definition we need to map the mutations, queries, and subscriptions that were created in the schema to GraphQL resolvers.
There are two main ways to create resolvers using CDK and AppSync:
- Writing the resolver as a string using
MappingTemplate.fromString - Using a predefined template (available templates listed here).
In our app we will be doing both.
Deploying the back end
That is all the code we will need for the back end. You can now deploy everything by running the deploy command:
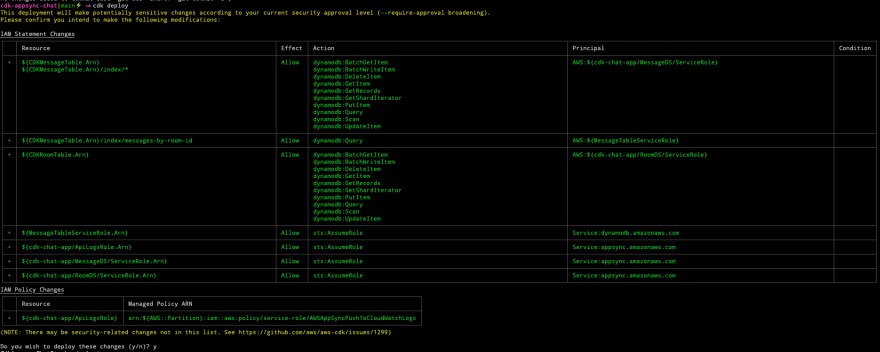
cdk deployBefore deploying you will be prompted with some out put that looks like this:
Once you deploy the back end you should see some output that looks like this:
Outputs:CdkChatStack.UserPoolClientId = 6lcq9gl36cugj6ttq8eqh5cf9mCdkChatStack.UserPoolId = us-east-1_7xli2V7OqCdkChatStack.GraphQLAPIURL = https://57vcrggstrf3xnve4c7isekyea.appsync-api.us-east-1.amazonaws.com/graphql
These values are the result of CfnOutput. You will be able to use these values to connect to the client application.
Client app
This tutorial comes paired with a completed front-end that you can now integrate with your back end.
We will also walk through the individual Amplify APIs for interacting with the back end for user authentication and interacting with the GraphQL API.
Using the pre-built client app
Clone the React chat app into your project and changed into the new directory:
git clone https://github.com/full-stack-serverless/react-chat-app-awscd react-chat-app-awsNext, install the dependencies:
npm install# oryarnNext, rename aws-exports-example.js to aws-exports.js.
Finally, populate the properties in aws-exports.js with the values output by the CDK CLI:
// aws-exports.jsconst config = { Auth: { region: "us-east-1", // or your region userPoolId: "your-userpool-id", userPoolWebClientId: "your-client-id" }, aws_appsync_graphqlEndpoint: "your-graphql-endpoint", aws_appsync_region: "us-east-1", // or your region aws_appsync_authenticationType: "AMAZON_COGNITO_USER_POOLS"}export default config;To see the values output from
CfnOutputby the CDK CLI at any time, you can run thecdk deploycommand (even with no changes).
Finally, run the app:
npm startUnderstanding the API calls
Next, let's take a look at how we are connecting to the back end via the client-side application.
Authentication
To authenticate you can either use the React UI Components or the Auth class.
UI Components
You can use Amplify React UI Components for creating a basic authentication flow.
For example the withAuthenticator and AmplifyAuthenticator components can stand up an entire authentication flow in just a few lines of code:
import React from 'react';import { withAuthenticator, AmplifySignOut } from '@aws-amplify/ui-react';const App = () => ( <div> <AmplifySignOut /> My App </div>);export default withAuthenticator(App);Auth class
The Auth class has methods for doing most typical identity management operations like signing up, signing in, MFA, and managing password recovery.
To sign a user up you can use the signUp method:
import { Auth } from 'aws-amplify';await Auth.signUp({ username: "dabit3", password: "MyCoolPassword", attributes: { email: "[email protected]" }});Check out the documentation here to see the entire flow of signing up and signing in.
API
To interact with the GraphQL API we will be using the API category.
Sending a query
import { API } from 'aws-amplify';import { listRooms } from './graphql/queries';const roomData = await API.graphql({ query: listRooms});Sending a query with variables
import { API } from 'aws-amplify';import { createRoom } from './graphql/mutations';await API.graphql({ query: createRoom, variables: { input: { name: "Cool cats" } }})Real time - GraphQL subscriptions
Subscriptions can be set up to listen to a general mutation (create, update, or delete) or they can be set up to take in arguments.
An important part of using GraphQL subscriptions is understanding when and how to use arguments because subtle changes enable you to modify how and when clients are notified about mutations that have occurred.
For a chat app, it makes a lot of sense to be able to just subscribe to new messages in a single room for example. To make this work, we can pass in the room ID for the messages we'd like to subscribe to.
Here's an example of both scenarios, which is how we are managing them in the app.
Listening for updates when a room is created and handling it in real time
import { API } from 'aws-amplify';import { onCreateRoom } from './graphql/subscriptions';API.graphql({ query: OnCreateRoom]}).subscribe({ next: roomData => { // roomData is the data from the mutation that triggered the subscription }})Listening for updates when a message in a particular room is created and handling it in real time
API.graphql({ query: OnCreateMessage, variables: { roomId: id }}).subscribe({ next: async messageData => { // messageData is the data from the mutation that triggered the subscription }})Check out the documentation here to see more details around how to interact with a GraphQL API using the API class.
The CDK API covers a very large surface area, enabling you to do quite a lot in a much more succinct way than traditional infrastructure as code. To learn more about additional CDK APIs, check out the documentation here.
Original Link: https://dev.to/dabit3/full-stack-serverless-building-a-real-time-chat-app-with-graphql-cdk-appsync-and-react-1dbb
Dev To
More About this Source Visit Dev To