
An Interest In:
Web News this Week
- April 23, 2024
- April 22, 2024
- April 21, 2024
- April 20, 2024
- April 19, 2024
- April 18, 2024
- April 17, 2024
Some of Our Sources
- Engadget
- Web Designer Wall
- Pearsonified
- Abduzeedo
- Vandelay Design
- Creative Curio
- Freelance Switch
- Design Modo
- Web Resource Source
- Willems Lab
Help Webnuz
Referal links:
Wordpress Development on Porter

Local development for Wordpress often requires a lot of configuration and installation of tools like PhpMyAdmin, MySQL, and Wordpress itself. Docker helps compartmentalize each of these components with containers. Simply put, containers are lightweight VMs that provide environments that are isolated from your host machine if you are familiar with heroku, you can think of them as Dynos. Docker lets you spin up and manage Wordpress stacks for your various projects without the headache of maintaining and configuring these technologies on your computer.
Despite Dockers ease of use, however, there is still a bit of learning curve that prevent Wordpress developers from taking advantage of containers. Porter lets you develop Wordpress themes and plugins using Docker, without having to configure or even install Docker.
What is Porter?
Porter is a remote development environment that lets you develop Docker containers in the cloud while using a local IDE of your choice. Using the Wordpress template provided on Porter, you can start developing themes and plugins without configuring or installing anything locally, then ship them into production with literally one-click.
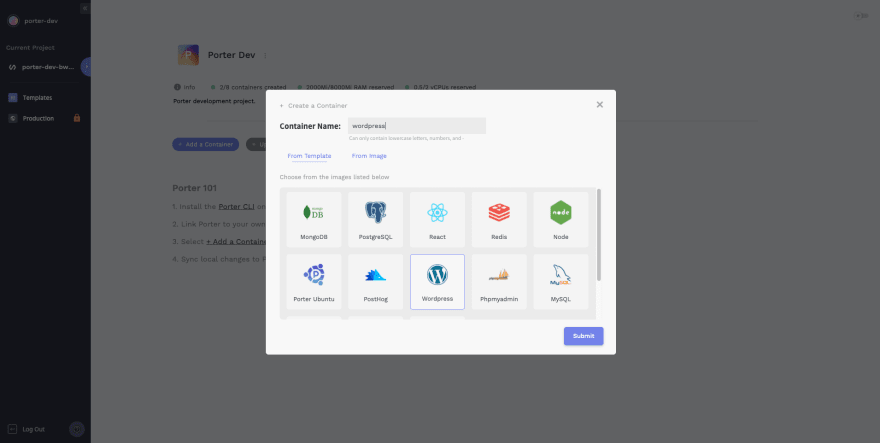
1. Create containers on Porter
Everything on Porter runs as Docker containers. Lets create Wordpress and MySQL containers on Porter using the default templates. You can do this by logging into Porters dashboard, then clicking on the Create a Container button and choosing the corresponding templates.
It may take up to a minute for these containers to load.
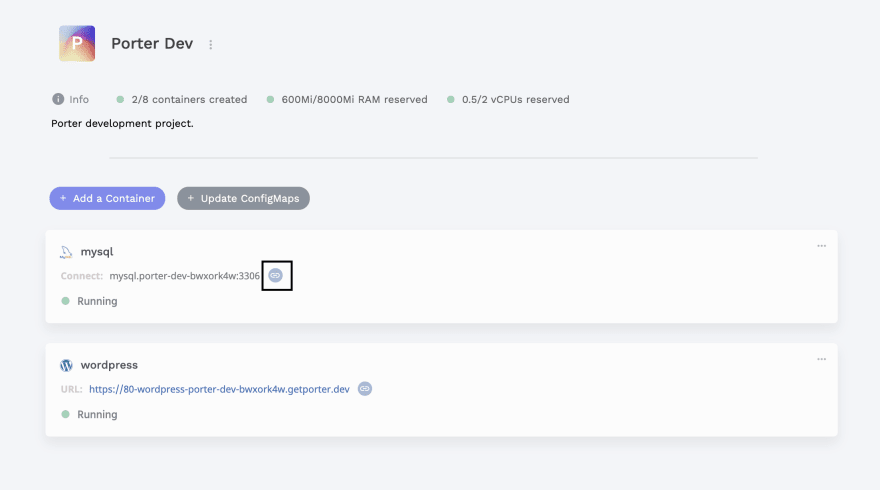
2. Connect the containers
Once you have created these containers, you need to make them talk to each other this can be done by changing the environment variables of each container. Click on the MySQL container you have created and change the environment variables MYSQL_ROOT_PASSWORD, MYSQL_DATABASE, MYSQL_USER, MYSQL_PASSWORD to values of your choice from the Environment tab. All variables are initially set to "default.

Once you have configured the MySQL container, copy the connection string displayed in the container by clicking on the icon boxed below.
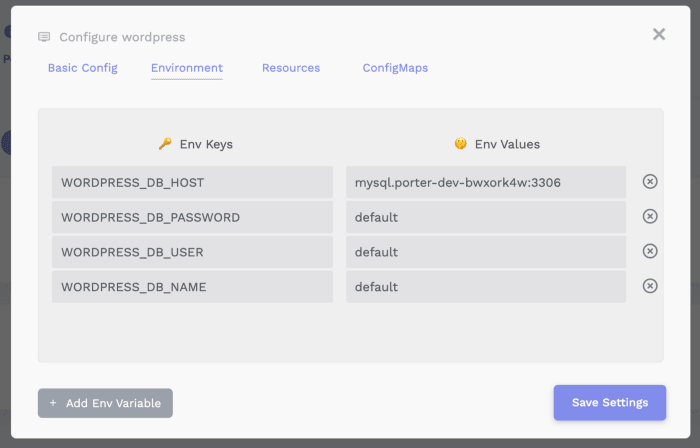
Now click on the Wordpress container, then change the environment variable WORDPRESS_DB_HOST from default to the connection string you have just copied make sure WORDPRESS_DB_PASSWORD also matches the MYSQL_ROOT_PASSWORD you have put in the MySQL container.
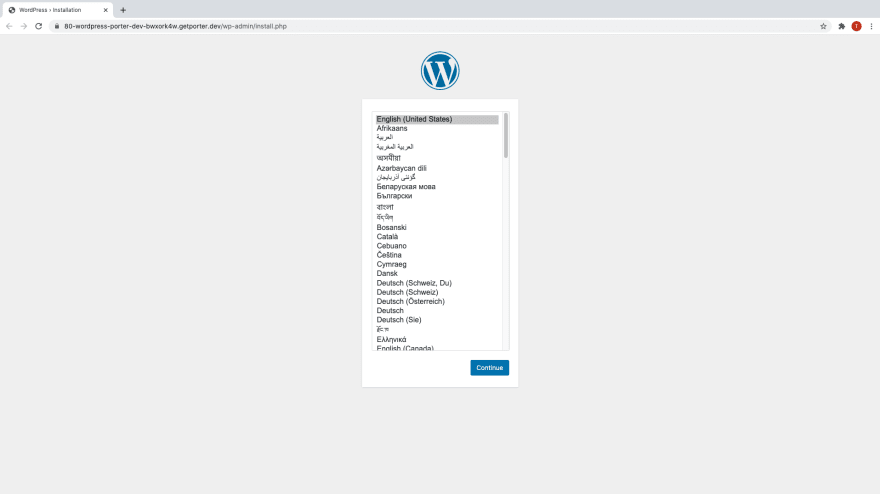
Once you hit save, the Wordpress container will restart and soon the URL on the container will display the familiar Wordpress installation page.
3. Develop on remote containers
The above URL is now effectively your localhost. But how do you develop on these remotely running containers? All you need to install is the porter-cli that will let you develop remotely using your own local IDE by syncing your local files with the files in the remote container. Lets see this in action.
Install the CLI with
npm i -g porter-cliif you are using MacOS. For other OS, see our docs.Run
porter login
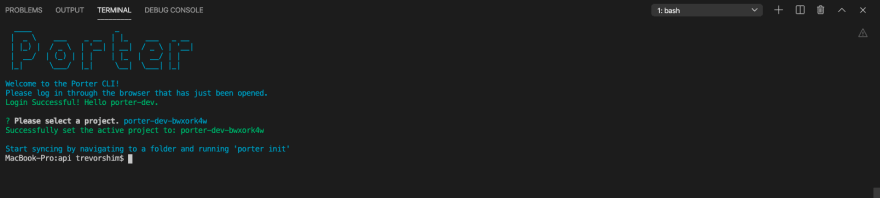
Make an empty local directory and run
porter initinside that directory. When prompted to choose a container, select the name of the Wordpress container you have created.Run
porter sync --bi-dirfrom the same directory this will start a bi-directional syncing process between the directory and your remote container.

- Once all the folders have been downloaded from the remote-container via sync, start developing your themes in the
wp-content/themesdirectory that has just been downloaded.
Any local edit you make in that local directory will be instantly propagated into the remote container that you can view on the above URL. As long as the syncing process is ongoing, the remote container will behave exactly like your localhost. Just run porter sync --bi-dir again when you want to start developing.
You can share your works in progress with clients and collaborators by simply giving them the URL you are developing on. The containers you develop on Porter can also be promoted to production with your custom domain in just one-click.
You can try developing Wordpress themes on Porter for free here.
Original Link: https://dev.to/porter/wordpress-development-on-porter-3419
Dev To
More About this Source Visit Dev To