
An Interest In:
Web News this Week
- April 25, 2024
- April 24, 2024
- April 23, 2024
- April 22, 2024
- April 21, 2024
- April 20, 2024
- April 19, 2024
Some of Our Sources
- BoingBoing
- Team Treehouse
- Just Creative
- Smashing Magazine
- Abduzeedo
- Vandelay Design
- Inspiredology
- Web Designer Depot
- Stylized Web
- Specky Boy
Help Webnuz
Referal links:
Building a Twitter Bot with Python and AWS Lambda
I think bots are neat. I really like the artwork on Pokmon trading cards. So I built a Twitter bot that tweets out two Pokmon cards every six hours in Pokmon in-game battle style.
You can check out the Twitter bot at @tinyversusbot and if you want to see the Pokmon team you'd start your adventure with, visit tinyversusbot.
Here's an overview of how I created this bot using Python and AWS Lambda.
Summary
Link a Twitter developer account to your Python project using the
tweepylibraryAdd your project to AWS Lambda to tweet in intervals
Breakdown
Part 1: Twitter Developer Account and tweepy Python Library
1. Create a Twitter Account
If you haven't already, you're going to need to create the Twitter account that your bot will be tweeting from/as. You can register here.
2. Create a Twitter Developer Account
You can create your Twitter developer account here. Connect this account to the Twitter account you made in Step 1.
3. Connect to your Twitter Account via Tweepy
I used the tweepy library for this bot - you'll need to have it installed.
pip install tweepyImport tweepy and set up the authorization.
import tweepyauth = tweepy.OAuthHandler(CONSUMER_KEY, CONSUMER_SECRET)auth.set_access_token(ACCESS_KEY, ACCESS_SECRET)api = tweepy.API(auth)Here are some tweet code examples:
# Standard tweet# var tweet || inline stringapi.update_status(status=tweet)## Tweet with media (multiple images)api.update_status(status=tweet, media_ids=mediaIds)Note: You can't tweet images directly from their web URLS. You'll have to store the image locally before you can use it.
Check out their documentation for other tweepy abilities.
Part 2: Setting Up Your Bot on AWS Lambda
1. Create an AWS Account
Sign up for an AWS account if you don't have one.
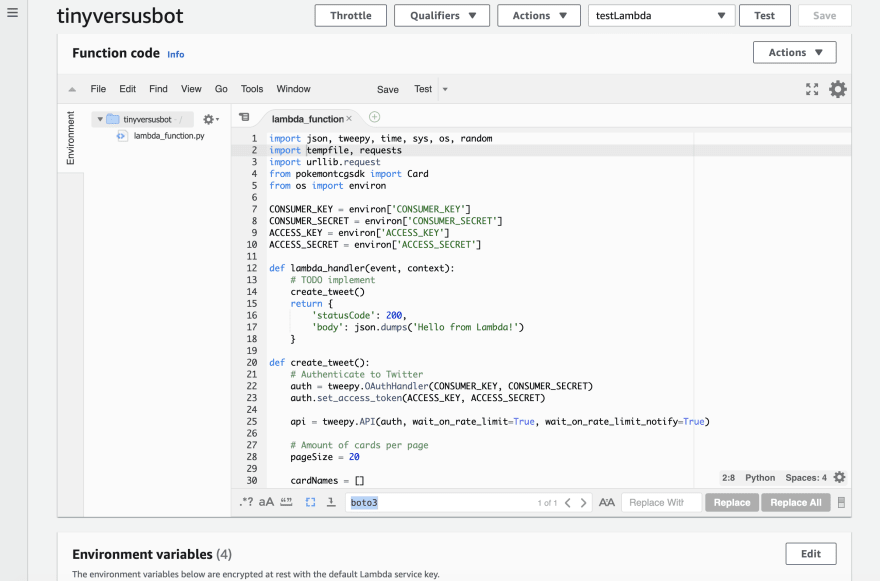
2. Create Your Lambda Function
Go to Lambda Service, click on "Functions", then on "Create function." Name your function, select the appropriate Runtime, then click "Create function."
In your Lambda Function, you can either place your code in lambda_function.py or create your own file within the AWS code editor. Don't delete the lambda_handler function that is needed to return a status code for Lambda to run.
Above the return in the lambda_handler function, make a call to your tweet function.
2.5. Add Environment Variables
I originally had this code committed to GitHub and deployed to Heroku, so I set up environment variables - this was so that I can connect to the Twitter API without committing my secrets.
When I moved the tweet code to AWS Lambda, I still created the environment variables to keep any credentials out of the code.
Add your authorization key and secrets as environment variables and update your code.
Here's an example where I declare my consumer key as an environment variable:
CONSUMER_KEY = environ['CONSUMER_KEY']3. Add Layer
I imported some Python packages that aren't installed natively on Lambda. Layers store dependencies and can be used by other functions, so if you happen to be creating a whole lot of Twitter bots that use the same libraries, you won't need to repackage them for every new function.
Your Python libraries need to be imported as a zipped folder within a python subdirectory. My zipped folder structure looks like this:
layer > python > my python librariesOn the Lambda dashboard, create a new layer and upload the .zip file. Go back to your Lambda function and add the new layer. To test and confirm that everything's working as expected, click the "Test" button above your Designer panel.
If there's a new tweet on your Twitter account, congratulations! It worked!
4. Add CloudWatch Trigger
Now we need to add a trigger that automatically runs at certain intervals so that your bot tweets on its own. My bot doesn't have any specific requirements, only that it needs to post every six hours, so I set it on a schedule with a fixed rate of 6 hours.
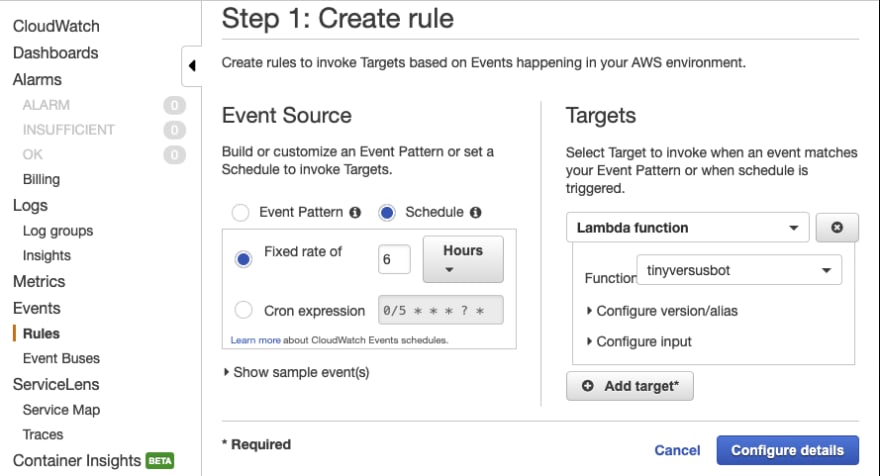
Go to your CloudWatch service and create a new rule (under the Events tab). Set a new target to your Lambda function and press "Configure details".
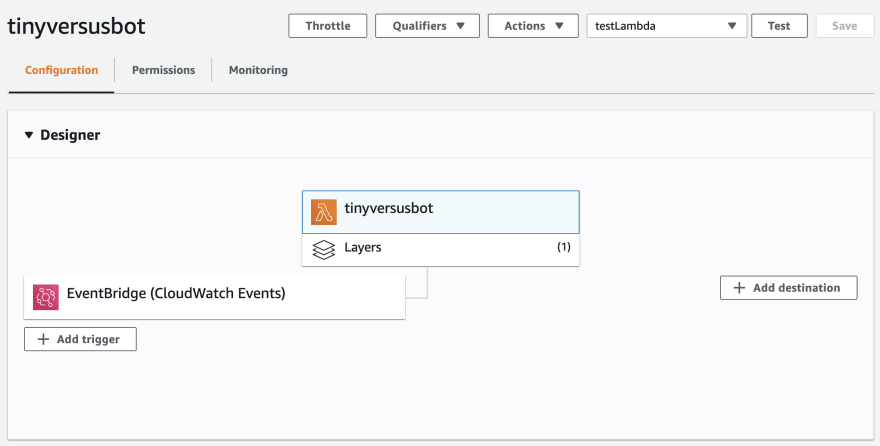
After doing all that, my Designer panel looks like this:
5. You're Done!
Your Twitter bot should be active and running on its own.
Pay attention to the default timeout setting. My code times out with the default time, so I had to raise the timeout setting. If your program takes more than the default 30 seconds, you will need to increase the timeout setting.
On the free tier of AWS Lambda, you get 1 million requests free each month. If you plan on going over the free tier limit, keep an eye on how much compute time you're consuming. CloudWatch metrics can be found on the "Monitoring" tab on your Lambda function.
Happy bot developing! Feel free to share your Twitter bots below.
Original Link: https://dev.to/jeannienguyen/building-a-twitter-bot-with-python-and-aws-lambda-27jg
Dev To
More About this Source Visit Dev To