
An Interest In:
Web News this Week
- March 21, 2024
- March 20, 2024
- March 19, 2024
- March 18, 2024
- March 17, 2024
- March 16, 2024
- March 15, 2024
Some of Our Sources
- BoingBoing
- Techcrunch
- TutsPlus - Code
- Just Creative
- Pearsonified
- Abduzeedo
- Fuel Your Creativity
- FanExtra - PSD
- Line 25
- Design Modo
Help Webnuz
Referal links:
How to Create an AWS Account
Introduction
This tutorial is a step by step walk-through on how to set up an AWS account.
To use any of the services available on AWS you must first create an account.
With an account you will have will be able to manage pricing, users, security, and can try the various services like the popular Amazon Simple Storage Service (Amazon S3).
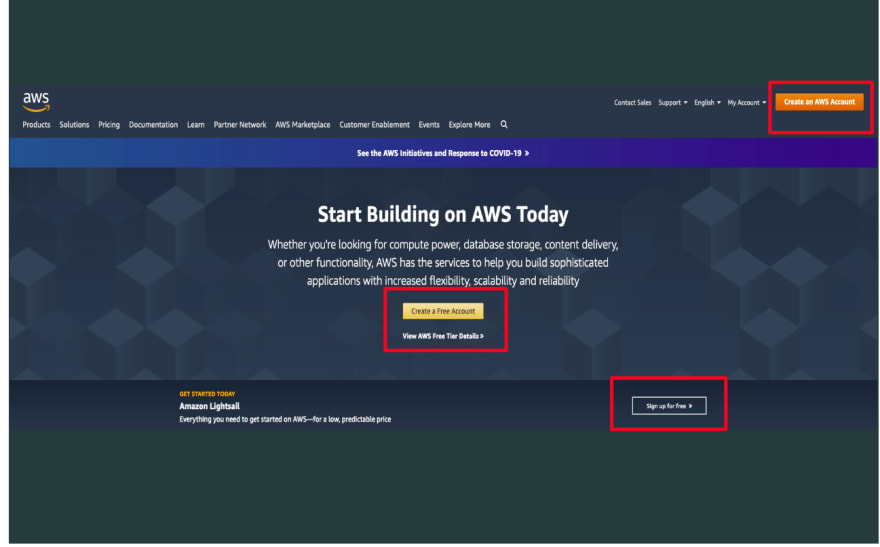
Step 1 - Navigating to create an acount
In this step, you will navigate to the
AWS Homepage and fill in the appropriate information to start creating your account.
To start navigate to the AWS Homepage
You can click any of the following buttons to create a new account:
Buttons:- Create an AWS Account
- Create a Free Account
- Sign up for free
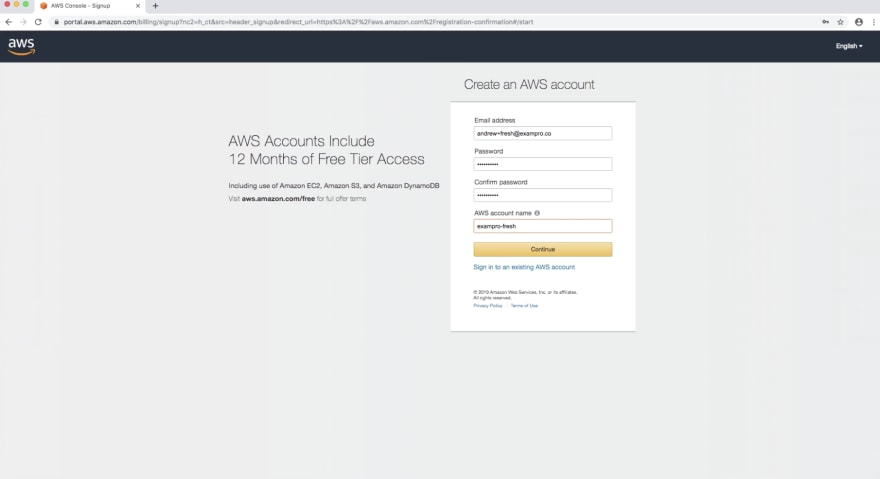
Next navigate to the Create an AWS account form and fill in the information with:
- Your Email
- Password
- AWS account name of your choosing
Click
Continue.
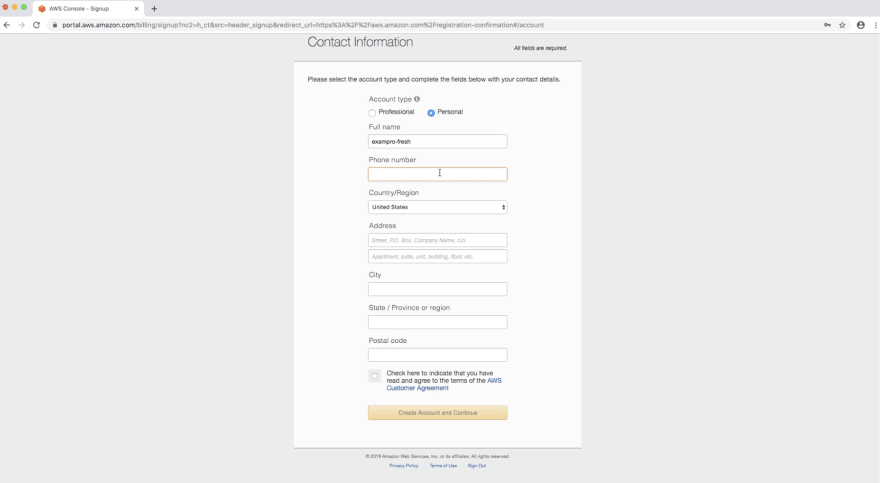
Step 2- Contact Information
In this step you will fill in your contact information.
You can choose a Professional or Personal account type.
Fill in the Contact information form. Fill in:
- Your Full Name
- Valid Phone Number
- Country/Region
- Address, City, State/ Province or region, and Postal code where valid.
Agree to the terms of use.
Click the
Create Account and Continuebutton.
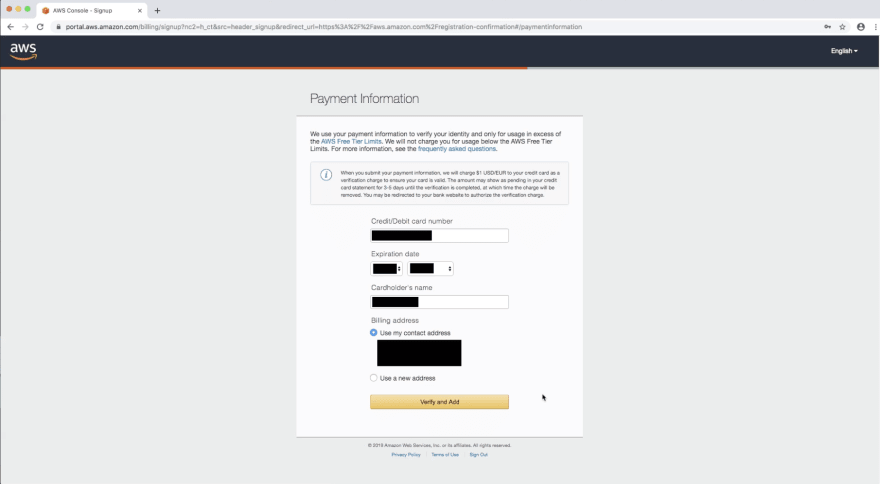
Step 3- Filling Out Your Payment Information
In order to use AWS you must provide a credit or debt card number.
You need to fill out the Payment Information with a valid debit or credit card to use AWS.
Once the information is filled in hit the
Verify and Addbutton.
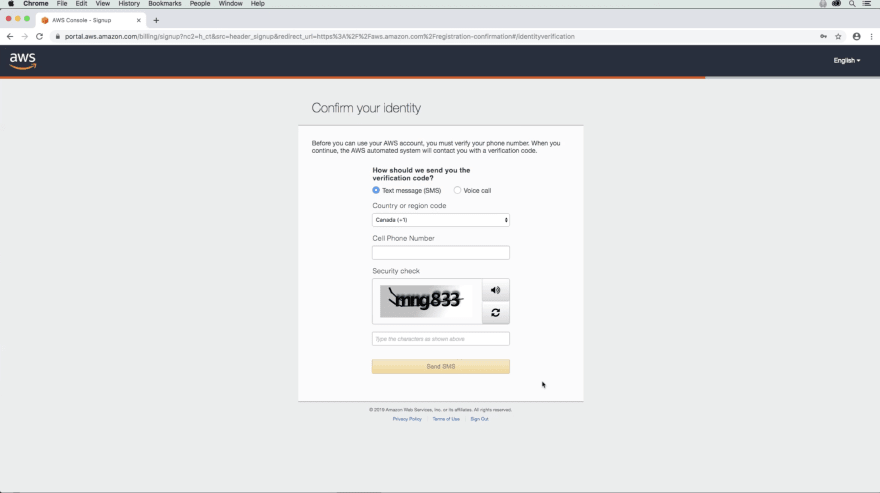
Step 4- Confirming Your Identity
Add a valid phone number so you can confirm your identity.
Choose Text Message or Voice callFill in the Security check
Click the
Send SMSbutton to continue.Once the you receive the verification code fill it in and hit the
Verify Codebutton.
Step 5- Choosing a Support Plan
- Select a Support Plan
- Choose the free Basic Plan
 ## Step 6- Signing In
Click the
Sign in to the Consolebutton.Fill in your email and click
NextFill in the password and sign in to the console.

You should now be at the AWS Management Console.
Conclusion
In this tutorial you followed the steps to create an individual AWS account.
Now you can explore other topics like creating an IAM user, password policy, or checking out all of the AWS services.
The above these topics are covered in ExamPro's Certified Cloud Practitioner Course.
Original Link: https://dev.to/exampro/how-to-create-an-aws-account-1h53
Dev To
More About this Source Visit Dev To