
An Interest In:
Web News this Week
- April 19, 2024
- April 18, 2024
- April 17, 2024
- April 16, 2024
- April 15, 2024
- April 14, 2024
- April 13, 2024
Some of Our Sources
- Slashdot
- BoingBoing
- Mashable
- Joshua Blankenship
- Inspiredology
- Reencoded
- Wal You
- Freelance Switch
- Design Modo
- Daily Now
Help Webnuz
Referal links:
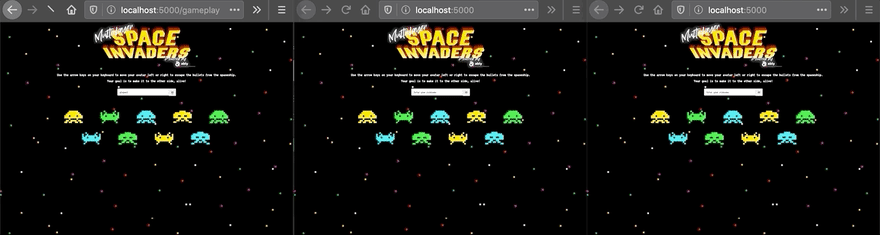
Building a realtime multiplayer browser game in less than a day - Part 1/4
Do you play games?.... Duh! Ever thought of building one yourself?... Hmm..
Games innately seem difficult to build. With lots of moving pieces involved (quite literally), game development seems like its restricted to devs whove immersed their feet deep into the holy waters of networking, mathematics, graphics, and the like.
However, with the web evolving ever so rapidly and with all the new protocols and libraries that have spanned in recent years, its now super simple to get started with building browser-based multiplayer games.
In this article, we'll look at step by step implementation of a realtime multiplayer game of space invaders (ah, the nostalgia!) with Phaser3 and Ably Realtime.

Along the way, well understand the architecture, system design, networking protocols behind this, and also look the caveats to keep in mind when building multiplayer browser-based games.
This tutorial series is broken down into four parts:
- Part 1: Introduction to gaming concepts and the Phaser library
- Part 2: Evaluating networking protocols for realtime apps
- Part 3: Implementing the server-side code to keep all players in sync
- Part 4: Finishing up the client-side code to render the game
One last thing before we get started. This article assumes a basic understanding of JavaScript and Express/NodeJS. I'll try and explain everything else as much as possible
Let's get gaming!
Part 1 -- Introduction to gaming concepts and Phaser
Let's begin by looking at the rules for the game as it's not exactly going to be the same as the original retro classic.
Game rules for multiplayer space invaders
- When a new player joins, they'll be randomly assigned a monster avatar out of the three available varieties.
- Each player can move their avatar left or right using the arrow keys on their keyboard
- Each player will see their own avatar in white but see everyone else will in a random colour that's pre-assigned to them
- When a preset number of players join the game, a ship is launched. This ship moves along the horizonal axis in a randomly chosen direction that changes randomly every 5 seconds. Along with this, the ship's velocity will also change. This ship also shoots bullets at regular intervals that we can preset as well
- All the avatars automatically move downwards with a preset increment throughout the game.
- The objective to win the game is to make it to the bottom border of the game screen without getting killed by one or more bullets being shot by the ship.
Components of a realtime multiplayer game
While it may seem like there are bunch of things going on behind a networked realtime game, they really comes down to three core components:
- Assets
- Physics
- Networking
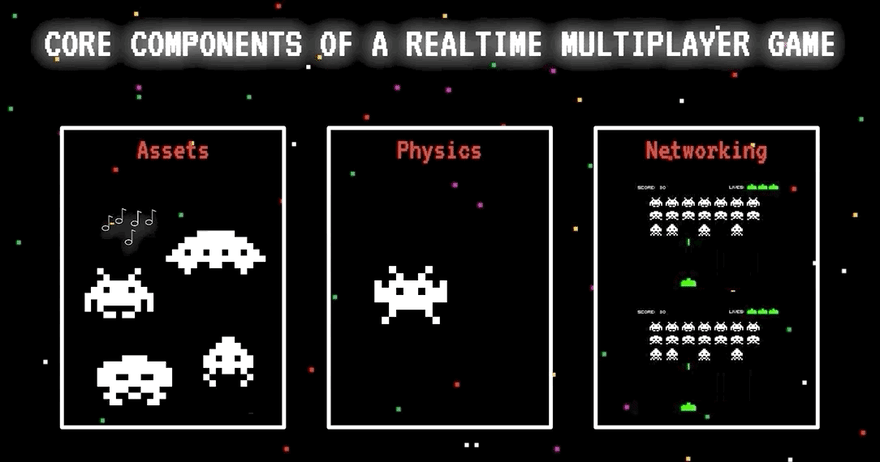
Let's look at each of these further.
1. Assets
Assets are the critical elements that make up the game. If you'd like an object to appear in your game, you can either draw one on the game canvas, or better yet use an image or a sprite sheet and animate along. Similarly, any audio you'd like to introduce and play in the game would fall under its assets.

If you are interested in making your game's theme super arcade, you can follow this pixel art tutorial by Glauber Kotaki to learn how.
2. Physics
Physics is what lets us move the assets around and decides how different objects in our game interact with each other. For example, in a simple game of pong, the ball is bounced back in a certain direction, with a certain velocity depending on which part of the paddle it collided with. Similarly, in our game, this could include computing where the ship needs to go, with what velocity, shooting of bullets, collision of these bullet objects with players' avatars, etc.
All these things are basically mathematical calculations in line with concepts of physics, under the hood. But so much mathematics can be overwhelming to write from scratch even for a simple game. So instead of writing every from scratch, we can use a physics engine that can do most of the math magic for us.
3. Networking
The final core component which is especially important for a multiplayer live online game is networking. It can be super tricky to maintain the synchronization between all the players, figure out which player died and if everyone else agrees with that claim.
Don't worry if all this starts to sound complex, it doesn't have to be. There are many pre-existing design patterns that can help us get started in the correct way. We can choose how we want the game architecture to be, with respect to the mechanics of the particular game in question. Throughout this article series, we'll talk about the patterns and architectural choices I went with to build this game and why.
Now that we have a better understanding of the core components, let's explore how we can get these working in our game.
Using Phaser 3 to add assets and enable physics
Phaser is a an open-sourced canvas and WebGL rendering JavaScript framework for HTML5. We'll use Phaser 3 to build the game. The reason I specifically mention the version is that there are many breaking changes between Phaser 2 and 3 including the syntax. Also, in case you are looking to add some cool new features to the game yourself in the future, you should know what/where to look.

Not only does Phaser allow us to display the assets on a canvas, play the animations and sounds, etc on a web page, but it also comes with an in-built physics engine (multiple actually). This means that we can just tell it things like what needs to be done when two objects collide and it'll automatically keep an eye for collision and execute a piece of code if it happens.
There's a really good video tutorial series for Phaser that I'd recommend if it's your first time working with Phaser 3.
In the TL;DR version of it, with Phaser3, we can specify a config object which would have the information about the canvas and the game itself, including the size of the canvas, its style attributes, various scenes that are included in our gameplay (discussed shortly), type of physics engine (as Phaser has many), etc.
We then pass the configuration object to start a new game.
This might sound a bit confusing as you haven't seen any code yet. Let's do that next.
Getting started with the game
Lets get straight to the game screen for now. We'll worry about the launch and leaderboard pages, later. Our game would be an HTML page with a canvas rendered on it. This canvas will hold and run the actual game. So, let's create a file, call it index.html. To keep things organized, we'll store all our HTML files in a folder called views and all the client-side JavaScript files in a folder called public. Let's start the views/index.html file with a basic skeleton:
As you can see, all that we are doing here is link to the CSS and JS files which we'll add shortly, but also more importantly the link to the Phaser JS CDN. You can copy the CSS directly from the GitHub project
Other than that, within the HTML body, we have a div with an id of game-container. This is where we'll add our game canvas through JavaScript.
Let's create a file in the public folder, call it script.js and start by defining the game configuration object that we talked about earlier.
As you can see, apart from specifying the size of the canvas and its background color, we've also specified where this canvas needs to go (identified by parent) and an array of the scenes that we'd like to be part of this game.
Phaser uses the concept of 'scenes' to organize the content of the game. You can think of a scene as what you are visually able to see at any point in time. While playing a game, if the game switches to a different background with different interactions among the game objects, then it's probably a separate scene from what you were viewing before.
For our game, we'll have a single scene (identified by GameScene). A scene in Phaser is a class that extends the Phaser.Scene class. Let's define this for our game. Add the following code above the config object as it is referencing the GameScene class.
As you can see, this class has three empty methods. These come with the Phaser.Scene class. Each of these methods has a different function as explained below
The
preload()method gets all the resources that we might need, from wherever they are, loads them in and keeps them ready for when wed like to add them to our game.The
create()method is executed once when the game first runs. We can add all the variable initializations, animation definitions, etc, in this method.The
update()method is executed continuously in a loop for as long as the game is on and hence is able to constantly update the game objects as per the game logic. We'll update the avatars, shoot bullets, move the ship, all in this method..
Loading assets and creating animations
Let's go ahead and load some assets now. Define the preload() method as follows
I originally hosted this game on Glitch which stores all the assets in its bucket, retrievable by a CDN link. You can use the same, otherwise Amazon S3 is another popular option.
We added three types of avatars, all in white and three other colours. Apart from those, we also added assets for the ship, bullet, and of course the explosion to play when a player dies.
As you can see, we loaded a spritesheet asset in Phaser using this.load.spritesheet() and sent it three parameters:
- the identifier
- path to the actual file
- the dimensions of the file (in pixels).
We can also just call it an image but then we won't be able to do the cool animations with it as you'll see shortly.
P.S. there's a better way to implement the avatar colours. We could simply add a colour tint to an existing sprite instead of loading the same object in multiple colours as separate assets. I don't know how yet, but I'll update this when I've figured it out :)
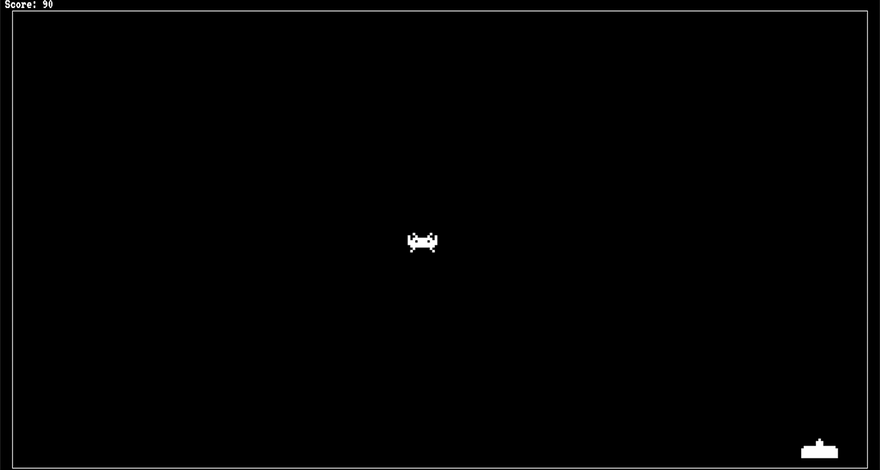
If you inspect the "explosion" sprite sheet, you'll see that it's a bunch of different images placed next to each other. The way we cause an "animation" is by going through these different images at a particular speed which makes it seem like it's actually a transparent video of an explosion happening.
In the create() method, we'll define the animation for this explosion:
We've used Phaser's this.anims.create() method to create the animation. This method takes in:
- the
keywhich we'll use later to play this animation frameswhich generates frames using the identifier of the asset to which we'd like to apply this animationframeRatethat specifies the speed at which we'd like to play this animationrepeatthat specifies how many times the animation will runhideOnCompletespecifies whether or not the asset which was being animated should go away after the animation is done
We won't add anything in the update() method for now. If you notice, we haven't actually instantiated the game either, we'll do that in a later part of this article series.
That's it for now. We'll learn about networking for realtime apps in Part 2 - Evaluating networking protocols for realtime apps
All articles in this series:
- Part 1: Introduction to gaming concepts and the Phaser library
- Part 2: Evaluating networking protocols for realtime apps
- Part 3: Implementing the server-side code to keep all players in sync
- Part 4: Finishing up the client-side code to render the game
A separate release relevant to this tutorial is available on GitHub if you'd like to check it out.
You can also follow the Github project for latest developments on this project.
If you have any questions, please feel free to reach out to me on Twitter @Srushtika. My DMs are open :)
Original Link: https://dev.to/ablydev/building-a-realtime-multiplayer-browser-game-in-less-than-a-day-part-1-4-14pm
Dev To
More About this Source Visit Dev To