
An Interest In:
Web News this Week
- April 23, 2024
- April 22, 2024
- April 21, 2024
- April 20, 2024
- April 19, 2024
- April 18, 2024
- April 17, 2024
Some of Our Sources
- Slashdot
- Pearsonified
- Smashing Magazine
- Smashing Apps
- Naldz Graphics
- FanExtra - PSD
- Noupe
- 24 Ways
- Wal You
- Daily Now
Help Webnuz
Referal links:
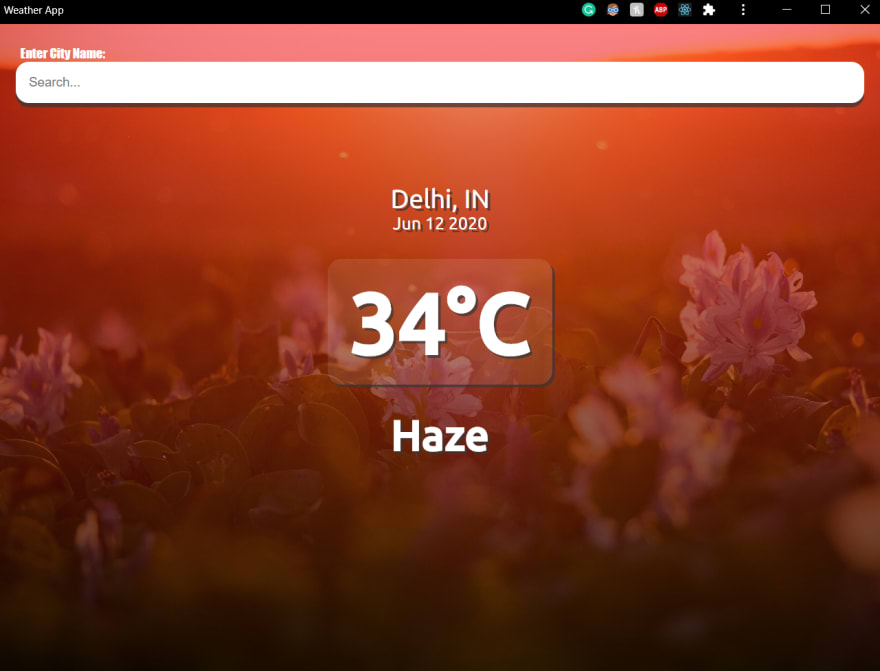
Building a Progressive Web App and Deploying it
In my previous article (which, thanks to you guys, became the top article of the week) I had discussed about how to build a weather app using ReactJS. In this article, you will learn what progressive web apps are and how to deploy the weather app to the PWA store.
Introduction to PWA
Progressive web apps are websites that bring web capabilities to an app-like experience. What it basically means is that instead of having to build a separate mobile app for your company or business interest, you can just build a progressive web app and take advantage of both web and native features. To make it even simpler, think of PWA as the best combination of both web and mobile apps.
Advantages of PWA:
- Progressive web apps are incredibly fast.
- Easier to visit the website than having to install the application.
- Native apps are well integrated and configured to the operating systems which provides better performance.
- Offline access.
- Less data usage.
Getting Started
While building the weather app we focused all our attention on the src folder. For building our PWA application we can concentrate on the public folder. Let's start by clearing the clutter in this folder until only index.html file remains.
Let's start of by creating a Service Worker in the index.html. Service worker is a script that runs in the background of a website. This can be very helpful because it can run even after termination of our application and hence can be capable of delivering notifications and working offline. A new service worker can be created using the following code in the index.html file just below the div with root id.
<script> if('serviceWorker' in navigator) { window.addEventListener('load', () => { navigator.serviceWorker.register('./serviceworker.js') .then(reg => console.log(reg.scope)) .catch(err => console.log(err)) }) }</script>Create a serviceworker.js file in the public folder. In this folder paste the following code:
const CACHE = "dev";const URL = ["index.html", "offline.html"];const self = this;As I mentioned earlier, PWA are extremely fast. The reason for this is that they maintain a cache. So, we create a variable CACHE and give it a name. Then, in variable URL we provide the URLs to be cached.
Now, there are three events that needs to be performed in this file:
- Installing the service worker
Add the URLs into the Cache Storage.
self.addEventListener("install", (e) => { e.waitUntil( caches.open(CACHE).then((cache) => { return cache.addAll(URL); }) );- Listen for requests
Match the request the page recieves and return the request if the fetch is a success, else render the offline page.
self.addEventListener("fetch", (e) => { e.respondWith( caches.match(e.request).then(() => { return fetch(e.request).catch(() => caches.match("offline.html")); }) );});- Activate the service worker
Remove old cache and store a new one.
self.addEventListener("activate", (e) => { const newCache = []; newCache.push(CACHE); e.waitUntil( caches.keys().then((cacheNames) => Promise.all( cacheNames.map((cacheName) => { if (!newCache.includes(cacheName)) { return caches.delete(cacheName); } }) ) ) );});If you would like to learn more about caching, please refer to this link.
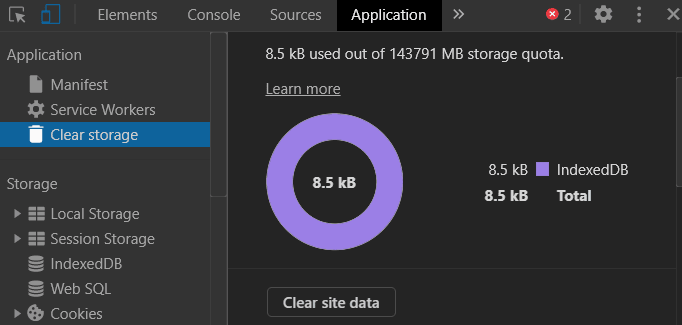
To make to sure we test this hit npm start on your terminal, go to your chrome developer console and select Application tab and on the Service workers Panel make sure to check Update on reload and then on the Clear storage panel hit Clear site data.

It's time to build our offline.html page. I will be using minimal styling for this page, but feel free to make this offline page look extraordinary.
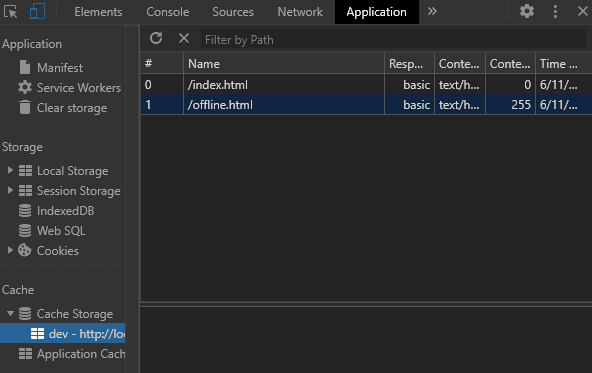
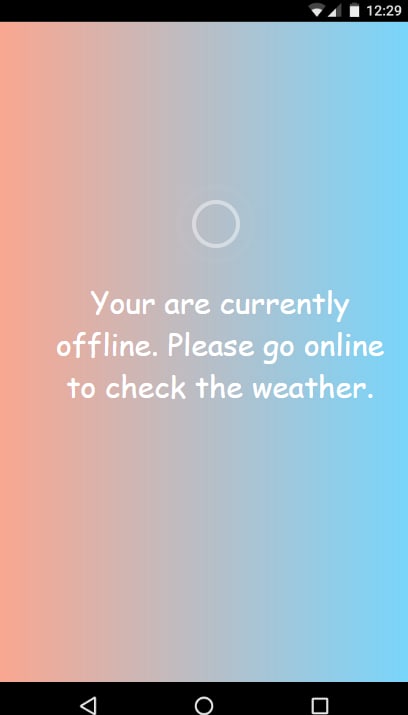
<!DOCTYPE html><html lang="en"> <head> <meta charset="UTF-8"> <meta name="viewport" content="width=device-width, initial-scale=1.0"> <title>Weather App</title> <link href="https://fonts.googleapis.com/css2?family=Balsamiq+Sans:wght@700&display=swap" rel="stylesheet"> <style type="text/css"> html { height: 100%; } body { height: 100%; background-image: linear-gradient( to right, rgba(255, 100, 0, 0.52), rgba(0, 195, 255, 0.73) ); display: flex; font-size: 30px; color: white; font-family: 'Balsamiq Sans', cursive; align-items: center; text-align: center; justify-content: center; } .lds-ripple { display: inline-block; position: relative; width: 80px; height: 80px; } .lds-ripple div { position: absolute; border: 4px solid #fff; opacity: 1; margin: -120px 170px; border-radius: 50%; animation: lds-ripple 1s cubic-bezier(0, 0.2, 0.8, 1) infinite; } .lds-ripple div:nth-child(2) { animation-delay: -0.5s; } @keyframes lds-ripple { 0% { top: 36px; left: 36px; width: 0; height: 0; opacity: 1; } 100% { top: 0px; left: 0px; width: 72px; height: 72px; opacity: 0; } } </style> </head> <body> <div class="lds-ripple"><div></div><div></div></div> <span>You are currently offline. Please go online to check the weather.</span> </body></html>Now, reload the page and watch your cache storage. If it looks something like the picture below, Congratulations! You've just cached your web pages for faster and offline access.
For further testing, go to the Network tab and select Offline.

Now reload your page to see your cached offline.html page.
Manifest
A manifest file is a simple JSON file that provides information about the application. So create a manifest.json file and paste this piece of code in there.
{ "name": "Weather App PWA", "short_name": "Weather App", "icons": [ { "src": "./logo.png", "type": "image/png", "sizes": "1024x1024" } ], "start_url": ".", "display": "standalone", "theme_color": "#000000", "background_color": "#ffffff"}To learn more about manifest files check out this link.
Lighthouse
Lighthouse is a tool to assess the quality of web applications. Install it and then on your chrome developer console click Generate report. Now let's check how our app performs:
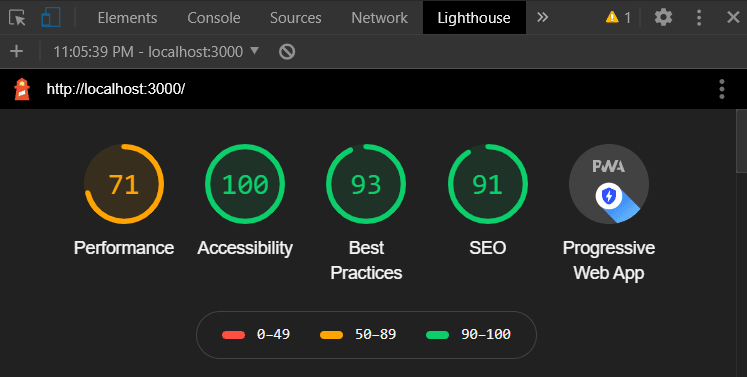
Well, we have a pretty good score as per Lighthouse. As you can see there is one test that is still not passing which is responsible for keeping our Performance score low.

Deploying the application
In order to overcome the error of not redirecting HTTP traffic to HTTPS, we will have to deploy our application.
Go to your terminal and enter, npm run build to create build folder in your project directory.
Create an account on Netlify and on your dashboard that looks something like this:
Just drag and drop your build folder onto this screen and that's all it takes to deploy your application online on netlify.
Click the generated URL to see your application for real on the internet, try and disconnect your internet to see the offline page too.
Result
Now, let's run a Lighthouse test on our deployed application:

Amazing! That's a great score for our PWA application.
Now, if you have done everything right, then you should see a + icon next to your bookmark icon on url search bar on chrome.

Now, this is the button that will allow you to install this application on your device. Click on the + icon and install the application.
Disconnect your internet connection to see the offline page.

That's really wonderful. The application is now native to your system and you can use it on your mobile too.
Now for the most amazing part - Publishing the app on PWA store. Head over to PWA Store and signup. After logging in, go to your profile page and click on the hamburger icon on the far right, and click on the little + symbol. Enter all the details of your application including name, description, screenshots, etc. Finally, run the Lighthouse PWA check. After getting all three ticks, you can submit it for review.
Voila! That's it. After review, your app will be published on the PWA store and after some time you can find it under Discover section.
This has been a long article, yet an informative one. I hope you understood every bit of what a Progressive Web App is, how you could build one, testing it using Lighthouse tool and also deploying the PWA application.
In case of any queries, please feel free to contact me on my LinkedIn. The code is available on my Github.
Thank You!
Original Link: https://dev.to/kgprajwal/building-a-progressive-web-app-and-deploying-it-10p7
Dev To
More About this Source Visit Dev To