
An Interest In:
Web News this Week
- March 20, 2024
- March 19, 2024
- March 18, 2024
- March 17, 2024
- March 16, 2024
- March 15, 2024
- March 14, 2024
Some of Our Sources
- BoingBoing
- Technology Review
- TutsPlus - Code
- Spoon Graphics
- Smashing Magazine
- Vandelay Design
- You The Designer
- Codrops
- Willems Lab
- Hashedout
Help Webnuz
Referal links:
Firebase - Short introduction for beginners
Hellog coders,
In the current tech world, Firebase is one of the most trending technologies that help you to make a super cool web app or mobile apps in a short span of time. Firebase is a B-A-S-S ( backend as a service ) provided by Google , by means of the backend as a service means that you don t have to think about how to store the data in the backend and how to configure your service. All that stuff will be handled by the platform.
Article originaly published on AppSeed's Blog. Thanks for reading!
Firebase provides all the tools and the stuff that you will need to make your web app or mobile Applications. Some of the services that usually need to develop or configure while making some app are to configure servers, manage hosting, manage user authentication, write the crud operation logic for our app, storage, push notifications and the list goes on . Firebase has all these services and you can get all this on the single click.
We can describe Firebase as a complete package of products and services that allows us to build web and mobile apps without concern about the backend and improve the quality of the App.
Firebase Services
We can mainly divide the services provided by the platform into the following parts:
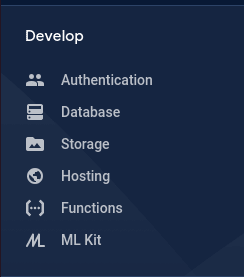
- Develop Services
- Quality Services
- Analytics Services
- Grow services
The development services help us to develop the application in the short span of time, quality services help us to maintain the quality of the app by looking into our crash list, check the performance of your app, Analytics service help to look how the users are engaging with your app and how many conversations are you making per user. The grow service helps as the app grows by doing the advanced prediction about the user behavior and by doing the A/B testing.
As this one is a beginner blog so we are only going to discuss the Development services as we go further we will learn about all the services and use them in our app.
Firebase Database
The database is one of the most important parts that usually all the dynamic apps needed to store the data. We store, retrieve, delete and update our data in the database from the application or the software that we have made . Firebase provide the two types of database to manage the data.
Real time database - Firebase Realtime is one of the amazing services provided by the firebase that helps us to sync with the database in the real time across the different devices or the platform . That means that if something changes happens in the database then all the devices are notified about the change if they are using the data that changes , users will be able to see the change in real time they didnt need to do the refresh to see the latest data. Isnt this amazing. The JSON format is used to store the data in the database.
Firestore Database: Firebase database is also used to help to store the data but the cloud firestore is more structured than the Realtime database. Cloud firestore has more features and advanced queries that help to fetch the data and be more scalable as our app grows. Firestore has the collection and inside the collection we have documents, just like the table in the database and their records inside the tables.
Firebase Authentication
If you are making some dynamic app then you usually need to authenticate the user so that you can show the user their own data not anyone else. The simple authentication method is email and password to authenticate the user, and if you want to give the user experience then you can include the social login like google, Facebook, LinkedIn and other. To design and develop your own authentication from scratch is very time consuming and costly. By the help of the firebase you can integrate all this social and email authentication in a very easy way. Firebase Authentication gives support for iOS, Android, Web, C++, and unity.
Firebase Hosting Service
The next service in the development service is the firebase hosting. As the name suggests this service will help you to deploy the web app into the firebase. You can deploy your web app into the firebase hosting just using some commands. No need to do the server setup, no need to install security certificates . you just have to use some commands and your web app will be deployed and ready to go live.
Firebase Storage
Cloud Storage is designed to help you quickly and easily store and serve user-generated content, such as photos and videos. We can use the storage to store the images, video, documents, music or any file that we need to store.
The security of your files stored in the cloud storage will be managed by the google. Firebase storage also helps you to resume your file upload or download if the app loses the connection or the app goes offline due to any reason.
Cloud functions
Firebase provides you the backed SDK for managing the database. You can easily do the CRUD operation with the help of this SDK, but sometimes you have to write your own backend logic , this is where the firebase cloud functions helps . Just write your backend code and deploy it as the cloud functions and call your code with the help of https service as you called the simple API.
Although the firebase function provides the most useful and most loved thing is the cloud function triggers. You can write the code of what to do when something changes or is deleted in the database . like you would like to send the email when someone does the purchase then you can write the onWrite trigger on the orders collection . then whenever the new entry is added on the orders database then this function will trigger and it sends the mail to the vendor.
Firebase firestore provides the onWrite, onUpdate, onDelete, onCreated triggers. There are also various triggers like authentication triggers which run on user creation, update, or delete, cloud storage triggers that run when some file is uploaded to the storage, the most commonly used common example of storage trigger is to make the thumbnail of the uploaded image. Write the code that makes a thumbnail of the image and make the trigger on image storage and whenever the image is stored in the database the trigger runs and makes the thumbnail of the image. Firebase helps you to create the awesome app using this service.
Firebase ML Kit
Firebase ML Kit is the mobile SDK that helps the android and the iOS app developers to use the machine learning services in their mobile app. Whether you are experienced with machine learning or not , you can integrate the google expertise level machine learning with the help of a few lines of the code . There are also various predefined google level machine learning services like recognize the text, reading the text from the images, Language detection, object detection. You can include this into your app in a very easy manner . You can also use your custom machine learning model to integrate into your app.
Firebase - A simple DEMO
So we have learned about how the Firebase development services help us to develop any web app or any android app. Now we make a simple demo app by using these services. First we have to make an account on the Firebase platform and make a basic project. Access console.firebase.google.com and sign in with your google account - the homepage looks as below:

Here you can see your existing firebase project or you can create the new firebase app by clicking on the Add Project. Let's move forward to create the new project.
This is the first step you see after clicking on the add project option. Enter the name for your project name. Here I used the app-seed as my project name. Keep note that whenever you create a new firebase app it also creates a Google-Cloud-Project. you can use this project ID to use the services of the google cloud just like for App engine, Cloud tasks and for other services. Please keep in mind that the Project ID is a globally unique identifier and cannot be changed in future. Here my project id is app-seed-de1a5.

The second step is to set Google Analytics for your Firebase project. The analytics services help us to see how the App users are using our app and make the future prediction based on the user's previous activity and much more. As we are setting the simple app we can disabled this one and click on the Create Project option.

This step it might take a while. After creating the project click on the continue and it will take you to the homepage of the Firebase app.

Congratulations, you have successfully created your first firebase app. You see how easy it was just a few clicks and everything is ready for your database, hosting, authentication and all other l things. The following are the development services and the top 5 are mostly used for the beginner projects.
Lets host our website into the firebase. For this we need to install the firebase CLI (firebase-tools) npm package to your local machine . let's install it, you must have node and NVM installed in your machine for this to work. If your local machine does not have a node installed, install it first and run this command then.
$ npm i -g firebase-toolsThe next step after installing firebase CLI is to run the firebases login command so that our CLI can know about our firebase projects. Run firebase login in the terminal and it asks for to open your default browser and asks for the permissions of your project. Allow firebase CLI that access.

After login with the firebase in the terminal we need to connect our firebase app with the firebase project for that make a new new folder anywhere and inside that project run the firebase init command.
$ firebase init 
Type Y to proceed further. And select the Hosting by up/down arrow key and press space to select the option and press enter to confirm.

Now it asks the options to select the existing project or create a new project. As we have already created the firebase project, select the existing project.

Now it shows all your firebase projects and selects your newly created project. As in our case it was the first one.

Now it asks for the directory which you want to select as the hosting directory. Where you keep all your HTML files and the content inside this folder will be deployed on the hosting. In the firebase ecosystem we will use the Public folder as the hosting directory . Then it asks for the main File that will be open when someone visits your app . Select Yes to rewrite all URLs to index.html. Thats the last step to configure the firebase project.

Now check your folder where you run the above commands. The firebase CLI had made some files and folders. As we have selected the Hosting it has created the public folder. If we had selected the firebase-function as option then the folder name would be the functions.

Now we have know the purpose of the public folder lets know about the other three files.
The resource file .firebaseserc, is very helpful when you have multiple projects with the same codebase . for example one if your live app and one is your testing app then you can do the configuration for both projects inside of this file.
{ "projects": { "production": "my-production-project-id", "testing": "my-staging-project-id" }}You can easily switch between the projects by using the firebase use command. For example if I have to use the testing app I can switch to the testing project by using firebase use testing and now what ever I do the hosting deployment or function deployment it refers to the testing project.
Another important file is firebase.json that contains the configuration path of the folder that we will use to deploy the hosting or the function, database rules and much more. The below is the firebase.json file contains.
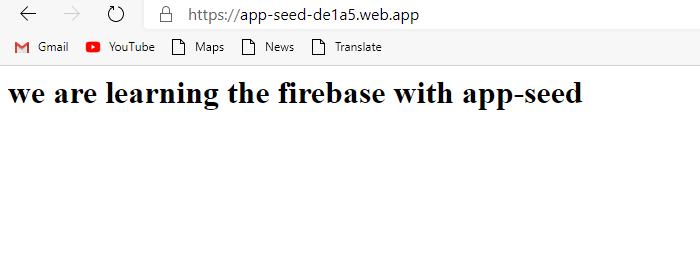
{ "hosting": { "public": "public", "ignore": [ "firebase.json", "**/.*", "**/node_modules/**" ], "rewrites": [ { "source": "**", "destination": "/index.html" } ] }}Change the default index.html file and write basic html code or copy the below one.
<html> <head> <title> learn with app seed </title> </head> <body> <h1>we are learning the firebase with app-seed</h1> </body></html>Here firebase deploy is the command and --only hosting is to deploy only the hosting. We can use only the firebase deploy command to deploy hosting, functions, database rules at one time . To deploy the firebase functions we use the command:
$ firebase deploy --only functionsAs the deployment is finished it give you the unique URL here in our case it is https://app-seed-de1a5.web.app. copy your URL into the browser and open it.
Congratulations! You just deployed this simple app. Now go to the firebase console and open the hosting tab. Here you can see your hosting URL and the deployment history.

Thanks for reading! Let me know your thoughts in the comments.
Links & Resources
- Firebase documentation - a must read resource
- How to host multiple sites with Firebase - a nice topic opened on StackOverflow
- Realtime Database vs. Cloud Firestore
Original Link: https://dev.to/sm0ke/firebase-short-introduction-for-beginners-24d8
Dev To
More About this Source Visit Dev To