
An Interest In:
Web News this Week
- March 20, 2024
- March 19, 2024
- March 18, 2024
- March 17, 2024
- March 16, 2024
- March 15, 2024
- March 14, 2024
Some of Our Sources
- Slashdot
- Just Creative
- Spoon Graphics
- Six Revisions
- Noupe
- Reencoded
- CSS Globe
- Stylized Web
- Daily Now
- The Verge
Help Webnuz
Referal links:
Adding Sign in with Apple to your iOS App
Since April 2020, all apps that use a third-party or social login service are required to offer Sign in with Apple if they want to be accepted in the App Store.
In a previous tutorial, we walked through the process of building a simple clone of Apple's iMessage. In this tutorial, we'll go through the steps of adding Sign in with Apple to that iMessage clone. If you have an existing app built with Stream's iOS Chat SDK and want to support this sign-in method, the steps will be similar, and the differences pointed out. If you're not building a messaging app, a good chunk of the information here will still apply, so stick around!
If you get lost during this tutorial, you can always check the completed project in this GitHub repo. If you run into any errors, there's a Troubleshooting section at the end of the repo's README that you can check on.
What is Sign in with Apple?
Sign in with Apple makes it easy for users to sign in to your apps and websites using their Apple ID. Instead of filling out forms, verifying email addresses, and choosing new passwords, they can use Sign in with Apple to set up an account and start using your app right away. All accounts are protected with two-factor authentication for superior security, and Apple will not track users' activity in your app or website.
What you need
- iOS 13+
- Xcode 11+
- Node.js 10+
- A Stream account
- Enrollment in the Apple Developer Program
Step 1: Configuring the client project
If your app is still early in development or using the iMessage clone project, follow the steps in the image below. If your application is already in production, you can jump to the next image.

Now, you need to add the Sign in with Apple capability in the "Signing & Capabilities" tab of your target.

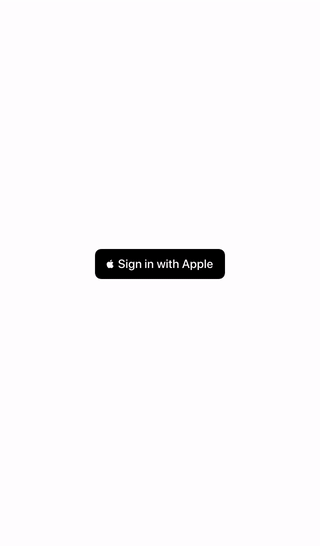
Step 2: Adding the sign-in button
To add the sign-in button, we'll use the AuthenticationServices framework, which provides all the functionality needed, including UI elements.
We also need to add the authentication screen, which will appear before the contacts screen. Let's create an AuthenticationViewController.swift file and paste in the following code:
Now, let's add this new screen as the first screen in the storyboard. If you're using the iMessage clone project, it should be the root view controller of the navigation controller. To finish it up, set up a Segue from it to the contacts screen with id kAuthToContactsSegueId:

Now, run the project, and you should have a button that, when pressed, leads to the contacts screen.

Of course, there is no real authentication happening here yet. We'll look into that in the next steps.
Step 3: Setting up the backend
Before we build real authentication into the client, we'll need a backend that can generate a Stream token when given the Apple ID credentials. If you already have a backend, you can use one of Stream's server-side chat libraries to set it up similarly.
To keep things short, we'll build a simple Node.js/Express backend with one endpoint: /authenticate. We'll also use the node-persist package to persist new user data the first time they authenticate. If you're not interested in building the backend yourself or are having problems, you can get the complete code in the repository.
In the terminal, run the following commands:
The following code snippets can be copied in sequence into the index.js.
Let's start coding our index.js by importing the objects we need:
Now, configure the Stream Chat client with the credentials that you get in your Stream dashboard:
Configure the Apple Auth client:
For details on filling those parameters, read apple-auth's SETUP.md.
If you're using something other than Node.js for your backend, there are versions of this library for other languages, such as Go. If you can't find it for your preferred backend stack, you'll have to read through apple-auth's source code and Sign in with Apple's API specifications to implement something similar from scratch.
Initialize express and the node-persist storage:
Now, let's start building the handler for the /authenticate endpoint by extracting the parameters we need from the request:
Now, we verify the appleAuthCode with Apple's servers using apple-auth and extract the user's email address from the response:
If we have an email, and a name was supplied in the authentication request we need to store that information in our persistent storage:
Information other than Apple Uid and auth code is only guaranteed to be given by Apple the first time the user tries to sign in. We use this fact to determine when to register the user, and it's why we need to save the information and resupply it in every authentication response.
Now, let's finish the handler by fetching the user data from local storage and relaying it in the response:
Finally, let's configure the express app to listen on port 4000:
Now, we can close index.js and leave the backend running with the following command:
If this is working, opening localhost:4000/authenticate in your browser will display Cannot GET /authenticate, which is OK, because we'll use POST in the client application.
Step 4: Request Authorization with Apple ID
Let's go back to Xcode.
First, we need to code the function to interface with the /authenticate endpoint we just created. Let's create a file named Authentication.swift and start by defining the request and response structures.
Thanks to Codable, we can easily transform those objects into and from JSON, which comes in very useful as we define the actual function to interface with /authenticate by sending AuthRequest and receiving AuthResponse:
Reminder: Sign in with Apple will only work on a real device. Make sure to replace [your local ip] with your Mac's local network IP address, which is not localhost nor 127.0.0.1. To find it out, run the following command on a terminal in your Mac:
Now, to authenticate the user with Apple, let's go back to AuthViewController.swift and edit the button's press handler to add this behavior:
This implementation will make pressing the Sign in with Apple button trigger the Sign in with Apple screen.
However, it won't compile yet, because we haven't conformed AuthViewController to a couple of required protocols.
We need conform AuthViewController to ASAuthorizationControllerPresentationContextProviding to tell Sign in with Apple which window to render the flow in:
Most importantly, we also need the conformance to ASAuthorizationControllerDelegate, which will let us receive the Apple credentials after the user completes the sign-in flow, which we can then use to authenticate, then configure our Stream client and move to the contacts screen:
Finally, we have a functioning Sign in with Apple implementation:

Since it's a new user, we don't have any contacts showing.
The backend logs should look similar to this:
Wrapping up
Congratulations! You can now build Sign in with Apple authentication into any iOS app. Make sure to read Sign in with Apple's guidelines and documentation to keep up-to-date with the requirements and announcements. Also, for your apps that need social media or messaging features, check out Stream's documentation for activity feeds and chat messaging.
Thanks for reading and happy coding!
Original Link: https://dev.to/cardoso/adding-sign-in-with-apple-to-your-ios-app-340n
Dev To
More About this Source Visit Dev To